

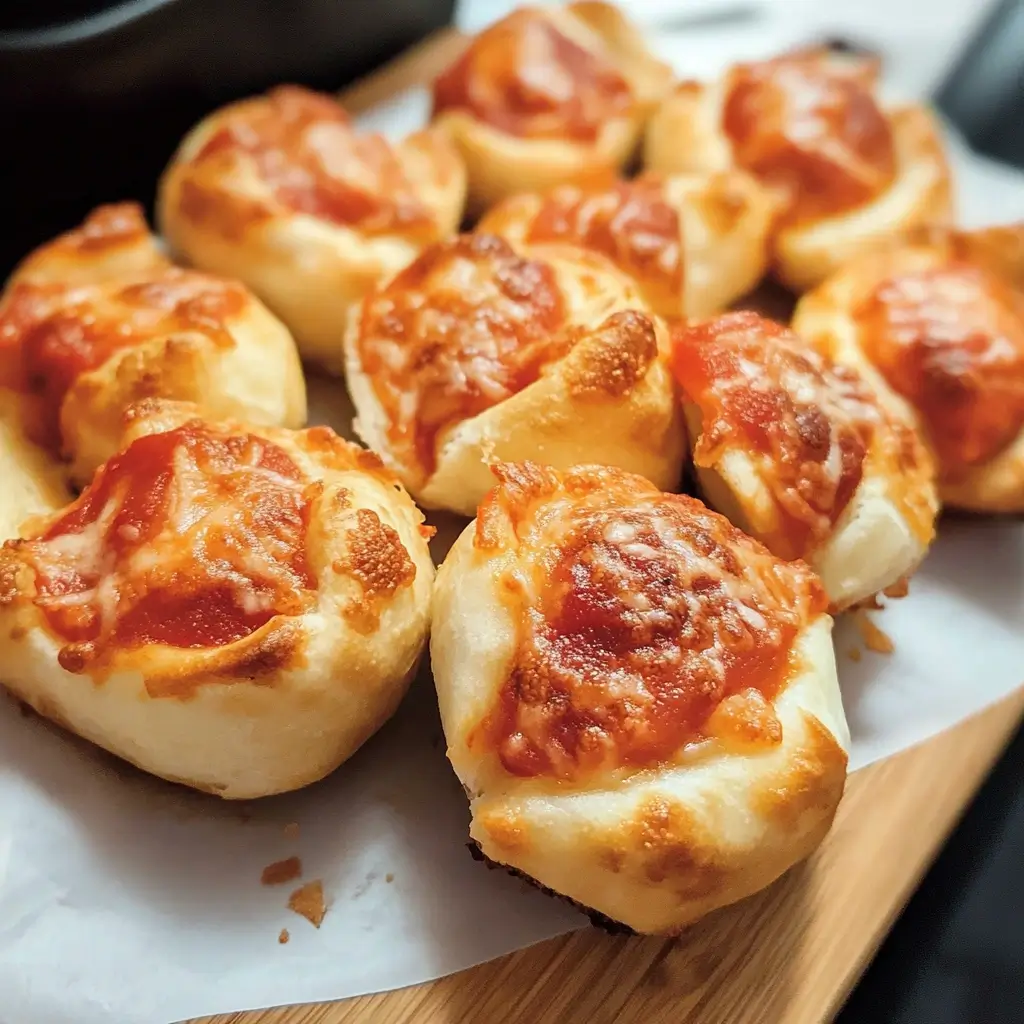

Okay, let’s get those Air Fryer Pizza Rolls sizzling! This has become an absolute game-changer in our house. My kids, who were previously obsessed with the frozen kind, now actively request these homemade versions. The first time I made them, the aroma alone had everyone hovering around the kitchen. The moment they came out of the air fryer, perfectly golden and bubbling, they disappeared in minutes. The crispy exterior giving way to that warm, gooey, cheesy, saucy center is just pure comfort food perfection. Plus, knowing exactly what goes into them? That’s a parent win. They’re surprisingly easy, incredibly versatile, and the air fryer makes them unbelievably crispy without the need for deep frying. Honestly, once you try these, you’ll find it hard to go back to store-bought ever again. They’re perfect for a quick lunch, an after-school snack, a party appetizer, or even a fun family dinner.
Why You’ll Absolutely Adore These Air Fryer Pizza Rolls
Before we dive into the nitty-gritty of making these delightful morsels, let’s talk about why this recipe will quickly become a staple in your culinary repertoire. It’s not just about making pizza rolls; it’s about creating an experience – a deliciously satisfying one at that!
- Unbeatable Crispiness: The air fryer is a magical appliance when it comes to achieving a level of crispiness that’s usually reserved for deep-fried foods. These pizza rolls emerge with a beautifully golden-brown, audibly crunchy exterior that gives way to a soft, chewy interior.
- Gooey, Cheesy Perfection: What’s a pizza roll without that iconic cheese pull? We ensure maximum meltiness by using the right kind of cheese and packing just enough into each roll. The warm, savory pizza sauce complements the cheese perfectly.
- Healthier Than Store-Bought or Deep-Fried: By using the air fryer, we significantly cut down on the oil needed compared to traditional frying methods. Plus, when you make them from scratch, you control the ingredients – no mysterious additives or preservatives.
- Incredibly Quick and Easy: From start to finish, you can have these pizza rolls ready in a remarkably short amount of time. The prep is straightforward, and the air fryer does its job efficiently. Perfect for those last-minute cravings or when you need a speedy snack.
- Fully Customizable: This is where the fun really begins! While we provide a classic pepperoni and cheese recipe, the sky’s the limit. Vegetarian? Load ’em up with veggies. Meat lover? Add sausage or ham. Feeling adventurous? Try a buffalo chicken or a BBQ pork filling.
- Kid-Friendly (and Adult-Approved!): Kids go absolutely wild for these. They’re fun to eat, perfectly portioned, and taste like their favorite food. But let’s be honest, adults love them just as much. They make a fantastic party appetizer or a satisfying game-day snack.
- Budget-Friendly: Making your own pizza rolls is often more economical than buying pre-packaged frozen varieties, especially if you’re feeding a crowd.
- Minimal Mess: Air frying means less oil splatter and fewer dishes compared to deep frying or even some oven-baked methods. Clean-up is a breeze!
These air fryer pizza rolls aren’t just a recipe; they’re a solution – for quick dinners, easy snacks, party food dilemmas, and picky eaters. Get ready to impress yourself and anyone lucky enough to share them with you!
Complete Recipe: Ingredients for Irresistible Air Fryer Pizza Rolls
To create these pockets of pizza perfection, you’ll need a few key components. The beauty of this recipe lies in its simplicity and the quality of readily available ingredients.
- For the Dough:
- 1 pound (approx. 450g) store-bought pizza dough (refrigerated, either in a can or a bag from the deli section. You can also use homemade if you’re feeling ambitious!)
- Alternatively, you can use:
- 1 can (13.8 oz / 391g) refrigerated pizza crust (like Pillsbury)
- Wonton wrappers (for smaller, crispier bites – you’ll need about 24-30)
- Egg roll wrappers (for larger rolls – you’ll need about 10-12)
- For the Filling:
- 1/2 cup (approx. 120ml) pizza sauce or marinara sauce (choose a thicker sauce to prevent sogginess)
- 1 cup (approx. 110g) shredded low-moisture mozzarella cheese (this type melts best and is less watery)
- 1/2 cup (approx. 50g) mini pepperoni slices, or regular pepperoni slices chopped into smaller pieces
- Optional: 1/4 cup grated Parmesan cheese (for an extra flavor kick)
- For Seasoning & Finishing:
- 1 tablespoon olive oil or a good quality cooking spray
- 1 teaspoon Italian seasoning (or a mix of dried oregano and basil)
- 1/2 teaspoon garlic powder (optional, but recommended)
- Pinch of salt and freshly ground black pepper (to taste, be mindful if your pepperoni is already salty)
- Optional for Egg Wash (for extra golden color and sealing power):
- 1 large egg, lightly beaten with 1 teaspoon of water
A Note on Dough Choice:
Using store-bought pizza dough is the quickest route and yields fantastic results, giving you that classic chewy pizza crust texture. If you opt for wonton or egg roll wrappers, the process will be slightly different (more like making mini egg rolls), and the texture will be thinner and crispier. For this primary recipe, we’ll focus on using standard pizza dough.
Step-by-Step Instructions: Crafting Your Air Fryer Pizza Rolls
Follow these instructions carefully, and you’ll be rewarded with perfectly cooked, delicious pizza rolls every single time.
1. Prepare Your Workspace and Dough:
* Lightly flour a clean, dry work surface (like a large cutting board or countertop).
* If using refrigerated pizza dough that needs to come to room temperature, take it out of the fridge about 15-20 minutes before you plan to start. This makes it easier to roll.
* Unroll or unpack your pizza dough onto the floured surface. If it’s a ball, use a floured rolling pin to roll it out into a rectangle, approximately 1/8 to 1/4 inch thick. Aim for a shape that’s easy to cut into smaller, uniform pieces (e.g., a 12×16 inch rectangle).
2. Cut the Dough:
* Using a pizza cutter or a sharp knife, cut the dough into small, even rectangles or squares. For classic pizza roll size, aim for pieces around 2×3 inches or 3×3 inches. You should get roughly 16-24 pieces depending on the size you cut and the total amount of dough. Don’t worry if they’re not perfectly uniform; rustic charm is part of the homemade appeal!
3. Assemble the Pizza Rolls:
* Sauce: Spoon a small amount of pizza sauce (about 1/2 to 1 teaspoon) onto the center of each dough piece. Be careful not to add too much, as this can make sealing difficult and cause them to leak during cooking. Leave a small border (about 1/4 to 1/2 inch) around the edges clear of sauce.
* Cheese: Sprinkle a pinch of shredded mozzarella cheese (and Parmesan, if using) over the sauce. Again, don’t overfill!
* Pepperoni: Place a few mini pepperoni slices or pieces of chopped pepperoni on top of the cheese.
* Seasoning: Lightly sprinkle a tiny bit of Italian seasoning and garlic powder (if using) over the fillings.
4. Seal the Rolls (Crucial Step!):
* This is the most important step to prevent your delicious fillings from oozing out in the air fryer.
* Method 1 (Folding): Gently fold one side of the dough rectangle over the filling to meet the other side, forming a smaller rectangle or a half-moon shape.
* Method 2 (Rolling): If your pieces are more rectangular, you can place the filling slightly off-center, fold in the shorter sides, and then roll it up like a tiny burrito or egg roll.
* Sealing: Firmly press the edges together to seal them. You can use your fingers, or for a more secure seal and a decorative edge, use the tines of a fork to crimp the edges. If the dough isn’t sticking well, lightly dab the edges with a tiny bit of water before pressing them together. Ensure there are no gaps.
* Optional Egg Wash for Sealing: If using the egg wash, lightly brush it along the edges before sealing. This not only helps them stick but also promotes browning.
5. Prepare for Air Frying:
* If your air fryer model requires preheating, preheat it to 380°F (190-195°C) for about 3-5 minutes.
* Lightly brush the tops of the sealed pizza rolls with olive oil or give them a quick spray with cooking spray. This helps them get extra crispy and golden. If you used an egg wash for sealing, you can brush the tops with the remaining egg wash.
6. Air Fry the Pizza Rolls:
* Carefully place the pizza rolls in the air fryer basket in a single layer. Do not overcrowd the basket! Work in batches if necessary to ensure even cooking and crisping. Leave a little space between each roll for air circulation.
* Air fry at 380°F (190-195°C) for 6-10 minutes. The exact time will vary depending on your air fryer model, the size of your pizza rolls, and how golden you like them.
* Check and Flip (Optional but Recommended): Around the halfway mark (3-5 minutes), gently shake the basket or use tongs to flip the pizza rolls. This helps them cook evenly on all sides.
* Continue air frying until they are golden brown, crispy, and the filling is hot and bubbly. You might see a tiny bit of cheese or sauce peeking out, which is perfectly fine.
7. Cool and Serve:
* Once cooked, carefully remove the pizza rolls from the air fryer basket. They will be very hot!
* Let them cool for a few minutes before serving, as the filling will be molten. This brief cooling period also allows the crust to crisp up further.
* Repeat with any remaining batches of pizza rolls.
Nutrition Facts
- Servings: This recipe typically yields 4-6 servings, assuming about 4-6 pizza rolls per person. (Approximately 20-24 rolls total, depending on size).
- Calories per serving (approximate): Around 350-450 calories.
Disclaimer: The nutritional information provided is an estimate and can vary significantly based on the specific brands of ingredients used, the exact size of the pizza rolls, and the types/amounts of fillings. For instance, using whole wheat dough or leaner fillings will alter the values.
Preparation and Cook Time
Understanding the time commitment will help you plan accordingly, whether it’s for a quick snack or part of a larger meal.
- Preparation Time: 20-25 minutes (This includes rolling out the dough, cutting, filling, and sealing the rolls. If you’re new to it, it might take a few extra minutes, but you’ll get faster with practice!)
- Cook Time: 6-10 minutes per batch in the air fryer. (If you need to cook in 2-3 batches, this could mean 12-30 minutes of total cook time).
- Total Time: Approximately 35-55 minutes (depending on the number of batches).
This relatively short time frame makes these homemade pizza rolls a fantastic option for busy weeknights or when you need a satisfying appetizer without spending hours in the kitchen.
How to Serve Your Delicious Air Fryer Pizza Rolls
These golden, crispy bites are fantastic on their own, but serving them with a few accompaniments can elevate the experience even further! Here are some delicious ideas:
- Classic Dipping Sauces:
- Marinara Sauce: A small bowl of warm marinara sauce for dipping is a classic and always a winner.
- Ranch Dressing: Cool and creamy ranch provides a lovely contrast to the warm, savory pizza rolls. A kid favorite!
- Garlic Butter Sauce: Melted butter infused with garlic and a pinch of parsley? Yes, please!
- Pesto: For a more gourmet twist, a vibrant basil pesto can be a delightful dip.
- Spicy Aioli: Mix mayonnaise with a bit of sriracha or your favorite hot sauce and a squeeze of lime for a zesty kick.
- As Part of a Meal:
- Appetizer Platter: Serve them alongside other finger foods like mozzarella sticks, chicken wings, or veggie sticks with dip for a fantastic party spread.
- Quick Lunch or Dinner: Pair a serving of pizza rolls with a fresh side salad (Caesar, garden, or Caprese) for a balanced and satisfying meal.
- Kid’s Meal Perfection: Serve with some fruit slices or baby carrots for a fun and easy kid-friendly dinner.
- Garnishes (Optional but Pretty!):
- A light sprinkle of freshly chopped parsley or basil over the warm pizza rolls adds a touch of color and freshness.
- A dusting of extra Parmesan cheese just before serving.
- Serving Presentation:
- Arrange them on a platter or in a basket lined with parchment paper.
- Provide small individual dipping bowls for each person if serving multiple sauces.
No matter how you choose to serve them, ensure they are served warm for the best experience – that’s when the cheese is perfectly gooey and the crust is at its crispiest!
Additional Expert Tips for the Best Homemade Pizza Rolls
To ensure your air fryer pizza rolls are consistently amazing, keep these five expert tips in mind:
- Don’t Overfill Your Rolls: This is perhaps the most common mistake. It’s tempting to pack in as much cheese and sauce as possible, but overfilling will lead to blowouts in the air fryer. The filling expands as it heats, and if there’s too much, it will force its way out, creating a mess and leaving you with less filling inside. A little goes a long way! Aim for about 1 to 1.5 teaspoons of total filling per roll.
- Seal Edges Tightly and Securely: This goes hand-in-hand with not overfilling. A proper seal is crucial to keep all that deliciousness contained. Press the edges firmly with your fingers. For an extra secure seal, moisten the edges very lightly with water before pressing, or use the tines of a fork to crimp them. This creates a physical barrier that’s harder for the filling to escape.
- Avoid Overcrowding the Air Fryer Basket: Air fryers work by circulating hot air around the food. If the basket is overcrowded, the air cannot circulate properly, resulting in uneven cooking. Some rolls might be burnt while others are undercooked or soggy. Cook in single-layer batches, leaving a bit of space between each roll for optimal crispiness.
- Preheat Your Air Fryer (If Recommended): While not all air fryers require preheating, many benefit from it. Preheating ensures that the cooking environment is at the correct temperature from the moment you put the food in. This helps the pizza rolls start crisping up immediately, leading to a better texture and more even cooking. Check your air fryer’s manual for specific preheating recommendations.
- Embrace Experimentation with Fillings & Dough: Once you’ve mastered the basic technique, don’t be afraid to get creative!
- Fillings: Try cooked sausage, diced ham, sautéed mushrooms, bell peppers, onions, olives, or even a buffalo chicken mixture. Just ensure any vegetable or meat fillings are pre-cooked and diced small.
- Dough: While pizza dough is classic, wonton wrappers create super crispy, bite-sized rolls. Egg roll wrappers make larger, yet still crispy versions. Crescent roll dough can also be used for a flakier, more buttery result. Adjust cooking times as needed for different dough types.
By following these tips, you’ll minimize common pitfalls and maximize your pizza roll success, achieving perfectly golden, crispy, and well-filled treats every time.
Creative Filling Variations to Explore
The classic pepperoni and cheese is a fantastic starting point, but the versatility of homemade pizza rolls means you can tailor them to any taste or occasion. Here are some exciting filling variations to inspire your next batch:
- The “Supreme” Pizza Roll:
- Filling: Pizza sauce, mozzarella, cooked crumbled Italian sausage, diced pepperoni, finely chopped green bell pepper, and black olives. (Ensure veggies are small and perhaps pre-sautéed to remove excess moisture).
- BBQ Chicken Pizza Roll:
- Filling: Cooked, shredded chicken tossed in your favorite BBQ sauce, a blend of mozzarella and cheddar cheese, and a sprinkle of finely diced red onion.
- Spinach and Artichoke Pizza Roll:
- Filling: Cream cheese mixed with cooked spinach (squeezed dry), chopped artichoke hearts, Parmesan cheese, mozzarella, and a hint of garlic. Think spinach artichoke dip in a pizza roll!
- Buffalo Chicken Pizza Roll:
- Filling: Cooked, shredded chicken tossed in buffalo sauce, mozzarella cheese, and a dollop of cream cheese or a drizzle of ranch/blue cheese dressing (inside the roll). Serve with extra blue cheese or ranch for dipping.
- Hawaiian Pizza Roll:
- Filling: Pizza sauce, mozzarella cheese, diced cooked ham, and finely diced pineapple (pat the pineapple dry to remove excess moisture).
- Veggie Delight Pizza Roll:
- Filling: Pizza sauce, mozzarella cheese, finely diced sautéed mushrooms, bell peppers (various colors), onions, and black olives. A sprinkle of feta cheese can add a nice tang.
- Meat Lover’s Pizza Roll:
- Filling: Pizza sauce, mozzarella cheese, cooked crumbled bacon, diced pepperoni, and cooked Italian sausage.
- Breakfast Pizza Roll (A Morning Twist!):
- Filling: Scrambled eggs, cooked crumbled breakfast sausage or bacon, cheddar cheese, and perhaps a tiny bit of country gravy instead of pizza sauce.
- Caprese Pizza Roll:
- Filling: A small piece of fresh mozzarella, a tiny basil leaf, and a dab of sundried tomato pesto or a very small slice of fresh tomato (seeds removed, patted dry).
Tips for Custom Fillings:
- Pre-cook Meats: Always use pre-cooked meats.
- Dice Small: Chop all ingredients into small, manageable pieces so they fit well and the rolls can be sealed properly.
- Manage Moisture: If using watery vegetables like mushrooms or tomatoes, sauté them first or pat them very dry to prevent soggy rolls.
- Don’t Overstuff: This rule is even more critical with more complex fillings.
Let your imagination run wild! These variations can turn a simple snack into a gourmet treat or a fun themed appetizer for parties.
Storing and Reheating Leftovers (If You Have Any!)
While these air fryer pizza rolls are best enjoyed fresh and hot, sometimes you might have leftovers, or you might want to make a big batch ahead of time. Here’s how to store and reheat them effectively:
Storing Cooked Pizza Rolls:
- Cool Completely: Allow the cooked pizza rolls to cool down completely to room temperature before storing. Storing them while still warm can create condensation, leading to soggy rolls.
- Refrigerate: Place the cooled pizza rolls in an airtight container or a resealable plastic bag. They can be stored in the refrigerator for up to 3-4 days.
- Freeze (for longer storage):
- Flash Freeze: Arrange the completely cooled pizza rolls in a single layer on a baking sheet lined with parchment paper. Place the baking sheet in the freezer for 1-2 hours, or until the rolls are solid. This prevents them from sticking together.
- Transfer to Freezer Bag/Container: Once frozen solid, transfer the pizza rolls to a freezer-safe airtight container or a heavy-duty freezer bag. Label with the date.
- They can be stored in the freezer for up to 2-3 months for best quality.
Reheating Pizza Rolls:
The air fryer is, unsurprisingly, the best way to reheat pizza rolls to bring back that delightful crispiness!
- From the Refrigerator:
- Preheat your air fryer to around 350-375°F (175-190°C).
- Place the refrigerated pizza rolls in the air fryer basket in a single layer.
- Air fry for 3-5 minutes, or until they are heated through and crispy again. Keep an eye on them to prevent burning.
- From the Freezer:
- You can reheat directly from frozen – no need to thaw!
- Preheat your air fryer to around 350°F (175°C). (A slightly lower temperature for frozen helps them heat through without burning the outside).
- Place the frozen pizza rolls in the air fryer basket in a single layer.
- Air fry for 8-12 minutes, flipping halfway, until they are heated through and crispy. The exact time will depend on their size and your air fryer.
- Oven Reheating (Alternative):
- Preheat your oven to 375°F (190°C).
- Place the pizza rolls on a baking sheet.
- Bake for 8-12 minutes (from refrigerated) or 15-20 minutes (from frozen), until hot and crispy.
- Microwave (Not Recommended for Crispiness):
- While you can microwave them, they will lose their crispiness and become soft or even chewy. If you’re in a pinch, microwave for 30-60 seconds, but the texture won’t be the same.
For the best “just-made” taste and texture, the air fryer reheating method is highly recommended.
Frequently Asked Questions (FAQ)
Here are answers to some common questions you might have about making air fryer pizza rolls:
- Q: Can I use wonton wrappers or egg roll wrappers instead of pizza dough?
- A: Absolutely! Using wonton or egg roll wrappers is a popular alternative.
- Wonton Wrappers: These will create smaller, crispier, almost “pizza bite” style rolls. The process is similar: place a small amount of filling, wet the edges, fold (often into triangles or small rectangles), and seal. Air fry time will likely be shorter, around 5-7 minutes, as they are thinner.
- Egg Roll Wrappers: These will give you larger rolls, similar in texture to a crispy egg roll but with pizza filling. Again, fill, fold like an egg roll (tucking in the sides), and seal with water. Air fry time might be similar to pizza dough, perhaps 7-10 minutes.
- Both will yield a thinner, flakier, crispier crust compared to the chewier texture of pizza dough.
- A: Absolutely! Using wonton or egg roll wrappers is a popular alternative.
- Q: Why are my pizza rolls leaking filling in the air fryer?
- A: This is usually due to one of two reasons (or both):
- Overfilling: Too much sauce or cheese will expand and force its way out. Use a modest amount of filling.
- Improper Sealing: The edges weren’t sealed tightly enough. Ensure you press the edges firmly, using a fork to crimp or a bit of water (or egg wash) as “glue” can help create a stronger seal. Also, check for any small holes or tears before air frying.
- A: This is usually due to one of two reasons (or both):
- Q: Can I make these pizza rolls ahead of time and freeze them before cooking?
- A: Yes, this is a great idea for meal prep! Assemble the pizza rolls as directed, but instead of air frying, place them in a single layer on a parchment-lined baking sheet and flash freeze until solid (about 1-2 hours). Then, transfer them to a freezer-safe bag or container. They can be stored for up to 2-3 months. When ready to cook, you can air fry them directly from frozen. You’ll likely need to add a few extra minutes to the cooking time (e.g., 10-14 minutes at 375-380°F), flipping halfway.
- Q: What’s the best temperature to air fry pizza rolls for optimal crispiness without burning?
- A: A temperature range of 375°F to 380°F (190-195°C) generally works best for pizza dough-based rolls. This is hot enough to get them crispy and golden quickly and cook the filling through without the exterior burning before the inside is hot. If using thinner wrappers like wonton wrappers, you might stick closer to 370-375°F. Always monitor them, as air fryer models can vary.
- Q: Can I use different types of cheese? What melts best?
- A: Yes, you can experiment with cheeses! Low-moisture mozzarella (either whole milk or part-skim) is the classic choice because it melts beautifully, gives a great cheese pull, and isn’t too oily or watery. Other good options include:
- Provolone: Offers a slightly sharper flavor and melts well.
- Cheddar (Mild or Medium): Can be good, especially in combinations (e.g., with mozzarella for BBQ chicken rolls), but sharp cheddar can sometimes get oily.
- Monterey Jack: A very good melter with a mild flavor.
- A blend: Pizza cheese blends often combine mozzarella with provolone or other good melting cheeses.
- Avoid very hard cheeses (like aged Parmesan) as the primary cheese, though they are great as a flavor enhancer. Also, be cautious with very soft, fresh cheeses as they can release a lot of moisture.
- A: Yes, you can experiment with cheeses! Low-moisture mozzarella (either whole milk or part-skim) is the classic choice because it melts beautifully, gives a great cheese pull, and isn’t too oily or watery. Other good options include:
Air Fryer Pizza Rolls Recipe
Ingredients
- For the Dough:
- 1 pound (approx. 450g) store-bought pizza dough (refrigerated, either in a can or a bag from the deli section. You can also use homemade if you’re feeling ambitious!)
- Alternatively, you can use:
- 1 can (13.8 oz / 391g) refrigerated pizza crust (like Pillsbury)
- Wonton wrappers (for smaller, crispier bites – you’ll need about 24-30)
- Egg roll wrappers (for larger rolls – you’ll need about 10-12)
- For the Filling:
- 1/2 cup (approx. 120ml) pizza sauce or marinara sauce (choose a thicker sauce to prevent sogginess)
- 1 cup (approx. 110g) shredded low-moisture mozzarella cheese (this type melts best and is less watery)
- 1/2 cup (approx. 50g) mini pepperoni slices, or regular pepperoni slices chopped into smaller pieces
- Optional: 1/4 cup grated Parmesan cheese (for an extra flavor kick)
- For Seasoning & Finishing:
- 1 tablespoon olive oil or a good quality cooking spray
- 1 teaspoon Italian seasoning (or a mix of dried oregano and basil)
- 1/2 teaspoon garlic powder (optional, but recommended)
- Pinch of salt and freshly ground black pepper (to taste, be mindful if your pepperoni is already salty)
- Optional for Egg Wash (for extra golden color and sealing power):
- 1 large egg, lightly beaten with 1 teaspoon of water
Instructions
Prepare Your Workspace and Dough:
* Lightly flour a clean, dry work surface (like a large cutting board or countertop).
* If using refrigerated pizza dough that needs to come to room temperature, take it out of the fridge about 15-20 minutes before you plan to start. This makes it easier to roll.
* Unroll or unpack your pizza dough onto the floured surface. If it’s a ball, use a floured rolling pin to roll it out into a rectangle, approximately 1/8 to 1/4 inch thick. Aim for a shape that’s easy to cut into smaller, uniform pieces (e.g., a 12×16 inch rectangle).
2. Cut the Dough:
* Using a pizza cutter or a sharp knife, cut the dough into small, even rectangles or squares. For classic pizza roll size, aim for pieces around 2×3 inches or 3×3 inches. You should get roughly 16-24 pieces depending on the size you cut and the total amount of dough. Don’t worry if they’re not perfectly uniform; rustic charm is part of the homemade appeal!
3. Assemble the Pizza Rolls:
* Sauce: Spoon a small amount of pizza sauce (about 1/2 to 1 teaspoon) onto the center of each dough piece. Be careful not to add too much, as this can make sealing difficult and cause them to leak during cooking. Leave a small border (about 1/4 to 1/2 inch) around the edges clear of sauce.
* Cheese: Sprinkle a pinch of shredded mozzarella cheese (and Parmesan, if using) over the sauce. Again, don’t overfill!
* Pepperoni: Place a few mini pepperoni slices or pieces of chopped pepperoni on top of the cheese.
* Seasoning: Lightly sprinkle a tiny bit of Italian seasoning and garlic powder (if using) over the fillings.
4. Seal the Rolls (Crucial Step!):
* This is the most important step to prevent your delicious fillings from oozing out in the air fryer.
* Method 1 (Folding): Gently fold one side of the dough rectangle over the filling to meet the other side, forming a smaller rectangle or a half-moon shape.
* Method 2 (Rolling): If your pieces are more rectangular, you can place the filling slightly off-center, fold in the shorter sides, and then roll it up like a tiny burrito or egg roll.
* Sealing: Firmly press the edges together to seal them. You can use your fingers, or for a more secure seal and a decorative edge, use the tines of a fork to crimp the edges. If the dough isn’t sticking well, lightly dab the edges with a tiny bit of water before pressing them together. Ensure there are no gaps.
* Optional Egg Wash for Sealing: If using the egg wash, lightly brush it along the edges before sealing. This not only helps them stick but also promotes browning.
5. Prepare for Air Frying:
* If your air fryer model requires preheating, preheat it to 380°F (190-195°C) for about 3-5 minutes.
* Lightly brush the tops of the sealed pizza rolls with olive oil or give them a quick spray with cooking spray. This helps them get extra crispy and golden. If you used an egg wash for sealing, you can brush the tops with the remaining egg wash.
6. Air Fry the Pizza Rolls:
* Carefully place the pizza rolls in the air fryer basket in a single layer. Do not overcrowd the basket! Work in batches if necessary to ensure even cooking and crisping. Leave a little space between each roll for air circulation.
* Air fry at 380°F (190-195°C) for 6-10 minutes. The exact time will vary depending on your air fryer model, the size of your pizza rolls, and how golden you like them.
* Check and Flip (Optional but Recommended): Around the halfway mark (3-5 minutes), gently shake the basket or use tongs to flip the pizza rolls. This helps them cook evenly on all sides.
* Continue air frying until they are golden brown, crispy, and the filling is hot and bubbly. You might see a tiny bit of cheese or sauce peeking out, which is perfectly fine.
7. Cool and Serve:
* Once cooked, carefully remove the pizza rolls from the air fryer basket. They will be very hot!
* Let them cool for a few minutes before serving, as the filling will be molten. This brief cooling period also allows the crust to crisp up further.
* Repeat with any remaining batches of pizza rolls
Nutrition
- Serving Size: One Normal Portion
- Calories: 350-450


