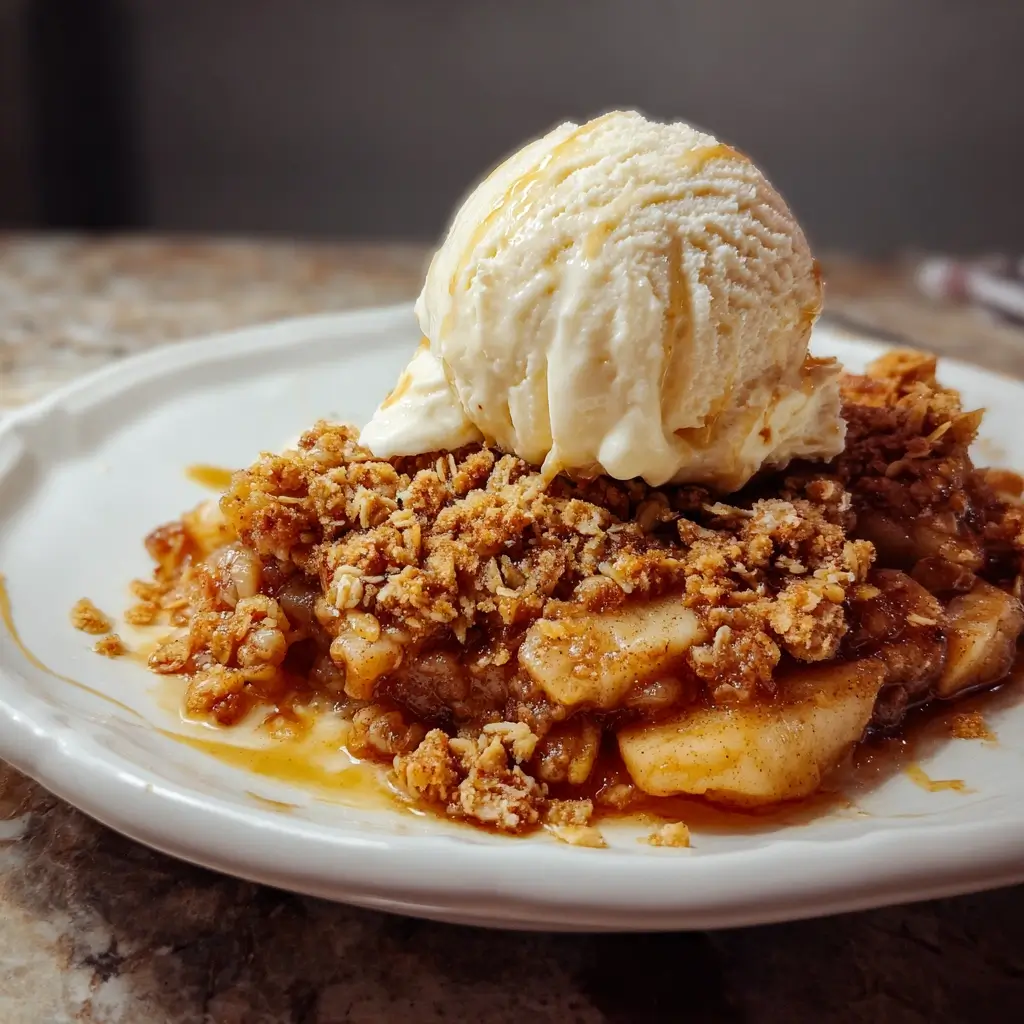
Of all the desserts that signal the arrival of autumn, none captures the heart and soul of the season quite like a warm, bubbling apple crisp. I still remember the first time I made this specific recipe. The house filled with the intoxicating aroma of baked apples, cinnamon, and buttery oats, a scent so comforting it felt like a hug. My family gathered in the kitchen, drawn by the smell, their eyes wide with anticipation. When I pulled the golden-brown, bubbly masterpiece from the oven, a collective “wow” echoed through the room. Serving it warm, with a generous scoop of vanilla ice cream slowly melting into the nooks and crannies of the crispy topping, was pure magic. That first bite—the perfect harmony of tart, tender apples, the crunchy, sweet topping, and the creamy cold of the ice cream—was a moment of pure bliss. It wasn’t just a dessert; it was an experience. This recipe has since become our family’s most requested fall treat, the centerpiece of cozy evenings, and a surefire way to bring smiles to everyone’s faces. It’s simple, rustic, and profoundly satisfying, proving that the most memorable dishes are often born from the simplest ingredients.
The Ultimate Apple Crisp with Vanilla Ice Cream Recipe
This recipe is designed for maximum flavor and texture. The filling is a perfect balance of tart and sweet, while the topping is generously thick, wonderfully crunchy, and rich with buttery, oaty goodness. Paired with vanilla ice cream, it’s a dessert that transcends seasons but truly shines in the fall.
Ingredients You’ll Need
For the Apple Filling:
- Apples: 3 pounds of firm, crisp apples (about 6-7 medium apples), peeled, cored, and sliced ¼-inch thick. A mix of tart (like Granny Smith) and sweet (like Honeycrisp or Braeburn) is ideal.
- Lemon Juice: 2 tablespoons, freshly squeezed. This prevents the apples from browning and adds a bright note of flavor.
- Granulated Sugar: ¼ cup. Adjust up or down slightly depending on the sweetness of your apples.
- Light Brown Sugar: ¼ cup, packed. Adds a wonderful molasses depth to the filling.
- All-Purpose Flour: 2 tablespoons. This helps to thicken the apple juices into a lovely syrup.
- Ground Cinnamon: 1 ½ teaspoons. The classic warm spice for any apple dessert.
- Ground Nutmeg: ½ teaspoon. Adds a subtle, warm complexity.
- Pinch of Salt: ⅛ teaspoon. Balances all the sweetness.
For the Crisp Topping:
- Old-Fashioned Rolled Oats: 1 ½ cups. Do not use instant or quick-cook oats, as they will become mushy. Rolled oats provide the best texture.
- All-Purpose Flour: 1 cup. Provides structure to the topping.
- Light Brown Sugar: 1 cup, packed. The key to a sweet, caramelized, and crispy topping.
- Granulated Sugar: ¼ cup. Adds an extra element of crunch.
- Ground Cinnamon: 1 teaspoon. To echo the flavors in the filling.
- Baking Powder: 1 teaspoon. A secret ingredient that helps make the topping a little lighter and crispier.
- Salt: ½ teaspoon. Crucial for balancing the sweetness of the topping.
- Unsalted Butter: 1 cup (2 sticks), cold and cut into ½-inch cubes. Cold butter is non-negotiable for a truly crisp, crumbly topping.
For Serving:
- Vanilla Bean Ice Cream: A high-quality brand is recommended.
Step-by-Step Instructions for the Best Homemade Apple Crisp
- Preheat and Prepare: Preheat your oven to 375°F (190°C). Grease a 9×13-inch baking dish or a similar 3-quart casserole dish with butter or non-stick spray.
- Make the Apple Filling: In a large bowl, combine the peeled and sliced apples with the fresh lemon juice and toss gently to coat. This step is important to prevent oxidation.
- Add Filling Flavorings: To the bowl of apples, add the granulated sugar, brown sugar, 2 tablespoons of all-purpose flour, 1 ½ teaspoons of cinnamon, nutmeg, and a pinch of salt. Mix thoroughly until the apples are evenly coated with the sugar and spice mixture.
- Assemble the Base: Pour the apple mixture into your prepared baking dish and spread it into an even layer.
- Prepare the Crisp Topping: In a separate large bowl, whisk together the dry ingredients for the topping: the rolled oats, 1 cup of all-purpose flour, 1 cup of packed brown sugar, granulated sugar, 1 teaspoon of cinnamon, baking powder, and ½ teaspoon of salt.
- Cut in the Cold Butter: Add the cold, cubed butter to the dry topping mixture. Using a pastry blender, two knives, or your fingertips, cut the butter into the flour and oat mixture. Work the butter in until the mixture resembles coarse crumbs with some pea-sized pieces of butter still visible. Do not overmix! Those larger butter pieces are what create pockets of steam, resulting in a flakier, crispier topping.
- Top the Apples: Evenly sprinkle the crisp topping over the apples in the baking dish. Gently pat it down, but don’t pack it too tightly. You want to cover the apples completely, right to the edges.
- Bake to Perfection: Place the baking dish on a baking sheet to catch any potential drips from the bubbling filling. Bake in the preheated oven for 45-55 minutes. The crisp is done when the fruit filling is hot and bubbly around the edges and the topping is a deep golden brown and fragrant.
- Rest Before Serving: This is a crucial step! Remove the apple crisp from the oven and let it rest on a wire rack for at least 15-20 minutes before serving. This allows the juices in the filling to set up and thicken properly, preventing a runny mess when you scoop it out.
The Star of the Show: Choosing the Best Apples for Your Crisp
The apple you choose can make or break your dessert. The ideal apple for a crisp holds its shape during baking, preventing a mushy, applesauce-like filling, and has a flavor that can stand up to the sweet topping. The best approach is often to use a combination of two or more varieties to achieve a complex flavor profile with both tart and sweet notes.
Top-Tier Apples for Baking:
- Granny Smith: The undisputed champion of baking apples. They are extremely firm and wonderfully tart, which provides a perfect acidic balance to the sweet, buttery topping. They hold their shape exceptionally well, ensuring you have distinct apple slices in your finished product.
- Honeycrisp: A fan favorite for a reason. As the name suggests, they are incredibly crisp and have a fantastic sweet-tart flavor. They maintain their texture well when baked, making them a reliable and delicious choice.
- Braeburn: This apple offers a complex, spicy-sweet flavor and a very firm texture that doesn’t break down into mush in the oven. It’s a fantastic all-rounder for any baked apple dish.
- Golden Delicious: Don’t let its delicate skin fool you. Golden Delicious apples are sweet and mellow, and they hold up surprisingly well to baking. They are a great choice to mix with a tarter apple like Granny Smith to add a layer of natural sweetness.
Apples to Use with Caution (or Avoid):
- Red Delicious: While beautiful, this apple is often mealy and has a mild flavor that gets lost in a bake. Its flesh breaks down quickly, leading to a mushy texture.
- McIntosh: A classic eating apple, the McIntosh is very tender and will break down into a soft, almost applesauce-like consistency when baked for a long time. If you prefer a softer filling, it can work, but it won’t give you defined apple slices.
- Gala: Similar to McIntosh, Gala apples are sweet and crisp for eating raw but tend to become soft and lose their distinct flavor when baked.
Deconstructing the Perfect Crisp Topping
The topping is half the experience, and getting it right is an art. It needs to be crunchy, clumpy, buttery, and flavorful. Each component plays a vital role.
Oats: Rolled vs. Quick
Always use old-fashioned rolled oats. These are whole oats that have been steamed and rolled flat. They maintain their integrity during baking, providing that signature chewy and crispy texture. Quick or instant oats are rolled thinner and cut finer. They absorb moisture too quickly and will turn into a pasty, gummy layer instead of a crisp one.
Flour and a Secret Helper
All-purpose flour acts as the binder, bringing the butter, sugar, and oats together. It creates the “crumble” part of the crisp. The secret ingredient we’ve included is a teaspoon of baking powder. While not traditional in all recipes, it provides a tiny bit of lift, making the topping slightly less dense and even crispier.
The Magic of Cold Butter
The temperature of your butter is paramount. Using cold butter, cut into cubes, is the single most important technique for a great topping. When you work cold butter into the flour, it remains in small, separate pieces. As the crisp bakes, these butter pieces melt, creating little pockets of steam. This steam pushes the surrounding flour and oat mixture up and away, resulting in a lighter, flakier, and ultimately crispier topping. If you use melted or softened butter, it will coat the flour and oats, creating a dense, greasy, and often soggy result.
Nutrition Facts
- Servings: 10-12 servings
- Calories per serving: Approximately 450-550 kcal (This is an estimate and can vary based on the exact size of your apples, type of sugar, and serving size.)
This is a decadent dessert meant for indulgence. The calories primarily come from the butter and sugar in the topping and the natural sugars in the apples. It’s a perfect treat for special occasions and cozy gatherings.
Preparation Time
- Active Preparation Time: 25 minutes (This includes peeling, coring, and slicing the apples, and mixing the filling and topping.)
- Baking Time: 45-55 minutes
- Resting Time: 15-20 minutes
- Total Time: Approximately 1 hour 30 minutes
How to Serve Your Apple Crisp for a Wow Factor
While delicious on its own, a few simple additions can elevate your apple crisp from a humble dessert to a showstopper.
- The Classic Scoop: The number one way to serve apple crisp is warm from the oven with a generous scoop of high-quality vanilla bean ice cream. The contrast between the warm, spiced apples, the crunchy topping, and the cold, creamy ice cream is a textural and flavorful masterpiece.
- A Drizzle of Decadence: Gently warm up some salted caramel sauce and drizzle it over the top of the ice cream and crisp. This adds another layer of rich, buttery flavor that complements the apples perfectly.
- A Dollop of Cream: If ice cream isn’t your thing, a large dollop of freshly whipped, lightly sweetened heavy cream or a tangy spoonful of crème fraîche can provide a wonderful creamy contrast without the intense cold.
- Extra Spice and Crunch: For a final flourish, consider a light dusting of ground cinnamon or a sprinkle of toasted pecans or walnuts over the top just before serving. This adds visual appeal and an extra layer of crunch.
- The Savory Twist: For a more sophisticated and traditional pairing, serve a slice of warm apple crisp with a thin slice of sharp cheddar cheese on the side. The sharp, salty flavor of the cheese cuts through the sweetness of the crisp in a surprisingly delicious way.
Additional Tips for Flawless Apple Crisp
- Don’t Overcrowd the Pan: Use a 9×13-inch dish or a similar 3-quart baker. If your apples are piled too high, the bottom layer can steam and turn mushy before the top layer is cooked through. A wider, shallower dish promotes more even cooking.
- Let it Rest—Seriously! It’s tempting to dig in the moment it comes out of the oven, but resting is essential. A 15-20 minute rest allows the molten, bubbly juices in the filling to cool slightly and thicken into a glorious syrup. Scooping too early will result in a soupy serving.
- Place a Baking Sheet Underneath: The apple filling will bubble up vigorously, especially around the edges. Placing your baking dish on a foil-lined baking sheet will catch any potential overflows, saving you from a sticky, burnt-on mess on the bottom of your oven.
- Embrace the Clumps: When making the topping, don’t strive for a uniform, sandy texture. You want a mix of fine crumbs and larger, pea-sized or even almond-sized clumps of the butter-oat mixture. These larger clumps will bake up into extra-crunchy, buttery bites that are the best part of any crisp.
- Make the Topping Ahead: To save time on the day of serving, you can prepare the crisp topping up to 3 days in advance. Store it in an airtight container or a zip-top bag in the refrigerator. This also ensures your butter stays extra cold, which is great for the final texture.
Frequently Asked Questions About Apple Crisp
1. What’s the difference between an apple crisp and an apple crumble?
This is a classic culinary question! The terms are often used interchangeably, but there is a traditional difference. A crisp (like this recipe) contains oats in the topping, which “crisp up” during baking. A crumble has a topping made from flour, sugar, and butter, resembling a streusel, which is more crumbly and sandy in texture.
2. Why is my apple crisp topping soggy instead of crispy?
There are a few common culprits for a soggy topping.
- Melted or Soft Butter: You used butter that wasn’t cold enough. This is the #1 reason. Cold butter is essential for a crispy texture.
- Overmixing the Topping: Working the butter in too much creates a paste rather than distinct clumps.
- Covering While Baking or Storing: Covering the crisp with foil while it bakes will trap steam and make the topping soggy. Likewise, covering it while it’s still warm will do the same. Let it cool completely before covering for storage.
- Using Quick Oats: Instant or quick-cook oats absorb too much moisture and turn mushy.
3. Can I make apple crisp ahead of time?
Yes, you have a couple of options.
- Assemble and Refrigerate (Up to 24 hours): You can fully assemble the crisp (filling and topping) in the baking dish, cover it tightly with plastic wrap, and refrigerate for up to 24 hours. You may need to add 10-15 minutes to the baking time since you’re starting from cold.
- Bake Ahead and Reheat: You can bake the crisp completely, let it cool, cover, and refrigerate for up to 3-4 days. To reheat, place it in a 350°F (175°C) oven for 15-20 minutes, or until warmed through. The oven is the best way to re-crisp the topping.
4. Do I have to peel the apples?
Technically, no, you don’t have to peel the apples. Leaving the peels on adds a bit of color, fiber, and a slightly more rustic texture. However, some apple peels can become tough and chewy after baking, which can be unpleasant for some people. For the best, most uniform texture where the apples melt in your mouth, we highly recommend peeling them.
5. Can I use different fruits or add nuts?
Absolutely! This recipe is very versatile.
- Fruits: You can substitute half of the apples with firm pears, or add a cup of fresh or frozen cranberries for a tart kick. In the summer, a peach or berry crisp using this same topping is fantastic.
- Nuts: For extra crunch and flavor, add ½ to ¾ cup of chopped pecans or walnuts to the topping mixture along with the oats and flour. They toast beautifully as the crisp bakes.
Apple Crisp with Vanilla Ice Cream Recipe
Ingredients
For the Apple Filling:
- Apples: 3 pounds of firm, crisp apples (about 6-7 medium apples), peeled, cored, and sliced ¼-inch thick. A mix of tart (like Granny Smith) and sweet (like Honeycrisp or Braeburn) is ideal.
- Lemon Juice: 2 tablespoons, freshly squeezed. This prevents the apples from browning and adds a bright note of flavor.
- Granulated Sugar: ¼ cup. Adjust up or down slightly depending on the sweetness of your apples.
- Light Brown Sugar: ¼ cup, packed. Adds a wonderful molasses depth to the filling.
- All-Purpose Flour: 2 tablespoons. This helps to thicken the apple juices into a lovely syrup.
- Ground Cinnamon: 1 ½ teaspoons. The classic warm spice for any apple dessert.
- Ground Nutmeg: ½ teaspoon. Adds a subtle, warm complexity.
- Pinch of Salt: ⅛ teaspoon. Balances all the sweetness.
For the Crisp Topping:
- Old-Fashioned Rolled Oats: 1 ½ cups. Do not use instant or quick-cook oats, as they will become mushy. Rolled oats provide the best texture.
- All-Purpose Flour: 1 cup. Provides structure to the topping.
- Light Brown Sugar: 1 cup, packed. The key to a sweet, caramelized, and crispy topping.
- Granulated Sugar: ¼ cup. Adds an extra element of crunch.
- Ground Cinnamon: 1 teaspoon. To echo the flavors in the filling.
- Baking Powder: 1 teaspoon. A secret ingredient that helps make the topping a little lighter and crispier.
- Salt: ½ teaspoon. Crucial for balancing the sweetness of the topping.
- Unsalted Butter: 1 cup (2 sticks), cold and cut into ½-inch cubes. Cold butter is non-negotiable for a truly crisp, crumbly topping.
For Serving:
- Vanilla Bean Ice Cream: A high-quality brand is recommended.
Instructions
- Preheat and Prepare: Preheat your oven to 375°F (190°C). Grease a 9×13-inch baking dish or a similar 3-quart casserole dish with butter or non-stick spray.
- Make the Apple Filling: In a large bowl, combine the peeled and sliced apples with the fresh lemon juice and toss gently to coat. This step is important to prevent oxidation.
- Add Filling Flavorings: To the bowl of apples, add the granulated sugar, brown sugar, 2 tablespoons of all-purpose flour, 1 ½ teaspoons of cinnamon, nutmeg, and a pinch of salt. Mix thoroughly until the apples are evenly coated with the sugar and spice mixture.
- Assemble the Base: Pour the apple mixture into your prepared baking dish and spread it into an even layer.
- Prepare the Crisp Topping: In a separate large bowl, whisk together the dry ingredients for the topping: the rolled oats, 1 cup of all-purpose flour, 1 cup of packed brown sugar, granulated sugar, 1 teaspoon of cinnamon, baking powder, and ½ teaspoon of salt.
- Cut in the Cold Butter: Add the cold, cubed butter to the dry topping mixture. Using a pastry blender, two knives, or your fingertips, cut the butter into the flour and oat mixture. Work the butter in until the mixture resembles coarse crumbs with some pea-sized pieces of butter still visible. Do not overmix! Those larger butter pieces are what create pockets of steam, resulting in a flakier, crispier topping.
- Top the Apples: Evenly sprinkle the crisp topping over the apples in the baking dish. Gently pat it down, but don’t pack it too tightly. You want to cover the apples completely, right to the edges.
- Bake to Perfection: Place the baking dish on a baking sheet to catch any potential drips from the bubbling filling. Bake in the preheated oven for 45-55 minutes. The crisp is done when the fruit filling is hot and bubbly around the edges and the topping is a deep golden brown and fragrant.
- Rest Before Serving: This is a crucial step! Remove the apple crisp from the oven and let it rest on a wire rack for at least 15-20 minutes before serving. This allows the juices in the filling to set up and thicken properly, preventing a runny mess when you scoop it out.
Nutrition
- Serving Size: One Normal Portion
- Calories: 450-550