

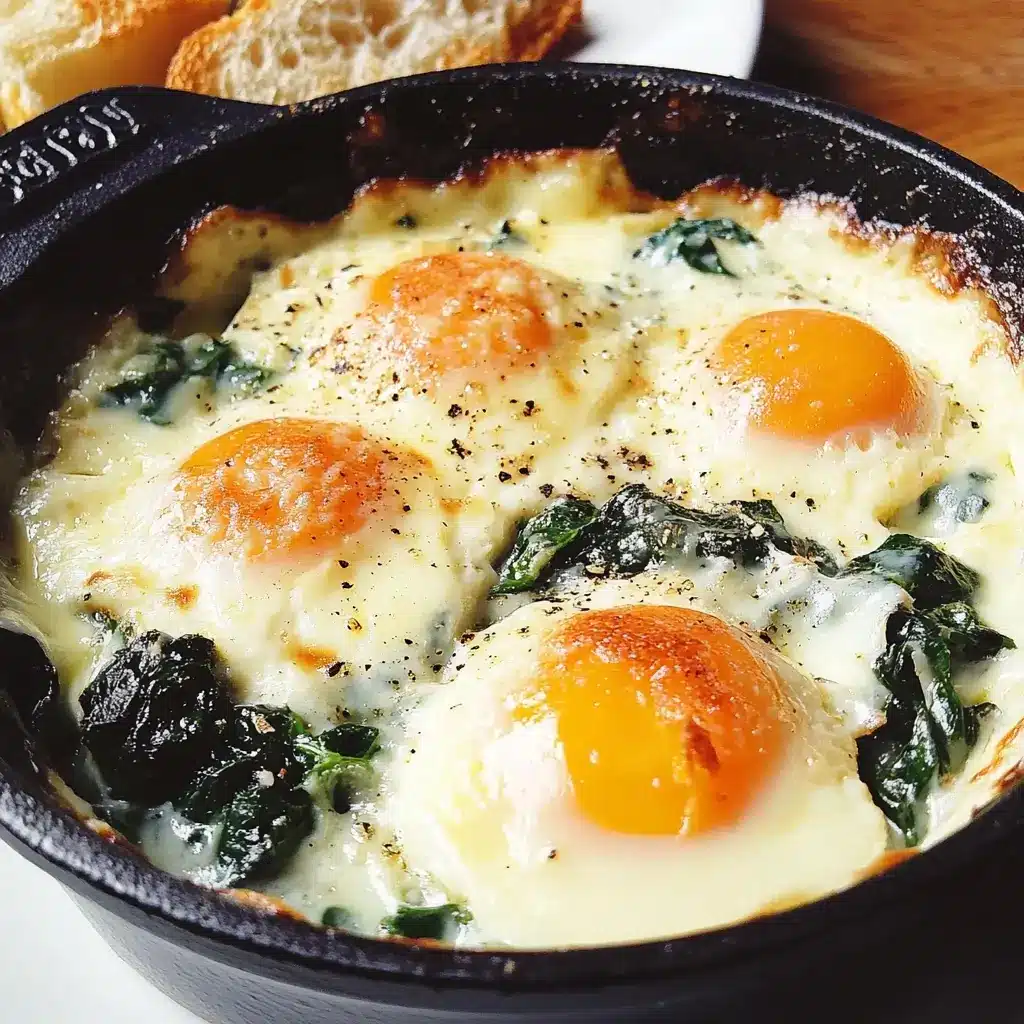

The first time I encountered Baked Eggs Florentine wasn’t in a fancy brunch spot, but rather during a cozy Sunday morning experiment in my own kitchen. I was looking for something a little special, something elegant yet comforting, to shake up our usual breakfast routine. The aroma that filled the house as these little ramekins bubbled away in the oven – garlic, spinach, cream, melting cheese – was intoxicating. When I finally pulled them out, golden brown and puffed slightly around the edges, revealing perfectly set whites and gloriously runny yolks nestled in creamy spinach, I knew I’d found a winner. Presenting them to my family felt like unveiling a little treasure. The appreciative murmurs, the satisfying clink of spoons against ceramic, and the sheer delight as everyone dipped crusty bread into that luscious combination of yolk and cheesy spinach… well, it instantly became a requested favorite. It’s the kind of dish that feels incredibly sophisticated but is surprisingly straightforward to make, transforming simple ingredients into a truly memorable meal. It’s my go-to for impressing guests with minimal stress, or simply for treating ourselves to a bit of weekend luxury.
The Enduring Charm of Eggs Florentine: A Baked Twist
While many associate “Florentine” style cooking – dishes featuring spinach and often a creamy sauce – with Florence, Italy, the popular legend credits Catherine de’ Medici. When she married Henry II of France in the 16th century, she supposedly brought her Italian chefs and a love for spinach, introducing it to French cuisine. Dishes prepared in this new style, prominently featuring spinach, were dubbed “Florentine” in her honor. Whether historically precise or not, the term stuck, signifying a delicious pairing.
Classic Eggs Florentine typically involves poached eggs served over toasted English muffins with sautéed spinach and a generous dollop of rich Hollandaise sauce. It’s a brunch icon, undeniably delicious but often perceived as requiring a bit more technique (hello, poaching and Hollandaise!).
This Baked Eggs Florentine recipe offers a brilliant alternative. By baking the eggs directly within a nest of creamy, seasoned spinach and topping it with cheese, we achieve a similar flavour profile with several distinct advantages:
- Simplicity: No need to fuss over poaching multiple eggs simultaneously or whisking up a potentially temperamental Hollandaise. The oven does most of the work.
- Presentation: Individual ramekins make for an elegant, personalized presentation, perfect for entertaining.
- Flavor Concentration: Baking allows the flavours of the spinach, cream, garlic, and cheese to meld beautifully with the eggs.
- Texture: You get the delightful contrast of tender baked egg whites, runny (or jammy, if you prefer) yolks, creamy spinach, and a gratinated cheesy topping.
It captures the essence of classic Eggs Florentine – the harmonious blend of egg, spinach, and richness – in a more approachable, rustic, yet equally satisfying format. It’s a testament to how simple, quality ingredients can be transformed into something truly special with the right technique.
Mastering the Ingredients: The Foundation of Flavor
The beauty of Baked Eggs Florentine lies in its relatively short ingredient list. However, the quality and preparation of each component significantly impact the final dish. Let’s break down the key players:
- Spinach – The Verdant Star: This is the heart of the “Florentine” aspect. You have two main choices:
- Fresh Spinach: Offers a brighter, arguably fresher flavour. Baby spinach is convenient as it requires less chopping, but mature spinach works well too (just remove tough stems and chop roughly). The key challenge with fresh spinach is its high water content. You must cook it down significantly and ideally squeeze out excess moisture before adding cream to avoid a watery final dish. A large volume of fresh spinach wilts down considerably.
- Frozen Spinach: A fantastic, convenient option. Opt for chopped frozen spinach. The crucial step here is thawing it completely and then squeezing out as much water as physically possible. Use your hands, a clean kitchen towel, or a potato ricer. Failing to remove enough water is the most common pitfall leading to a soupy result. While perhaps slightly less vibrant than fresh, properly prepared frozen spinach yields excellent results.
- Eggs – The Golden Centerpiece: The star of the show! Use large, good-quality eggs. Fresher eggs tend to have firmer whites that hold their shape better around the yolk. While cold eggs straight from the fridge are fine, some chefs prefer using room temperature eggs, believing they cook more evenly. The choice is yours, but consistency is key. The goal is perfectly set whites and yolks cooked to your preference (runny, jammy, or firm).
- The Creamy Element – Binding It All Together: This adds richness and moisture, creating the luscious sauce that coats the spinach.
- Heavy Cream (Double Cream): Provides the richest flavour and creamiest texture. It’s less likely to curdle when heated. This is often the preferred choice for indulgence.
- Half-and-Half (Single Cream): A lighter alternative that still provides creaminess. Works well, but the result will be slightly less decadent.
- Béchamel Sauce: For a more classic French approach, you could make a light Béchamel (butter, flour, milk) and fold the spinach into that. This adds another layer of flavour and structure.
- Milk: Using only milk will result in a much thinner sauce. If opting for milk, consider adding a small amount of cornstarch slurry or increasing the cheese to help thicken it.
- Cheese – The Savory Crown: Cheese adds saltiness, umami, and a beautiful golden crust.
- Parmesan (Parmigiano-Reggiano): Offers a sharp, nutty, salty flavour. Grates finely and melts well into the sauce, also browning nicely on top.
- Gruyère: A classic Alpine cheese known for its excellent melting properties and complex nutty, earthy flavour. Pairs beautifully with spinach and eggs.
- Other Options: Sharp white cheddar, Fontina, or even a touch of crumbled goat cheese or feta could offer interesting variations. Use what you love, but ensure it melts reasonably well. Grating your own cheese from a block is always superior to pre-shredded, which often contains anti-caking agents that affect melting.
- Aromatics & Seasoning – Building Depth: These supporting actors are crucial for flavour.
- Garlic: Essential for pairing with spinach. Freshly minced garlic provides the best flavour.
- Shallots or Onion: Finely chopped shallots offer a milder, more delicate flavour than onion, but yellow or white onion works too. Sautéing these first builds a flavour base.
- Nutmeg: A classic pairing with cream sauces and spinach. Just a pinch adds warmth and complexity. Freshly grated nutmeg is far superior in aroma and flavour to pre-ground.
- Salt and Freshly Ground Black Pepper: Essential for enhancing all the other flavours. Remember that cheese adds saltiness, so season cautiously initially and adjust.
- Optional: A pinch of red pepper flakes can add a subtle warmth.
- Fat for Sautéing – The Starting Point:
- Butter: Adds richness and flavour that complements the cream and cheese.
- Olive Oil: A good alternative, especially extra virgin olive oil for flavour. You can also use a combination of both.
Choosing quality ingredients and preparing them correctly, especially managing the moisture in the spinach, sets the stage for a perfect Baked Eggs Florentine.
Baked Eggs Florentine: The Complete Recipe
This recipe provides a reliable foundation for delicious Baked Eggs Florentine. Feel free to adjust seasonings or cheese types based on your preference.
Yields: 4 servings
Prep time: 20 minutes
Cook time: 15-20 minutes
Ingredients:
- 1 tablespoon Unsalted Butter or Olive Oil
- 1 large Shallot, finely chopped (about 1/3 cup)
- 2-3 cloves Garlic, minced
- 10 ounces (about 280g) Fresh Spinach, washed and roughly chopped (or 1 (10 oz) package frozen chopped spinach, thawed and squeezed very dry)
- 1/2 cup (120ml) Heavy Cream (or Half-and-Half)
- 1/4 teaspoon Freshly Grated Nutmeg
- Salt, to taste (start with 1/4 tsp, adjust later)
- Freshly Ground Black Pepper, to taste (start with 1/8 tsp)
- Pinch of Red Pepper Flakes (optional)
- 4 Large Eggs
- 1/2 cup (about 50g) Grated Cheese (Parmesan, Gruyère, or a mix recommended)
- Softened butter for greasing ramekins
**Equipment:**
- 4 individual oven-safe ramekins (6-8 ounce capacity is ideal)
- Large skillet
- Spatula or wooden spoon
- Baking sheet
Step-by-Step Instructions: Crafting Your Baked Eggs Florentine Masterpiece
Follow these steps carefully for guaranteed deliciousness. The key is managing the spinach moisture and achieving your desired egg consistency.
**1. Preparation is Key:**
- Preheat Oven: Position a rack in the center of your oven and preheat to 375°F (190°C).
- Grease Ramekins: Generously grease the inside of four 6-to-8-ounce ramekins with softened butter. This prevents sticking and adds a subtle richness. Place the prepared ramekins on a baking sheet – this makes them easier to handle and catches any potential spills.
**2. Sautéing the Flavor Base:**
- Melt Fat: Heat the butter or olive oil in a large skillet over medium heat.
- Cook Aromatics: Add the finely chopped shallot (or onion) and cook, stirring occasionally, until softened and translucent, about 3-4 minutes. Don’t let it brown too much.
- Add Garlic: Stir in the minced garlic and optional red pepper flakes. Cook for about 1 minute more, until fragrant. Be careful not to burn the garlic, as it will turn bitter.
**3. Cooking the Spinach (Crucial Step!):**
- If Using Fresh Spinach: Add the spinach to the skillet in batches if necessary (it will seem like a lot, but it wilts down dramatically). Cook, stirring frequently, until all the spinach has wilted and released its liquid. Continue cooking, stirring occasionally, until most of the liquid has evaporated. This can take 5-8 minutes. You want the spinach mixture to be relatively dry. Optional but recommended: Transfer the cooked spinach to a fine-mesh sieve and press gently to remove any remaining excess liquid.
- If Using Frozen Spinach: Ensure your thawed spinach has been thoroughly squeezed dry (as described in the ingredients section). Add the squeezed spinach to the skillet with the cooked aromatics. Stir well to combine and heat through, about 2-3 minutes, ensuring any remaining moisture cooks off.
**4. Creating the Creamy Nest:**
- Add Cream & Seasonings: Pour the heavy cream (or half-and-half) over the spinach mixture in the skillet. Stir in the freshly grated nutmeg, salt, and freshly ground black pepper.
- Simmer Briefly: Bring the mixture to a gentle simmer and cook for 1-2 minutes, allowing the cream to reduce slightly and the flavours to meld. The mixture should be thick and creamy, not watery. Taste and adjust seasoning if needed – remember the cheese will add saltiness later.
- Remove from Heat: Take the skillet off the heat.
**5. Assembling the Ramekins:**
- Divide Spinach Mixture: Carefully spoon the creamy spinach mixture evenly among the four prepared ramekins.
- Make a Well: Using the back of a spoon, create a small indentation or “well” in the center of the spinach mixture in each ramekin. This helps cradle the egg yolk.
**6. The Grand Finale – Adding the Eggs:**
- Crack the Eggs: Carefully crack one large egg directly into the well in each ramekin. Try not to break the yolk. Alternatively, you can crack each egg into a small bowl first and then gently slide it into the well – this gives you more control and makes it easier to remove any stray shell pieces. Season the top of each egg lightly with a tiny pinch of salt and pepper if desired.
**7. Baking to Perfection:**
- Top with Cheese: Sprinkle the grated cheese evenly over the spinach and the whites of the eggs in each ramekin. Avoid covering the yolk completely if you want it visible.
- Bake: Carefully place the baking sheet with the ramekins into the preheated oven. Bake for 15-20 minutes. Baking time will vary depending on your oven and desired yolk consistency:
- For Runny Yolks: Bake for about 12-15 minutes, or until the egg whites are just set (no longer translucent) but the yolks are still soft and jiggle when gently shaken.
- For Jammy/Soft-Set Yolks: Bake for 15-18 minutes.
- For Fully Set Yolks: Bake for 18-20+ minutes.
- Keep a close eye on them during the last few minutes, as eggs can go from perfectly cooked to overcooked quickly.
- Optional Water Bath (Bain-Marie): For gentler, more even cooking and to help prevent the eggs from becoming rubbery, you can place the ramekins in a larger baking dish and carefully pour hot water into the dish until it reaches halfway up the sides of the ramekins before placing it in the oven. This is optional but recommended for the most tender results.
**8. Resting and Serving:**
- Rest Briefly: Carefully remove the baking sheet from the oven. Let the ramekins rest for 1-2 minutes before serving. The eggs will continue to cook slightly from the residual heat (carryover cooking).
- Serve: Serve immediately in the ramekins, placed on small plates (perhaps with a napkin underneath to prevent sliding). Garnish as desired (see serving suggestions). Warn guests that the ramekins are hot!
**Nutrition Facts (Estimated)**
Please note that these values are approximate and can vary significantly based on the specific ingredients used (especially the type of cream and amount/type of cheese).
- Servings: 4
- Calories per serving: Approximately 350 – 450 kcal
Key Nutritional Highlights:
- Protein: High in protein from the eggs and cheese.
- Vitamins & Minerals: Good source of Vitamin A, Vitamin K, folate, and iron (from spinach), Vitamin B12 and choline (from eggs), and calcium (from dairy).
- Fat: Contains saturated fat from cream and cheese, and healthy fats from eggs and potentially olive oil.
For a lighter version, consider using half-and-half or milk (with a thickener), reducing the amount of cheese, or using lower-fat cheese options.
**Time Commitment: Planning Your Brunch (or Breakfast!)**
Understanding the time involved helps plan your meal smoothly.
- Preparation Time: Approximately 15-20 minutes. This includes chopping aromatics, preparing the spinach (washing/chopping fresh or squeezing frozen), sautéing, mixing the cream sauce, and assembling the ramekins.
- Cook Time: Approximately 15-20 minutes in the oven. This depends heavily on your desired yolk consistency and your specific oven’s calibration.
- Total Time: Approximately 30-40 minutes from start to finish.
This relatively short total time makes Baked Eggs Florentine feasible not just for leisurely weekend brunches, but also for a slightly more special weekday breakfast if you prep components ahead (like the spinach mixture).
**How to Serve: Elevating Your Baked Eggs Florentine Experience**
Serving Baked Eggs Florentine is part of its charm. Here’s how to make the most of it:
- Serve Directly in Ramekins: The individual portions are inherently elegant. Place each hot ramekin on a small plate lined with a napkin or doily for presentation and safety.
- The Essential Bread: Crusty bread is practically mandatory for dipping into the runny yolk and scooping up the creamy spinach. Offer a variety:
- Toasted slices of sourdough, baguette, or ciabatta.
- Warm, buttered English muffins (a nod to the classic version).
- “Soldiers” – fingers of toasted bread.
- Garlic bread for an extra flavour dimension.
- Good quality gluten-free toast if needed.
- Simple Side Dishes: Keep sides relatively light to complement the richness of the eggs.
- A simple green salad with a light vinaigrette (lemon-based works well).
- A bowl of fresh berries or a mixed fruit salad.
- Slow-roasted cherry tomatoes drizzled with balsamic glaze.
- A few slices of crispy prosciutto or bacon on the side.
- Simple roasted asparagus spears.
- Garnish Gracefully: A little garnish adds visual appeal and freshness.
- A sprinkle of fresh chopped parsley or chives.
- An extra crack of freshly ground black pepper.
- A very light drizzle of high-quality extra virgin olive oil.
- A tiny pinch of smoked paprika or Aleppo pepper for colour and subtle flavour.
- Beverage Pairings:
- Morning: Freshly brewed coffee, assorted teas, or fresh orange juice.
- Brunch: Mimosas, Bellinis, or even a light, crisp white wine like a Sauvignon Blanc or Pinot Grigio can pair nicely.
The goal is to provide accompaniments that complement the richness without overwhelming the star dish, and crucially, something to soak up every last delicious bit.
**Additional Tips for Perfect Baked Eggs Florentine Every Time**
Beyond the core recipe, these five tips can elevate your Baked Eggs Florentine from great to truly exceptional:
- Banish Watery Spinach – The Golden Rule: This cannot be stressed enough. Whether using fresh or frozen, excess water is the enemy. For fresh, cook it until the liquid evaporates before adding cream. For frozen, thaw completely and squeeze relentlessly using hands, a towel, or even a potato ricer. Watery spinach leads to a diluted sauce and potentially prevents the egg whites from setting properly near the base. Aim for a thick, concentrated spinach base.
- Master Your Yolk Consistency: Ovens vary, and so do preferences for yolk runniness. Start checking earlier than the recipe suggests, maybe around the 12-minute mark. Gently jiggle the baking sheet – the whites should look opaque and set, while the yolk jiggles to your desired degree. Remember carryover cooking: the eggs will continue to set slightly after removing from the oven. If unsure, err on the side of slightly underdone yolks, as overcooked yolks become chalky.
- Ramekin Readiness & Size Matters: Don’t skimp on greasing the ramekins! Butter thoroughly to ensure easy serving and cleanup. The size of your ramekins impacts baking time; standard 6-to-8-ounce ramekins are ideal. Smaller ramekins may cook faster, larger ones slightly slower. Ensure they are oven-safe!
- Flavor Boosters & Variations: Don’t be afraid to customize!
- Mushrooms: Sauté sliced mushrooms with the shallots for an earthy depth.
- Meat: Add crispy cooked bacon bits, pancetta, or chopped prosciutto to the spinach mixture.
- Spice: Increase the red pepper flakes or add a dash of cayenne for more heat.
- Herbs: Add a tablespoon of chopped fresh herbs like dill or tarragon to the cream sauce.
- Wine Deglaze: After sautéing the shallots/garlic, deglaze the pan with a splash of dry white wine before adding the spinach for extra complexity.
- Smart Make-Ahead Strategy: While Baked Eggs Florentine is best served immediately after baking, you can prepare the creamy spinach mixture ahead of time. Cook the spinach base (Steps 2-4), let it cool completely, then store it in an airtight container in the refrigerator for up to 2 days. When ready to serve, simply divide the cold spinach mixture among the greased ramekins, make the wells, add the eggs and cheese, and bake as directed (you might need to add 1-3 extra minutes to the baking time since the base is cold). Do not bake the entire dish ahead and reheat, as the eggs will become rubbery and overcooked.
**Baked Eggs Florentine FAQs: Your Questions Answered**
Here are answers to some common questions about making this delightful dish:
- Q: Can I really use frozen spinach instead of fresh? Will it taste okay?
A: Absolutely! Frozen chopped spinach is a very convenient and effective option for Baked Eggs Florentine. The key difference lies in the preparation. You MUST thaw it completely and squeeze out every bit of excess water before adding it to the skillet. If you do this properly, the flavour and texture are excellent, and some even prefer its consistency in the final dish. It saves the time of washing, chopping, and wilting a large volume of fresh leaves. - Q: How do I know exactly when the eggs are perfectly cooked to my liking?
A: Visual cues are your best guide. The egg whites should be completely opaque and set – no jiggly translucent parts. For runny yolks, the yolk itself should still be vibrant yellow/orange and jiggle noticeably when the ramekin is gently shaken. For jammy yolks, they will jiggle less and look slightly more set around the edges. For fully cooked yolks, they will be firm and barely move. Start checking around the 12-15 minute mark and monitor closely. It’s better to pull them slightly early, as they continue cooking for a minute or two after leaving the oven. - Q: Can I make Baked Eggs Florentine dairy-free or vegan?A: Yes, with modifications.
- Dairy-Free: Use olive oil instead of butter. Replace heavy cream with a full-fat, unsweetened plant-based cream alternative (like cashew cream, oat cream, or coconut cream – note coconut may impart flavour). Use a good quality dairy-free Parmesan or Gruyère-style shred, or sprinkle with nutritional yeast for a cheesy flavour.
- Vegan: Follow the dairy-free modifications. For the egg replacement, this is trickier as the baked egg is central. You could try using a commercial vegan egg substitute designed for baking/scrambling, placing it in the well. Alternatively, you could skip the “egg” and bake the creamy spinach with vegan cheese, perhaps adding cubes of seasoned, baked tofu into the well instead for protein and texture, though this significantly changes the nature of the dish.
- Q: I don’t have individual ramekins. What else can I use?A: You have options!
- Muffin Tin: A standard muffin tin works well for smaller, individual portions. Grease the cups well. You’ll need to divide the ingredients among more cups (likely 6-8), and the baking time will probably be shorter (start checking around 10-12 minutes).
- Small Oven-Safe Skillet: You can make a larger, shareable version in a small (8-10 inch) oven-safe skillet. Prepare the spinach mixture in the skillet, make multiple wells (e.g., for 4-6 eggs), crack eggs in, top with cheese, and bake the whole skillet. Baking time might be slightly longer.
- Small Casserole Dish: Similar to the skillet method, a small oven-safe baking or casserole dish can work for a family-style presentation.
- Q: How should I store and reheat leftovers?
A: Baked Eggs Florentine is definitely best enjoyed fresh from the oven for the ideal texture (especially the yolks). However, if you have leftovers, cover the ramekins tightly with plastic wrap or transfer the contents to an airtight container and store in the refrigerator for up to 2 days. To reheat, the microwave is quickest (heat gently in 30-second bursts until warm), but the eggs will likely cook further and become firm. Reheating gently in a low oven (around 300°F/150°C) until warmed through might yield slightly better results, but the original texture, particularly of a runny yolk, cannot be fully replicated.

Baked Eggs Florentine Recipe
Ingredients
- 1 tablespoon Unsalted Butter or Olive Oil
- 1 large Shallot, finely chopped (about 1/3 cup)
- 2–3 cloves Garlic, minced
- 10 ounces (about 280g) Fresh Spinach, washed and roughly chopped (or 1 (10 oz) package frozen chopped spinach, thawed and squeezed very dry)
- 1/2 cup (120ml) Heavy Cream (or Half-and-Half)
- 1/4 teaspoon Freshly Grated Nutmeg
- Salt, to taste (start with 1/4 tsp, adjust later)
- Freshly Ground Black Pepper, to taste (start with 1/8 tsp)
- Pinch of Red Pepper Flakes (optional)
- 4 Large Eggs
- 1/2 cup (about 50g) Grated Cheese (Parmesan, Gruyère, or a mix recommended)
- Softened butter for greasing ramekins
Instructions
**1. Preparation is Key:**
- Preheat Oven: Position a rack in the center of your oven and preheat to 375°F (190°C).
- Grease Ramekins: Generously grease the inside of four 6-to-8-ounce ramekins with softened butter. This prevents sticking and adds a subtle richness. Place the prepared ramekins on a baking sheet – this makes them easier to handle and catches any potential spills.
**2. Sautéing the Flavor Base:**
- Melt Fat: Heat the butter or olive oil in a large skillet over medium heat.
- Cook Aromatics: Add the finely chopped shallot (or onion) and cook, stirring occasionally, until softened and translucent, about 3-4 minutes. Don’t let it brown too much.
- Add Garlic: Stir in the minced garlic and optional red pepper flakes. Cook for about 1 minute more, until fragrant. Be careful not to burn the garlic, as it will turn bitter.
**3. Cooking the Spinach (Crucial Step!):**
- If Using Fresh Spinach: Add the spinach to the skillet in batches if necessary (it will seem like a lot, but it wilts down dramatically). Cook, stirring frequently, until all the spinach has wilted and released its liquid. Continue cooking, stirring occasionally, until most of the liquid has evaporated. This can take 5-8 minutes. You want the spinach mixture to be relatively dry. Optional but recommended: Transfer the cooked spinach to a fine-mesh sieve and press gently to remove any remaining excess liquid.
- If Using Frozen Spinach: Ensure your thawed spinach has been thoroughly squeezed dry (as described in the ingredients section). Add the squeezed spinach to the skillet with the cooked aromatics. Stir well to combine and heat through, about 2-3 minutes, ensuring any remaining moisture cooks off.
**4. Creating the Creamy Nest:**
- Add Cream & Seasonings: Pour the heavy cream (or half-and-half) over the spinach mixture in the skillet. Stir in the freshly grated nutmeg, salt, and freshly ground black pepper.
- Simmer Briefly: Bring the mixture to a gentle simmer and cook for 1-2 minutes, allowing the cream to reduce slightly and the flavours to meld. The mixture should be thick and creamy, not watery. Taste and adjust seasoning if needed – remember the cheese will add saltiness later.
- Remove from Heat: Take the skillet off the heat.
**5. Assembling the Ramekins:**
- Divide Spinach Mixture: Carefully spoon the creamy spinach mixture evenly among the four prepared ramekins.
- Make a Well: Using the back of a spoon, create a small indentation or “well” in the center of the spinach mixture in each ramekin. This helps cradle the egg yolk.
**6. The Grand Finale – Adding the Eggs:**
- Crack the Eggs: Carefully crack one large egg directly into the well in each ramekin. Try not to break the yolk. Alternatively, you can crack each egg into a small bowl first and then gently slide it into the well – this gives you more control and makes it easier to remove any stray shell pieces. Season the top of each egg lightly with a tiny pinch of salt and pepper if desired.
**7. Baking to Perfection:**
- Top with Cheese: Sprinkle the grated cheese evenly over the spinach and the whites of the eggs in each ramekin. Avoid covering the yolk completely if you want it visible.
- Bake: Carefully place the baking sheet with the ramekins into the preheated oven. Bake for 15-20 minutes. Baking time will vary depending on your oven and desired yolk consistency:
- For Runny Yolks: Bake for about 12-15 minutes, or until the egg whites are just set (no longer translucent) but the yolks are still soft and jiggle when gently shaken.
- For Jammy/Soft-Set Yolks: Bake for 15-18 minutes.
- For Fully Set Yolks: Bake for 18-20+ minutes.
- Keep a close eye on them during the last few minutes, as eggs can go from perfectly cooked to overcooked quickly.
- Optional Water Bath (Bain-Marie): For gentler, more even cooking and to help prevent the eggs from becoming rubbery, you can place the ramekins in a larger baking dish and carefully pour hot water into the dish until it reaches halfway up the sides of the ramekins before placing it in the oven. This is optional but recommended for the most tender results.
**8. Resting and Serving:**
- Rest Briefly: Carefully remove the baking sheet from the oven. Let the ramekins rest for 1-2 minutes before serving. The eggs will continue to cook slightly from the residual heat (carryover cooking).
- Serve: Serve immediately in the ramekins, placed on small plates (perhaps with a napkin underneath to prevent sliding). Garnish as desired (see serving suggestions). Warn guests that the ramekins are hot!
Nutrition
- Serving Size: One Normal Portion
- Calories: 350 – 450 kcal


