


It’s funny how sometimes the simplest ideas turn out to be absolute game-changers in the kitchen. For the longest time, I viewed bell peppers merely as an ingredient – something to chop into a stir-fry or slice onto a salad. The thought of them being the star, the actual vessel of a sandwich, seemed a bit unconventional. But one afternoon, staring at a fridge full of vibrant bell peppers and feeling a bit tired of regular bread, the idea sparked. I decided to experiment, and let me tell you, the Bell Pepper Sandwich has become an absolute sensation in our household! My kids, who usually need a bit of coaxing to eat their veggies, devoured these with gusto, loving the crunch and the colorful presentation. My husband, initially skeptical, is now a convert, frequently requesting these for his work lunches. They are incredibly versatile, surprisingly sturdy, and offer a fantastic, refreshing alternative to traditional sandwiches, packing a nutritional punch without the carb load. It’s the kind of recipe that makes you feel good while you’re eating it – light, yet satisfying, and bursting with fresh flavors.
The Ultimate Bell Pepper Sandwich: A Fresh & Crunchy Delight
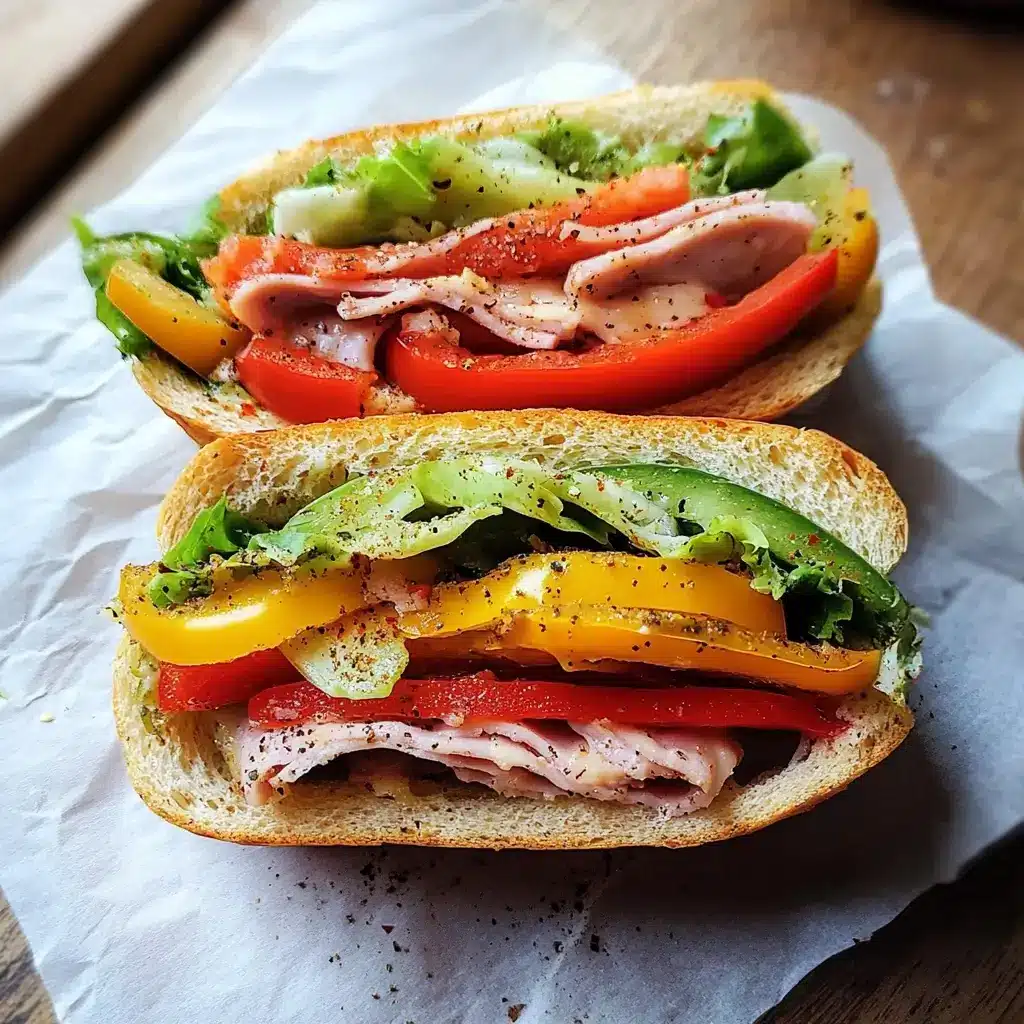
Discover the joy of a bread-free sandwich with this vibrant and healthy Bell Pepper Sandwich recipe. Perfect for a light lunch, a post-workout snack, or a colorful addition to any meal, this recipe swaps out traditional bread slices for crisp, sweet bell peppers, creating a low-carb, gluten-free, and utterly delicious alternative. Packed with your favorite fillings, it’s a customizable treat that’s as fun to make as it is to eat.
Complete Recipe: Bell Pepper Sandwich
This recipe provides a classic, crowd-pleasing filling, but feel free to get creative and use your favorites!
Yields: 2 large sandwiches (4 halves)
Prep time: 20 minutes
Cook time (optional, for roasting peppers): 20-25 minutes (if not roasting, then 0 minutes)
Total time: 20 minutes (or 45 minutes if roasting peppers)
Ingredients:
- For the “Bread”:
- 2 large, firm bell peppers (any color – red, yellow, and orange are sweetest; choose ones that are fairly blocky and can sit flat when halved)
- For the Spread & Binder:
- 4 tablespoons (60g) cream cheese, softened (or hummus for a dairy-free/vegan option)
- 1 tablespoon mayonnaise (optional, for extra creaminess)
- 1 teaspoon Dijon mustard (optional, for a tangy kick)
- For the Protein:
- 4-6 slices (approx. 100-150g) deli turkey breast, thinly sliced
- Alternatively: cooked chicken breast, ham, roast beef, or plant-based options like seasoned tofu slices or chickpea salad.
- For the Cheese:
- 4 slices (approx. 80-100g) Provolone cheese (or Cheddar, Swiss, Monterey Jack)
- Alternatively: crumbled feta or goat cheese for a different texture and flavor.
- For the Veggies & Crunch:
- 1/2 cup packed fresh spinach leaves or mixed greens
- 1/4 medium cucumber, thinly sliced
- 1/4 small red onion, very thinly sliced (optional, for a sharp bite)
- 4-6 slices of ripe tomato
- For Seasoning:
- Salt, to taste
- Freshly ground black pepper, to taste
- Pinch of dried oregano or Italian seasoning (optional)
- Everything Bagel Seasoning (optional, for garnish and flavor)
Instructions: Crafting Your Bell Pepper Sandwich
Follow these simple steps to create your delicious and healthy Bell Pepper Sandwiches.
- Prepare the Bell Peppers:
- Wash the bell peppers thoroughly under cold running water.
- Pat them completely dry with a paper towel. This is crucial for ensuring the fillings don’t slide around and the peppers aren’t watery.
- Place a bell pepper on its side on a cutting board. Using a sharp knife, carefully slice it in half lengthwise, from the stem to the base.
- Gently pull apart the halves. Remove the stem, seeds, and white pithy membranes from the inside of each pepper half. Scrape gently with a spoon or your knife to get a clean interior. Aim for a smooth, hollowed-out pepper “boat.”
- Optional Roasting Step: If you prefer softer peppers, you can lightly roast them. Preheat your oven to 400°F (200°C). Place the pepper halves cut-side down on a baking sheet lined with parchment paper. Roast for 15-20 minutes, or until slightly tender but still holding their shape. Let them cool completely before filling. This step mellows the pepper flavor and softens the texture. However, for a crispier, quicker sandwich, use them raw.
- Mix the Spread:
- In a small bowl, combine the softened cream cheese, mayonnaise (if using), and Dijon mustard (if using).
- Mix well until smooth and well combined. If you’re using hummus, you can use it as is or mix in a little lemon juice or spices.
- Assemble the Sandwiches:
- Take one bell pepper half. Spread a generous layer (about 1 tablespoon) of the cream cheese mixture evenly on the inside surface. This acts as a delicious “glue” for the other ingredients.
- Sprinkle lightly with salt, pepper, and dried oregano or Italian seasoning, if desired.
- Layer 1 (Greens): Place a layer of fresh spinach leaves or mixed greens onto the cream cheese. This creates a barrier to prevent other ingredients from making the pepper soggy too quickly.
- Layer 2 (Protein): Fold or roll your deli turkey slices (or chosen protein) and arrange them neatly over the greens.
- Layer 3 (Cheese): Place a slice of Provolone cheese (or your chosen cheese) on top of the protein.
- Layer 4 (Veggies): Arrange the thinly sliced cucumber, tomato, and red onion (if using) over the cheese. Lightly season the tomato slices with a pinch of salt and pepper.
- Top it Off: Take another bell pepper half. Spread the remaining cream cheese mixture on its inside surface.
- Carefully place this second pepper half on top of the fillings, matching up the edges as best as possible to form a “sandwich.”
- Secure and Slice (Optional but Recommended):
- If your sandwich is generously filled, you might want to secure it. You can do this by inserting a couple of long toothpicks or small skewers through the top pepper half and into the bottom, especially if you plan to slice it or pack it for later.
- For easier eating, especially if the peppers are large, you can slice the assembled bell pepper sandwich in half crosswise using a sharp serrated knife. This also showcases the beautiful layers inside.
- Serve Immediately:
- Enjoy your fresh, crunchy Bell Pepper Sandwich right away for the best texture and flavor.
Nutrition Facts
- Servings: 2 large sandwiches (each sandwich made from two pepper halves)
- Calories per serving (approximate): 300-450 calories.
Disclaimer: The exact nutritional information will vary significantly based on the specific brands and quantities of ingredients used, especially the type and amount of deli meat, cheese, and spreads. This is an estimate based on the ingredients listed above. Using leaner meats, low-fat cheese, and hummus instead of cream cheese will lower the calorie and fat content.
Preparation Time
- Active Preparation Time: 15-20 minutes (this includes washing, chopping vegetables, and assembling the sandwiches).
- Optional Roasting Time for Peppers: 20-25 minutes (plus cooling time).
- Total Time (Raw Peppers): Approximately 20 minutes.
- Total Time (Roasted Peppers): Approximately 45-50 minutes (including cooling).
This makes it an exceptionally quick meal option, especially when using raw peppers.
How to Serve Your Bell Pepper Sandwich
Bell Pepper Sandwiches are wonderfully versatile. Here are some creative and delicious ways to serve them:
- As a Light Lunch or Dinner:
- Serve a whole sandwich (two halves) as a complete, satisfying meal.
- Pair with a small side salad dressed with a light vinaigrette for added greens and freshness.
- A cup of clear vegetable soup or a light broth makes a comforting accompaniment, especially on cooler days.
- For a Healthy Work or School Lunchbox:
- Pack the assembled sandwich tightly in a container. If sliced, ensure it’s wrapped well to maintain its structure.
- Include a small ice pack to keep it cool and fresh until lunchtime.
- Add some fruit (apple slices, grapes, berries) and a handful of nuts or seeds for a balanced meal.
- As an Appetizer or Party Food:
- Slice the assembled sandwiches into smaller, bite-sized wedges or quarters.
- Arrange them artfully on a platter.
- Secure each mini-sandwich with a decorative toothpick for easy handling.
- They add a vibrant splash of color to any appetizer spread.
- Post-Workout Fuel:
- The combination of protein from the deli meat/cheese and vitamins from the peppers and veggies makes this a great replenishing snack after exercise.
- With Dips and Spreads on the Side:
- Offer extra hummus, guacamole, or a light yogurt-based dip for dipping the sandwich or adding extra flavor as you eat.
- Deconstructed Style for Kids (or Picky Eaters):
- Serve the bell pepper halves open-faced, with the fillings attractively arranged on top.
- Alternatively, serve the pepper strips and fillings separately on a platter, allowing everyone to build their own.
- Themed Variations:
- Mediterranean: Fill with hummus, feta cheese, Kalamata olives, cucumber, and sun-dried tomatoes.
- Italian: Use Provolone, salami or prosciutto, roasted red pepper strips (inside the raw pepper shell!), and a pesto spread.
- Spicy Southwestern: Use pepper jack cheese, spicy deli turkey or chipotle chicken, avocado, and a cilantro-lime spread.
Additional Tips for the Perfect Bell Pepper Sandwich
- Choose Your Peppers Wisely: Look for large, firm bell peppers with relatively flat sides if possible. Blocky, four-lobed peppers often sit more stably when halved. The color doesn’t just affect appearance; red, yellow, and orange peppers are generally sweeter and have higher levels of certain antioxidants than green peppers, which are slightly more bitter. Ensure they are fresh and free from soft spots or blemishes.
- Pat Peppers Dry Thoroughly: This is a simple but crucial step. Moisture on the inside of the pepper halves can make your fillings slide around and can lead to a slightly soggy experience if you’re not eating them immediately. Use a clean paper towel to pat both the inside and outside dry after washing and deseeding.
- Don’t Overstuff: While it’s tempting to load up your bell pepper sandwich with lots of fillings, overstuffing can make it difficult to close and eat. Aim for a balanced amount where the pepper halves can comfortably meet. If you have lots of fillings, consider making open-faced pepper “boats” instead.
- Layer Strategically for Texture and Sog-Resistance: Start with your spread, then add a layer of leafy greens (like spinach or lettuce). This acts as a moisture barrier, preventing wetter ingredients like tomatoes from making everything else soggy too quickly, especially if you’re prepping them slightly ahead of time. Place drier ingredients like meat and cheese in the middle.
- Season Every Layer (Lightly): A common mistake in sandwich making is under-seasoning. A tiny pinch of salt and pepper on your tomato slices, or a sprinkle of your favorite dried herbs in the cream cheese spread, can elevate the overall flavor profile significantly. However, be mindful of salty ingredients like deli meats and cheese, and adjust accordingly. Everything Bagel Seasoning is a fantastic all-in-one option for adding flavor and texture to the spread or the top of the pepper.
FAQ Section: Your Bell Pepper Sandwich Questions Answered
Q1: Can I make Bell Pepper Sandwiches ahead of time?
A: Yes, you can make them a few hours ahead, especially if you’re packing them for lunch. For best results, ensure the peppers are thoroughly dried. Layering strategically (greens as a barrier) also helps. If making them the night before, it’s best to store the fillings and prepped pepper halves separately and assemble just before packing or eating to maintain maximum crispness. Some fillings, like tuna salad or egg salad, might make the peppers watery faster.
Q2: Are Bell Pepper Sandwiches keto-friendly or low-carb?
A: Absolutely! This is one of their main advantages. Bell peppers are naturally low in carbohydrates and high in fiber and nutrients. When filled with low-carb ingredients like deli meats, cheese, leafy greens, and low-carb spreads (like cream cheese or avocado), they make an excellent keto and low-carb meal option. Just be mindful of any added sugars in spreads or dressings.
Q3: How do I prevent my Bell Pepper Sandwich from getting soggy?
A: The key is moisture control.
* Pat the pepper halves completely dry after washing and deseeding.
* Use a spread like cream cheese or hummus as a barrier.
* Place leafy greens between the spread and wetter ingredients like tomatoes.
* If using very juicy tomatoes, you can lightly salt them and let them sit on a paper towel for a few minutes to draw out excess moisture before adding them to the sandwich.
* Eat within a few hours of assembly for the best texture.
Q4: What are the best types of bell peppers to use for sandwiches?
A: Any color of bell pepper will work!
* Red, yellow, and orange peppers are generally sweeter and visually very appealing. They also tend to have higher levels of Vitamin C and A.
* Green bell peppers are slightly less sweet, with a more vegetal, slightly bitter flavor, which some people prefer. They are usually the most budget-friendly.
* The most important factor is to choose peppers that are large, firm, and relatively blocky or symmetrical, so they form good “buns” when halved. Avoid peppers that are overly wrinkled or have soft spots.
Q5: Can I use roasted bell peppers instead of raw ones?
A: Yes, you definitely can! Roasting bell peppers brings out their sweetness and gives them a softer, more tender texture. If you prefer a less crunchy sandwich, roast the pepper halves (cut-side down on a baking sheet at 400°F/200°C for 15-25 minutes until tender-crisp), let them cool completely, and then fill them. Be aware that roasted peppers will be softer and might not hold their shape as rigidly as raw peppers, and they will release more moisture, so they are best eaten soon after assembly.
Bell Pepper Sandwich Recipe
Ingredients
- For the “Bread”:
- 2 large, firm bell peppers (any color – red, yellow, and orange are sweetest; choose ones that are fairly blocky and can sit flat when halved)
- For the Spread & Binder:
- 4 tablespoons (60g) cream cheese, softened (or hummus for a dairy-free/vegan option)
- 1 tablespoon mayonnaise (optional, for extra creaminess)
- 1 teaspoon Dijon mustard (optional, for a tangy kick)
- For the Protein:
- 4–6 slices (approx. 100-150g) deli turkey breast, thinly sliced
- Alternatively: cooked chicken breast, ham, roast beef, or plant-based options like seasoned tofu slices or chickpea salad.
- For the Cheese:
- 4 slices (approx. 80-100g) Provolone cheese (or Cheddar, Swiss, Monterey Jack)
- Alternatively: crumbled feta or goat cheese for a different texture and flavor.
- For the Veggies & Crunch:
- 1/2 cup packed fresh spinach leaves or mixed greens
- 1/4 medium cucumber, thinly sliced
- 1/4 small red onion, very thinly sliced (optional, for a sharp bite)
- 4–6 slices of ripe tomato
- For Seasoning:
- Salt, to taste
- Freshly ground black pepper, to taste
- Pinch of dried oregano or Italian seasoning (optional)
- Everything Bagel Seasoning (optional, for garnish and flavor)
Instructions
- Prepare the Bell Peppers:
- Wash the bell peppers thoroughly under cold running water.
- Pat them completely dry with a paper towel. This is crucial for ensuring the fillings don’t slide around and the peppers aren’t watery.
- Place a bell pepper on its side on a cutting board. Using a sharp knife, carefully slice it in half lengthwise, from the stem to the base.
- Gently pull apart the halves. Remove the stem, seeds, and white pithy membranes from the inside of each pepper half. Scrape gently with a spoon or your knife to get a clean interior. Aim for a smooth, hollowed-out pepper “boat.”
- Optional Roasting Step: If you prefer softer peppers, you can lightly roast them. Preheat your oven to 400°F (200°C). Place the pepper halves cut-side down on a baking sheet lined with parchment paper. Roast for 15-20 minutes, or until slightly tender but still holding their shape. Let them cool completely before filling. This step mellows the pepper flavor and softens the texture. However, for a crispier, quicker sandwich, use them raw.
- Mix the Spread:
- In a small bowl, combine the softened cream cheese, mayonnaise (if using), and Dijon mustard (if using).
- Mix well until smooth and well combined. If you’re using hummus, you can use it as is or mix in a little lemon juice or spices.
- Assemble the Sandwiches:
- Take one bell pepper half. Spread a generous layer (about 1 tablespoon) of the cream cheese mixture evenly on the inside surface. This acts as a delicious “glue” for the other ingredients.
- Sprinkle lightly with salt, pepper, and dried oregano or Italian seasoning, if desired.
- Layer 1 (Greens): Place a layer of fresh spinach leaves or mixed greens onto the cream cheese. This creates a barrier to prevent other ingredients from making the pepper soggy too quickly.
- Layer 2 (Protein): Fold or roll your deli turkey slices (or chosen protein) and arrange them neatly over the greens.
- Layer 3 (Cheese): Place a slice of Provolone cheese (or your chosen cheese) on top of the protein.
- Layer 4 (Veggies): Arrange the thinly sliced cucumber, tomato, and red onion (if using) over the cheese. Lightly season the tomato slices with a pinch of salt and pepper.
- Top it Off: Take another bell pepper half. Spread the remaining cream cheese mixture on its inside surface.
- Carefully place this second pepper half on top of the fillings, matching up the edges as best as possible to form a “sandwich.”
- Secure and Slice (Optional but Recommended):
- If your sandwich is generously filled, you might want to secure it. You can do this by inserting a couple of long toothpicks or small skewers through the top pepper half and into the bottom, especially if you plan to slice it or pack it for later.
- For easier eating, especially if the peppers are large, you can slice the assembled bell pepper sandwich in half crosswise using a sharp serrated knife. This also showcases the beautiful layers inside.
- Serve Immediately:
- Enjoy your fresh, crunchy Bell Pepper Sandwich right away for the best texture and flavor.
Nutrition
- Serving Size: One Normal Portion
- Calories: 300-450


