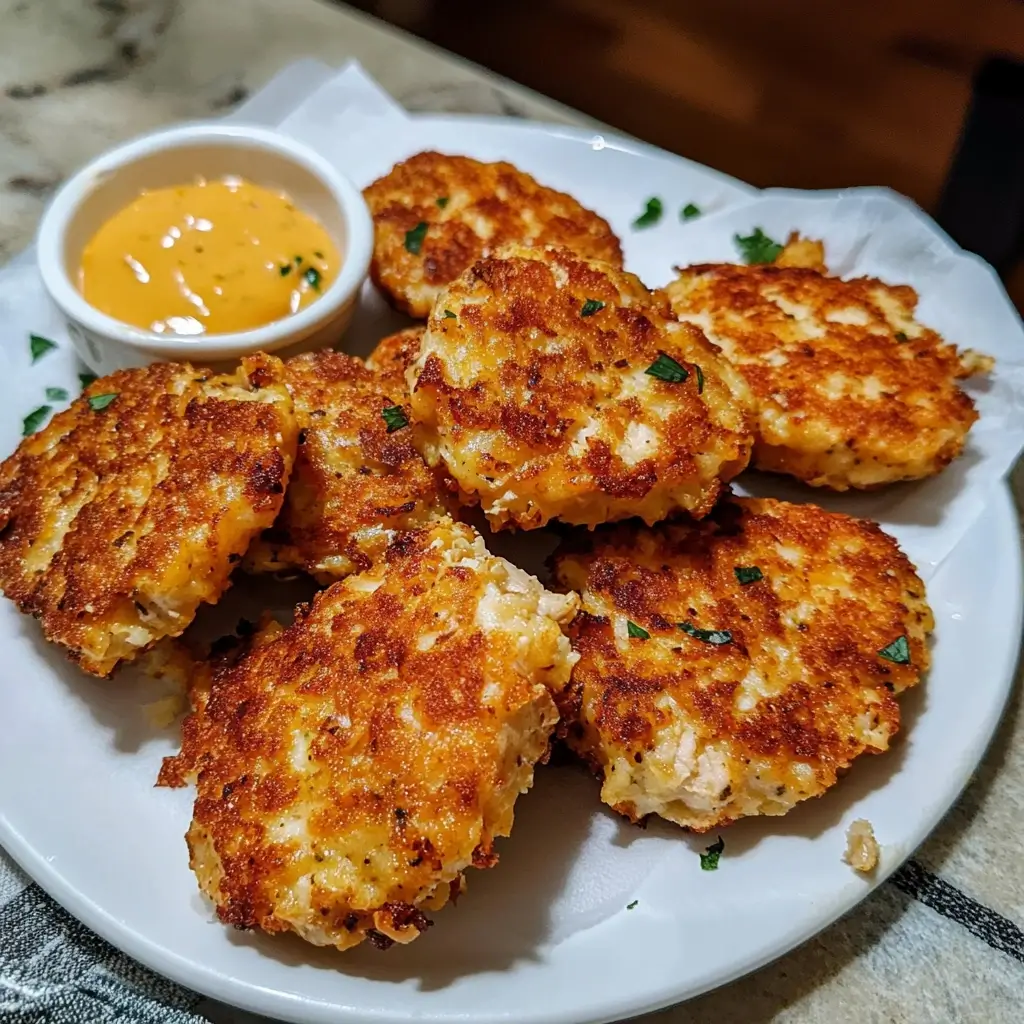
Let me tell you about a recipe that genuinely saved dinner time in my house more times than I can count – these unbelievably delicious Cheesy Chicken Fritters. I remember the first time I made them, mostly out of desperation, staring at some leftover roast chicken and wondering how to make it exciting again. My kids, notorious skeptics of anything “new,” eyed the golden-brown patties suspiciously. But the moment they took that first bite? Magic. The crispy exterior gave way to a tender, cheesy, chicken-filled center that was just pure comfort. The silence that followed, punctuated only by enthusiastic chewing, was the highest praise. Since that day, these fritters have become a staple. They’re my go-to for using up leftover chicken, a guaranteed crowd-pleaser when friends drop by unexpectedly, and honestly, sometimes I cook chicken specifically just to make them! They strike that perfect balance between being incredibly easy to whip up (seriously, even on a busy weeknight) and tasting like you spent hours in the kitchen. They are versatile, satisfying, and have that irresistible cheesy pull that makes everyone reach for “just one more.” If you’re looking for a recipe that’s bound to become a family favorite and a reliable player in your meal rotation, you’ve absolutely found it right here.
Cheesy Chicken Fritters: Ingredients
Creating these delightful fritters requires a handful of simple, yet flavorful ingredients. Each component plays a crucial role in achieving that perfect balance of texture and taste – crispy outside, tender and cheesy inside. Here’s what you’ll need:
- Cooked Chicken (2 cups, finely chopped or shredded): The star of the show! Leftover rotisserie chicken works beautifully here, offering fantastic flavor and saving you cooking time. You can also use poached, baked, or grilled chicken breasts or thighs. Ensure it’s chopped quite finely (about 1/4-inch dice) or well-shredded so the fritters hold together nicely and the texture is consistent. Using pre-cooked chicken makes this recipe exceptionally fast.
- Sharp Cheddar Cheese (1 cup, shredded): This brings the essential “cheesy” element and a lovely sharp flavor that complements the chicken. Shredding your own cheese from a block often results in better melting and flavor compared to pre-shredded varieties (which can contain anti-caking agents). Medium cheddar works too if you prefer a milder taste.
- Panko Breadcrumbs (1/2 cup): These Japanese-style breadcrumbs are key to achieving that signature light and crispy exterior. They absorb less oil than traditional breadcrumbs, resulting in a crunchier, less greasy fritter. If you don’t have Panko, regular fine, dry breadcrumbs can be substituted, though the texture might be slightly denser.
- All-Purpose Flour (1/4 cup): This acts as an additional binder, helping to hold the fritter mixture together along with the egg and breadcrumbs. It provides structure and prevents the fritters from falling apart during cooking.
- Large Eggs (2): The primary binder, eggs hold all the ingredients together, add richness, and contribute to the tenderness of the fritter’s interior. Make sure they are well beaten before adding to the mixture for even distribution.
- Mayonnaise (2 tablespoons): This might seem like an unusual ingredient, but it adds moisture, a subtle tang, and richness, contributing to a more tender and flavorful interior. You can substitute with sour cream or Greek yogurt if preferred, though the taste profile will change slightly.
- Green Onions (Scallions) (1/4 cup, finely chopped): These add a fresh, mild oniony bite and flecks of color throughout the fritters. Use both the white and green parts for the best flavor balance. Finely chopped chives or even a tablespoon of very finely minced yellow onion can be used as alternatives.
- Garlic (2 cloves, minced): Adds a necessary aromatic depth and savory flavor that pairs wonderfully with chicken and cheese. Freshly minced garlic provides the best flavor, but 1/2 teaspoon of garlic powder can be substituted in a pinch.
- Salt (1/2 teaspoon, or to taste): Enhances all the other flavors. Adjust based on the saltiness of your cooked chicken and cheese. Taste the mixture before adding the raw egg if you used raw chicken initially (and cooked it separately), or season generously knowing the chicken and cheese contribute salt. It’s often easier to add a bit more salt later than to fix an oversalted dish.
- Black Pepper (1/4 teaspoon, freshly ground, or to taste): Adds a touch of warmth and spice. Freshly ground black pepper offers a more pungent and complex flavor than pre-ground.
- Optional: Paprika (1/2 teaspoon): Adds a touch of color and a subtle sweet-smoky flavor dimension. Smoked paprika works exceptionally well if you enjoy that profile.
- Vegetable Oil or Light Olive Oil (approx. 1/4 cup, for frying): Needed for pan-frying the fritters to golden-brown perfection. Use a neutral-flavored oil with a relatively high smoke point. You want enough oil to generously coat the bottom of the pan for shallow frying, ensuring even cooking and crispiness. The exact amount will depend on the size of your skillet.
Instructions: Crafting Your Perfect Cheesy Chicken Fritters
Follow these steps carefully to ensure your fritters are crispy on the outside, tender and cheesy on the inside, and utterly irresistible. The process is straightforward and rewarding!
- Prepare the Chicken Base: Ensure your cooked chicken is finely chopped or shredded. Consistency is key here – pieces that are too large can make the fritters difficult to form and prone to falling apart. Place the prepared chicken into a large mixing bowl. This bowl should be big enough to comfortably hold all the ingredients and allow for easy mixing.
- Add Cheese and Dry Ingredients: To the bowl with the chicken, add the shredded sharp cheddar cheese, Panko breadcrumbs, and all-purpose flour. Gently toss these ingredients together with the chicken until the chicken pieces are lightly coated. This initial dry mix helps ensure the cheese and binders are well distributed before the wet ingredients are added.
- Incorporate Wet Ingredients and Seasonings: Create a small well in the center of the chicken mixture. Add the lightly beaten eggs, mayonnaise, finely chopped green onions, minced garlic, salt, black pepper, and paprika (if using).
- Combine Gently but Thoroughly: Using a fork or a rubber spatula, gently mix all the ingredients together until just combined. Be careful not to overmix! Overmixing can develop the gluten in the flour too much, potentially leading to tougher fritters. The mixture should be moist enough to hold its shape but not overly wet or sloppy. If it feels too dry, you could add another teaspoon of mayonnaise or a tiny splash of milk. If it feels slightly too wet, a tablespoon more of Panko breadcrumbs can help.
- Form the Fritters: You have a couple of options here for forming uniform patties. You can use a medium-sized cookie scoop (about 2 tablespoons) or simply use lightly dampened hands or two spoons. Scoop portions of the mixture and gently flatten them into small patties, about 2-3 inches in diameter and about 1/2 inch thick. Aim for consistency in size and thickness to ensure they cook evenly. Place the formed patties on a clean plate or baking sheet lined with parchment paper. This recipe should yield approximately 10-12 fritters, depending on the size you make them. Pro Tip: If the mixture is very sticky, chilling it in the refrigerator for 15-20 minutes can make it easier to handle and shape.
- Heat the Oil: Place a large skillet (non-stick or well-seasoned cast iron works best) over medium heat. Add enough vegetable or light olive oil to generously coat the bottom of the pan – about 1/4 inch deep. Allow the oil to heat up properly. You’ll know it’s ready when it shimmers slightly, or when a tiny crumb of the fritter mixture dropped into the oil sizzles immediately and vigorously. If the oil starts smoking, it’s too hot – reduce the heat slightly. If it doesn’t sizzle, it’s not hot enough, and your fritters will absorb too much oil and become greasy.
- Cook the Fritters in Batches: Carefully place several fritters into the hot oil, leaving some space between them. Do not overcrowd the pan! Overcrowding lowers the oil temperature, leading to soggy fritters, and makes flipping them difficult. Fry the fritters for about 3-5 minutes per side. The timing will depend on your stove and the exact heat of the oil. Look for a deep golden-brown color and a crispy crust on the first side before flipping.
- Flip and Cook Second Side: Using a thin spatula, carefully flip the fritters once the first side is beautifully golden brown and crisp. Cook on the second side for another 3-5 minutes, until it’s equally golden brown and the fritter is heated through (remember, the chicken is already cooked, so you’re primarily cooking the egg, melting the cheese, and crisping the exterior). Adjust the heat as needed during cooking – if they are browning too quickly, lower the heat; if they are taking too long to brown, increase it slightly.
- Drain Excess Oil: Once cooked, immediately remove the fritters from the skillet using the spatula and place them on a plate lined with paper towels. This crucial step helps absorb any excess surface oil, keeping them wonderfully crispy rather than greasy.
- Serve Warm: Cheesy Chicken Fritters are undeniably best served hot and fresh while the cheese is gooey and the crust is at its crispiest. Arrange them on a platter and serve immediately with your favorite dipping sauces (see suggestions below!).
Nutrition Facts
Understanding the nutritional profile can be helpful for meal planning. Please note that these values are estimates and can vary based on the specific ingredients used (e.g., type of chicken, fat content of cheese, amount of oil absorbed during frying).
- Servings: This recipe typically yields about 10-12 fritters.
- Serving Size: A standard serving is considered to be 3 fritters.
- Calories Per Serving (approximate): 400 – 480 kcal
Disclaimer: The nutritional information provided is an estimate calculated using standard ingredient databases. Actual values may differ based on variations in ingredient brands, portion sizes, potential substitutions, and the amount of oil absorbed during the frying process. For precise nutritional information, it is recommended to calculate based on the specific ingredients and measurements used in your kitchen. These fritters offer a good source of protein from the chicken, eggs, and cheese.
Preparation Time
One of the beauties of this Cheesy Chicken Fritter recipe is how quickly it comes together, especially when using pre-cooked chicken.
- Preparation Time: Approximately 15 minutes (This includes chopping/shredding the chicken if not already done, chopping green onions/garlic, measuring ingredients, mixing, and shaping the fritters).
- Cooking Time: Approximately 15-20 minutes (This accounts for frying the fritters in 2-3 batches, about 6-10 minutes per batch).
- Total Time: Approximately 30-35 minutes
This relatively short time frame makes these fritters an excellent option for busy weeknights, a quick lunch, or an easy appetizer when entertaining.
How to Serve Cheesy Chicken Fritters
These versatile fritters can be served in numerous ways, adapting beautifully to different meals and occasions. Here are some ideas to get you started:
- As an Appetizer:
- Arrange them attractively on a platter.
- Garnish with extra chopped green onions or fresh parsley for a pop of color.
- Serve alongside a variety of dipping sauces for guests to choose from. This is perfect for parties, game days, or casual get-togethers.
- With Dipping Sauces: The right dip can elevate your fritters! Consider these popular choices:
- Classic Ranch Dressing: Cool, creamy, and herby – a crowd-pleaser.
- Tangy Honey Mustard: Sweet and sharp, it cuts through the richness beautifully.
- Spicy Sriracha Mayo: Adds a creamy kick for those who like heat. Simply mix mayonnaise with sriracha to your desired spice level.
- Garlic Aioli: Rich, garlicky, and sophisticated. Easy to make with mayo, garlic, lemon juice, and salt.
- Sweet Chili Sauce: Offers a delightful sweet and slightly spicy contrast.
- Marinara Sauce: A simple tomato sauce provides a comforting, slightly acidic counterpoint, especially good if you add Italian herbs to the fritters.
- Blue Cheese Dressing: A bold choice that pairs well if you enjoy its pungent flavor.
- As a Main Course: Transform these fritters into a satisfying meal:
- Serve 3-4 fritters per person.
- Pair with a Simple Green Salad dressed with a light vinaigrette for freshness.
- Accompany with Steamed Vegetables like broccoli, green beans, or asparagus.
- Offer a side of Coleslaw for a creamy, crunchy contrast.
- Serve alongside Roasted Potatoes or Sweet Potato Fries for a heartier meal.
- A scoop of Mashed Potatoes or Creamy Polenta also works wonderfully.
- In Sandwiches or Wraps:
- Stuff a couple of warm fritters into a pita pocket with shredded lettuce, sliced tomatoes, and a drizzle of ranch or tzatziki.
- Wrap them in a soft tortilla with cheese, salsa, and sour cream for a unique twist on a quesadilla or wrap.
- Make mini sliders by placing a fritter on a small bun with a pickle slice and your favorite sauce.
- Kid-Friendly Meal:
- Serve with ketchup – always a hit with kids!
- Pair with simple, easy-to-eat sides like apple slices, carrot sticks, or buttered corn.
Additional Tips for Fritter Perfection
Want to take your Cheesy Chicken Fritters from great to absolutely sensational? Here are five extra tips:
- Achieve Maximum Crispiness: For an even crispier exterior, you can try a double coating technique, though it adds a step. After forming the patties, lightly dredge them in a little extra flour, then dip them briefly back into the beaten egg (you might need an extra egg for this), and finally coat them generously in Panko breadcrumbs before frying. This creates a thicker, crunchier crust. Also, ensure your oil temperature remains consistent – not too low, not too high.
- Don’t Shred the Cheese Too Finely: While finely chopped chicken is good, using standard shredded cheese (rather than powder-fine) ensures you get those lovely pockets of melted cheese within the fritter, contributing to both flavor and the desirable “cheese pull” texture. A medium shred from a box grater is often ideal.
- Experiment with Herbs and Spices: Don’t be afraid to customize the flavor profile! Add a pinch of cayenne pepper for heat, some dried dill for a fresh twist (especially good with a ranch dip), smoked paprika for depth, or even a teaspoon of Italian seasoning for a different aromatic profile. Fresh herbs like finely chopped parsley or cilantro can also be mixed in for brightness.
- Ensure Chicken is Dry: If you’ve just boiled or poached chicken, make sure it’s well-drained and even patted slightly dry before chopping or shredding. Excess moisture from the chicken can make the fritter mixture too wet, making it harder to form patties and potentially leading to sogginess after frying. Leftover roast chicken is often ideal as it tends to be drier.
- Resting the Mixture (Optional but Helpful): If you have the time, letting the mixed fritter batter rest in the refrigerator for about 20-30 minutes before shaping and frying can be beneficial. This allows the flour and breadcrumbs to fully hydrate and helps the mixture bind together better, making the patties easier to form and less likely to fall apart during cooking. It also helps meld the flavors.
Frequently Asked Questions (FAQ)
Here are answers to some common questions you might have about making Cheesy Chicken Fritters:
- Q: Can I use raw chicken instead of cooked chicken?
- A: While this recipe is designed for cooked chicken for speed and ease, you can adapt it for raw chicken, preferably ground chicken. If using ground chicken, mix it with the other ingredients as directed (you might need slightly less binder like flour/panko initially). Form the patties, and then you must ensure they are cooked thoroughly. This will likely mean increasing the cooking time significantly (perhaps 6-8 minutes per side over slightly lower medium heat to cook through without burning the outside) and potentially finishing them in a moderate oven (350°F/175°C) for 10 minutes after browning to guarantee the chicken is cooked. Always check the internal temperature reaches 165°F (74°C). Using cooked chicken is generally much simpler and yields a texture more typical of fritters.
- Q: Can I bake these chicken fritters instead of frying them?
- A: Yes, you can bake them for a lighter option, although they won’t achieve the same level of crispiness as pan-frying. Preheat your oven to 400°F (200°C). Place the formed fritters on a baking sheet lined with parchment paper. For better browning and crispness, lightly spray or brush the tops of the fritters with oil. Bake for about 15-20 minutes, flipping halfway through, until golden brown and heated through. An air fryer would also work well, typically at around 375°F (190°C) for 10-15 minutes, flipping once.
- Q: How do I make these Cheesy Chicken Fritters gluten-free?
- A: Absolutely! To make this recipe gluten-free, you’ll need to substitute the all-purpose flour and Panko breadcrumbs. Use a gluten-free all-purpose flour blend (one containing xanthan gum is usually best for binding) instead of regular flour. For the breadcrumbs, use certified gluten-free Panko or regular gluten-free breadcrumbs. Crushed gluten-free crackers or even almond flour (though this changes the texture and flavor) could also work as part of the binder/coating. Ensure all other ingredients (like mayonnaise or any added seasonings) are also certified gluten-free.
- Q: How should I store and reheat leftover fritters?
- A: Store cooled leftover fritters in an airtight container in the refrigerator for up to 3-4 days. To reheat and maintain some crispiness, the best methods are using an oven, toaster oven, or air fryer. Preheat to around 350°F (175°C) and heat for 5-10 minutes until warmed through and re-crisped. Microwaving is not recommended as it tends to make the fritters soft and potentially soggy. You can also freeze cooked and cooled fritters: place them in a single layer on a baking sheet until frozen solid, then transfer to a freezer bag or container for up to 2-3 months. Reheat directly from frozen using the oven or air fryer method (add a few extra minutes to the heating time).
- Q: Can I add vegetables or other ingredients to the fritter mixture?
- A: Definitely! These fritters are quite adaptable. You can incorporate finely diced vegetables for extra nutrition and flavor. Good options include: finely diced bell peppers (any color), corn kernels (canned or frozen, thawed), finely shredded zucchini (make sure to squeeze out excess moisture thoroughly!), or finely chopped cooked mushrooms. You could also add crispy crumbled bacon bits or a different type of cheese like Pepper Jack for a spicy kick, or mozzarella for extra gooeyness. Just ensure any additions are finely chopped and don’t add excessive moisture to the mixture. Adjust seasonings accordingly.
There you have it – everything you need to know to create truly fantastic Cheesy Chicken Fritters. They are a testament to how simple ingredients can come together to create something wonderfully comforting and delicious. Enjoy the process and the delicious results!
Print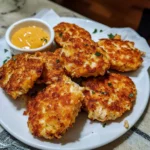
Cheesy Chicken Fritters Recipe
Ingredients
- Cooked Chicken (2 cups, finely chopped or shredded): The star of the show! Leftover rotisserie chicken works beautifully here, offering fantastic flavor and saving you cooking time. You can also use poached, baked, or grilled chicken breasts or thighs. Ensure it’s chopped quite finely (about 1/4-inch dice) or well-shredded so the fritters hold together nicely and the texture is consistent. Using pre-cooked chicken makes this recipe exceptionally fast.
- Sharp Cheddar Cheese (1 cup, shredded): This brings the essential “cheesy” element and a lovely sharp flavor that complements the chicken. Shredding your own cheese from a block often results in better melting and flavor compared to pre-shredded varieties (which can contain anti-caking agents). Medium cheddar works too if you prefer a milder taste.
- Panko Breadcrumbs (1/2 cup): These Japanese-style breadcrumbs are key to achieving that signature light and crispy exterior. They absorb less oil than traditional breadcrumbs, resulting in a crunchier, less greasy fritter. If you don’t have Panko, regular fine, dry breadcrumbs can be substituted, though the texture might be slightly denser.
- All-Purpose Flour (1/4 cup): This acts as an additional binder, helping to hold the fritter mixture together along with the egg and breadcrumbs. It provides structure and prevents the fritters from falling apart during cooking.
- Large Eggs (2): The primary binder, eggs hold all the ingredients together, add richness, and contribute to the tenderness of the fritter’s interior. Make sure they are well beaten before adding to the mixture for even distribution.
- Mayonnaise (2 tablespoons): This might seem like an unusual ingredient, but it adds moisture, a subtle tang, and richness, contributing to a more tender and flavorful interior. You can substitute with sour cream or Greek yogurt if preferred, though the taste profile will change slightly.
- Green Onions (Scallions) (1/4 cup, finely chopped): These add a fresh, mild oniony bite and flecks of color throughout the fritters. Use both the white and green parts for the best flavor balance. Finely chopped chives or even a tablespoon of very finely minced yellow onion can be used as alternatives.
- Garlic (2 cloves, minced): Adds a necessary aromatic depth and savory flavor that pairs wonderfully with chicken and cheese. Freshly minced garlic provides the best flavor, but 1/2 teaspoon of garlic powder can be substituted in a pinch.
- Salt (1/2 teaspoon, or to taste): Enhances all the other flavors. Adjust based on the saltiness of your cooked chicken and cheese. Taste the mixture before adding the raw egg if you used raw chicken initially (and cooked it separately), or season generously knowing the chicken and cheese contribute salt. It’s often easier to add a bit more salt later than to fix an oversalted dish.
- Black Pepper (1/4 teaspoon, freshly ground, or to taste): Adds a touch of warmth and spice. Freshly ground black pepper offers a more pungent and complex flavor than pre-ground.
- Optional: Paprika (1/2 teaspoon): Adds a touch of color and a subtle sweet-smoky flavor dimension. Smoked paprika works exceptionally well if you enjoy that profile.
- Vegetable Oil or Light Olive Oil (approx. 1/4 cup, for frying): Needed for pan-frying the fritters to golden-brown perfection. Use a neutral-flavored oil with a relatively high smoke point. You want enough oil to generously coat the bottom of the pan for shallow frying, ensuring even cooking and crispiness. The exact amount will depend on the size of your skillet.
Instructions
- Prepare the Chicken Base: Ensure your cooked chicken is finely chopped or shredded. Consistency is key here – pieces that are too large can make the fritters difficult to form and prone to falling apart. Place the prepared chicken into a large mixing bowl. This bowl should be big enough to comfortably hold all the ingredients and allow for easy mixing.
- Add Cheese and Dry Ingredients: To the bowl with the chicken, add the shredded sharp cheddar cheese, Panko breadcrumbs, and all-purpose flour. Gently toss these ingredients together with the chicken until the chicken pieces are lightly coated. This initial dry mix helps ensure the cheese and binders are well distributed before the wet ingredients are added.
- Incorporate Wet Ingredients and Seasonings: Create a small well in the center of the chicken mixture. Add the lightly beaten eggs, mayonnaise, finely chopped green onions, minced garlic, salt, black pepper, and paprika (if using).
- Combine Gently but Thoroughly: Using a fork or a rubber spatula, gently mix all the ingredients together until just combined. Be careful not to overmix! Overmixing can develop the gluten in the flour too much, potentially leading to tougher fritters. The mixture should be moist enough to hold its shape but not overly wet or sloppy. If it feels too dry, you could add another teaspoon of mayonnaise or a tiny splash of milk. If it feels slightly too wet, a tablespoon more of Panko breadcrumbs can help.
- Form the Fritters: You have a couple of options here for forming uniform patties. You can use a medium-sized cookie scoop (about 2 tablespoons) or simply use lightly dampened hands or two spoons. Scoop portions of the mixture and gently flatten them into small patties, about 2-3 inches in diameter and about 1/2 inch thick. Aim for consistency in size and thickness to ensure they cook evenly. Place the formed patties on a clean plate or baking sheet lined with parchment paper. This recipe should yield approximately 10-12 fritters, depending on the size you make them. Pro Tip: If the mixture is very sticky, chilling it in the refrigerator for 15-20 minutes can make it easier to handle and shape.
- Heat the Oil: Place a large skillet (non-stick or well-seasoned cast iron works best) over medium heat. Add enough vegetable or light olive oil to generously coat the bottom of the pan – about 1/4 inch deep. Allow the oil to heat up properly. You’ll know it’s ready when it shimmers slightly, or when a tiny crumb of the fritter mixture dropped into the oil sizzles immediately and vigorously. If the oil starts smoking, it’s too hot – reduce the heat slightly. If it doesn’t sizzle, it’s not hot enough, and your fritters will absorb too much oil and become greasy.
- Cook the Fritters in Batches: Carefully place several fritters into the hot oil, leaving some space between them. Do not overcrowd the pan! Overcrowding lowers the oil temperature, leading to soggy fritters, and makes flipping them difficult. Fry the fritters for about 3-5 minutes per side. The timing will depend on your stove and the exact heat of the oil. Look for a deep golden-brown color and a crispy crust on the first side before flipping.
- Flip and Cook Second Side: Using a thin spatula, carefully flip the fritters once the first side is beautifully golden brown and crisp. Cook on the second side for another 3-5 minutes, until it’s equally golden brown and the fritter is heated through (remember, the chicken is already cooked, so you’re primarily cooking the egg, melting the cheese, and crisping the exterior). Adjust the heat as needed during cooking – if they are browning too quickly, lower the heat; if they are taking too long to brown, increase it slightly.
- Drain Excess Oil: Once cooked, immediately remove the fritters from the skillet using the spatula and place them on a plate lined with paper towels. This crucial step helps absorb any excess surface oil, keeping them wonderfully crispy rather than greasy.
- Serve Warm: Cheesy Chicken Fritters are undeniably best served hot and fresh while the cheese is gooey and the crust is at its crispiest. Arrange them on a platter and serve immediately with your favorite dipping sauces (see suggestions below!).
Nutrition
- Serving Size: One Normal Portion
- Calories: 400 – 480 kcal