


There are some weeknight dinners that just work. They’re the ones that bring everyone to the table without complaint, the ones that fill the house with an aroma that promises something delicious is on the way, and the ones that don’t leave you with a mountain of dishes to tackle afterward. This Cheesy Fajita Baked Chicken is unequivocally one of those meals. The first time I made this, I was scrambling for a dinner idea that was both exciting and easy. I pulled out some chicken, a few stray bell peppers, and an onion, and decided to lean into the Tex-Mex flavors my family adores. The result was nothing short of a revelation. The chicken came out perfectly tender and juicy, the vegetables were caramelized and sweet, and the blanket of gooey, melted cheese on top sealed the deal. My kids, who are usually picky about vegetables, devoured every last colorful strip of pepper and onion without a second thought. It has since become a staple in our dinner rotation, our go-to for a satisfying, low-effort meal that feels like a restaurant treat right at home. It’s more than just a recipe; it’s a solution to the “what’s for dinner?” dilemma, and one that I’m thrilled to share.
Complete Recipe: The Ultimate Cheesy Fajita Baked Chicken
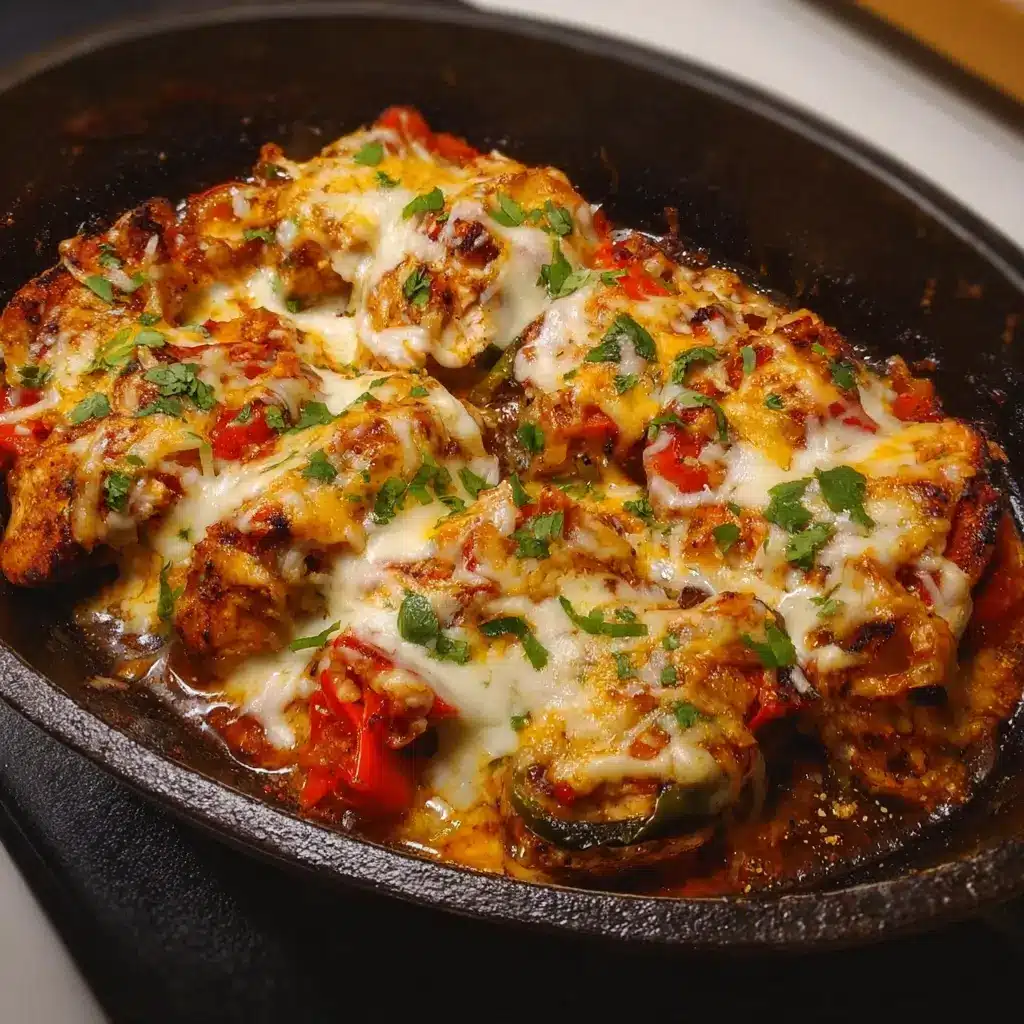
This one-pan wonder combines the smoky, zesty flavors of classic fajitas with the ease of a baked casserole. By cooking everything together on a single sheet pan, you allow the flavors to meld beautifully while ensuring the chicken stays incredibly moist. This recipe is designed for maximum flavor with minimal cleanup.
Ingredients
This recipe is incredibly flexible, but for the perfect balance of flavor, texture, and color, here are the recommended ingredients and amounts.
For the Chicken and Vegetables:
- Chicken: 1.5 lbs (about 680g) boneless, skinless chicken breasts, sliced into ½-inch strips
- Bell Peppers: 3 large bell peppers, a mix of colors (e.g., one red, one yellow, one orange), deseeded and sliced into ¼-inch strips
- Onion: 1 large yellow onion, halved and sliced into ¼-inch strips
- Olive Oil: 3 tablespoons, extra virgin
For the Homemade Fajita Seasoning:
- Chili Powder: 2 tablespoons
- Smoked Paprika: 1 tablespoon (or sweet paprika if preferred)
- Cumin: 1 tablespoon
- Garlic Powder: 1.5 teaspoons
- Onion Powder: 1.5 teaspoons
- Dried Oregano: 1 teaspoon (preferably Mexican oregano)
- Salt: 1 teaspoon
- Black Pepper: ½ teaspoon
- Cayenne Pepper: ¼ teaspoon (or more, to taste)
For the Cheesy Topping:
- Shredded Cheese: 2 cups (about 8 oz) of a Mexican cheese blend, Monterey Jack, or a mix of cheddar and mozzarella.
For Serving (Optional):
- Fresh cilantro, chopped
- Lime wedges
- Sour cream or Greek yogurt
- Guacamole
- Salsa or Pico de Gallo
A Deeper Look at the Key Ingredients
To truly elevate this dish from good to great, understanding your ingredients is key.
Choosing the Right Chicken: While this recipe calls for boneless, skinless chicken breasts for a lean, easy-to-slice option, don’t hesitate to use boneless, skinless chicken thighs. Thighs contain slightly more fat, which translates to extra flavor and an even more forgiving cooking process, as they are much harder to overcook and dry out. The key, regardless of the cut, is to slice the chicken into uniform strips to ensure everything cooks evenly in the same amount of time.
The Power of Peppers: The rainbow of bell peppers isn’t just for looks; it’s for flavor. Red, yellow, and orange peppers are mature versions of the green bell pepper. As they ripen, their flavor mellows and becomes significantly sweeter, which provides a beautiful contrast to the savory chicken and smoky spices. Green peppers can be used, but they have a more bitter, vegetal flavor. Using a mix gives you a complex, visually stunning final dish.
The Secret to Amazing Fajitas: Homemade Seasoning: While store-bought fajita seasoning packets are convenient, they often contain anti-caking agents, excessive sodium, and MSG. Making your own blend takes less than five minutes and gives you complete control over the flavor profile. The combination of earthy cumin, smoky paprika, and robust chili powder forms the backbone of any great fajita seasoning. Mexican oregano offers a more floral, citrusy note than its Mediterranean cousin, making it a worthy addition if you can find it. Don’t be afraid to customize this blend—add a pinch of coriander for a bright, citrusy note or more cayenne for a serious kick of heat.
The Best Cheese for the Ultimate Cheese Pull: The cheese is the grand finale of this dish. For the best melt and flavor, use a cheese that you shred yourself from a block. Pre-shredded cheeses are coated with starches like potato starch or cellulose to prevent clumping, which can inhibit a smooth, seamless melt. A Mexican blend is ideal as it typically contains Monterey Jack (for superior melting), Cheddar (for sharp flavor), Asadero, and Queso Quesadilla. If you can’t find a blend, either Monterey Jack on its own or a 50/50 mix of medium cheddar and low-moisture mozzarella will deliver that glorious, stringy cheese pull everyone loves.
Instructions: Step-by-Step Guide to Perfection
Follow these simple steps to create a flawless Cheesy Fajita Baked Chicken dinner. The process is straightforward and designed to be as efficient as possible.
Step 1: Preheat and Prepare the Pan
Preheat your oven to 400°F (200°C). Grab a large, rimmed baking sheet. Using a large pan is crucial; if the ingredients are too crowded, they will steam instead of roast, preventing them from developing those delicious caramelized edges. If needed, use two smaller baking sheets.
Step 2: Make the Fajita Seasoning
In a small bowl, combine all the fajita seasoning ingredients: chili powder, smoked paprika, cumin, garlic powder, onion powder, dried oregano, salt, black pepper, and cayenne pepper. Whisk them together until they are thoroughly mixed. This ensures an even distribution of flavor.
Step 3: Season the Chicken and Vegetables
Place the sliced chicken, sliced bell peppers, and sliced onion directly onto the prepared baking sheet. Drizzle them with the 3 tablespoons of olive oil. Sprinkle about three-quarters of the homemade fajita seasoning blend over the ingredients. Using your hands or a pair of tongs, toss everything together until the chicken and vegetables are evenly coated in oil and spices.
Step 4: Arrange for Roasting
Spread the chicken and vegetable mixture into a single, even layer on the baking sheet. This is the most important step for achieving a proper roast. A single layer allows hot air to circulate around each piece, promoting browning and caramelization.
Step 5: Bake to Perfection
Place the baking sheet in the preheated oven and bake for 20-25 minutes. The cooking time will vary depending on the thickness of your chicken strips. The chicken should be cooked through (reaching an internal temperature of 165°F or 74°C), and the vegetables should be tender-crisp and slightly charred at the edges.
Step 6: Add the Cheese and Broil (Optional but Recommended)
Carefully remove the baking sheet from the oven. Sprinkle the remaining fajita seasoning over the top for an extra flavor boost. Evenly distribute the 2 cups of shredded cheese over the chicken and vegetables.
Step 7: The Final Melt
Return the baking sheet to the oven. You can either bake for another 3-5 minutes, just until the cheese is melted and bubbly, or for a restaurant-style finish, switch your oven to the broil setting. Broil for 1-2 minutes, watching it very closely, until the cheese is bubbling and has beautiful golden-brown spots. The broiler is intense, so do not walk away during this step!
Step 8: Rest and Garnish
Remove the pan from the oven and let it rest for a few minutes. This allows the juices in the chicken to redistribute, ensuring a tender bite. Garnish generously with fresh chopped cilantro and serve immediately with lime wedges on the side for squeezing.
Nutrition Facts
- Servings: 6
- Calories per serving: Approximately 485 kcal
Disclaimer: The nutritional information provided is an estimate and can vary based on the specific ingredients used (e.g., type of cheese, cut of chicken) and portion sizes.
- Protein: 42g
- Fat: 29g
- Carbohydrates: 12g
- Fiber: 4g
- Sugar: 6g
Making It Low-Carb and Keto-Friendly
This Cheesy Fajita Baked Chicken is easily adaptable for a low-carb or ketogenic diet. Onions and bell peppers do contain carbs, but can fit into most low-carb plans in moderation. To make it fully keto-compliant:
- Be mindful of your portion of onions and peppers.
- Use full-fat cheese and sour cream.
- Serve in lettuce cups, with cauliflower rice, or alongside a simple avocado salad instead of traditional tortillas or rice.
Preparation Time
- Prep Time: 15 minutes
- Cook Time: 25-30 minutes
- Total Time: 40-45 minutes
This recipe is a true weeknight champion, delivering a full-flavored, satisfying meal in under an hour from start to finish.
How to Serve Your Cheesy Fajita Baked Chicken
The beauty of this dish lies in its versatility. You can serve it in a variety of ways to suit any preference or occasion. Here are some of our favorite methods:
- Classic Fajita Style:
- Warm Tortillas: Serve with a stack of warm flour or corn tortillas for a traditional build-your-own fajita experience.
- Essential Toppings: Set up a toppings bar with bowls of:
- Sour cream or full-fat Greek yogurt
- Fresh guacamole or sliced avocado
- Your favorite salsa or fresh pico de gallo
- Pickled or fresh jalapeños
- A generous squeeze of fresh lime juice over everything
- Fajita Bowls (A Healthier Twist):
- Build a Base: Create a hearty and healthy bowl by layering the cheesy chicken and vegetable mixture over a base of:
- Cilantro-lime rice
- Brown rice or quinoa for extra fiber and protein
- Cauliflower rice for a low-carb/keto option
- A bed of crisp shredded romaine lettuce for a fajita salad
- Build a Base: Create a hearty and healthy bowl by layering the cheesy chicken and vegetable mixture over a base of:
- Loaded and Creative Options:
- Fajita Nachos: Spoon the mixture over a bed of tortilla chips, add more cheese if desired, and bake until everything is hot and bubbly.
- Fajita Quesadillas: Use the cooked mixture as a filling for large flour tortillas, add extra cheese, fold, and pan-fry until golden brown and crispy.
- Stuffed Potatoes: Pile the cheesy fajita chicken into a large baked potato or sweet potato for a comforting and complete meal.
Additional Tips for Success
These five tips will help you master this recipe and adapt it to your liking.
- Don’t Crowd the Pan: This is the golden rule of roasting. Giving your ingredients space on the baking sheet is essential for achieving caramelization. When vegetables are packed too tightly, they release steam, which gets trapped and effectively steams the food instead of roasting it. The result is soft, pale vegetables instead of tender-crisp, browned ones. If your pan is too small, divide the mixture between two pans.
- Meal Prep Magic: This recipe is fantastic for meal prepping. You can slice all the vegetables and chicken ahead of time and store them in separate airtight containers in the refrigerator for up to 3 days. You can also mix the fajita seasoning blend and store it in an airtight jar for months. When you’re ready to cook, just toss everything together on the pan and bake.
- The Broiler is Your Friend: For that authentic, sizzling fajita platter look and taste from a restaurant, don’t skip the final broil. The intense, direct heat from the broiler blisters the cheese and chars the edges of the vegetables in just a minute or two, adding a smoky depth of flavor that baking alone cannot achieve. Just be sure to watch it like a hawk.
- Control the Spice Level: The homemade seasoning is easy to customize. For a family with young children or those sensitive to heat, simply omit the cayenne pepper entirely. For spice lovers, feel free to double the cayenne or even add a pinch of chipotle powder for a smoky heat. You can also serve with hot sauce or pickled jalapeños on the side so everyone can adjust their own plate.
- Don’t Be Afraid to Use Chicken Thighs: While chicken breasts are a lean choice, boneless, skinless chicken thighs offer a richer flavor and are much more forgiving. Their higher fat content keeps them moist and tender, even if you accidentally overcook them by a few minutes. They are an excellent, and often more affordable, alternative.
Frequently Asked Questions (FAQ)
Here are answers to some common questions about making Cheesy Fajita Baked Chicken.
1. Can I use a different protein, like steak or shrimp?
Absolutely! This recipe is incredibly versatile.
- For Steak: Use 1.5 lbs of flank or skirt steak, sliced thinly against the grain. Steak cooks faster than chicken, so reduce the initial baking time to 10-15 minutes before adding the cheese.
- For Shrimp: Use 1.5 lbs of large, peeled, and deveined shrimp. Shrimp cooks very quickly. Add the shrimp to the pan with the vegetables for only the last 5-7 minutes of the initial baking time, or until they are pink and opaque. Then add the cheese and proceed with the recipe.
2. How do I store and reheat leftovers?
Store any leftovers in an airtight container in the refrigerator for up to 4 days. Reheating in the microwave works, but it can make the chicken and vegetables a bit soft. For the best results, reheat leftovers in a skillet over medium heat until warmed through, or spread them on a baking sheet and heat in a 350°F (175°C) oven for 10-15 minutes. This will help crisp up the vegetables again.
3. Is this recipe gluten-free?
Yes, this recipe is naturally gluten-free as written. The chicken, vegetables, cheese, and homemade seasoning contain no gluten. To keep the entire meal gluten-free, be sure to serve it with certified gluten-free corn tortillas, over rice, or as a salad.
4. Can I make this dish ahead of time for a party?
Yes, you can. You can fully assemble and bake the dish as directed. Let it cool, cover it tightly with foil, and refrigerate. When you’re ready to serve, reheat it, covered, in a 350°F (175°C) oven for about 20-25 minutes, or until it’s heated through. You may want to add a fresh layer of cheese for the last 5 minutes of reheating for the best presentation.
5. My chicken came out dry. What did I do wrong?
The most common cause of dry chicken is overcooking. Chicken breasts are very lean and can dry out quickly. To prevent this, ensure your chicken strips are uniform in size for even cooking. Start checking for doneness at the lower end of the recommended cooking time (around the 20-minute mark). The most reliable way to guarantee juicy chicken is to use an instant-read meat thermometer. Pull the chicken from the oven as soon as it reaches an internal temperature of 165°F (74°C) in the thickest part. Letting it rest for a few minutes before serving also helps lock in the juices.

Cheesy Fajita Baked Chicken Recipe
Ingredients
For the Chicken and Vegetables:
- Chicken: 1.5 lbs (about 680g) boneless, skinless chicken breasts, sliced into ½-inch strips
- Bell Peppers: 3 large bell peppers, a mix of colors (e.g., one red, one yellow, one orange), deseeded and sliced into ¼-inch strips
- Onion: 1 large yellow onion, halved and sliced into ¼-inch strips
- Olive Oil: 3 tablespoons, extra virgin
For the Homemade Fajita Seasoning:
- Chili Powder: 2 tablespoons
- Smoked Paprika: 1 tablespoon (or sweet paprika if preferred)
- Cumin: 1 tablespoon
- Garlic Powder: 1.5 teaspoons
- Onion Powder: 1.5 teaspoons
- Dried Oregano: 1 teaspoon (preferably Mexican oregano)
- Salt: 1 teaspoon
- Black Pepper: ½ teaspoon
- Cayenne Pepper: ¼ teaspoon (or more, to taste)
For the Cheesy Topping:
- Shredded Cheese: 2 cups (about 8 oz) of a Mexican cheese blend, Monterey Jack, or a mix of cheddar and mozzarella.
Instructions
Step 1: Preheat and Prepare the Pan
Preheat your oven to 400°F (200°C). Grab a large, rimmed baking sheet. Using a large pan is crucial; if the ingredients are too crowded, they will steam instead of roast, preventing them from developing those delicious caramelized edges. If needed, use two smaller baking sheets.
Step 2: Make the Fajita Seasoning
In a small bowl, combine all the fajita seasoning ingredients: chili powder, smoked paprika, cumin, garlic powder, onion powder, dried oregano, salt, black pepper, and cayenne pepper. Whisk them together until they are thoroughly mixed. This ensures an even distribution of flavor.
Step 3: Season the Chicken and Vegetables
Place the sliced chicken, sliced bell peppers, and sliced onion directly onto the prepared baking sheet. Drizzle them with the 3 tablespoons of olive oil. Sprinkle about three-quarters of the homemade fajita seasoning blend over the ingredients. Using your hands or a pair of tongs, toss everything together until the chicken and vegetables are evenly coated in oil and spices.
Step 4: Arrange for Roasting
Spread the chicken and vegetable mixture into a single, even layer on the baking sheet. This is the most important step for achieving a proper roast. A single layer allows hot air to circulate around each piece, promoting browning and caramelization.
Step 5: Bake to Perfection
Place the baking sheet in the preheated oven and bake for 20-25 minutes. The cooking time will vary depending on the thickness of your chicken strips. The chicken should be cooked through (reaching an internal temperature of 165°F or 74°C), and the vegetables should be tender-crisp and slightly charred at the edges.
Step 6: Add the Cheese and Broil (Optional but Recommended)
Carefully remove the baking sheet from the oven. Sprinkle the remaining fajita seasoning over the top for an extra flavor boost. Evenly distribute the 2 cups of shredded cheese over the chicken and vegetables.
Step 7: The Final Melt
Return the baking sheet to the oven. You can either bake for another 3-5 minutes, just until the cheese is melted and bubbly, or for a restaurant-style finish, switch your oven to the broil setting. Broil for 1-2 minutes, watching it very closely, until the cheese is bubbling and has beautiful golden-brown spots. The broiler is intense, so do not walk away during this step!
Step 8: Rest and Garnish
Remove the pan from the oven and let it rest for a few minutes. This allows the juices in the chicken to redistribute, ensuring a tender bite. Garnish generously with fresh chopped cilantro and serve immediately with lime wedges on the side for squeezing.
Nutrition
- Serving Size: One Normal Portion
- Calories: 485
- Sugar: 6g
- Fat: 29g
- Carbohydrates: 12g
- Fiber: 4g
- Protein: 42g


