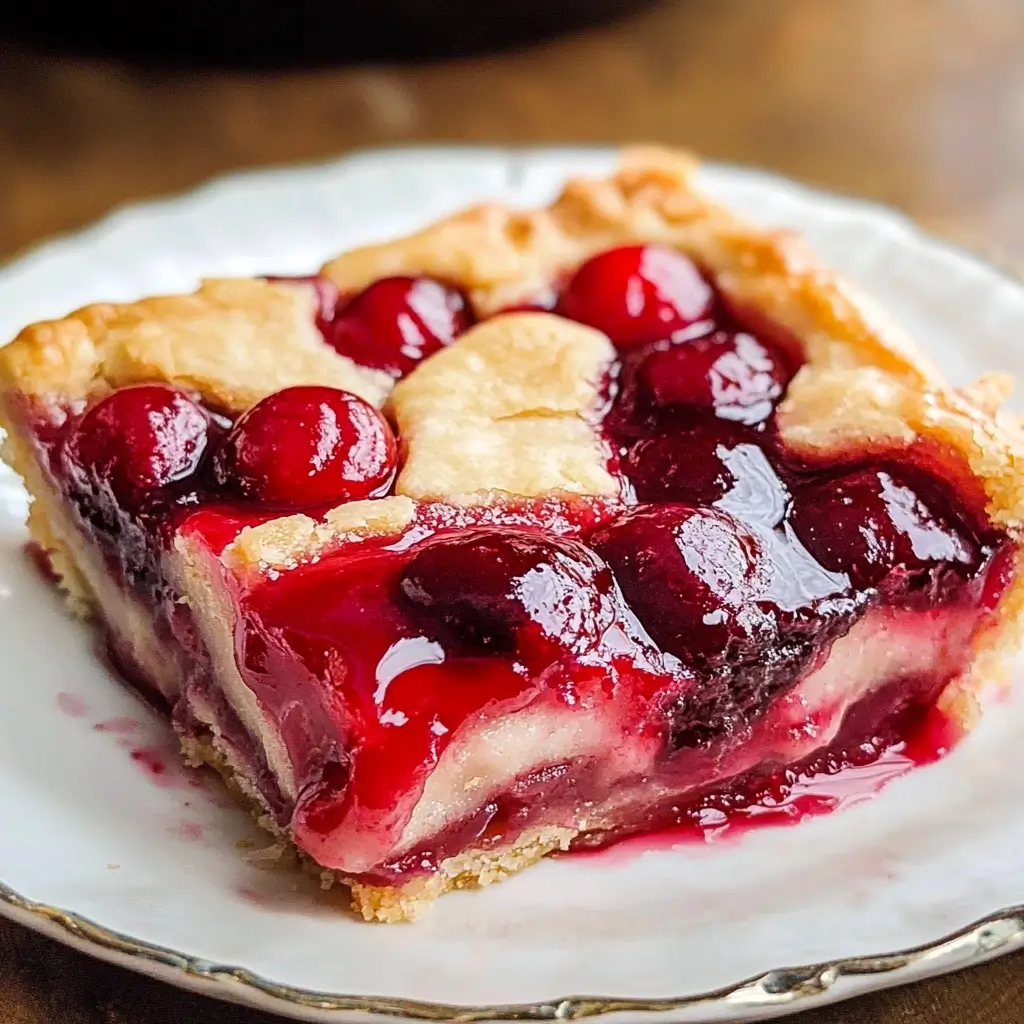
Oh, Cherry Pie Bars. Just the name conjures up images of sunny afternoons, picnics in the park, and the sweet, comforting aroma of baking wafting through the kitchen. For my family, these aren’t just dessert bars; they are little squares of pure joy, a taste of summer bottled up in a perfectly portable treat. From the first time I baked a batch, following a recipe I stumbled upon in an old cookbook, they were an instant hit. My kids, usually picky eaters, devoured them with gusto, their faces smeared with sticky cherry goodness. My husband, a self-proclaimed pie connoisseur, declared them “better than pie,” a statement I still cherish. Since then, Cherry Pie Bars have become a staple in our household, requested for every potluck, birthday, and even just a simple weeknight dessert. They are incredibly easy to make, surprisingly versatile, and undeniably delicious. If you’re looking for a crowd-pleasing dessert that captures the essence of summer, look no further. These Cherry Pie Bars are guaranteed to become your new favorite, just like they became ours. Get ready to experience the magic of sweet cherries nestled in a buttery crust – you won’t be disappointed!
Ingredients: The Building Blocks of Cherry Perfection
The beauty of Cherry Pie Bars lies in their simplicity. You don’t need a long list of exotic ingredients or complicated techniques to achieve bakery-worthy results. The magic comes from the quality of the ingredients and the perfect balance of sweet and tart. Let’s break down each component to ensure your Cherry Pie Bars are a resounding success.
For the Buttery, Flaky Crust:
- All-Purpose Flour (3 cups): The foundation of our crust. All-purpose flour provides the right balance of gluten for structure and tenderness. Make sure to measure it correctly – spoon the flour into your measuring cup and level it off with a knife, rather than scooping directly from the bag, which can pack the flour and lead to a denser crust. For a slightly more tender crust, you can substitute a tablespoon or two of flour with cornstarch.
- Granulated Sugar (1/2 cup): Adds a touch of sweetness to the crust, complementing the cherry filling. Granulated sugar also helps with browning and contributes to the overall texture.
- Salt (1/2 teaspoon): Don’t underestimate the power of salt! It enhances the flavors of all the other ingredients, especially the butter and the cherries. It also balances the sweetness and prevents the crust from tasting bland. Use regular table salt or fine sea salt.
- Cold Unsalted Butter (1 cup, 2 sticks): The star of the crust! Cold butter is crucial for creating a flaky texture. When cold butter is cut into the flour, it creates small pockets of fat. During baking, the water in the butter turns to steam, creating layers and pockets of air, resulting in a light and flaky crust. Use unsalted butter so you can control the amount of salt in the recipe. Make sure it is ice cold – you can even chill it in the freezer for 15-20 minutes before starting.
- Ice Water (6-8 tablespoons): The liquid that brings the dough together. Ice water is essential for keeping the butter cold and preventing the gluten from developing too much, which would result in a tough crust. Add the water gradually, just until the dough comes together. You might need slightly more or less depending on the humidity and your flour.
For the Luscious Cherry Filling:
- Canned Cherry Pie Filling (2 cans, 21 ounces each): The convenience factor is a win here, and canned cherry pie filling provides consistent sweetness and thickness. Look for high-quality cherry pie filling. You can use regular or light pie filling depending on your preference. If you want a richer cherry flavor, you can opt for “more fruit” pie filling.
- Almond Extract (1/2 teaspoon): A secret ingredient that elevates the cherry flavor to another level. Almond extract pairs beautifully with cherries, adding a subtle nutty and warm note that enhances the overall taste. A little goes a long way, so don’t overdo it!
- Lemon Juice (1 tablespoon): Brightens up the cherry filling and balances the sweetness. Lemon juice adds a touch of acidity that cuts through the richness of the cherries and prevents the filling from being overly cloying. Freshly squeezed lemon juice is always best, but bottled lemon juice will also work in a pinch.
Optional Toppings (For Extra Deliciousness):
- Streusel Topping (Optional): For an added layer of texture and sweetness, a streusel topping is a fantastic addition. It typically consists of flour, butter, sugar, and sometimes oats or nuts. A simple streusel can be made with equal parts flour, sugar, and cold butter, crumbled together.
- Glaze (Optional): A simple glaze drizzled over the cooled bars adds a touch of elegance and extra sweetness. A basic glaze can be made with powdered sugar and milk or lemon juice.
Ingredient Quality Matters:
While Cherry Pie Bars are forgiving, using high-quality ingredients will undoubtedly elevate the final product. Opt for good quality butter – European-style butter with a higher fat content will result in an even richer and flakier crust. For the cherry pie filling, choose a brand you trust and enjoy. If you are feeling ambitious, you can even make your own cherry pie filling from fresh or frozen cherries, but canned filling is perfectly acceptable and convenient for this recipe.
Instructions: Baking Your Way to Cherry Bar Heaven
Now that we’ve gathered our ingredients, let’s get to the fun part – baking! These instructions are designed to be clear and easy to follow, even for beginner bakers. Take your time, read through each step, and enjoy the process. The reward of warm, homemade Cherry Pie Bars is well worth it!
Step 1: Prepare the Buttery Crust
- Combine Dry Ingredients: In a large bowl, whisk together the all-purpose flour, granulated sugar, and salt. Whisking ensures the ingredients are evenly distributed, especially the salt, which is crucial for flavor.
- Cut in the Cold Butter: This is the most important step for a flaky crust. Cut the cold butter into small cubes (about 1/2 inch). Add the cold butter cubes to the flour mixture. Using a pastry blender or your fingertips, cut the butter into the flour until the mixture resembles coarse crumbs with some pea-sized pieces of butter remaining. The goal is to break down the butter into smaller pieces while still keeping some larger pieces intact. These larger pieces of butter will create steam during baking, leading to flakiness. Work quickly to keep the butter cold.
- Add Ice Water: Gradually add ice water, one tablespoon at a time, mixing gently after each addition. Mix until the dough just comes together and forms a shaggy ball. Be careful not to overmix, as this will develop the gluten and make the crust tough. You want the dough to be moist enough to hold together but not sticky.
- Divide and Chill the Dough: Divide the dough in half. Form each half into a disc, about 1 inch thick. Wrap each disc tightly in plastic wrap and refrigerate for at least 30 minutes, or up to 2 hours. Chilling the dough is crucial. It allows the gluten to relax, making the dough easier to roll out, and it firms up the butter, which will prevent the crust from shrinking during baking.
Step 2: Assemble the Cherry Pie Bars
- Preheat Oven and Prepare Baking Pan: Preheat your oven to 375°F (190°C). Grease and flour a 9×13 inch baking pan. Alternatively, line the pan with parchment paper, leaving an overhang on the sides for easy removal of the bars later. Parchment paper makes cleanup a breeze and ensures the bars don’t stick to the pan.
- Roll Out the Bottom Crust: Remove one disc of chilled dough from the refrigerator. On a lightly floured surface, roll out the dough into a rectangle large enough to fit the bottom of your baking pan. Aim for about 1/8 inch thickness. Use a rolling pin and work from the center outwards, rotating the dough as you roll to ensure even thickness.
- Transfer to Baking Pan: Carefully transfer the rolled-out dough to the prepared baking pan. Gently press the dough into the bottom and up the sides of the pan, creating a slight edge. If the dough tears, simply patch it together with your fingers.
- Prepare the Cherry Filling: In a medium bowl, combine the canned cherry pie filling, almond extract, and lemon juice. Stir gently to combine. Taste and adjust sweetness or lemon juice if needed, although canned filling is usually perfectly balanced.
- Pour in Cherry Filling: Pour the cherry filling evenly over the bottom crust in the baking pan. Spread it out to ensure it reaches all corners.
Step 3: Create the Top Crust (or Streusel)
- Option 1: Top Crust: Remove the second disc of chilled dough from the refrigerator. Roll it out just like you did the bottom crust, into a rectangle large enough to cover the baking pan. Carefully place the top crust over the cherry filling. Trim any excess dough from the edges and crimp the edges to seal the top and bottom crusts together. Cut vents in the top crust using a knife or fork to allow steam to escape during baking. This prevents the crust from puffing up too much and cracking.
- Option 2: Streusel Topping: If using streusel, in a separate bowl, combine your streusel ingredients (e.g., 1/2 cup all-purpose flour, 1/4 cup granulated sugar, 1/4 cup cold butter, cubed). Use your fingertips or a pastry blender to crumble the butter into the flour and sugar until the mixture resembles coarse crumbs. Sprinkle the streusel evenly over the cherry filling.
Step 4: Bake to Golden Perfection
- Bake: Bake in the preheated oven for 35-45 minutes, or until the crust is golden brown and the cherry filling is bubbly. The baking time may vary depending on your oven, so keep an eye on the bars. The crust should be nicely browned, and the filling should be visibly bubbling around the edges.
- Cool Completely: Remove the baking pan from the oven and let the Cherry Pie Bars cool completely in the pan on a wire rack before cutting. This is crucial! If you try to cut them while they are still warm, the filling will be too soft, and the bars will fall apart. Cooling allows the filling to set and the crust to firm up, making for clean cuts and perfect bar texture. Cooling can take at least 2-3 hours, or even overnight.
Step 5: Cut and Serve
- Cut into Bars: Once completely cooled, cut the Cherry Pie Bars into squares or rectangles. Use a sharp knife and cut cleanly through the crust and filling. For neat cuts, you can wipe the knife clean between each cut.
- Serve and Enjoy: Serve the Cherry Pie Bars at room temperature or slightly chilled. They are delicious on their own or with your favorite toppings.
Nutrition Facts: A Sweet Treat in Moderation
While Cherry Pie Bars are undeniably delicious, like all desserts, they are best enjoyed in moderation as part of a balanced diet. Here’s a general estimate of the nutritional information per serving. Please note that these values are approximate and can vary depending on the specific ingredients and brands used, as well as the size of each bar.
- Servings: This recipe typically yields 12-16 bars, depending on how you cut them. For nutritional estimates, we’ll assume 16 servings.
- Calories per Serving (estimated): 300-350 calories per bar.
Approximate Nutritional Breakdown per Serving (per 1/16th of the recipe):
- Calories: 300-350
- Fat: 15-20g (primarily from butter)
- Saturated Fat: 8-12g
- Cholesterol: 40-50mg
- Sodium: 200-250mg
- Carbohydrates: 40-45g
- Sugar: 25-30g (primarily from pie filling and added sugar)
- Protein: 2-3g
Important Considerations:
- These are estimates and can vary. Homemade versions might be slightly different from commercially prepared bars.
- Canned cherry pie filling contributes significantly to the sugar content.
- Portion control is key. Enjoying a bar as an occasional treat is perfectly fine.
Preparation Time: From Kitchen to Oven in a Flash
One of the great advantages of Cherry Pie Bars is their relatively quick preparation time, especially compared to a traditional pie. Here’s a breakdown of the estimated time involved:
- Prep Time (Dough & Filling): 30-40 minutes (includes making the dough, chilling time, and preparing the filling)
- Bake Time: 35-45 minutes
- Cooling Time: 2-3 hours (minimum, ideally longer for best texture)
- Total Time (excluding cooling): Approximately 1 hour 15 minutes – 1 hour 25 minutes
- Total Time (including cooling): Approximately 3 hours 15 minutes – 4 hours 25 minutes
Tips for Time Management:
- Make the Dough Ahead: The dough can be made up to 2 days in advance and stored in the refrigerator, or frozen for up to a month. This is a great way to break up the preparation.
- Use Canned Pie Filling: Canned cherry pie filling saves a significant amount of time compared to making your own filling from scratch.
- Streusel Topping (faster than top crust): If you opt for a streusel topping instead of a full top crust, it will slightly reduce the prep time as streusel is quicker to make than rolling out a second crust.
- Chill Dough Efficiently: Ensure your butter and water are ice cold to minimize dough chilling time. While 30 minutes is the minimum, longer chilling (up to 2 hours) is perfectly fine and can be done while you are busy with other tasks.
While the total time including cooling might seem long, the active hands-on time is quite short, making Cherry Pie Bars a relatively quick and easy dessert to make.
How to Serve: Versatile Ways to Enjoy Your Cherry Pie Bars
Cherry Pie Bars are incredibly versatile and can be enjoyed in numerous ways, making them perfect for various occasions. Here are some serving suggestions to elevate your cherry bar experience:
- Classic & Simple:
- On their own: Simply cut into bars and serve at room temperature. They are delicious just as they are, showcasing the flavors of the buttery crust and sweet cherry filling.
- Slightly Chilled: For a refreshing treat, especially on a warm day, chill the bars in the refrigerator for about 30 minutes before serving.
- With Cool & Creamy Companions:
- Vanilla Ice Cream: A classic pairing! The cold, creamy vanilla ice cream perfectly complements the warm, fruity bars. The contrast in temperature and texture is delightful.
- Whipped Cream: A dollop of freshly whipped cream adds a light and airy sweetness. You can use store-bought or homemade whipped cream.
- Cool Whip: For a lighter option, Cool Whip or other whipped toppings work well.
- Greek Yogurt or Cream Cheese Frosting: For a tangier and richer pairing, serve with a dollop of plain Greek yogurt or a light cream cheese frosting.
- For Special Occasions:
- Dust with Powdered Sugar: Before serving, dust the bars with powdered sugar for an elegant touch.
- Drizzle with Glaze: A simple glaze made from powdered sugar and milk or lemon juice adds extra sweetness and visual appeal. You can get creative with flavored glazes like almond or vanilla.
- Garnish with Fresh Cherries: If fresh cherries are in season, garnish the bars with a few fresh cherries for a beautiful presentation.
- Serve with a Berry Compote: A homemade berry compote (strawberries, raspberries, blueberries) can add another layer of fruity flavor and sophistication.
- Beverage Pairings:
- Coffee or Tea: Cherry Pie Bars are wonderful with a cup of hot coffee or tea, especially in the afternoon or as an after-dinner treat.
- Iced Tea or Lemonade: For a refreshing summer pairing, serve with iced tea or lemonade.
- Milk: A glass of cold milk is a simple and comforting pairing, especially for kids.
- Dessert Wine: For a more sophisticated pairing, consider a light dessert wine like Moscato or a late-harvest Riesling.
No matter how you choose to serve them, Cherry Pie Bars are sure to be a hit. Their versatility and deliciousness make them perfect for casual gatherings, potlucks, picnics, or even a simple weeknight dessert.
Additional Tips for Cherry Pie Bar Success
To ensure your Cherry Pie Bars are absolutely perfect every time, here are five additional tips based on my baking experience:
- Keep Ingredients Cold: This is paramount for a flaky crust. Use ice-cold butter, ice water, and even chill your flour if you are working in a warm kitchen. Cold ingredients prevent the butter from melting too quickly and ensure those crucial pockets of fat remain in the dough for flakiness.
- Don’t Overmix the Dough: Overmixing develops the gluten in the flour, resulting in a tough crust. Mix just until the dough comes together and forms a shaggy ball. It’s okay if it’s not perfectly smooth.
- Chill the Dough Adequately: Don’t skip the chilling step! Chilling the dough is essential for relaxing the gluten, firming up the butter, and making the dough easier to roll out. At least 30 minutes is recommended, but longer chilling (up to 2 hours) is even better.
- Use Parchment Paper for Easy Removal: Lining your baking pan with parchment paper with an overhang makes removing the bars a breeze. No more struggling to get the bars out of the pan! Simply lift them out using the parchment paper “handles.”
- Let Them Cool Completely Before Cutting: Patience is key! Resist the temptation to cut into the bars while they are still warm. Cooling allows the cherry filling to set and the crust to firm up, resulting in clean cuts and bars that hold their shape beautifully. If possible, cool them overnight in the refrigerator for the best texture.
FAQ: Your Cherry Pie Bar Questions Answered
Got questions about making Cherry Pie Bars? Here are answers to some frequently asked questions to help you bake with confidence:
Q1: Can I use fresh or frozen cherries instead of canned cherry pie filling?
A: Yes, you can! For fresh or frozen cherries, you’ll need to make your own cherry pie filling from scratch. There are many recipes available online. You’ll typically need to pit and cook the cherries with sugar, cornstarch (or another thickener), lemon juice, and almond extract. Using fresh or frozen cherries will give you a more intense cherry flavor and allows you to control the sweetness and ingredients. However, it does add more time to the preparation.
Q2: Can I make these Cherry Pie Bars ahead of time?
A: Absolutely! Cherry Pie Bars are a great make-ahead dessert. Baked and cooled bars can be stored in an airtight container at room temperature for up to 3 days or in the refrigerator for up to 5 days. For longer storage, you can freeze them.
Q3: How do I freeze Cherry Pie Bars?
A: To freeze, cool the bars completely and cut them into squares. Wrap each bar individually in plastic wrap, then place them in a freezer-safe container or bag. Freeze for up to 2-3 months. To thaw, simply remove the desired number of bars from the freezer and let them thaw at room temperature for about 30-60 minutes, or overnight in the refrigerator.
Q4: Can I substitute the butter in the crust with margarine or shortening?
A: While you can technically substitute, I highly recommend using butter for the best flavor and flakiness. Butter has a higher fat content and richer flavor than margarine or shortening, which contributes significantly to the texture and taste of the crust. If you must substitute, use a high-quality stick margarine with at least 80% fat. Shortening will result in a flakier crust, but it lacks the buttery flavor.
Q5: My cherry pie bars are soggy on the bottom. What did I do wrong?
A: Soggy bottoms can be caused by a few factors:
- Not baking long enough: Ensure the crust is fully baked and golden brown, especially on the bottom.
- Filling too wet: If you are using homemade cherry filling, make sure it’s not too watery. Thicken it sufficiently with cornstarch or another thickener. Canned pie filling is usually the right consistency.
- Pan type: Dark metal pans can bake faster and potentially burn the bottom crust before the center is cooked. Use a light-colored metal pan or reduce oven temperature slightly and bake for a bit longer.
- Cooling too quickly: Letting the bars cool completely in the pan is important. If you try to remove them too soon, the bottom crust might still be slightly soft.
By following these tips and FAQs, you’ll be well-equipped to bake perfect Cherry Pie Bars every time. Enjoy the process and the delicious results!
Print
Cherry Pie Bars Recipe
Ingredients
For the Buttery, Flaky Crust:
- All-Purpose Flour (3 cups): The foundation of our crust. All-purpose flour provides the right balance of gluten for structure and tenderness. Make sure to measure it correctly – spoon the flour into your measuring cup and level it off with a knife, rather than scooping directly from the bag, which can pack the flour and lead to a denser crust. For a slightly more tender crust, you can substitute a tablespoon or two of flour with cornstarch.
- Granulated Sugar (1/2 cup): Adds a touch of sweetness to the crust, complementing the cherry filling. Granulated sugar also helps with browning and contributes to the overall texture.
- Salt (1/2 teaspoon): Don’t underestimate the power of salt! It enhances the flavors of all the other ingredients, especially the butter and the cherries. It also balances the sweetness and prevents the crust from tasting bland. Use regular table salt or fine sea salt.
- Cold Unsalted Butter (1 cup, 2 sticks): The star of the crust! Cold butter is crucial for creating a flaky texture. When cold butter is cut into the flour, it creates small pockets of fat. During baking, the water in the butter turns to steam, creating layers and pockets of air, resulting in a light and flaky crust. Use unsalted butter so you can control the amount of salt in the recipe. Make sure it is ice cold – you can even chill it in the freezer for 15-20 minutes before starting.
- Ice Water (6-8 tablespoons): The liquid that brings the dough together. Ice water is essential for keeping the butter cold and preventing the gluten from developing too much, which would result in a tough crust. Add the water gradually, just until the dough comes together. You might need slightly more or less depending on the humidity and your flour.
For the Luscious Cherry Filling:
- Canned Cherry Pie Filling (2 cans, 21 ounces each): The convenience factor is a win here, and canned cherry pie filling provides consistent sweetness and thickness. Look for high-quality cherry pie filling. You can use regular or light pie filling depending on your preference. If you want a richer cherry flavor, you can opt for “more fruit” pie filling.
- Almond Extract (1/2 teaspoon): A secret ingredient that elevates the cherry flavor to another level. Almond extract pairs beautifully with cherries, adding a subtle nutty and warm note that enhances the overall taste. A little goes a long way, so don’t overdo it!
- Lemon Juice (1 tablespoon): Brightens up the cherry filling and balances the sweetness. Lemon juice adds a touch of acidity that cuts through the richness of the cherries and prevents the filling from being overly cloying. Freshly squeezed lemon juice is always best, but bottled lemon juice will also work in a pinch.
Optional Toppings (For Extra Deliciousness):
- Streusel Topping (Optional): For an added layer of texture and sweetness, a streusel topping is a fantastic addition. It typically consists of flour, butter, sugar, and sometimes oats or nuts. A simple streusel can be made with equal parts flour, sugar, and cold butter, crumbled together.
- Glaze (Optional): A simple glaze drizzled over the cooled bars adds a touch of elegance and extra sweetness. A basic glaze can be made with powdered sugar and milk or lemon juice.
Instructions
Step 1: Prepare the Buttery Crust
- Combine Dry Ingredients: In a large bowl, whisk together the all-purpose flour, granulated sugar, and salt. Whisking ensures the ingredients are evenly distributed, especially the salt, which is crucial for flavor.
- Cut in the Cold Butter: This is the most important step for a flaky crust. Cut the cold butter into small cubes (about 1/2 inch). Add the cold butter cubes to the flour mixture. Using a pastry blender or your fingertips, cut the butter into the flour until the mixture resembles coarse crumbs with some pea-sized pieces of butter remaining. The goal is to break down the butter into smaller pieces while still keeping some larger pieces intact. These larger pieces of butter will create steam during baking, leading to flakiness. Work quickly to keep the butter cold.
- Add Ice Water: Gradually add ice water, one tablespoon at a time, mixing gently after each addition. Mix until the dough just comes together and forms a shaggy ball. Be careful not to overmix, as this will develop the gluten and make the crust tough. You want the dough to be moist enough to hold together but not sticky.
- Divide and Chill the Dough: Divide the dough in half. Form each half into a disc, about 1 inch thick. Wrap each disc tightly in plastic wrap and refrigerate for at least 30 minutes, or up to 2 hours. Chilling the dough is crucial. It allows the gluten to relax, making the dough easier to roll out, and it firms up the butter, which will prevent the crust from shrinking during baking.
Step 2: Assemble the Cherry Pie Bars
- Preheat Oven and Prepare Baking Pan: Preheat your oven to 375°F (190°C). Grease and flour a 9×13 inch baking pan. Alternatively, line the pan with parchment paper, leaving an overhang on the sides for easy removal of the bars later. Parchment paper makes cleanup a breeze and ensures the bars don’t stick to the pan.
- Roll Out the Bottom Crust: Remove one disc of chilled dough from the refrigerator. On a lightly floured surface, roll out the dough into a rectangle large enough to fit the bottom of your baking pan. Aim for about 1/8 inch thickness. Use a rolling pin and work from the center outwards, rotating the dough as you roll to ensure even thickness.
- Transfer to Baking Pan: Carefully transfer the rolled-out dough to the prepared baking pan. Gently press the dough into the bottom and up the sides of the pan, creating a slight edge. If the dough tears, simply patch it together with your fingers.
- Prepare the Cherry Filling: In a medium bowl, combine the canned cherry pie filling, almond extract, and lemon juice. Stir gently to combine. Taste and adjust sweetness or lemon juice if needed, although canned filling is usually perfectly balanced.
- Pour in Cherry Filling: Pour the cherry filling evenly over the bottom crust in the baking pan. Spread it out to ensure it reaches all corners.
Step 3: Create the Top Crust (or Streusel)
- Option 1: Top Crust: Remove the second disc of chilled dough from the refrigerator. Roll it out just like you did the bottom crust, into a rectangle large enough to cover the baking pan. Carefully place the top crust over the cherry filling. Trim any excess dough from the edges and crimp the edges to seal the top and bottom crusts together. Cut vents in the top crust using a knife or fork to allow steam to escape during baking. This prevents the crust from puffing up too much and cracking.
- Option 2: Streusel Topping: If using streusel, in a separate bowl, combine your streusel ingredients (e.g., 1/2 cup all-purpose flour, 1/4 cup granulated sugar, 1/4 cup cold butter, cubed). Use your fingertips or a pastry blender to crumble the butter into the flour and sugar until the mixture resembles coarse crumbs. Sprinkle the streusel evenly over the cherry filling.
Step 4: Bake to Golden Perfection
- Bake: Bake in the preheated oven for 35-45 minutes, or until the crust is golden brown and the cherry filling is bubbly. The baking time may vary depending on your oven, so keep an eye on the bars. The crust should be nicely browned, and the filling should be visibly bubbling around the edges.
- Cool Completely: Remove the baking pan from the oven and let the Cherry Pie Bars cool completely in the pan on a wire rack before cutting. This is crucial! If you try to cut them while they are still warm, the filling will be too soft, and the bars will fall apart. Cooling allows the filling to set and the crust to firm up, making for clean cuts and perfect bar texture. Cooling can take at least 2-3 hours, or even overnight.
Step 5: Cut and Serve
- Cut into Bars: Once completely cooled, cut the Cherry Pie Bars into squares or rectangles. Use a sharp knife and cut cleanly through the crust and filling. For neat cuts, you can wipe the knife clean between each cut.
- Serve and Enjoy: Serve the Cherry Pie Bars at room temperature or slightly chilled. They are delicious on their own or with your favorite toppings.
Nutrition
- Serving Size: One Normal Portion
- Calories: 300-350
- Sugar: 25-30g
- Sodium: 200-250mg
- Fat: 15-20g
- Saturated Fat: 8-12g
- Carbohydrates: 40-45g
- Protein: 2-3g
- Cholesterol: 40-50mg