


Of all the holiday treats that have graced our family’s dessert table, none disappear quite as quickly as these Chocolate Billionaires. I remember the first time I made them. I was looking for a simple, no-bake candy that felt luxurious and special enough for a Christmas Eve gathering. I stumbled upon a basic recipe, but I knew it could be something more. After a few batches of tweaking—toasting the pecans just so, finding the perfect balance of chewy caramel, and selecting a chocolate that offered a satisfying snap—this version was born. The first time my nephew, a notoriously picky eater, tried one, his eyes widened. He didn’t just eat one; he ate five. He declared them “rich people candy,” and the name “Billionaires” stuck in our house forever. Now, making them is a cherished tradition. The kitchen fills with the nutty, buttery scent of toasting pecans and the rich aroma of melting chocolate. It’s a recipe that isn’t just about the final product; it’s about the joy of creating something truly decadent and sharing it with the people you love. They are the ultimate indulgence—a perfect harmony of crunchy, chewy, and smooth that feels impossibly lavish yet is surprisingly simple to create.
What Exactly Are Chocolate Billionaires?
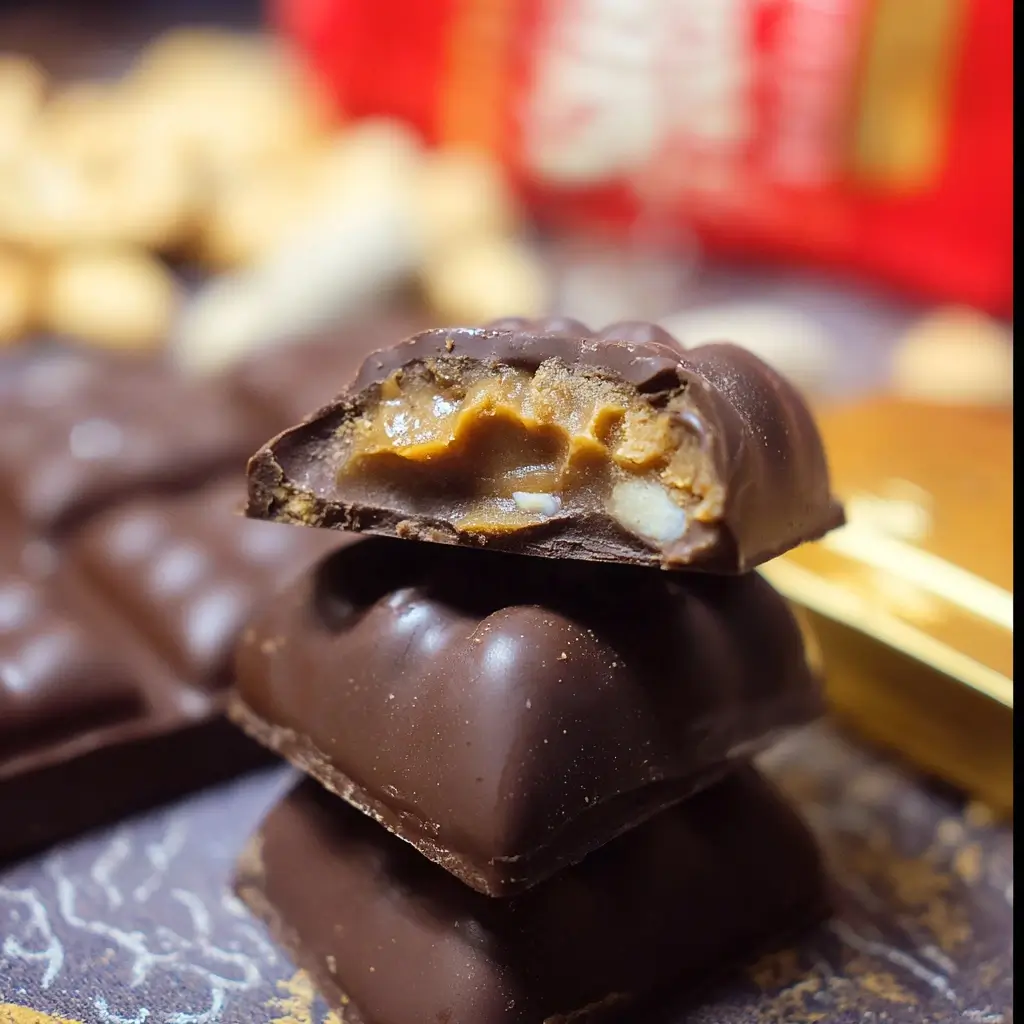
Before we dive into the recipe, let’s talk about what makes these candies so special. Chocolate Billionaires are a type of confection that belongs to the beloved family of pecan and caramel clusters, often seen as a close cousin to the classic “Turtles.” The magic lies in their trifecta of textures and flavors. At the heart of each cluster is a generous pile of toasted pecans, providing a deep, nutty flavor and a satisfying crunch. This nutty base is then enrobed in a rich, buttery, and chewy caramel that holds everything together. The entire cluster is then sealed with a luxurious coating of high-quality melted chocolate, which hardens into a smooth, glossy shell.
The name “Billionaires” itself evokes a sense of opulence and richness, and it’s a fitting title. Each bite is an experience: first, the snap of the chocolate shell, followed by the soft, yielding chew of the caramel, and finally, the crunchy, savory finish of the toasted pecans. They are a quintessential holiday treat, perfect for gifting, sharing at parties, or simply enjoying with a cup of coffee on a quiet afternoon. Unlike some complex candy recipes that require candy thermometers and precise timing, this version uses a clever shortcut with store-bought caramels, making it accessible to bakers and candy makers of all skill levels.
Why This Recipe Will Become Your Go-To Treat
There are countless reasons to fall in love with this particular Chocolate Billionaires recipe, but here are a few that make it stand out:
- Incredibly Simple, Deceptively Elegant: This is a no-bake recipe that requires minimal equipment. By using high-quality pre-made caramels, you skip the most intimidating part of candy making—cooking sugar to the perfect temperature. The result is a professional-looking candy that will have everyone thinking you spent all day in the kitchen.
- Perfect for Gifting: Packed in a beautiful tin or a cellophane bag tied with a ribbon, these Billionaires make a thoughtful and delicious homemade gift for holidays, birthdays, or as a thank-you gesture. They travel well and stay fresh for weeks, making them ideal for shipping to loved ones.
- A Symphony of Textures: This isn’t a one-note candy. The combination of the crisp, toasted pecans, the soft and chewy caramel, and the smooth, hard chocolate shell creates a multi-layered textural experience that is simply irresistible.
- Completely Customizable: While the classic pecan-caramel-chocolate combination is divine, this recipe is a fantastic base for your own creative twists. You can swap the nuts, use different types of chocolate, or add a sprinkle of sea salt to make them your own.
The Cast of Ingredients: Choosing for Quality
The beauty of a simple recipe like this is that the quality of each ingredient truly shines through. Using the best possible components will elevate your candy from good to unforgettable.
- Pecan Halves: 3 cups (about 340g). The star of the crunch. Using whole pecan halves, rather than pieces, provides a better texture and a more beautiful appearance in the final cluster. Toasting them is a non-negotiable step; it awakens their natural oils, deepens their flavor, and makes them significantly crispier.
- Soft Caramel Squares: One 11-ounce bag (about 312g), unwrapped. This is our brilliant shortcut. Look for the individually wrapped, soft caramel squares (like Kraft’s). These melt down into a perfectly smooth and chewy caramel without the fuss of a candy thermometer.
- Heavy Whipping Cream: 3 tablespoons. This is the secret to a luscious, smooth caramel sauce. When you melt the caramels, they can become quite thick. The heavy cream thins the caramel just enough to make it perfectly pourable and gives it an even richer, creamier mouthfeel. Do not substitute with milk or half-and-half, as the fat content in heavy cream is crucial for the right consistency.
- High-Quality Chocolate Chips or Wafers: 2 cups (about 12 ounces or 340g). This is the finishing touch, so choose wisely.
- Semi-Sweet Chocolate: The classic choice. It provides a rich, deep chocolate flavor that beautifully balances the sweetness of the caramel. Ghirardelli or Guittard semi-sweet chips are excellent options.
- Dark Chocolate (60-70% cacao): For a more intense, less sweet chocolate experience that contrasts wonderfully with the caramel.
- Milk Chocolate: A great option if you’re making these for kids or those with a serious sweet tooth. It results in a sweeter, creamier candy.
- Chocolate Melting Wafers: These are specifically designed for candy making. They contain ingredients that help them melt smoothly and set up with a nice shine and snap, even without formal tempering. They are a fantastic, foolproof option.
- Coconut Oil or Vegetable Shortening: 1 teaspoon (optional, but highly recommended). Adding a small amount of coconut oil or shortening to your melting chocolate helps it melt more smoothly, makes it a bit thinner and easier to work with, and gives the finished candy a beautiful, glossy sheen.
Step-by-Step Instructions for Chocolate Perfection
Follow these detailed steps to create your own batch of irresistible Chocolate Billionaires. The process is straightforward, but taking your time with each stage will ensure the best results.
Step 1: Prepare Your Workspace and Toast the Pecans
- Line Baking Sheets: Line two large baking sheets with parchment paper or silicone baking mats. This is essential for preventing the candies from sticking and makes cleanup a breeze.
- Preheat Oven: Preheat your oven to 350°F (175°C).
- Toast the Pecans: Spread the pecan halves in a single, even layer on one of the prepared baking sheets. Place them in the preheated oven and toast for 6-8 minutes. You’ll know they’re ready when they are fragrant and have deepened slightly in color. Watch them closely, as nuts can go from perfectly toasted to burnt in less than a minute.
- Cool and Chop: Once toasted, remove the pecans from the oven and let them cool completely on the baking sheet. Once cooled, roughly chop them. You want a mix of larger pieces and smaller bits for varied texture. Set aside.
Step 2: Create the Caramel-Pecan Clusters
- Melt the Caramels: In a medium-sized, microwave-safe bowl, combine the unwrapped caramel squares and the 3 tablespoons of heavy whipping cream.
- Microwave in Intervals: Microwave on high for 1 minute. Remove and stir well with a silicone spatula. The caramels will not be fully melted yet. Continue to microwave in 30-second intervals, stirring thoroughly after each one, until the caramel is completely melted, smooth, and lump-free. Be careful not to overheat it, as it can become too stiff.
- Combine with Pecans: Pour the cooled, chopped pecans into the bowl with the melted caramel. Use your spatula to fold and stir everything together until every piece of pecan is generously coated in the luscious caramel.
- Form the Clusters: Working quickly while the caramel is still warm and pliable, use two spoons or a small cookie scoop (about 1 tablespoon size) to drop mounds of the caramel-pecan mixture onto the second parchment-lined baking sheet. Space them about 2 inches apart to prevent them from merging. You should get between 24 and 30 clusters.
- Chill to Set: Place the baking sheet with the clusters into the refrigerator for at least 30 minutes, or until the caramel is firm to the touch. This step is crucial; if the caramel is warm, the hot chocolate will slide right off.
Step 3: Coat with Chocolate
- Melt the Chocolate: Once the caramel clusters are firm, it’s time to melt the chocolate. You can do this in the microwave or using a double boiler.
- Microwave Method: Place the chocolate chips and the optional coconut oil in a microwave-safe bowl. Microwave in 30-second intervals at 50% power, stirring well after each interval, until the chocolate is almost completely melted. Remove from the microwave and continue stirring until the residual heat melts the remaining bits and the chocolate is silky smooth.
- Double Boiler Method: Fill a small saucepan with about an inch of water and bring it to a gentle simmer. Place the chocolate and coconut oil in a heatproof bowl that fits snugly over the saucepan without touching the water. Stir constantly until the chocolate is completely melted and smooth.
- Dip the Clusters: Remove the chilled caramel-pecan clusters from the refrigerator. Take one cluster and place it on a fork. Dip it into the melted chocolate, turning it to coat completely. You can also use a spoon to pour chocolate over the top to ensure it’s fully covered.
- Remove Excess Chocolate: Lift the chocolate-coated cluster out of the bowl with the fork. Gently tap the fork against the side of the bowl several times. This allows the excess chocolate to drip off, creating a thinner, more professional-looking coating and preventing a thick “foot” of chocolate from forming at the base.
- Place and Set: Using a toothpick or another spoon, carefully slide the coated candy off the fork and back onto the parchment-lined baking sheet. Repeat with the remaining clusters.
- Final Chill: Once all the candies are coated, place the baking sheets back into the refrigerator for another 20-30 minutes, or until the chocolate is completely firm and set.
Nutrition Facts
- Servings: Approximately 28 candies
- Calories per serving: Approximately 190 kcal
Disclaimer: The nutritional information provided is an estimate and will vary depending on the specific brands of ingredients used.
Preparation Time
- Active Time: 45 minutes
- Chilling Time: 1 hour
- Total Time: 1 hour 45 minutes
How to Serve and Present Your Billionaires
These candies are a treat in themselves, but a little creative presentation can make them even more special.
- On a Holiday Dessert Platter: Arrange them on a festive platter alongside other holiday cookies and candies like sugar cookies, fudge, and peppermint bark. Their rich, dark appearance provides a beautiful contrast to lighter-colored treats.
- As a Coffee or Hot Cocoa Companion: Serve one or two Billionaires alongside a steaming mug of black coffee, a latte, or rich hot chocolate. The bitterness of the coffee beautifully cuts through the sweetness of the candy.
- As an Ice Cream Topping: For an ultra-decadent dessert, roughly chop a Chocolate Billionaire and sprinkle it over a scoop of high-quality vanilla bean or coffee ice cream. The mix of warm, chewy, and cold is divine.
- On a Dessert Charcuterie Board: Create a “sweet” charcuterie board with Billionaires as the centerpiece. Surround them with fresh berries (raspberries, strawberries), sliced apples, pretzels, shortbread cookies, and a bowl of whipped cream for dipping.
- For Gifting:
- Tins and Boxes: Line a holiday tin or a small cardboard candy box with festive tissue paper or mini cupcake liners and arrange the Billionaires inside.
- Cellophane Bags: Stack 4-5 candies in a clear cellophane bag and tie it shut with a beautiful satin or grosgrain ribbon. Attach a small, handwritten gift tag for a personal touch.
Additional Tips for Candy-Making Success
- Don’t Skip Toasting the Pecans: This step seems small, but it is the single most important thing you can do to improve the flavor of your candies. Raw pecans are mild and waxy; toasted pecans are deeply nutty, fragrant, and crunchy. It makes a world of difference.
- Work in a Cool, Dry Room: Chocolate is sensitive to heat and humidity. If your kitchen is very warm, the chocolate may have trouble setting up properly. If possible, work in a cooler environment. Avoid making these on a rainy day, as humidity can sometimes cause issues with caramel and chocolate.
- Master the “Double Fork” Method for Dipping: For perfectly coated candies with no “foot,” use two forks. Use one fork to lower and lift the cluster from the chocolate. Use the second, clean fork to help slide the coated candy onto the parchment paper. This keeps your dipping fork relatively clean and gives you more control.
- Add a Finishing Touch: While the chocolate is still wet, you can add a simple garnish for a professional look. A tiny sprinkle of flaky sea salt (like Maldon) is a fantastic choice, as the salt enhances the flavor of both the chocolate and the caramel. You could also add a sprinkle of festive-colored nonpareils or a drizzle of melted white chocolate after the dark chocolate has set.
- Patience with Chilling is Key: Don’t rush the chilling times. The initial chill for the caramel-pecan clusters ensures they are firm enough to handle dipping. If they are too soft, they will fall apart in the warm chocolate. The final chill is what gives the chocolate shell that signature snap and glossy finish.
Frequently Asked Questions (FAQ)
1. Why did my melted caramel get too hard after I stirred in the pecans?
This usually happens if the caramel was overheated or if you took too long to mix and scoop. Caramels begin to firm up as they cool. To fix this, you can try placing the bowl back in the microwave for 10-15 seconds to soften it slightly. Work quickly when scooping the clusters. Using a small, metal cookie scoop can speed up the process significantly.
2. My melted chocolate seized up and became a thick, grainy paste. What went wrong?
Chocolate seizes when it comes into contact with even a tiny drop of water or if it’s scorched by overheating. Ensure your bowl, spatula, and all utensils are bone dry. When melting chocolate in the microwave, always use a lower power setting (50%) and short intervals. If using a double boiler, don’t let the water boil vigorously, and make sure no steam or water gets into the bowl. Unfortunately, once chocolate seizes, it’s very difficult to save for coating purposes (though it can still be used in some baked goods like brownies).
3. Can I use a different kind of nut?
Absolutely! This recipe is wonderful with other nuts. Try using toasted walnuts, almonds (whole or slivered), or even cashews for a different flavor profile. A mix of nuts would also be delicious. Just be sure to toast them first to bring out their best flavor.
4. How should I store my Chocolate Billionaires, and how long will they last?
Store the finished candies in an airtight container at cool room temperature. If you stack them, place a sheet of wax paper between the layers to prevent them from sticking together. They will stay fresh for up to 2 weeks. You can also store them in the refrigerator, which will keep them fresh for up to a month, but be aware that chocolate can sometimes develop a slight “bloom” (a harmless white film) when refrigerated. It’s best to let them come to room temperature for about 15-20 minutes before serving for the best texture.
5. Can I make these ahead of time for a party or for holiday gifts?
Yes, these are the perfect make-ahead candy! Their long shelf life makes them ideal for holiday prep. You can make them up to two weeks in advance. Prepare them completely, let them set, and then store them in an airtight container as described above until you are ready to serve or package them as gifts. This frees up your time for other preparations closer to your event.

Chocolate Billionaires Recipe
Ingredients
- Pecan Halves: 3 cups (about 340g). The star of the crunch. Using whole pecan halves, rather than pieces, provides a better texture and a more beautiful appearance in the final cluster. Toasting them is a non-negotiable step; it awakens their natural oils, deepens their flavor, and makes them significantly crispier.
- Soft Caramel Squares: One 11-ounce bag (about 312g), unwrapped. This is our brilliant shortcut. Look for the individually wrapped, soft caramel squares (like Kraft’s). These melt down into a perfectly smooth and chewy caramel without the fuss of a candy thermometer.
- Heavy Whipping Cream: 3 tablespoons. This is the secret to a luscious, smooth caramel sauce. When you melt the caramels, they can become quite thick. The heavy cream thins the caramel just enough to make it perfectly pourable and gives it an even richer, creamier mouthfeel. Do not substitute with milk or half-and-half, as the fat content in heavy cream is crucial for the right consistency.
- High-Quality Chocolate Chips or Wafers: 2 cups (about 12 ounces or 340g). This is the finishing touch, so choose wisely.
- Semi-Sweet Chocolate: The classic choice. It provides a rich, deep chocolate flavor that beautifully balances the sweetness of the caramel. Ghirardelli or Guittard semi-sweet chips are excellent options.
- Dark Chocolate (60-70% cacao): For a more intense, less sweet chocolate experience that contrasts wonderfully with the caramel.
- Milk Chocolate: A great option if you’re making these for kids or those with a serious sweet tooth. It results in a sweeter, creamier candy.
- Chocolate Melting Wafers: These are specifically designed for candy making. They contain ingredients that help them melt smoothly and set up with a nice shine and snap, even without formal tempering. They are a fantastic, foolproof option.
- Coconut Oil or Vegetable Shortening: 1 teaspoon (optional, but highly recommended). Adding a small amount of coconut oil or shortening to your melting chocolate helps it melt more smoothly, makes it a bit thinner and easier to work with, and gives the finished candy a beautiful, glossy sheen.
Instructions
Step 1: Prepare Your Workspace and Toast the Pecans
- Line Baking Sheets: Line two large baking sheets with parchment paper or silicone baking mats. This is essential for preventing the candies from sticking and makes cleanup a breeze.
- Preheat Oven: Preheat your oven to 350°F (175°C).
- Toast the Pecans: Spread the pecan halves in a single, even layer on one of the prepared baking sheets. Place them in the preheated oven and toast for 6-8 minutes. You’ll know they’re ready when they are fragrant and have deepened slightly in color. Watch them closely, as nuts can go from perfectly toasted to burnt in less than a minute.
- Cool and Chop: Once toasted, remove the pecans from the oven and let them cool completely on the baking sheet. Once cooled, roughly chop them. You want a mix of larger pieces and smaller bits for varied texture. Set aside.
Step 2: Create the Caramel-Pecan Clusters
- Melt the Caramels: In a medium-sized, microwave-safe bowl, combine the unwrapped caramel squares and the 3 tablespoons of heavy whipping cream.
- Microwave in Intervals: Microwave on high for 1 minute. Remove and stir well with a silicone spatula. The caramels will not be fully melted yet. Continue to microwave in 30-second intervals, stirring thoroughly after each one, until the caramel is completely melted, smooth, and lump-free. Be careful not to overheat it, as it can become too stiff.
- Combine with Pecans: Pour the cooled, chopped pecans into the bowl with the melted caramel. Use your spatula to fold and stir everything together until every piece of pecan is generously coated in the luscious caramel.
- Form the Clusters: Working quickly while the caramel is still warm and pliable, use two spoons or a small cookie scoop (about 1 tablespoon size) to drop mounds of the caramel-pecan mixture onto the second parchment-lined baking sheet. Space them about 2 inches apart to prevent them from merging. You should get between 24 and 30 clusters.
- Chill to Set: Place the baking sheet with the clusters into the refrigerator for at least 30 minutes, or until the caramel is firm to the touch. This step is crucial; if the caramel is warm, the hot chocolate will slide right off.
Step 3: Coat with Chocolate
- Melt the Chocolate: Once the caramel clusters are firm, it’s time to melt the chocolate. You can do this in the microwave or using a double boiler.
- Microwave Method: Place the chocolate chips and the optional coconut oil in a microwave-safe bowl. Microwave in 30-second intervals at 50% power, stirring well after each interval, until the chocolate is almost completely melted. Remove from the microwave and continue stirring until the residual heat melts the remaining bits and the chocolate is silky smooth.
- Double Boiler Method: Fill a small saucepan with about an inch of water and bring it to a gentle simmer. Place the chocolate and coconut oil in a heatproof bowl that fits snugly over the saucepan without touching the water. Stir constantly until the chocolate is completely melted and smooth.
- Dip the Clusters: Remove the chilled caramel-pecan clusters from the refrigerator. Take one cluster and place it on a fork. Dip it into the melted chocolate, turning it to coat completely. You can also use a spoon to pour chocolate over the top to ensure it’s fully covered.
- Remove Excess Chocolate: Lift the chocolate-coated cluster out of the bowl with the fork. Gently tap the fork against the side of the bowl several times. This allows the excess chocolate to drip off, creating a thinner, more professional-looking coating and preventing a thick “foot” of chocolate from forming at the base.
- Place and Set: Using a toothpick or another spoon, carefully slide the coated candy off the fork and back onto the parchment-lined baking sheet. Repeat with the remaining clusters.
- Final Chill: Once all the candies are coated, place the baking sheets back into the refrigerator for another 20-30 minutes, or until the chocolate is completely firm and set.
Nutrition
- Serving Size: One Normal Portion
- Calories: 190


