


Of all the weekend breakfast debates that echo through our kitchen, the classic “pancakes versus donuts” is by far the most frequent. My kids love the comforting, fluffy nature of a stack of pancakes, while my husband and I crave the sweet, handheld delight of a fresh donut. For years, it felt like a choice we had to make, a delicious sacrifice for the sake of family harmony. That all changed the morning I decided to stop choosing and start creating. The result was these Chocolate Chip Pancake Donuts, and to say they were a game-changer is an understatement. The moment they came out of the oven, our home was filled with the warm, inviting scent of vanilla, butter, and melting chocolate. They had the signature cakey, tender crumb of a perfect pancake but in the undeniably fun shape of a donut. Watching my family’s eyes light up as they took their first bite—a perfect fusion of their two favorite breakfasts—was pure magic. This recipe isn’t just a fun novelty; it has become our most requested weekend treat, effortlessly solving the great breakfast debate and bringing a new level of joy to our mornings.
The Ultimate Chocolate Chip Pancake Donuts Recipe
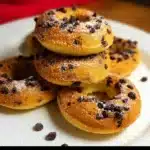
Get ready to experience the best of both breakfast worlds. This recipe uses a standard pancake mix as a base, transforming it into incredibly moist, fluffy, and cakey baked donuts studded with pockets of melted chocolate. They are simple to make, endlessly customizable, and guaranteed to be a hit with the entire family.
Ingredients
- Pancake Mix: 2 cups of your favorite complete pancake mix (the kind that typically requires just water, but we’ll be enriching it)
- Granulated Sugar: 1/3 cup (to give it that sweet, donut-like flavor)
- Milk: 1 cup (whole milk is recommended for the richest flavor and texture)
- Large Egg: 1, lightly beaten
- Melted Unsalted Butter: 1/4 cup (plus extra for greasing the pan)
- Vanilla Extract: 2 teaspoons
- Mini Chocolate Chips: 3/4 cup (tossed with 1 teaspoon of all-purpose flour to prevent sinking)
- Optional for Topping:
- Powdered sugar for dusting
- Simple vanilla glaze (1 cup powdered sugar + 2-3 tablespoons milk)
- Chocolate sauce for drizzling
Step-by-Step Instructions
Follow these detailed instructions to ensure your pancake donuts come out perfectly fluffy and delicious every single time. We recommend reading through all the steps before you begin.
1. Preparation and Preheating
First things first, preheat your oven to 375°F (190°C). This is a crucial step; a properly heated oven ensures the donuts cook quickly and evenly, resulting in a light and airy texture.
Next, prepare your donut pan. Even if you have a non-stick pan, it’s essential to grease it thoroughly to guarantee an easy release. You can use melted butter, a baking spray with flour, or shortening. Use a pastry brush or a paper towel to get into every crevice of the donut molds, including the center post. A well-greased pan is the secret to perfectly shaped donuts.
2. Combine the Dry Ingredients
In a large mixing bowl, add the 2 cups of pancake mix and the 1/3 cup of granulated sugar. Use a whisk to combine them thoroughly. This step ensures that the sugar is evenly distributed, which helps with both the flavor and the final texture of the donuts.
3. Mix the Wet Ingredients
In a separate medium-sized bowl, combine all of your wet ingredients. Add the 1 cup of milk, the 1/4 cup of cooled melted butter, the lightly beaten egg, and the 2 teaspoons of vanilla extract. Whisk these ingredients together until they are well combined and smooth. Mixing the wet ingredients separately helps prevent over-mixing the final batter.
4. Combine Wet and Dry Ingredients
Now, pour the wet ingredient mixture into the large bowl containing the dry ingredients. Using a spatula or a wooden spoon, gently fold the ingredients together. Mix just until the flour streaks have disappeared. It is perfectly fine—and actually desirable—for the batter to have a few small lumps. Do not over-mix! Over-mixing develops the gluten in the pancake mix, which will result in tough, dense, and chewy donuts instead of the light and fluffy texture we’re aiming for.
5. Fold in the Chocolate Chips
Take your 3/4 cup of mini chocolate chips that you’ve tossed in a teaspoon of flour. Gently fold them into the batter until they are evenly distributed. The light coating of flour helps to suspend the chocolate chips within the batter, preventing them all from sinking to the bottom of the donut mold during baking.
6. Fill the Donut Pan
This is where a little technique goes a long way. The easiest and cleanest way to fill the donut pan is by transferring the batter into a piping bag or a large zip-top bag. If using a zip-top bag, simply snip off one of the bottom corners to create a makeshift piping bag.
Carefully pipe the batter into each well of the prepared donut pan. Fill each mold about two-thirds to three-quarters full. This will give the donuts enough room to rise and expand without overflowing. If you don’t have a piping bag, you can use two spoons—one to scoop the batter and the other to push it into the mold—but be prepared for a slightly messier process.
7. Bake to Perfection
Place the filled donut pan on the center rack of your preheated oven. Bake for 10-12 minutes. The donuts are done when they are golden brown and a wooden toothpick or cake tester inserted into the thickest part of a donut comes out clean or with a few moist crumbs attached. Another great way to check for doneness is to gently press the top of a donut with your finger; it should spring back.
8. Cool and Release
Once baked, remove the donut pan from the oven and place it on a wire cooling rack. Let the donuts cool in the pan for about 5-7 minutes. This allows them to set up slightly, making them much easier to remove without breaking.
After the initial cooling period, carefully invert the pan onto the wire rack. The donuts should release easily. If any stick, you can gently loosen the edges with a thin silicone spatula or a butter knife. Allow the donuts to cool completely on the wire rack before dusting with powdered sugar or glazing. Applying a glaze to warm donuts will cause it to melt and run off.
Nutrition Facts
- Servings: 12 donuts
- Calories per serving: Approximately 195 kcal
Disclaimer: The nutritional information provided is an estimate and can vary based on the specific brands of ingredients used, such as the type of pancake mix and milk.
Preparation Time
- Prep Time: 10 minutes
- Cook Time: 12 minutes
- Total Time: 22 minutes
How to Serve Your Pancake Donuts
The beauty of these donuts is their versatility. They can be dressed up or down depending on the occasion. Here are some of our favorite ways to serve them:
- The Classic Dusting:
- Simply place some powdered sugar in a fine-mesh sieve and lightly dust it over the cooled donuts for a classic, elegant look.
- Glazed and Glorious:
- Simple Vanilla Glaze: Whisk together 1 cup of powdered sugar with 2-3 tablespoons of milk and a splash of vanilla until smooth. Dip the top of each donut into the glaze and let it set on a wire rack.
- Chocolate Glaze: Melt 1/2 cup of chocolate chips with 1 teaspoon of coconut oil in the microwave in 30-second intervals. Dip the donuts for a rich, decadent coating.
- Maple Glaze: Combine 1 cup of powdered sugar with 3 tablespoons of pure maple syrup for a flavor that truly screams “pancakes!”
- The Ultimate Donut Bar:
- Set up a “decorate your own donut” station for a party or special family breakfast.
- Bowls of Toppings: Sprinkles, mini M&M’s, crushed nuts (pecans, walnuts), shredded coconut, more mini chocolate chips, or crushed cookies like Oreos.
- Drizzles: Set out small pitchers of chocolate sauce, caramel sauce, and strawberry syrup.
- As a Breakfast Platter:
- Serve the donuts alongside other breakfast favorites to create a beautiful and satisfying spread.
- Fresh Fruit: A side of fresh berries, sliced bananas, or melon cubes provides a fresh contrast.
- Savory Sides: Pair with scrambled eggs, bacon, or sausage links to balance the sweetness.
- Yogurt Dip: A bowl of Greek yogurt mixed with a little honey or maple syrup makes a fantastic, protein-rich dip for the donuts.
Additional Tips for Perfect Pancake Donuts
Elevate your donut game from good to absolutely unforgettable with these five professional tips.
1. Don’t Skip Greasing the Pan: It might seem redundant with a non-stick pan, but donut pans have a unique shape with a center post that can be tricky. A thorough greasing with melted butter or baking spray ensures every donut pops out cleanly, preserving its perfect ring shape. This is the #1 rule for frustration-free donut making.
2. The Piping Bag is Your Best Friend: While you can use spoons, using a piping bag (or a large Ziploc bag with the corner snipped off) is a transformative technique. It allows for a fast, clean, and even distribution of batter into the molds. This prevents messy edges that can burn and ensures all your donuts are a uniform size and cook evenly.
3. Master the Doneness Test: Ovens can vary, so don’t rely solely on time. The “spring-back” test is the most reliable method for cake-style baked goods. When you gently press the surface of the donut, it should feel firm and bounce back. If it leaves an indent, it needs another minute or two. An over-baked pancake donut will be dry, so watch them closely during the last few minutes of baking.
4. The Flour-Toss for Chocolate Chips is Non-Negotiable: Have you ever baked something with chocolate chips only to find they all sank to the bottom and formed a melted layer? Tossing your mini chocolate chips in a small amount of flour (1 teaspoon is plenty) before folding them into the batter is the secret. The dry flour absorbs some of the batter’s moisture, creating a thicker “halo” around each chip that helps it stay suspended, ensuring you get chocolate in every single bite.
5. Let Them Cool Strategically: Patience is a virtue, especially when it comes to baked donuts. Letting them cool in the pan for 5-7 minutes is the sweet spot. It allows the structure of the donut to set, so they won’t fall apart when you invert the pan. However, don’t leave them in the pan for too long, as the residual steam can make the bottoms soggy. Move them to a wire rack for the final cooling stage to allow air to circulate all around them, keeping them perfectly fluffy.
Frequently Asked Questions (FAQ)
1. Can I make these without a donut pan?
Yes, you absolutely can! The best alternative is a standard muffin tin. Grease the muffin cups well and fill them about two-thirds full with the batter. Bake for a slightly longer time, around 15-18 minutes, or until a toothpick comes out clean. They will be “pancake muffins” or “donut holes” in shape, but they will still be incredibly delicious.
2. Can I use a “just add water” pancake mix?
You can, but for the best results, you’ll want to enrich it. The recipe above is designed to do just that by adding milk, butter, and an egg. If you use a “just add water” mix and follow this recipe, you will get a fantastic result. If you were to only add water as per the box directions, the donuts would lack the richness, moisture, and cake-like texture that makes this recipe special. The added fat from the butter and egg is key to a tender crumb.
3. How do I store leftover pancake donuts?
These donuts are best enjoyed the day they are made. However, if you have leftovers, store them in an airtight container at room temperature for up to 2 days. If you have glazed the donuts, it’s best to store them in a single layer to prevent the glaze from getting smudged. Avoid refrigerating them, as the cold air can dry them out and make them stale faster.
4. Can I freeze these pancake donuts for later?
Yes, they freeze wonderfully! For best results, freeze them before glazing or adding any toppings. Allow the donuts to cool completely on a wire rack. Then, place them on a baking sheet in a single layer and “flash freeze” them for about an hour. Once they are solid, transfer them to a freezer-safe zip-top bag or airtight container. They can be frozen for up to 3 months. To serve, let them thaw at room temperature for an hour, or gently warm them in the microwave for 15-20 seconds. Then you can glaze or dust them as if they were freshly made.
5. Why did my donuts turn out tough or dry?
The two most common culprits for tough or dry baked goods are over-mixing and over-baking. When you mix the wet and dry ingredients, you are developing gluten. For a tender, cakey donut, you want minimal gluten development. Mix just until the ingredients are combined; a few lumps are a good sign! Secondly, baked donuts cook very quickly. Even an extra 60-90 seconds in the oven can be the difference between a moist, fluffy donut and a dry, crumbly one. Keep a close eye on them and use the spring-back test for perfect results.
Chocolate Chip Pancake Donuts Recipe
Ingredients
- Pancake Mix: 2 cups of your favorite complete pancake mix (the kind that typically requires just water, but we’ll be enriching it)
- Granulated Sugar: 1/3 cup (to give it that sweet, donut-like flavor)
- Milk: 1 cup (whole milk is recommended for the richest flavor and texture)
- Large Egg: 1, lightly beaten
- Melted Unsalted Butter: 1/4 cup (plus extra for greasing the pan)
- Vanilla Extract: 2 teaspoons
- Mini Chocolate Chips: 3/4 cup (tossed with 1 teaspoon of all-purpose flour to prevent sinking)
- Optional for Topping:
- Powdered sugar for dusting
- Simple vanilla glaze (1 cup powdered sugar + 2-3 tablespoons milk)
- Chocolate sauce for drizzling
Instructions
First things first, preheat your oven to 375°F (190°C). This is a crucial step; a properly heated oven ensures the donuts cook quickly and evenly, resulting in a light and airy texture.
Next, prepare your donut pan. Even if you have a non-stick pan, it’s essential to grease it thoroughly to guarantee an easy release. You can use melted butter, a baking spray with flour, or shortening. Use a pastry brush or a paper towel to get into every crevice of the donut molds, including the center post. A well-greased pan is the secret to perfectly shaped donuts.
In a large mixing bowl, add the 2 cups of pancake mix and the 1/3 cup of granulated sugar. Use a whisk to combine them thoroughly. This step ensures that the sugar is evenly distributed, which helps with both the flavor and the final texture of the donuts.
In a separate medium-sized bowl, combine all of your wet ingredients. Add the 1 cup of milk, the 1/4 cup of cooled melted butter, the lightly beaten egg, and the 2 teaspoons of vanilla extract. Whisk these ingredients together until they are well combined and smooth. Mixing the wet ingredients separately helps prevent over-mixing the final batter.
Now, pour the wet ingredient mixture into the large bowl containing the dry ingredients. Using a spatula or a wooden spoon, gently fold the ingredients together. Mix just until the flour streaks have disappeared. It is perfectly fine—and actually desirable—for the batter to have a few small lumps. Do not over-mix! Over-mixing develops the gluten in the pancake mix, which will result in tough, dense, and chewy donuts instead of the light and fluffy texture we’re aiming for.
Take your 3/4 cup of mini chocolate chips that you’ve tossed in a teaspoon of flour. Gently fold them into the batter until they are evenly distributed. The light coating of flour helps to suspend the chocolate chips within the batter, preventing them all from sinking to the bottom of the donut mold during baking.
This is where a little technique goes a long way. The easiest and cleanest way to fill the donut pan is by transferring the batter into a piping bag or a large zip-top bag. If using a zip-top bag, simply snip off one of the bottom corners to create a makeshift piping bag.
Carefully pipe the batter into each well of the prepared donut pan. Fill each mold about two-thirds to three-quarters full. This will give the donuts enough room to rise and expand without overflowing. If you don’t have a piping bag, you can use two spoons—one to scoop the batter and the other to push it into the mold—but be prepared for a slightly messier process.
Place the filled donut pan on the center rack of your preheated oven. Bake for 10-12 minutes. The donuts are done when they are golden brown and a wooden toothpick or cake tester inserted into the thickest part of a donut comes out clean or with a few moist crumbs attached. Another great way to check for doneness is to gently press the top of a donut with your finger; it should spring back.
Once baked, remove the donut pan from the oven and place it on a wire cooling rack. Let the donuts cool in the pan for about 5-7 minutes. This allows them to set up slightly, making them much easier to remove without breaking.
After the initial cooling period, carefully invert the pan onto the wire rack. The donuts should release easily. If any stick, you can gently loosen the edges with a thin silicone spatula or a butter knife. Allow the donuts to cool completely on the wire rack before dusting with powdered sugar or glazing. Applying a glaze to warm donuts will cause it to melt and run off.
Nutrition
- Serving Size: One Normal Portion
- Calories: 195


