


Of all the traditions that fill our home with joy during the Halloween season, the one that creates the most delightful chaos is our annual treat-making day. Last year, amidst the frantic search for costume pieces and the carving of lopsided pumpkins, I decided we needed a simple, no-bake project that everyone, from my youngest to my “too-cool-for-this” teenager, could enjoy. That’s when these Chocolate Covered Halloween Pretzels were born. I expected them to be a fun, 30-minute activity. What I didn’t expect was for them to become the star of our Halloween party. The sight of a platter piled high with spooky mummies, vibrant monsters, and ghoulish ghosts was met with gasps of delight. The combination of the salty, crunchy pretzel with the sweet, smooth chocolate is a timeless classic, but seeing them transformed into edible art made them irresistible. My family still talks about how much fun we had, not just eating them, but making them—flicking white chocolate for mummy bandages and carefully placing candy eyes to create the perfect monster expression. This recipe isn’t just about making a treat; it’s about creating a memory, a moment of sweet, spooky, and slightly messy fun that captures the true spirit of Halloween.
Why You’ll Be Obsessed with These Spooky Pretzels
Before we dive into the delicious details, let’s talk about why this recipe is an absolute must-try for your Halloween festivities. It’s more than just a snack; it’s a versatile, crowd-pleasing, and stress-free solution to your holiday treat needs.
- Incredibly Easy & No-Bake: This is the ultimate low-stress recipe. There’s no oven required, no complicated baking techniques, and no long list of intimidating steps. It’s all about melting, dipping, and decorating. This makes it perfect for last-minute party prep or a fun activity with the kids without turning your kitchen into a disaster zone.
- Endlessly Customizable: The beauty of these pretzels lies in their versatility. You can use any kind of chocolate, any color of candy melts, and an infinite variety of sprinkles and toppings. This recipe is a blank canvas for your spooky creativity. You can match them to a party theme, use your kids’ favorite colors, or create a whole family of unique monster designs.
- Kid-Friendly Fun: This is the perfect project to get the little ones involved in the kitchen. They can help with unwrapping pretzels, stirring the chocolate (with supervision), and, of course, the best part—decorating! Sprinkling, drizzling, and placing candy eyeballs are all tasks that kids love, making them feel like true Halloween chefs.
- The Perfect Sweet & Salty Combination: There’s a reason chocolate-covered pretzels are a universal favorite. The sharp, savory crunch of the salty pretzel rod is the perfect counterbalance to the rich, sweet, and creamy chocolate coating. It’s a flavor and texture combination that satisfies every craving.
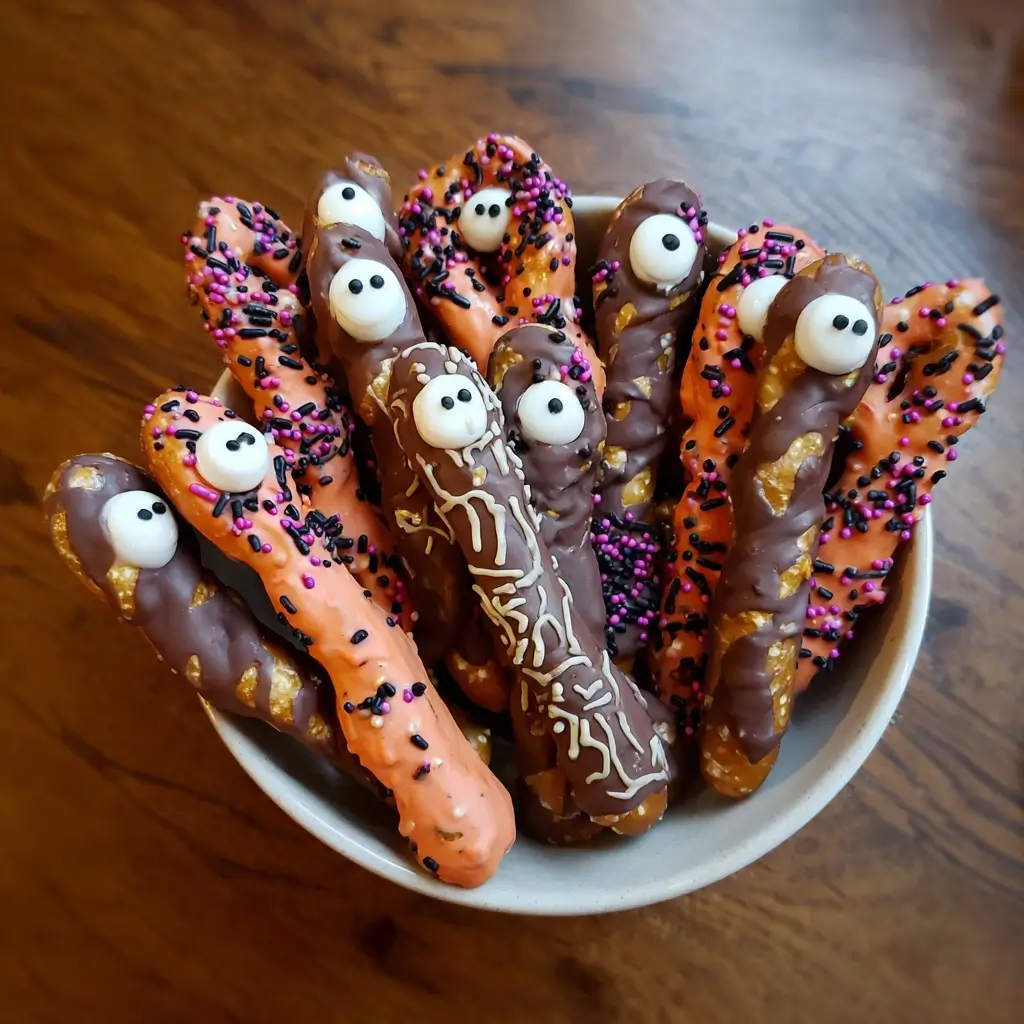
- Stunning Party Centerpiece: Don’t underestimate the visual “wow” factor of these treats. A bouquet of decorated pretzel rods in a tall glass or a platter artfully arranged with different designs looks incredibly impressive. They double as both a delicious dessert and a festive decoration for your Halloween party table. They are also fantastic as party favors, classroom treats, or “Boo Basket” fillers.
Ingredients for Your Halloween Pretzel Masterpiece
Gathering your ingredients is the first step to creating these ghoulishly good treats. The list is simple, but choosing high-quality components will make a big difference in the final result.
For the Pretzels & Chocolate Base
- Pretzel Rods: 1 bag (10-12 ounces). Look for sturdy, classic pretzel rods. They provide the perfect handle for dipping and are less likely to break than twists or thinner sticks.
- High-Quality Chocolate: 24 ounces total. This is the star of the show, so quality matters! You can use one type or a mix.
- Dark or Semi-Sweet Chocolate Wafers or Chips: 12 ounces. Melting wafers (like Ghirardelli or Guittard) are highly recommended as they contain stabilizers that help them melt smoothly and set with a nice sheen without tempering. If using chocolate chips, you’ll need to add a bit of oil.
- White Chocolate Wafers or Chips: 12 ounces. Essential for creating mummies, ghosts, and for coloring. Again, wafers are preferred for the best results.
- Coconut Oil or Vegetable Shortening: 2 teaspoons, divided (optional, but highly recommended). This is the secret ingredient for perfectly smooth, dippable chocolate, especially if you are using chocolate chips instead of melting wafers.
For Decorating (The Fun Part!)
- Candy Melts: Orange, green, purple, and black. A little goes a long way. These are perfect for drizzling and creating vibrant designs.
- Halloween Sprinkles: A festive mix of nonpareils, jimmies, and shaped sprinkles (like bats, pumpkins, or ghosts).
- Candy Eyeballs: A variety of sizes is fun for creating different monster expressions. These are a non-negotiable for monster and mummy pretzels!
- Black Decorating Icing or Gel: In a fine-tipped tube for drawing mouths or spider bodies.
Essential Tools & Equipment
Having the right tools on hand will make the process smooth and enjoyable. You likely have most of these in your kitchen already.
- Baking Sheets: Two large, rimmed baking sheets.
- Parchment Paper or Wax Paper: To line the baking sheets, preventing the pretzels from sticking and making cleanup a breeze.
- Tall, Narrow Glass or Jar: This is a game-changer for dipping. It allows you to use less chocolate while getting a deep, even coat on the pretzel rod. A pint glass or a mason jar works perfectly.
- Microwave-Safe Bowls: Several small to medium bowls for melting the different types of chocolate and candy melts.
- Spoons and/or Rubber Spatulas: For stirring the chocolate and helping to coat the pretzels.
- Piping Bags or Small Ziploc Bags: For drizzling fine lines of chocolate, essential for mummies and spiderwebs.
- Scissors: To snip the corner of the Ziploc bags if you’re using them for piping.
Step-by-Step Instructions: How to Make Chocolate Covered Halloween Pretzels
Now for the magic! Follow these simple steps to create your spooky and delicious pretzel rods.
Step 1: Prepare Your Dipping Station
Organization is key to a stress-free decorating experience.
- Line Baking Sheets: Line two large baking sheets with parchment paper or wax paper. This is where your finished pretzels will set. Make sure you have enough clear counter space or room in your refrigerator for these sheets.
- Set Up Toppings: Open all your sprinkles, candy eyeballs, and other decorations. Pour small amounts into little bowls for easy access. Once your pretzels are dipped, you need to work quickly before the chocolate sets, so having everything ready is crucial.
- Select Your Pretzels: Carefully inspect your pretzel rods and set aside any that are broken.
Step 2: Melt the Chocolate to Silky Perfection
The goal is smooth, fluid chocolate. We’ll cover the two most common methods.
Microwave Method (Easiest):
- Place 12 ounces of dark or semi-sweet chocolate wafers in a microwave-safe bowl.
- Microwave on 50% power for 30-second intervals. After each interval, remove the bowl and stir thoroughly with a rubber spatula, even if the chocolate doesn’t look melted. The residual heat will continue to melt the wafers.
- Continue this process until the chocolate is almost completely melted. Stir until the last few lumps dissolve, resulting in a smooth, glossy consistency.
- If using chocolate chips, add 1 teaspoon of coconut oil or shortening before melting to help it become smoother and more fluid.
- Do not overheat the chocolate! This can cause it to “seize,” becoming thick, grainy, and unusable. Low and slow is the key.
Double Boiler Method:
- Fill a small saucepan with about an inch of water and bring it to a gentle simmer over low heat.
- Place a heatproof bowl (glass or metal) over the saucepan. Ensure the bottom of the bowl does not touch the water.
- Add the chocolate wafers (and oil, if using chips) to the bowl.
- Stir constantly as the gentle steam heat melts the chocolate until it is completely smooth. This method provides gentle, even heat and reduces the risk of scorching.
Step 3: The Art of the Dip
- Transfer Chocolate: Carefully pour the melted dark or semi-sweet chocolate into your tall, narrow glass. This will make it much easier to coat the pretzels evenly.
- Dip the Pretzel: Hold a pretzel rod by one end and dip it into the chocolate, leaving about 2-3 inches uncovered to act as a handle.
- Coat Evenly: Tilt the glass and rotate the pretzel to coat it about two-thirds of the way up.
- Remove Excess: As you lift the pretzel out, gently tap it against the rim of the glass. This allows the excess chocolate to drip back into the glass, preventing a puddle from forming on your baking sheet and creating a neater finish. You can also use the back of a spoon to scrape off any extra chocolate.
Step 4: Unleash Your Inner Ghoul – Decorate!
This is where the fun really begins. Work on one pretzel at a time for the best results.
- Place on Sheet: Lay the freshly dipped pretzel on the prepared parchment-lined baking sheet.
- Decorate Immediately: While the chocolate is still wet, add your decorations. Sprinkle with festive Halloween sprinkles or carefully place candy eyeballs. The chocolate acts as the glue. If you wait too long, the toppings won’t stick.
- Repeat: Continue this process of dipping and decorating with the remaining pretzels until you’ve used all the dark chocolate or have the desired number of pretzels.
Step 5: Chill Out and Let Them Set
- Refrigerate: Place the baking sheets with the decorated pretzels in the refrigerator for 10-15 minutes, or until the chocolate is completely firm to the touch.
- Second Layer (for Mummies/Ghosts): While the first batch is chilling, melt your white chocolate using the same method as before. Once the dark chocolate pretzels are fully set, you can begin creating your layered designs like mummies and ghosts (see detailed design guides below).
Spooktacular Halloween Pretzel Design Ideas (Step-by-Step Guides)
Here’s how to create the most popular and eye-catching designs that will make your platter pop.
The Classic Mummy Pretzel
These are arguably the most iconic Halloween pretzels and are surprisingly easy to make.
- Base Coat: Dip your pretzel rod in dark or white chocolate and let it set completely. A dark chocolate base provides a nice contrast.
- Melt White Chocolate: Melt your white chocolate and transfer it to a piping bag or a Ziploc bag. Snip a very tiny corner off the bag.
- Create Bandages: Hold the set pretzel over another piece of parchment paper (to catch drips) and quickly drizzle the white chocolate back and forth across the pretzel in a crisscross pattern. Leave a small gap near the top for the eyes. Don’t aim for perfection; messy, overlapping lines look more like authentic mummy bandages.
- Add Eyes: While the white chocolate “bandages” are still wet, press two small candy eyeballs into the gap you left.
- Set: Place on the baking sheet to set completely.
The Friendly Ghost Pretzel
Simple, elegant, and just a little bit spooky.
- Dip in White: Dip the entire top two-thirds of the pretzel rod in melted white chocolate.
- Create the Ghostly Shape: Lay the pretzel on the parchment paper. Use a toothpick or the back of a spoon to gently drag the chocolate at the bottom of the dipped section downwards into a wavy, ghostly tail.
- Add a Face: While the chocolate is still wet, place two candy eyeballs towards the top. For the mouth, you have two options:
- Option A (Easiest): Place a single chocolate sprinkle or nonpareil for a small “o” shaped mouth.
- Option B (More Detail): Let the white chocolate set completely. Then, use a toothpick dipped in melted dark chocolate or a black decorating gel pen to draw a small, spooky mouth.
- Set: Let it harden fully in the fridge.
The Googly-Eyed Monster Pretzel
These are all about vibrant colors and chaotic fun.
- Choose a Color: Melt a bright-colored candy melt (green, orange, or purple).
- Dip and Decorate: Dip the pretzel rod in the colored melt. Immediately cover it with a mix of Halloween sprinkles and jimmies.
- Add Eyes: While the coating is still wet, go wild with the candy eyeballs! Add one giant eye for a cyclops monster, two regular eyes, or a cluster of five or six for a truly monstrous look.
- Set: Place on the baking sheet to set. Create a variety of colors for a vibrant “Monster Mash” platter.
The Candy Corn Ombre Pretzel
A tribute to the classic Halloween candy, this design looks advanced but is quite simple.
- Melt Colors: You will need three small bowls with melted candy: one with white, one with orange, and one with yellow.
- Yellow First: Dip the top inch of the pretzel rod in the yellow candy melts.
- Orange Next: Dip the pretzel a bit further into the orange, going over the yellow and extending another inch down the rod. The colors will blend slightly where they meet, creating the ombre effect.
- White Last: Finally, dip the pretzel into the white chocolate, covering the orange and extending another inch.
- Set: Carefully lay on the parchment paper to set. The key is to work quickly and dip in successive sections.
The Sinister Spiderweb Pretzel
An elegant and spooky design that is surprisingly easy to execute.
- Base Coat: Dip the pretzel in a base color—white chocolate, dark chocolate, or orange candy melts all work well. Lay it on the parchment paper.
- Create Lines: While the base coat is still wet, use a piping bag with a contrasting color (black on orange/white, or white on dark chocolate) to pipe 3-4 horizontal lines across the pretzel.
- Drag the Web: Immediately take a toothpick and drag it vertically down through the lines, starting from the top. Then, drag the toothpick vertically up in the space between your first lines. Continue this up-and-down dragging pattern across the pretzel to create the web effect.
- Set: Let this intricate design set completely before handling.
Nutrition Facts
- Servings: Approximately 24 pretzels
- Calories per serving: Approximately 150-180 kcal
Disclaimer: The nutritional information is an estimate and will vary significantly based on the type of chocolate used, the thickness of the coating, and the amount and type of toppings added.
Preparation & Total Time
- Preparation Time: 20 minutes
- Decorating & Setting Time: 40-60 minutes
- Total Time: Approximately 1 hour to 1 hour 20 minutes
How to Serve Your Ghoulishly Good Pretzels
Presentation can elevate these simple treats into a show-stopping dessert. Here are some fun and festive ways to serve them:
- The Pretzel Bouquet:
- Find a tall, sturdy glass, a festive mug, or a small vase.
- Fill it with black or orange crinkle paper, candy corn, or Halloween-colored M&M’s to act as a base.
- Stand the finished pretzel rods upright in the glass to create a stunning, edible bouquet. This makes a fantastic centerpiece for a food table.
- The Spooky Platter:
- Arrange the different pretzel designs on a large black or white platter.
- Alternate the designs (mummy, then monster, then ghost) to create visual interest.
- Fill in the empty spaces on the platter with extra Halloween candy, like gummy worms, candy corn, and chocolate eyeballs, to create a full and festive dessert board.
- Individual Party Favors:
- Once the pretzels are completely set, slide one or two into a long, thin cellophane treat bag.
- Tie the bag securely with a festive Halloween ribbon (orange, black, or purple).
- Add a small, custom “Happy Halloween” or “Thanks for coming!” tag for a personal touch. These are perfect for school parties or as take-home gifts for your guests.
- Haunted Dessert Bar Addition:
- Incorporate the pretzels into a larger Halloween dessert bar.
- Place them alongside other themed treats like “dirt pudding” cups, pumpkin cupcakes, and a bowl of “witch’s brew” punch.
Pro Tips for Perfect Pretzel-Making
Follow these five expert tips to ensure your pretzel-making process is flawless and fun.
- The Secret to Perfectly Melted Chocolate: The biggest mistake people make is overheating chocolate. Use 50% power on your microwave and stir every 30 seconds. If your chocolate (especially chips) still seems too thick for dipping, stir in ½ teaspoon of coconut oil or vegetable shortening at a time until it reaches a smooth, fluid consistency. It makes a world of difference for a thin, even coat.
- Avoid the Dreaded Pretzel Snap: Be gentle! Pretzel rods are sturdy, but they can still break. When tapping off the excess chocolate, use a light, gentle tapping motion against the rim of the glass rather than a hard whack. Support the pretzel with your fingers as you work.
- Master the Drip for a Clean Finish: After dipping, hold the pretzel horizontally over the chocolate bowl and slowly rotate it. Gravity will help pull the excess chocolate off evenly, preventing a thick “foot” of chocolate from pooling when you lay it down.
- Strategic Sprinkling for Maximum Impact: To avoid getting sprinkles all over your work surface, hold the freshly dipped pretzel over a small bowl or a separate piece of parchment paper while you decorate. This catches all the excess sprinkles, which you can then pour back into their container.
- Make-Ahead & Storage Savvy: These are the perfect make-ahead treat! You can make them up to a week in advance. Store them in a single layer in an airtight container at cool room temperature. Do not store them in the refrigerator long-term, as condensation can form on the chocolate, making it sticky or discolored.
Frequently Asked Questions (FAQ)
1. Can I use pretzel twists or other shapes instead of rods?
Absolutely! Pretzel twists and small pretzel sticks work great. For twists, you’ll be dipping instead of coating. Hold them with tongs or a fork, submerge them in the chocolate, lift them out, and let the excess drip off before placing them on the parchment paper. They are perfect for making bite-sized monster treats.
2. Why did my chocolate get thick and lumpy (seize)?
Chocolate “seizes” when it comes into contact with even a tiny drop of water or when it’s overheated. This causes it to become a thick, grainy, unworkable paste. To prevent this, make sure all your bowls and utensils are perfectly dry. When melting, use low heat (or 50% power in the microwave) and stir frequently. Unfortunately, once chocolate has seized, it’s very difficult to save for dipping, but you can still use it in baked goods like brownies.
3. What’s the best kind of chocolate to use? Melting wafers or chocolate chips?
For the easiest and best-looking results, candy melts or chocolate melting wafers are the superior choice. They are specifically designed to melt easily and set up hard and shiny without any special techniques. Chocolate chips contain stabilizers to help them hold their shape in cookies, which means they don’t melt as fluidly. If you use chocolate chips, adding a teaspoon of coconut oil or shortening is essential to thin them out for dipping.
4. How long do these chocolate-covered pretzels last?
When stored properly in an airtight container at a cool room temperature, these pretzels will stay fresh and delicious for up to one week. The pretzel will start to lose its crispness after that. Avoid storing them in a warm or humid spot, which can cause the chocolate to soften.
5. Can I freeze my finished Halloween pretzels?
It’s generally not recommended to freeze chocolate-covered pretzels. When they thaw, condensation can form on the surface of the chocolate, which can cause discoloration (sugar bloom), make them sticky, and make your sprinkles bleed color. Since they last for a week at room temperature, it’s best to make them within that timeframe.

Chocolate Covered Halloween Pretzels Recipe
Ingredients
For the Pretzels & Chocolate Base
- Pretzel Rods: 1 bag (10-12 ounces). Look for sturdy, classic pretzel rods. They provide the perfect handle for dipping and are less likely to break than twists or thinner sticks.
- High-Quality Chocolate: 24 ounces total. This is the star of the show, so quality matters! You can use one type or a mix.
- Dark or Semi-Sweet Chocolate Wafers or Chips: 12 ounces. Melting wafers (like Ghirardelli or Guittard) are highly recommended as they contain stabilizers that help them melt smoothly and set with a nice sheen without tempering. If using chocolate chips, you’ll need to add a bit of oil.
- White Chocolate Wafers or Chips: 12 ounces. Essential for creating mummies, ghosts, and for coloring. Again, wafers are preferred for the best results.
- Coconut Oil or Vegetable Shortening: 2 teaspoons, divided (optional, but highly recommended). This is the secret ingredient for perfectly smooth, dippable chocolate, especially if you are using chocolate chips instead of melting wafers.
For Decorating (The Fun Part!)
- Candy Melts: Orange, green, purple, and black. A little goes a long way. These are perfect for drizzling and creating vibrant designs.
- Halloween Sprinkles: A festive mix of nonpareils, jimmies, and shaped sprinkles (like bats, pumpkins, or ghosts).
- Candy Eyeballs: A variety of sizes is fun for creating different monster expressions. These are a non-negotiable for monster and mummy pretzels!
- Black Decorating Icing or Gel: In a fine-tipped tube for drawing mouths or spider bodies.
Instructions
Step 1: Prepare Your Dipping Station
Organization is key to a stress-free decorating experience.
- Line Baking Sheets: Line two large baking sheets with parchment paper or wax paper. This is where your finished pretzels will set. Make sure you have enough clear counter space or room in your refrigerator for these sheets.
- Set Up Toppings: Open all your sprinkles, candy eyeballs, and other decorations. Pour small amounts into little bowls for easy access. Once your pretzels are dipped, you need to work quickly before the chocolate sets, so having everything ready is crucial.
- Select Your Pretzels: Carefully inspect your pretzel rods and set aside any that are broken.
Step 2: Melt the Chocolate to Silky Perfection
The goal is smooth, fluid chocolate. We’ll cover the two most common methods.
Microwave Method (Easiest):
- Place 12 ounces of dark or semi-sweet chocolate wafers in a microwave-safe bowl.
- Microwave on 50% power for 30-second intervals. After each interval, remove the bowl and stir thoroughly with a rubber spatula, even if the chocolate doesn’t look melted. The residual heat will continue to melt the wafers.
- Continue this process until the chocolate is almost completely melted. Stir until the last few lumps dissolve, resulting in a smooth, glossy consistency.
- If using chocolate chips, add 1 teaspoon of coconut oil or shortening before melting to help it become smoother and more fluid.
- Do not overheat the chocolate! This can cause it to “seize,” becoming thick, grainy, and unusable. Low and slow is the key.
Double Boiler Method:
- Fill a small saucepan with about an inch of water and bring it to a gentle simmer over low heat.
- Place a heatproof bowl (glass or metal) over the saucepan. Ensure the bottom of the bowl does not touch the water.
- Add the chocolate wafers (and oil, if using chips) to the bowl.
- Stir constantly as the gentle steam heat melts the chocolate until it is completely smooth. This method provides gentle, even heat and reduces the risk of scorching.
Step 3: The Art of the Dip
- Transfer Chocolate: Carefully pour the melted dark or semi-sweet chocolate into your tall, narrow glass. This will make it much easier to coat the pretzels evenly.
- Dip the Pretzel: Hold a pretzel rod by one end and dip it into the chocolate, leaving about 2-3 inches uncovered to act as a handle.
- Coat Evenly: Tilt the glass and rotate the pretzel to coat it about two-thirds of the way up.
- Remove Excess: As you lift the pretzel out, gently tap it against the rim of the glass. This allows the excess chocolate to drip back into the glass, preventing a puddle from forming on your baking sheet and creating a neater finish. You can also use the back of a spoon to scrape off any extra chocolate.
Step 4: Unleash Your Inner Ghoul – Decorate!
This is where the fun really begins. Work on one pretzel at a time for the best results.
- Place on Sheet: Lay the freshly dipped pretzel on the prepared parchment-lined baking sheet.
- Decorate Immediately: While the chocolate is still wet, add your decorations. Sprinkle with festive Halloween sprinkles or carefully place candy eyeballs. The chocolate acts as the glue. If you wait too long, the toppings won’t stick.
- Repeat: Continue this process of dipping and decorating with the remaining pretzels until you’ve used all the dark chocolate or have the desired number of pretzels.
Step 5: Chill Out and Let Them Set
- Refrigerate: Place the baking sheets with the decorated pretzels in the refrigerator for 10-15 minutes, or until the chocolate is completely firm to the touch.
- Second Layer (for Mummies/Ghosts): While the first batch is chilling, melt your white chocolate using the same method as before. Once the dark chocolate pretzels are fully set, you can begin creating your layered designs like mummies and ghosts
Nutrition
- Serving Size: One Normal Portion
- Calories: 150-180


