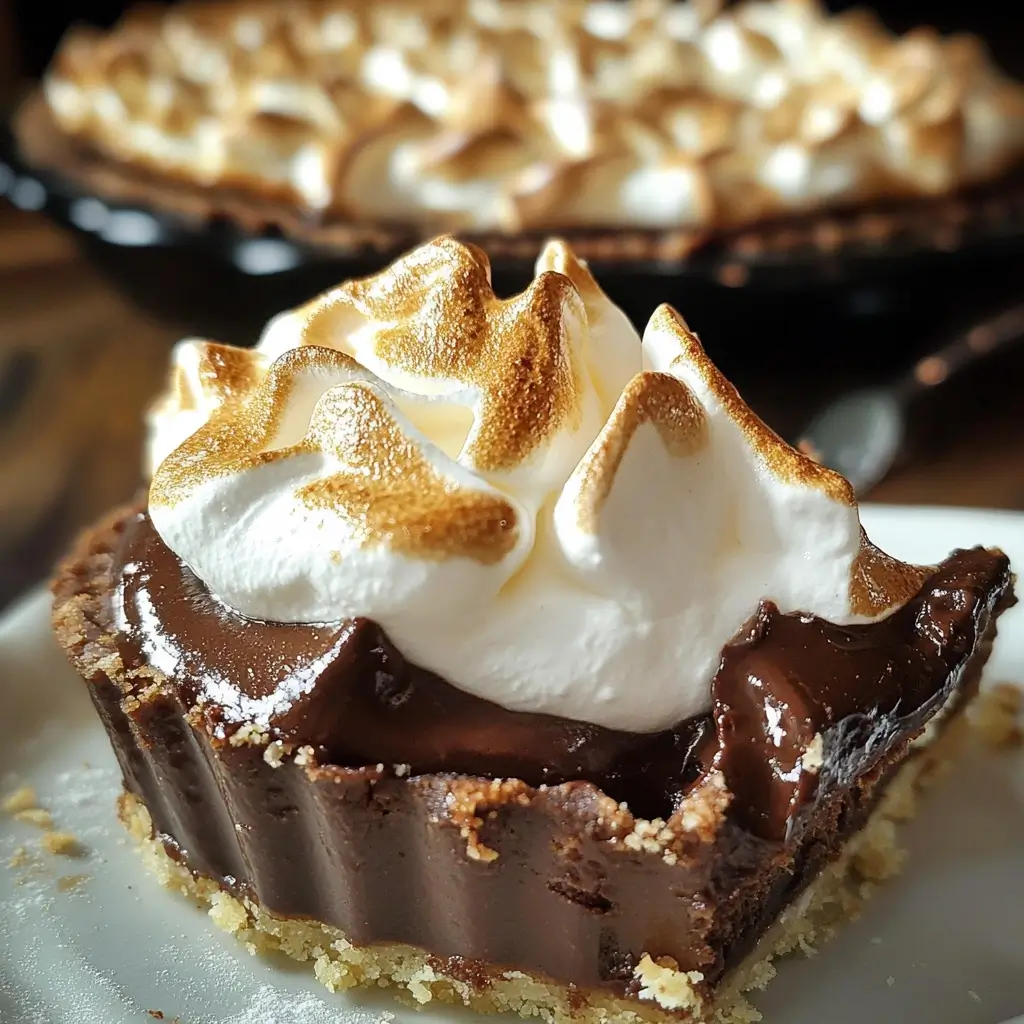
Chocolate Meringue Pie. Just the name conjures up images of rich, decadent chocolate nestled under a cloud of sweet, airy meringue. For me, it’s more than just a dessert; it’s a taste of home, a memory wrapped in layers of flavor and texture. I first baked this pie years ago, a slightly nervous attempt to impress my then-fiancé’s family. Let’s just say it was a resounding success. The silence that fell over the table as everyone took their first bite was more eloquent than any praise. Since then, this Chocolate Meringue Pie has become a staple at family gatherings, holidays, and even just those ordinary Sundays that deserve a little something special. My kids, now teenagers, practically demand it for their birthdays, and my husband claims it’s the best dessert I make – high praise indeed! The magic lies in the contrast: the crisp, buttery crust, the intensely chocolatey and smooth filling, and that glorious, billowy meringue that melts in your mouth. It’s a symphony of textures and tastes, a perfect balance of sweet and rich, and an absolute showstopper that will impress anyone who tries it. This isn’t just a recipe; it’s an experience, and I’m thrilled to share it with you so you can bring a slice of heaven into your own home.
Ingredients: The Building Blocks of Chocolate Meringue Perfection
To create this masterpiece, we’ll need to gather our ingredients. Each component plays a crucial role in the final taste and texture of the pie, so using quality ingredients will truly elevate your baking experience. We’ll break down the ingredients into three key parts: the crust, the rich chocolate filling, and the ethereal meringue topping.
For the Perfectly Flaky Pie Crust:
- 1 ½ cups all-purpose flour: The foundation of our crust. All-purpose flour provides the right balance of protein and starch for a tender yet sturdy crust. It’s important to measure flour correctly; spoon it into your measuring cup and level it off with a straight edge to avoid using too much, which can lead to a dry crust.
- ½ teaspoon salt: Salt is a flavor enhancer, balancing the sweetness and bringing out the buttery notes in the crust. It also helps to control gluten development, contributing to a more tender texture.
- ½ cup (1 stick) unsalted butter, chilled and cut into small cubes: Cold butter is the secret to a flaky crust. As the butter melts during baking, it creates steam, which separates the layers of dough and results in a light, flaky texture. Make sure your butter is very cold – even freezing it for 15 minutes before using can be beneficial, especially in warmer climates. Using unsalted butter gives you control over the overall saltiness of the pie.
- ¼ cup vegetable shortening, chilled and cut into small pieces: Shortening, like butter, contributes to flakiness. However, shortening has a higher melting point than butter, which helps to create an even more tender and crumbly crust. Using a combination of butter and shortening provides the best of both worlds – flavor from the butter and tenderness from the shortening. Again, ensure your shortening is well chilled.
- ¼ cup ice water, plus more if needed: Ice water is essential for bringing the dough together without overworking it. Cold water keeps the butter and shortening cold, preventing the gluten from developing too much, which is key for a tender crust. Add the water gradually, a tablespoon at a time, until the dough just comes together. You may need slightly more or less depending on the humidity and your flour.
For the Decadent Chocolate Filling:
- 1 cup granulated sugar: Provides sweetness and structure to the filling. Granulated sugar dissolves smoothly and creates a balanced sweetness that complements the rich chocolate.
- ¼ cup unsweetened cocoa powder: The heart of our chocolate flavor. Use a good quality unsweetened cocoa powder for the best chocolate intensity. Dutch-processed cocoa powder will result in a darker, richer flavor, while natural cocoa powder will have a slightly more acidic and fruity note. Both work well, choose your preference!
- ¼ cup cornstarch: Acts as a thickening agent, giving the filling its smooth and creamy texture. Cornstarch is crucial for preventing the filling from being too runny.
- ¼ teaspoon salt: Balances the sweetness and enhances the chocolate flavor.
- 2 cups milk: Provides the liquid base for the filling and contributes to its creamy texture. Whole milk will result in the richest flavor, but 2% milk can also be used. Avoid using skim milk as it will lack the necessary richness.
- 4 large egg yolks: Egg yolks add richness, creaminess, and a beautiful golden color to the filling. They also contribute to the filling’s set and stability. Save the egg whites for the meringue topping!
- 2 tablespoons unsalted butter: Adds extra richness and a glossy sheen to the filling. Stirring in butter at the end of cooking creates a velvety smooth texture.
- 1 teaspoon vanilla extract: Enhances the chocolate flavor and adds a touch of warmth and complexity. Use pure vanilla extract for the best flavor; avoid imitation vanilla.
- 6 ounces semi-sweet chocolate, finely chopped: The star of the show! Use good quality semi-sweet chocolate for the most intense and delicious chocolate flavor. Chopping the chocolate finely ensures it melts smoothly into the hot filling. You can use chocolate chips, but finely chopped chocolate bars will melt more evenly.
For the Ethereal Meringue Topping:
- 4 large egg whites: The base of our light and airy meringue. Egg whites, when whipped, create a stable foam that becomes the meringue. Make sure there is absolutely no yolk in the whites, as any fat will prevent them from whipping properly.
- ¼ teaspoon cream of tartar: Stabilizes the egg whites and helps them whip to a greater volume and hold their shape. Cream of tartar is especially helpful in humid climates. If you don’t have cream of tartar, you can substitute a pinch of salt or a teaspoon of lemon juice, though cream of tartar is preferred for the best meringue stability.
- ½ cup granulated sugar: Sweetens the meringue and contributes to its stability. Granulated sugar is gradually added to the whipped egg whites to create a glossy, stable meringue.
- ½ teaspoon vanilla extract: Adds a touch of flavor to the meringue and complements the chocolate filling.
Instructions: Crafting Your Chocolate Meringue Pie Step-by-Step
Now that we have all our ingredients prepared, let’s embark on the journey of creating this delectable Chocolate Meringue Pie. Follow these step-by-step instructions carefully for pie perfection.
Step 1: Preparing the Perfect Pie Crust
- Combine dry ingredients: In a large bowl, whisk together the flour and salt. This ensures the salt is evenly distributed throughout the flour.
- Cut in the cold fats: Add the chilled, cubed butter and shortening to the flour mixture. Using a pastry blender or your fingertips (working quickly to keep the fats cold), cut the butter and shortening into the flour until the mixture resembles coarse crumbs with some pea-sized pieces of butter and shortening remaining. These larger pieces are crucial for creating flaky layers. Avoid overworking the dough at this stage.
- Add ice water: Gradually add the ice water, one tablespoon at a time, mixing gently with a fork after each addition. Continue adding water until the dough just comes together and is slightly moist but not sticky. You should be able to pinch a bit of dough together and it holds its shape.
- Form the dough: Turn the dough out onto a lightly floured surface. Gently gather it into a disc. Divide the disc in half, if making a double crust pie (we’ll only need one for this recipe, so you can freeze half for later use or another pie). Form the half disc into a smooth ball, then flatten it into a disc about 1 inch thick. Wrap the dough disc tightly in plastic wrap and refrigerate for at least 30 minutes, or up to 2 hours. This chilling step is essential as it allows the gluten to relax and the fats to firm up, making the dough easier to roll out and preventing shrinkage during baking.
- Roll out the crust: On a lightly floured surface, roll out the chilled dough disc into a 12-inch circle, about ⅛ inch thick. Rotate the dough as you roll to ensure even thickness and prevent sticking.
- Transfer to pie plate: Gently fold the dough circle in half or quarters and transfer it to a 9-inch pie plate. Unfold the dough and ease it into the pie plate, pressing it gently against the bottom and sides. Trim any excess dough hanging over the edge, leaving about a ½ inch overhang. Crimp the edges decoratively using your fingers or a fork.
- Pre-bake the crust (Blind Bake): Prick the bottom of the crust all over with a fork to prevent it from puffing up during baking. Line the crust with parchment paper or aluminum foil and fill it with pie weights or dried beans. This will weigh down the crust and prevent it from shrinking or bubbling. Bake in a preheated oven at 375°F (190°C) for 15 minutes.
- Remove weights and continue baking: Carefully remove the parchment paper and pie weights. Return the crust to the oven and bake for another 10-15 minutes, or until lightly golden brown. This pre-baking ensures the crust is fully cooked and crisp before we add the wet filling. Let the crust cool completely while you prepare the filling.
Step 2: Creating the Rich Chocolate Filling
- Combine dry ingredients in saucepan: In a medium saucepan, whisk together the granulated sugar, cocoa powder, cornstarch, and salt. Whisking ensures there are no lumps of cocoa powder or cornstarch.
- Whisk in milk and egg yolks: Gradually whisk in the milk until smooth, making sure to break up any clumps. Then, whisk in the egg yolks one at a time, whisking until fully incorporated after each addition.
- Cook over medium heat: Place the saucepan over medium heat and cook, stirring constantly with a whisk, until the mixture comes to a simmer and begins to thicken. Continue cooking, stirring constantly, for 1-2 minutes more, or until the filling is thick enough to coat the back of a spoon. It should be smooth and glossy. Be careful not to scorch the bottom, so keep stirring continuously.
- Remove from heat and add chocolate and butter: Remove the saucepan from the heat and immediately add the chopped semi-sweet chocolate, butter, and vanilla extract. Stir until the chocolate and butter are completely melted and the filling is smooth and glossy.
- Pour into pre-baked crust: Pour the hot chocolate filling into the cooled pre-baked pie crust, spreading it evenly.
Step 3: Whipping Up the Ethereal Meringue Topping
- Beat egg whites and cream of tartar: In a clean, grease-free bowl of an electric mixer fitted with the whisk attachment (or using a hand mixer), beat the egg whites and cream of tartar on medium speed until soft peaks form. Soft peaks will stand up briefly but the tips will curl over.
- Gradually add sugar: Gradually add the granulated sugar, one tablespoon at a time, beating on medium-high speed after each addition until the sugar is fully dissolved and the meringue is glossy and stiff peaks form. Stiff peaks will stand straight up when the whisk is lifted. This process takes time, be patient and ensure the sugar is fully dissolved for a smooth meringue.
- Stir in vanilla extract: Beat in the vanilla extract.
- Spread meringue over filling: Immediately spoon or pipe the meringue over the hot chocolate filling, ensuring it reaches all the way to the crust edge to seal it. You can create decorative swirls with a spoon or piping bag.
Step 4: Baking and Cooling to Perfection
- Bake in preheated oven: Bake the pie in a preheated oven at 350°F (175°C) for 10-15 minutes, or until the meringue is lightly golden brown on top. Keep a close eye on it as meringue can brown quickly.
- Cool completely: Remove the pie from the oven and let it cool completely at room temperature for at least 2-3 hours before slicing and serving. This is crucial for the filling to set properly and the meringue to stabilize. Do not refrigerate the pie immediately as condensation can form on the meringue and make it weep.
- Refrigerate after cooling: Once cooled completely at room temperature, you can refrigerate the pie for later serving. Refrigerating will help the filling set further and make slicing easier.
Nutrition Facts: A Treat to be Savored
(Please note: Nutritional information is an estimate and can vary based on specific ingredients and portion sizes.)
Servings: 8 slices
Approximate Calories per Serving: 450-550 calories
This Chocolate Meringue Pie, while undeniably delicious, is a dessert best enjoyed in moderation as part of a balanced diet. Here’s a general breakdown of approximate nutritional content per serving:
- Calories: 450-550 kcal
- Fat: 25-30g (primarily from butter, shortening, egg yolks, and chocolate)
- Saturated Fat: 15-20g (primarily from butter and chocolate)
- Cholesterol: 150-200mg (primarily from egg yolks)
- Sodium: 200-250mg
- Carbohydrates: 50-60g (primarily from sugar and flour)
- Sugar: 35-45g (from granulated sugar and chocolate)
- Protein: 5-7g (from egg whites, egg yolks, and milk)
These values are estimates and can fluctuate. Factors like the type of chocolate used (darker chocolate will have slightly less sugar), the specific brand of ingredients, and the size of slices will affect the final nutritional content. This pie is a treat and should be enjoyed as such, recognizing its higher calorie and sugar content.
Preparation Time: Planning for Pie Perfection
Making Chocolate Meringue Pie is a rewarding process, but it does require some time and planning. Here’s a breakdown of the estimated preparation time:
- Crust Preparation: 30 minutes (active time) + 30 minutes (chilling time)
- Filling Preparation: 20 minutes (active time)
- Meringue Preparation: 15 minutes (active time)
- Baking Time: 25-30 minutes (crust and assembled pie)
- Cooling Time: 2-3 hours (room temperature)
Total Estimated Time: Approximately 4-5 hours (including chilling and cooling time)
Active Preparation Time: Approximately 1 hour and 15 minutes
While the total time might seem lengthy, much of it is inactive time spent chilling and cooling. You can break down the preparation into stages. For example, you can make the pie crust a day ahead and store it in the refrigerator. Similarly, the chocolate filling can be made ahead and reheated gently before pouring into the crust. However, the meringue is best made and baked just before serving for the freshest and most stable result.
How to Serve: Presenting Your Pie Masterpiece
Chocolate Meringue Pie is a showstopper on its own, but here are some delightful ways to serve it and enhance the experience:
- Classic Slice: Simply slice the pie into wedges and serve as is. The beauty of this pie is in its simplicity.
- With Whipped Cream: A dollop of lightly sweetened whipped cream complements the richness of the chocolate and the sweetness of the meringue beautifully.
- With Vanilla Ice Cream: A scoop of high-quality vanilla ice cream adds a cool and creamy contrast to the warm flavors of the pie.
- Dusted with Cocoa Powder: A light dusting of unsweetened cocoa powder over the meringue adds a touch of elegance and visual appeal, and subtly enhances the chocolate flavor.
- Chocolate Shavings: For an extra chocolatey touch, garnish with dark or semi-sweet chocolate shavings.
- Fresh Berries: A few fresh raspberries or strawberries provide a bright, tart contrast to the richness of the pie and add a pop of color.
- Coffee or Tea: Chocolate Meringue Pie pairs perfectly with a cup of hot coffee or tea, especially a robust black coffee or a delicate Earl Grey tea.
- Dessert Wine: For a more sophisticated pairing, consider serving with a dessert wine like a late-harvest Riesling or a Tawny Port, which complement the sweetness and richness of the pie.
Serving Temperature: Chocolate Meringue Pie is best served slightly chilled or at room temperature. Serving it too cold can dull the flavors, while serving it too warm might cause the meringue to soften.
Additional Tips for Chocolate Meringue Pie Perfection
Here are five essential tips to help you achieve Chocolate Meringue Pie perfection every time:
- Use Cold Ingredients for the Crust: The key to a flaky pie crust is keeping the butter and shortening cold. Use ice water, and handle the dough as little as possible to prevent the fats from melting. If your kitchen is warm, consider chilling your flour and bowl as well.
- Don’t Overbake the Meringue: Meringue can go from perfectly golden to burnt very quickly. Keep a close eye on it during the final baking stage. You want a light golden-brown color, not dark brown or burnt. If the meringue starts to brown too quickly, you can loosely tent the pie with foil.
- Make Sure Your Bowl and Whisk are Grease-Free for Meringue: Even a tiny bit of grease or egg yolk in the egg whites can prevent them from whipping properly. Wipe your bowl and whisk with lemon juice or vinegar to ensure they are completely clean and grease-free.
- Add Sugar Gradually to Meringue: Adding sugar gradually, one tablespoon at a time, and beating well after each addition is crucial for creating a stable and glossy meringue. This allows the sugar to dissolve properly and prevents the meringue from becoming grainy.
- Cool the Pie Completely Before Slicing: Patience is key! Allowing the pie to cool completely at room temperature is essential for the filling to set and the meringue to stabilize. Slicing into a warm pie will result in a runny filling and a messy slice.
FAQ: Your Chocolate Meringue Pie Questions Answered
Here are five frequently asked questions about making Chocolate Meringue Pie:
Q1: Can I make the pie crust ahead of time?
A: Absolutely! Making the pie crust ahead of time is a great time-saver. You can make the dough disc, wrap it tightly in plastic wrap, and store it in the refrigerator for up to 2 days or in the freezer for up to 2 months. If frozen, thaw the dough in the refrigerator overnight before rolling it out. You can also pre-bake the crust a day ahead and store it at room temperature, well-covered, until ready to fill.
Q2: Can I use a store-bought pie crust?
A: While homemade pie crust is highly recommended for the best flavor and texture, you can use a store-bought refrigerated pie crust in a pinch. Follow the package instructions for pre-baking. Keep in mind that a homemade crust will elevate the overall quality of the pie.
Q3: My meringue is weeping (liquid forming on top). How can I prevent this?
A: Meringue weeping can be caused by several factors. Overbaking or underbaking the meringue, humidity, and not dissolving the sugar properly are common culprits. Ensure you bake the meringue until it’s just lightly golden brown, not overbaked. Make sure you beat the sugar into the egg whites gradually and thoroughly until it’s fully dissolved and the meringue is glossy and stiff. Avoid making meringue on very humid days if possible, or consider increasing the amount of cream of tartar for added stability. Cooling the pie slowly at room temperature also helps prevent weeping.
Q4: Can I substitute dark chocolate for semi-sweet chocolate in the filling?
A: Yes, you can substitute dark chocolate for semi-sweet chocolate for a richer, less sweet chocolate filling. Use a good quality dark chocolate with a cocoa percentage around 60-70%. Keep in mind that dark chocolate is less sweet, so the overall pie will be less sweet than if using semi-sweet chocolate. You may want to adjust the sugar slightly if you prefer a sweeter pie.
Q5: How should I store leftover Chocolate Meringue Pie?
A: Store leftover Chocolate Meringue Pie in the refrigerator, loosely covered, for up to 2-3 days. The meringue will soften slightly in the refrigerator, but the pie will still be delicious. It’s best to consume the pie within a few days for the best meringue texture. Freezing Chocolate Meringue Pie is not recommended as the meringue texture will deteriorate upon thawing.
Enjoy creating and savoring your own slice of heaven with this classic Chocolate Meringue Pie recipe!
Print
Chocolate Meringue Pie Recipe
Ingredients
For the Perfectly Flaky Pie Crust:
- 1 ½ cups all-purpose flour: The foundation of our crust. All-purpose flour provides the right balance of protein and starch for a tender yet sturdy crust. It’s important to measure flour correctly; spoon it into your measuring cup and level it off with a straight edge to avoid using too much, which can lead to a dry crust.
- ½ teaspoon salt: Salt is a flavor enhancer, balancing the sweetness and bringing out the buttery notes in the crust. It also helps to control gluten development, contributing to a more tender texture.
- ½ cup (1 stick) unsalted butter, chilled and cut into small cubes: Cold butter is the secret to a flaky crust. As the butter melts during baking, it creates steam, which separates the layers of dough and results in a light, flaky texture. Make sure your butter is very cold – even freezing it for 15 minutes before using can be beneficial, especially in warmer climates. Using unsalted butter gives you control over the overall saltiness of the pie.
- ¼ cup vegetable shortening, chilled and cut into small pieces: Shortening, like butter, contributes to flakiness. However, shortening has a higher melting point than butter, which helps to create an even more tender and crumbly crust. Using a combination of butter and shortening provides the best of both worlds – flavor from the butter and tenderness from the shortening. Again, ensure your shortening is well chilled.
- ¼ cup ice water, plus more if needed: Ice water is essential for bringing the dough together without overworking it. Cold water keeps the butter and shortening cold, preventing the gluten from developing too much, which is key for a tender crust. Add the water gradually, a tablespoon at a time, until the dough just comes together. You may need slightly more or less depending on the humidity and your flour.
For the Decadent Chocolate Filling:
- 1 cup granulated sugar: Provides sweetness and structure to the filling. Granulated sugar dissolves smoothly and creates a balanced sweetness that complements the rich chocolate.
- ¼ cup unsweetened cocoa powder: The heart of our chocolate flavor. Use a good quality unsweetened cocoa powder for the best chocolate intensity. Dutch-processed cocoa powder will result in a darker, richer flavor, while natural cocoa powder will have a slightly more acidic and fruity note. Both work well, choose your preference!
- ¼ cup cornstarch: Acts as a thickening agent, giving the filling its smooth and creamy texture. Cornstarch is crucial for preventing the filling from being too runny.
- ¼ teaspoon salt: Balances the sweetness and enhances the chocolate flavor.
- 2 cups milk: Provides the liquid base for the filling and contributes to its creamy texture. Whole milk will result in the richest flavor, but 2% milk can also be used. Avoid using skim milk as it will lack the necessary richness.
- 4 large egg yolks: Egg yolks add richness, creaminess, and a beautiful golden color to the filling. They also contribute to the filling’s set and stability. Save the egg whites for the meringue topping!
- 2 tablespoons unsalted butter: Adds extra richness and a glossy sheen to the filling. Stirring in butter at the end of cooking creates a velvety smooth texture.
- 1 teaspoon vanilla extract: Enhances the chocolate flavor and adds a touch of warmth and complexity. Use pure vanilla extract for the best flavor; avoid imitation vanilla.
- 6 ounces semi-sweet chocolate, finely chopped: The star of the show! Use good quality semi-sweet chocolate for the most intense and delicious chocolate flavor. Chopping the chocolate finely ensures it melts smoothly into the hot filling. You can use chocolate chips, but finely chopped chocolate bars will melt more evenly.
For the Ethereal Meringue Topping:
- 4 large egg whites: The base of our light and airy meringue. Egg whites, when whipped, create a stable foam that becomes the meringue. Make sure there is absolutely no yolk in the whites, as any fat will prevent them from whipping properly.
- ¼ teaspoon cream of tartar: Stabilizes the egg whites and helps them whip to a greater volume and hold their shape. Cream of tartar is especially helpful in humid climates. If you don’t have cream of tartar, you can substitute a pinch of salt or a teaspoon of lemon juice, though cream of tartar is preferred for the best meringue stability.
- ½ cup granulated sugar: Sweetens the meringue and contributes to its stability. Granulated sugar is gradually added to the whipped egg whites to create a glossy, stable meringue.
- ½ teaspoon vanilla extract: Adds a touch of flavor to the meringue and complements the chocolate filling.
Instructions
Step 1: Preparing the Perfect Pie Crust
- Combine dry ingredients: In a large bowl, whisk together the flour and salt. This ensures the salt is evenly distributed throughout the flour.
- Cut in the cold fats: Add the chilled, cubed butter and shortening to the flour mixture. Using a pastry blender or your fingertips (working quickly to keep the fats cold), cut the butter and shortening into the flour until the mixture resembles coarse crumbs with some pea-sized pieces of butter and shortening remaining. These larger pieces are crucial for creating flaky layers. Avoid overworking the dough at this stage.
- Add ice water: Gradually add the ice water, one tablespoon at a time, mixing gently with a fork after each addition. Continue adding water until the dough just comes together and is slightly moist but not sticky. You should be able to pinch a bit of dough together and it holds its shape.
- Form the dough: Turn the dough out onto a lightly floured surface. Gently gather it into a disc. Divide the disc in half, if making a double crust pie (we’ll only need one for this recipe, so you can freeze half for later use or another pie). Form the half disc into a smooth ball, then flatten it into a disc about 1 inch thick. Wrap the dough disc tightly in plastic wrap and refrigerate for at least 30 minutes, or up to 2 hours. This chilling step is essential as it allows the gluten to relax and the fats to firm up, making the dough easier to roll out and preventing shrinkage during baking.
- Roll out the crust: On a lightly floured surface, roll out the chilled dough disc into a 12-inch circle, about ⅛ inch thick. Rotate the dough as you roll to ensure even thickness and prevent sticking.
- Transfer to pie plate: Gently fold the dough circle in half or quarters and transfer it to a 9-inch pie plate. Unfold the dough and ease it into the pie plate, pressing it gently against the bottom and sides. Trim any excess dough hanging over the edge, leaving about a ½ inch overhang. Crimp the edges decoratively using your fingers or a fork.
- Pre-bake the crust (Blind Bake): Prick the bottom of the crust all over with a fork to prevent it from puffing up during baking. Line the crust with parchment paper or aluminum foil and fill it with pie weights or dried beans. This will weigh down the crust and prevent it from shrinking or bubbling. Bake in a preheated oven at 375°F (190°C) for 15 minutes.
- Remove weights and continue baking: Carefully remove the parchment paper and pie weights. Return the crust to the oven and bake for another 10-15 minutes, or until lightly golden brown. This pre-baking ensures the crust is fully cooked and crisp before we add the wet filling. Let the crust cool completely while you prepare the filling.
Step 2: Creating the Rich Chocolate Filling
- Combine dry ingredients in saucepan: In a medium saucepan, whisk together the granulated sugar, cocoa powder, cornstarch, and salt. Whisking ensures there are no lumps of cocoa powder or cornstarch.
- Whisk in milk and egg yolks: Gradually whisk in the milk until smooth, making sure to break up any clumps. Then, whisk in the egg yolks one at a time, whisking until fully incorporated after each addition.
- Cook over medium heat: Place the saucepan over medium heat and cook, stirring constantly with a whisk, until the mixture comes to a simmer and begins to thicken. Continue cooking, stirring constantly, for 1-2 minutes more, or until the filling is thick enough to coat the back of a spoon. It should be smooth and glossy. Be careful not to scorch the bottom, so keep stirring continuously.
- Remove from heat and add chocolate and butter: Remove the saucepan from the heat and immediately add the chopped semi-sweet chocolate, butter, and vanilla extract. Stir until the chocolate and butter are completely melted and the filling is smooth and glossy.
- Pour into pre-baked crust: Pour the hot chocolate filling into the cooled pre-baked pie crust, spreading it evenly.
Step 3: Whipping Up the Ethereal Meringue Topping
- Beat egg whites and cream of tartar: In a clean, grease-free bowl of an electric mixer fitted with the whisk attachment (or using a hand mixer), beat the egg whites and cream of tartar on medium speed until soft peaks form. Soft peaks will stand up briefly but the tips will curl over.
- Gradually add sugar: Gradually add the granulated sugar, one tablespoon at a time, beating on medium-high speed after each addition until the sugar is fully dissolved and the meringue is glossy and stiff peaks form. Stiff peaks will stand straight up when the whisk is lifted. This process takes time, be patient and ensure the sugar is fully dissolved for a smooth meringue.
- Stir in vanilla extract: Beat in the vanilla extract.
- Spread meringue over filling: Immediately spoon or pipe the meringue over the hot chocolate filling, ensuring it reaches all the way to the crust edge to seal it. You can create decorative swirls with a spoon or piping bag.
Step 4: Baking and Cooling to Perfection
- Bake in preheated oven: Bake the pie in a preheated oven at 350°F (175°C) for 10-15 minutes, or until the meringue is lightly golden brown on top. Keep a close eye on it as meringue can brown quickly.
- Cool completely: Remove the pie from the oven and let it cool completely at room temperature for at least 2-3 hours before slicing and serving. This is crucial for the filling to set properly and the meringue to stabilize. Do not refrigerate the pie immediately as condensation can form on the meringue and make it weep.
- Refrigerate after cooling: Once cooled completely at room temperature, you can refrigerate the pie for later serving. Refrigerating will help the filling set further and make slicing easier.
Nutrition
- Serving Size: One Normal Portion
- Calories: 450-550
- Sugar: 35-45g
- Sodium: 200-250mg
- Fat: 25-30g
- Saturated Fat: 15-20g
- Carbohydrates: 50-60g
- Protein: 5-7g
- Cholesterol: 150-200mg