

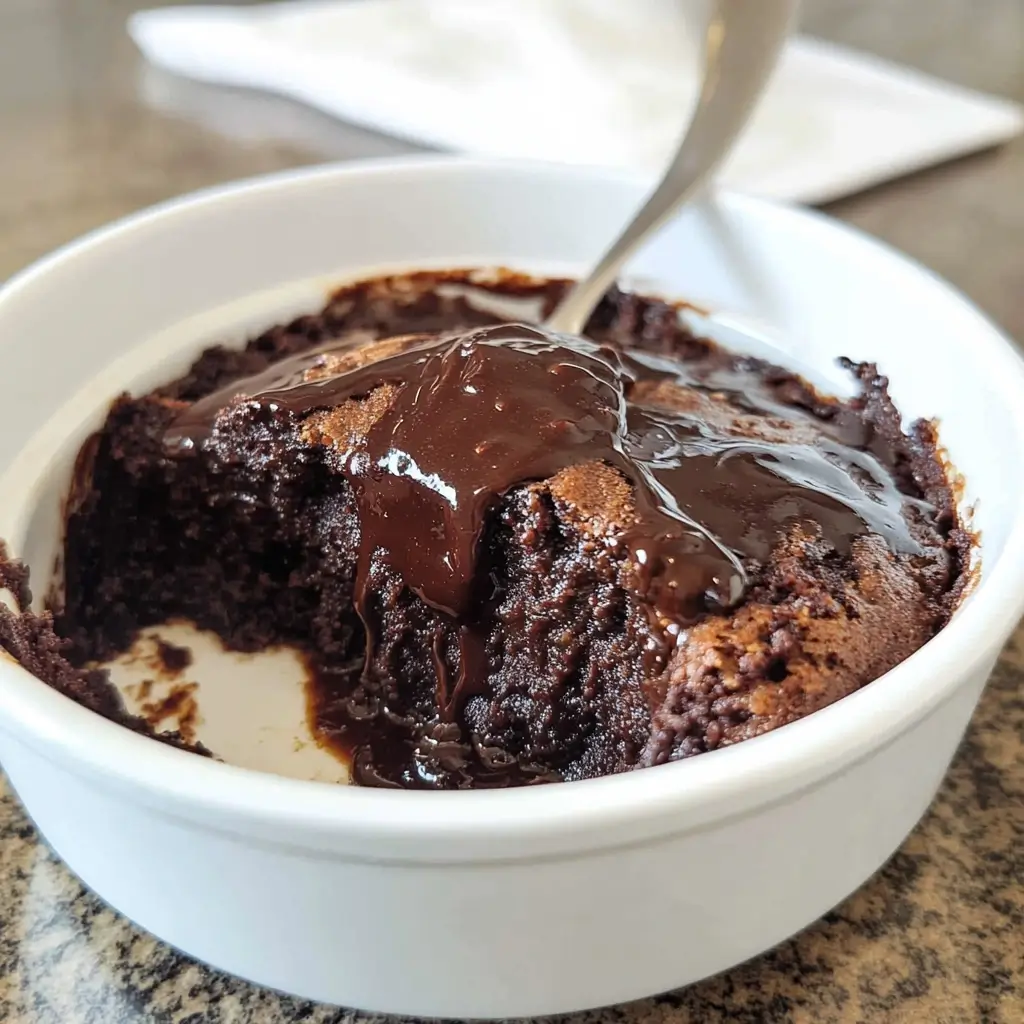

There are some desserts that just feel like a warm hug on a plate, and for me, Chocolate Self Saucing Pudding is right at the top of that list. Growing up, this was the dessert my mum would whip up on chilly evenings, and the rich chocolate aroma wafting from the oven was always enough to bring a smile to everyone’s face. Now, it’s a tradition I’ve carried on in my own home, and let me tell you, it’s always a hit. The magic of this pudding is in its simplicity – a humble batter transforms in the oven into a decadent, moist cake nestled in a pool of luscious chocolate sauce. It’s the kind of dessert that’s both incredibly easy to make and utterly impressive to serve. Just the other night, I made this for a casual family dinner, and the silence as everyone dug in, followed by contented sighs and requests for seconds, was all the validation I needed. This isn’t just a recipe; it’s a recipe for happiness, a guaranteed crowd-pleaser, and a shortcut to instant comfort. Whether you’re a seasoned baker or just starting out, this Chocolate Self Saucing Pudding recipe is one you absolutely need in your repertoire. Get ready to experience dessert perfection, effortlessly made in your own kitchen.
Ingredients
The beauty of this Chocolate Self Saucing Pudding lies in its use of everyday ingredients, likely already stocked in your pantry. Here’s what you’ll need to create this magical dessert:
- 1 cup (140 grams) plain flour: Also known as all-purpose flour, this forms the base of our pudding, providing structure and a tender crumb. Ensure it’s measured correctly for the best texture.
- ½ cup (105 grams) white sugar: Granulated white sugar adds sweetness to the pudding batter and contributes to its moistness. It also plays a role in the overall texture.
- 1 teaspoon baking powder: This is the leavening agent that will give our pudding a light and airy texture. Make sure your baking powder is fresh for optimal rise.
- ¼ cup cocoa powder: Unsweetened cocoa powder is the heart of the chocolate flavor. Use a good quality cocoa powder for a richer, more intense chocolate taste. Dutch-processed cocoa will give a darker, less bitter flavor, while natural cocoa will provide a brighter chocolate note. Both work wonderfully in this recipe; it comes down to personal preference.
- ¼ teaspoon salt: A pinch of salt might seem insignificant, but it’s crucial for enhancing the flavors of all the other ingredients, especially the chocolate. It balances the sweetness and prevents the pudding from tasting flat.
- 50 grams butter (melted): Melted butter adds richness, moisture, and flavor to the pudding. You can use salted or unsalted butter; if using salted, you might want to slightly reduce the added salt in the dry ingredients, though it’s usually not necessary in this recipe. Make sure the butter is cooled slightly after melting to avoid cooking the egg.
- 1 egg: A large egg acts as a binder, adding structure and richness to the pudding. It also contributes to the moistness and overall texture. Use a room temperature egg for better incorporation.
- 1 teaspoon vanilla extract: Vanilla extract enhances the chocolate flavor and adds a touch of warmth and complexity. Pure vanilla extract is recommended for the best flavor, but vanilla essence can be used in a pinch.
- ½ cup (125 ml) milk: Milk adds moisture to the batter and helps to create a smooth and cohesive mixture. You can use any type of milk – full cream, reduced-fat, or even plant-based milk like almond or soy milk will work well.
For the Topping (Sauce Creation):
- ½ cup (100 grams) brown sugar: Brown sugar is the key to the self-saucing magic. It creates a rich, caramel-like flavor in the sauce and contributes to its beautiful color. Light or dark brown sugar can be used; dark brown sugar will result in a more intense molasses flavor and a darker sauce.
- ¼ cup cocoa powder: An additional measure of cocoa powder in the topping intensifies the chocolate flavor of the sauce and complements the pudding beautifully. Again, use good quality cocoa powder.
- 1 ½ cups (375 ml) boiling water: This is the secret ingredient that transforms the sugary topping into a luscious, flowing chocolate sauce. The boiling water melts the sugars and cocoa, creating the signature sauce as the pudding bakes.
Instructions
Making this Chocolate Self Saucing Pudding is surprisingly simple. Follow these step-by-step instructions for guaranteed success:
- Preheat the Oven and Prepare the Baking Dish: Start by preheating your oven to 180°C/350°F. This ensures the oven is at the correct temperature when you place the pudding in, promoting even baking. While the oven is preheating, prepare your baking dish. A dish approximately 25cm x 20cm (or a similar size, around 9×7 inches) works perfectly. Spray the baking dish generously with cooking spray. This is crucial to prevent the pudding from sticking and to ensure easy removal once baked. You can also lightly grease and flour the dish if you prefer.
- Combine Dry Ingredients for the Pudding: In a medium-sized bowl, whisk together the dry ingredients for the pudding base. This includes 1 cup of plain flour, ½ cup of white sugar, 1 teaspoon of baking powder, ¼ cup of cocoa powder, and ¼ teaspoon of salt. Whisking is important as it not only combines the ingredients but also helps to aerate the flour and break up any lumps of cocoa powder, resulting in a smoother batter. Set this bowl aside.
- Combine Wet Ingredients for the Pudding: In a separate small bowl or a Pyrex jug, whisk together the wet ingredients. This includes 50 grams of melted butter (make sure it’s cooled slightly), 1 egg, 1 teaspoon of vanilla extract, and ½ cup of milk. Whisk these ingredients until they are well combined and slightly emulsified. This ensures that the wet ingredients are evenly distributed throughout the dry ingredients in the next step.
- Combine Wet and Dry Ingredients to Form the Batter: Pour the wet ingredients into the bowl of dry ingredients. Using a spatula or a wooden spoon, gently fold the wet and dry ingredients together until they are just combined. It’s important not to overmix the batter at this stage. Overmixing can develop the gluten in the flour, resulting in a tougher pudding. Mix until you just see no more streaks of dry flour; a few lumps are perfectly fine.
- Pour Batter into the Prepared Baking Dish: Pour the pudding batter evenly into the prepared baking dish. Use a spatula to smooth out the top of the batter, ensuring it’s level. This will help the pudding bake evenly and look more appealing.
- Prepare the Topping: In a small bowl, whisk together the ingredients for the topping: ½ cup of brown sugar and ¼ cup of cocoa powder. Whisk until well combined and there are no lumps of cocoa powder.
- Sprinkle Topping Evenly over the Batter: Sprinkle the brown sugar and cocoa powder mixture evenly over the top of the pudding batter in the baking dish. Ensure it’s distributed across the entire surface for consistent sauce formation.
- Carefully Pour Boiling Water over the Topping: This is the critical step for creating the self-saucing magic. Carefully and slowly pour 1 ½ cups of boiling water over the sprinkled topping. Pour it evenly over the entire surface of the pudding. Do not stir or mix at this stage. The boiling water will seep through the topping and batter, creating the sauce underneath as it bakes.
- Bake the Pudding: Carefully transfer the baking dish to the preheated oven. Bake for 30 minutes, or until the pudding is set around the edges and slightly wobbly in the center. The baking time may vary slightly depending on your oven, so it’s a good idea to check for doneness around the 25-minute mark. The top should look set, and you should see the sauce bubbling around the edges.
- Serve Immediately: Once baked, remove the Chocolate Self Saucing Pudding from the oven and let it stand for a few minutes. Serve it immediately while it’s warm and saucy. It’s absolutely divine served hot, spooned into bowls, and enjoyed with your favorite accompaniments.
- Storing Leftovers: If you happen to have any leftovers (though it’s rare!), they can be stored covered in the refrigerator for up to 3 days. To reheat, gently warm individual portions in the microwave or oven until heated through. The sauce may thicken upon refrigeration, but it will become saucy again when reheated.
Nutrition Facts
While Chocolate Self Saucing Pudding is undeniably a decadent treat, understanding the approximate nutritional content can help you enjoy it mindfully. Please note that these are estimated values and can vary based on specific ingredient brands and portion sizes.
Servings: Approximately 6 servings
Approximate Nutrition Facts per Serving (estimated):
- Calories: 350-450 kcal (depending on portion size and ingredients used)
- Fat: 15-20 grams
- Saturated Fat: 8-12 grams
- Cholesterol: 50-70 mg
- Sodium: 150-250 mg
- Carbohydrates: 50-60 grams
- Sugar: 35-45 grams
- Protein: 5-7 grams
- Fiber: 2-3 grams
Important Note: This dessert is intended to be enjoyed as an occasional treat due to its higher sugar and fat content. It’s always best to enjoy desserts in moderation as part of a balanced diet.
Preparation Time
One of the many appeals of Chocolate Self Saucing Pudding is its speed and ease of preparation.
- Prep Time: 10 minutes
- Cook Time: 30 minutes
- Total Time: 40 minutes
From start to finish, you can have a warm, comforting, and utterly delicious dessert on the table in under 45 minutes. This makes it perfect for weeknight treats, spontaneous gatherings, or whenever you need a chocolate fix in a hurry.
How to Serve
Chocolate Self Saucing Pudding is delicious on its own, but it truly shines when paired with complementary flavors and textures. Here are some delightful serving suggestions:
- Vanilla Ice Cream: The classic pairing! The cold, creamy vanilla ice cream melts slightly into the warm pudding and sauce, creating a heavenly contrast of temperatures and textures.
- Whipped Cream: A dollop of freshly whipped cream adds lightness and airiness to the rich pudding. You can use regular whipped cream or lightly sweetened whipped cream.
- Custard: Warm vanilla custard poured over the pudding enhances the creamy texture and adds another layer of comforting warmth.
- Berries: Fresh berries like raspberries, strawberries, or blueberries provide a burst of freshness and a touch of tartness that cuts through the richness of the chocolate.
- Chocolate Shavings: For an extra touch of chocolate indulgence, sprinkle dark or milk chocolate shavings over the top of the pudding.
- Dusting of Cocoa Powder: A light dusting of cocoa powder adds visual appeal and enhances the chocolate aroma.
- Caramel Sauce Drizzle: For an even more decadent experience, drizzle a little caramel sauce over the pudding and ice cream or whipped cream.
- Nuts: Toasted nuts like chopped walnuts, pecans, or hazelnuts add a delightful crunch and nutty flavor that complements the chocolate.
Additional Tips for Perfect Chocolate Self Saucing Pudding
To ensure your Chocolate Self Saucing Pudding is a resounding success every time, here are some helpful tips:
- Don’t Overmix the Batter: As mentioned in the instructions, avoid overmixing the batter once you combine the wet and dry ingredients. Overmixing develops the gluten in the flour, which can result in a tougher, less tender pudding. Mix just until the ingredients are combined and no streaks of dry flour remain. A few lumps are perfectly acceptable.
- Use Boiling Water: It’s crucial to use boiling water for pouring over the topping. The boiling water is what melts the sugar and cocoa in the topping and creates the luscious sauce underneath the pudding as it bakes. Using lukewarm or cold water will not produce the same self-saucing effect.
- Ensure Even Baking Dish Size: Using a baking dish of the recommended size (approximately 25cm x 20cm or similar) is important for even baking and proper sauce distribution. If the dish is too large, the pudding might spread out too thinly and the sauce might be less concentrated. If the dish is too small, it might take longer to bake and could overflow.
- Check for Doneness Correctly: To check if the pudding is done, gently poke the center with a skewer or toothpick. It should come out with moist crumbs attached, but not wet batter. The edges should be set, and the center should still be slightly wobbly. Don’t overbake, as this can make the pudding dry.
- Adjust Sugar Levels to Taste: While this recipe provides a balanced sweetness, you can adjust the sugar levels to suit your personal preference. If you prefer a less sweet pudding, you can slightly reduce the white sugar in the pudding batter or the brown sugar in the topping. For a sweeter pudding, you can slightly increase the sugar, but be mindful not to make it overly sweet.
Frequently Asked Questions (FAQ) about Chocolate Self Saucing Pudding
Here are some common questions and answers to help you master this delightful dessert:
Q1: Can I use different types of flour?
A: While plain flour (all-purpose flour) is recommended for this recipe for the best texture, you can experiment with other types of flour with some adjustments. Whole wheat flour can be used for a slightly nuttier flavor, but it may result in a denser pudding. If using whole wheat flour, you might want to slightly increase the liquid (milk) to compensate for its higher absorption. Gluten-free flour blends can also be used, but ensure they are designed for baking and contain a binder like xanthan gum to mimic gluten’s structure. Always check the specific gluten-free flour blend’s recommendations for substitutions.
Q2: Can I substitute the butter with oil?
A: Yes, you can substitute the melted butter with a neutral-flavored oil like vegetable oil or canola oil in a pinch. However, butter contributes significantly to the flavor and richness of the pudding. Using oil will result in a slightly less flavorful pudding, though still moist. For a richer flavor, sticking with butter is recommended. If you are dairy-free, you can use a plant-based butter alternative.
Q3: Can I make this pudding ahead of time?
A: Chocolate Self Saucing Pudding is best enjoyed fresh and warm, straight from the oven. However, you can prepare the dry and wet ingredients separately ahead of time. Store the dry ingredients in an airtight container and the wet ingredients covered in the refrigerator. When ready to bake, combine them as per the instructions. Baked leftovers can be stored in the fridge for up to 3 days and reheated. The texture might be slightly different after refrigeration and reheating, but it will still be delicious.
Q4: What if I don’t have brown sugar? Can I use white sugar for the topping?
A: Brown sugar is crucial for the characteristic flavor and texture of the sauce in Chocolate Self Saucing Pudding. It provides a caramel-like depth that white sugar lacks. While you can technically use white sugar in the topping in an emergency, the sauce will be significantly different – less rich, less flavorful, and potentially thinner. If you must substitute, try adding a teaspoon of molasses to the white sugar to mimic some of the brown sugar’s flavor. However, for the best results, brown sugar is highly recommended.
Q5: My pudding is not saucy enough. What did I do wrong?
A: Several factors can contribute to a pudding that is not saucy enough:
- Not enough boiling water: Ensure you are using the correct amount of boiling water (1 ½ cups or 375 ml) and that it is truly boiling when poured over the topping.
- Uneven pouring of boiling water: Make sure you pour the boiling water evenly over the entire surface of the topping, not just in one spot.
- Oven temperature too low: If your oven temperature is too low, the pudding might not bake properly and the sauce might not form correctly. Ensure your oven is accurately preheated to 180°C/350°F.
- Baking dish too large: If you use a baking dish that is too large, the sauce might spread out too thinly and appear less abundant. Use a dish of the recommended size (approximately 25cm x 20cm or similar).
- Overbaking: Overbaking can dry out the pudding and reduce the amount of sauce. Check for doneness around 25-30 minutes and remove it from the oven as soon as it’s set around the edges and slightly wobbly in the center.
By following this detailed recipe, tips, and FAQs, you are well-equipped to create a truly exceptional Chocolate Self Saucing Pudding that will impress everyone who tastes it. Enjoy the delightful comfort and chocolatey goodness of this classic dessert!
Print
Chocolate Self Saucing Pudding Recipe
Ingredients
- 1 cup (140 grams) plain flour: Also known as all-purpose flour, this forms the base of our pudding, providing structure and a tender crumb. Ensure it’s measured correctly for the best texture.
- ½ cup (105 grams) white sugar: Granulated white sugar adds sweetness to the pudding batter and contributes to its moistness. It also plays a role in the overall texture.
- 1 teaspoon baking powder: This is the leavening agent that will give our pudding a light and airy texture. Make sure your baking powder is fresh for optimal rise.
- ¼ cup cocoa powder: Unsweetened cocoa powder is the heart of the chocolate flavor. Use a good quality cocoa powder for a richer, more intense chocolate taste. Dutch-processed cocoa will give a darker, less bitter flavor, while natural cocoa will provide a brighter chocolate note. Both work wonderfully in this recipe; it comes down to personal preference.
- ¼ teaspoon salt: A pinch of salt might seem insignificant, but it’s crucial for enhancing the flavors of all the other ingredients, especially the chocolate. It balances the sweetness and prevents the pudding from tasting flat.
- 50 grams butter (melted): Melted butter adds richness, moisture, and flavor to the pudding. You can use salted or unsalted butter; if using salted, you might want to slightly reduce the added salt in the dry ingredients, though it’s usually not necessary in this recipe. Make sure the butter is cooled slightly after melting to avoid cooking the egg.
- 1 egg: A large egg acts as a binder, adding structure and richness to the pudding. It also contributes to the moistness and overall texture. Use a room temperature egg for better incorporation.
- 1 teaspoon vanilla extract: Vanilla extract enhances the chocolate flavor and adds a touch of warmth and complexity. Pure vanilla extract is recommended for the best flavor, but vanilla essence can be used in a pinch.
- ½ cup (125 ml) milk: Milk adds moisture to the batter and helps to create a smooth and cohesive mixture. You can use any type of milk – full cream, reduced-fat, or even plant-based milk like almond or soy milk will work well.
For the Topping (Sauce Creation):
- ½ cup (100 grams) brown sugar: Brown sugar is the key to the self-saucing magic. It creates a rich, caramel-like flavor in the sauce and contributes to its beautiful color. Light or dark brown sugar can be used; dark brown sugar will result in a more intense molasses flavor and a darker sauce.
- ¼ cup cocoa powder: An additional measure of cocoa powder in the topping intensifies the chocolate flavor of the sauce and complements the pudding beautifully. Again, use good quality cocoa powder.
- 1 ½ cups (375 ml) boiling water: This is the secret ingredient that transforms the sugary topping into a luscious, flowing chocolate sauce. The boiling water melts the sugars and cocoa, creating the signature sauce as the pudding bakes.
Instructions
- Preheat the Oven and Prepare the Baking Dish: Start by preheating your oven to 180°C/350°F. This ensures the oven is at the correct temperature when you place the pudding in, promoting even baking. While the oven is preheating, prepare your baking dish. A dish approximately 25cm x 20cm (or a similar size, around 9×7 inches) works perfectly. Spray the baking dish generously with cooking spray. This is crucial to prevent the pudding from sticking and to ensure easy removal once baked. You can also lightly grease and flour the dish if you prefer.
- Combine Dry Ingredients for the Pudding: In a medium-sized bowl, whisk together the dry ingredients for the pudding base. This includes 1 cup of plain flour, ½ cup of white sugar, 1 teaspoon of baking powder, ¼ cup of cocoa powder, and ¼ teaspoon of salt. Whisking is important as it not only combines the ingredients but also helps to aerate the flour and break up any lumps of cocoa powder, resulting in a smoother batter. Set this bowl aside.
- Combine Wet Ingredients for the Pudding: In a separate small bowl or a Pyrex jug, whisk together the wet ingredients. This includes 50 grams of melted butter (make sure it’s cooled slightly), 1 egg, 1 teaspoon of vanilla extract, and ½ cup of milk. Whisk these ingredients until they are well combined and slightly emulsified. This ensures that the wet ingredients are evenly distributed throughout the dry ingredients in the next step.
- Combine Wet and Dry Ingredients to Form the Batter: Pour the wet ingredients into the bowl of dry ingredients. Using a spatula or a wooden spoon, gently fold the wet and dry ingredients together until they are just combined. It’s important not to overmix the batter at this stage. Overmixing can develop the gluten in the flour, resulting in a tougher pudding. Mix until you just see no more streaks of dry flour; a few lumps are perfectly fine.
- Pour Batter into the Prepared Baking Dish: Pour the pudding batter evenly into the prepared baking dish. Use a spatula to smooth out the top of the batter, ensuring it’s level. This will help the pudding bake evenly and look more appealing.
- Prepare the Topping: In a small bowl, whisk together the ingredients for the topping: ½ cup of brown sugar and ¼ cup of cocoa powder. Whisk until well combined and there are no lumps of cocoa powder.
- Sprinkle Topping Evenly over the Batter: Sprinkle the brown sugar and cocoa powder mixture evenly over the top of the pudding batter in the baking dish. Ensure it’s distributed across the entire surface for consistent sauce formation.
- Carefully Pour Boiling Water over the Topping: This is the critical step for creating the self-saucing magic. Carefully and slowly pour 1 ½ cups of boiling water over the sprinkled topping. Pour it evenly over the entire surface of the pudding. Do not stir or mix at this stage. The boiling water will seep through the topping and batter, creating the sauce underneath as it bakes.
- Bake the Pudding: Carefully transfer the baking dish to the preheated oven. Bake for 30 minutes, or until the pudding is set around the edges and slightly wobbly in the center. The baking time may vary slightly depending on your oven, so it’s a good idea to check for doneness around the 25-minute mark. The top should look set, and you should see the sauce bubbling around the edges.
- Serve Immediately: Once baked, remove the Chocolate Self Saucing Pudding from the oven and let it stand for a few minutes. Serve it immediately while it’s warm and saucy. It’s absolutely divine served hot, spooned into bowls, and enjoyed with your favorite accompaniments.
- Storing Leftovers: If you happen to have any leftovers (though it’s rare!), they can be stored covered in the refrigerator for up to 3 days. To reheat, gently warm individual portions in the microwave or oven until heated through. The sauce may thicken upon refrigeration, but it will become saucy again when reheated.
Nutrition
- Serving Size: One Normal Portion
- Calories: 350-450 kcal
- Sugar: 35-45 grams
- Sodium: 150-250 mg
- Fat: 15-20 grams
- Saturated Fat: 8-12 grams
- Carbohydrates: 50-60 grams
- Fiber: 2-3 grams
- Protein: 5-7 grams
- Cholesterol: 50-70 mg


