


There are certain desserts that instantly transport you to a place of warmth, comfort, and cherished memories, and for my family, Classic Southern Banana Pudding is unequivocally one of them. The first time I made this specific recipe, following the old-fashioned method of a homemade custard and a fluffy, golden meringue, the reaction was pure magic. My kids, usually picky eaters, were hovering around the kitchen, their noses twitching at the sweet aroma wafting from the oven. My husband, a Southerner born and bred, declared it “just like Grandma used to make, only maybe a tiny bit better” – the highest praise imaginable! The creamy, cool custard, punctuated by sweet, yielding bananas and softened vanilla wafers, all crowned with that cloud-like meringue, created a symphony of textures and flavors that had everyone reaching for seconds. It’s more than just a dessert; it’s a centerpiece, a conversation starter, and a guaranteed crowd-pleaser that never fails to bring smiles to our faces. This recipe has since become a staple for family gatherings, holidays, and those “just because” moments when we crave a taste of pure, unadulterated Southern comfort.
The Enduring Charm of Classic Southern Banana Pudding
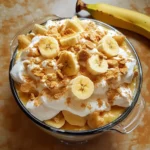
Southern Banana Pudding is not merely a dessert; it’s a culinary institution, a cornerstone of Southern cuisine that evokes nostalgia, comfort, and the sweet taste of tradition. For generations, this beloved concoction has graced potluck tables, family reunions, church suppers, and holiday feasts, each spoonful a testament to simple ingredients transformed into something truly special. What makes it so universally adored? Perhaps it’s the harmonious blend of creamy, vanilla-infused custard, the tender sweetness of ripe bananas, the comforting chewiness of softened vanilla wafers, and often, the ethereal crown of a lightly golden, toasted meringue. It’s a dessert that doesn’t rely on fancy techniques or exotic ingredients, but rather on the quality of its components and the love with which it’s assembled. This classic recipe stays true to those roots, delivering an authentic taste experience that will transport you straight to a sun-drenched Southern porch.
Why This Classic Southern Banana Pudding Recipe Steals the Show
In a world brimming with quick fixes and instant pudding mixes, taking the time to craft a homemade custard from scratch elevates banana pudding from a simple dessert to an extraordinary culinary experience. This recipe champions that traditional approach.
- The Custard is Queen: Forget the box! The heart of this recipe is a rich, velvety, homemade vanilla custard. Cooked slowly on the stovetop, it develops a depth of flavor and a luxurious texture that store-bought versions simply cannot replicate. The use of real egg yolks contributes to its richness and beautiful pale yellow hue.
- Perfectly Balanced Sweetness: This recipe strikes the perfect balance – sweet enough to be a treat, but not so cloying that it overwhelms the natural sweetness of the bananas or the delicate vanilla notes.
- Textural Masterpiece: The interplay of textures is key to exceptional banana pudding. You get the smooth, cool custard, the soft, almost cake-like Nilla wafers that have absorbed some of the custard’s moisture, the yielding slices of fresh banana, and (if you opt for it) the light, airy meringue.
- Authentic Meringue Topping: While some modern versions opt for whipped cream, the classic Southern banana pudding is often adorned with a beautiful, billowy meringue, baked to a delicate golden brown. This recipe provides clear instructions for achieving that perfect, sweet, and stable meringue that adds an extra layer of elegance and traditional charm.
- Timeless Appeal: This isn’t a trendy dessert that will be forgotten next season. It’s a classic for a reason – its flavors and textures are universally loved and have stood the test of time.
A Culinary Journey: The History of Banana Pudding
While bananas themselves have been cultivated for thousands of years, their journey into the American dessert landscape, particularly into banana pudding, is a more recent story, intertwined with advancements in transportation and marketing.
Bananas began to be imported into the United States in larger quantities in the late 19th century, primarily through port cities like New Orleans. Initially, they were an exotic and somewhat expensive fruit. As transportation improved and banana plantations in Central and South America expanded, bananas became more accessible and affordable to the average American household.
The concept of a “pudding” in the late 19th and early 20th centuries often referred to a trifle-like dessert, involving layers of cake or biscuits, fruit, and a custard or cream. Early versions of banana pudding likely followed this model, using sponge cake or ladyfingers.
The real game-changer for banana pudding as we know it today was the rise of commercially produced vanilla wafers. Nabisco (then the National Biscuit Company) heavily promoted their “Vanilla Wafers” (now Nilla Wafers) in the early 20th century. Around the 1920s, recipes featuring vanilla wafers, bananas, and custard started appearing in newspapers and company cookbooks. Nabisco was instrumental in popularizing banana pudding by printing a recipe on their Nilla Wafers box in the 1940s, cementing the cookie’s role as the quintessential base for this dessert.
The homemade cooked custard was a staple in Southern kitchens, often made with readily available ingredients like eggs, milk, sugar, and flour or cornstarch as a thickener. Combined with the increasingly popular bananas and the convenient vanilla wafers, banana pudding quickly became a Southern favorite. Its simplicity, comforting nature, and ability to feed a crowd made it ideal for the region’s strong tradition of communal dining. The meringue topping, a common feature on many Southern pies (like lemon meringue or chocolate meringue), naturally found its way atop banana pudding, adding a touch of elegance and using up the egg whites left over from making the custard.
Today, while variations exist (some using instant pudding, others topped with whipped cream), the “classic” Southern Banana Pudding, with its homemade cooked custard, layers of Nilla wafers and bananas, and a billowy meringue, remains a cherished icon of Southern culinary heritage.
Gather Your Ingredients: What You’ll Need for Perfect Banana Pudding
Crafting the perfect Southern Banana Pudding starts with quality ingredients. Here’s what you’ll need to assemble this masterpiece. Precision in measurement is key, especially for the custard, to achieve that signature creamy texture.
For the Custard:
- ¾ cup granulated sugar
- ⅓ cup all-purpose flour
- ¼ teaspoon salt
- 3 large egg yolks (reserve whites for meringue)
- 2 ½ cups whole milk (do not use skim or low-fat for best results)
- 1 ½ teaspoons pure vanilla extract
- 2 tablespoons unsalted butter, cut into small pieces
For Assembly:
- 1 box (11-12 ounces) Nilla Wafers (or similar vanilla wafer cookies)
- 4-5 ripe but firm bananas, sliced about ¼-inch thick (you want them sweet, with a few brown spots on the peel, but not mushy)
For the Meringue Topping (Optional, but Classic):
- 3 large egg whites (from the eggs above), at room temperature
- ¼ teaspoon cream of tartar
- 6 tablespoons granulated sugar (or superfine sugar for easier dissolving)
- ½ teaspoon pure vanilla extract
Equipment Needed:
- Medium saucepan (for custard)
- Whisk
- Spatula
- 2 to 2.5-quart baking dish or trifle bowl
- Electric mixer (handheld or stand mixer) for meringue
- Clean, grease-free bowl for meringue
Step-by-Step Instructions: Crafting Your Southern Banana Pudding Masterpiece
Follow these steps carefully, and you’ll be rewarded with a banana pudding that’s the talk of the table!
Part 1: Making the Luscious Homemade Custard
- Combine Dry Ingredients: In a medium, heavy-bottomed saucepan, whisk together ¾ cup of granulated sugar, ⅓ cup of all-purpose flour, and ¼ teaspoon of salt. This prevents lumps when you add the liquid.
- Prepare Egg Yolks: In a separate small bowl, lightly whisk the 3 large egg yolks.
- Gradually Add Milk: Slowly pour the 2 ½ cups of whole milk into the saucepan with the dry ingredients, whisking constantly until smooth and fully combined.
- Cook the Custard: Place the saucepan over medium heat. Cook, stirring constantly and scraping the bottom and corners of the pan with a heatproof spatula or whisk to prevent scorching and lumps. Bring the mixture to a gentle boil. Continue to cook and stir for 1-2 minutes more, or until the custard has noticeably thickened to a pudding-like consistency. It should coat the back of a spoon.
- Temper the Egg Yolks: This is a crucial step to prevent the yolks from scrambling. Remove the saucepan from the heat. Very slowly, pour about ½ cup of the hot milk mixture into the whisked egg yolks, whisking the yolks vigorously as you pour. This gently warms the yolks.
- Combine and Finish Cooking: Pour the tempered egg yolk mixture back into the saucepan with the remaining milk mixture. Return the saucepan to medium heat. Cook, stirring constantly, for another 2-3 minutes, until the custard is thick, bubbly around the edges, and has reached at least 160°F (71°C) on an instant-read thermometer. Do not overboil.
- Add Flavor and Richness: Remove the saucepan from the heat. Stir in the 2 tablespoons of unsalted butter (cut into pieces) and 1 ½ teaspoons of pure vanilla extract until the butter is melted and the custard is smooth and glossy.
- Cool Slightly (Optional but Recommended): To prevent the custard from cooking the bananas too much upon assembly, you can let it cool for about 10-15 minutes, stirring occasionally to prevent a skin from forming. Alternatively, press plastic wrap directly onto the surface of the custard while it cools.
Part 2: Assembling the Banana Pudding
- Prepare Your Dish: Choose a 2 to 2.5-quart baking dish (an 8×8 inch or 9×9 inch square dish, or a similar sized oval/round dish works well) or a glass trifle bowl for a beautiful presentation.
- First Layer of Wafers: Arrange a single layer of Nilla Wafers to cover the bottom of your chosen dish. You can break some wafers to fill in any gaps.
- First Layer of Bananas: Top the wafers with a single layer of sliced bananas. Try to cover the wafers as evenly as possible.
- First Layer of Custard: Pour about one-third of the warm (or slightly cooled) custard evenly over the bananas and wafers. Gently spread with a spatula if needed.
- Repeat Layers: Create another layer of Nilla Wafers, followed by another layer of sliced bananas, and then another third of the custard.
- Final Layers: Add a final layer of Nilla Wafers. Top with the remaining sliced bananas (if you have any left and want extra banana flavor, otherwise end with wafers before the final custard). Pour the remaining custard over the top, ensuring all wafers and bananas are covered. You might reserve a few whole wafers or crushed wafers for garnish if not making meringue.
Part 3: The Crowning Glory – Making the Meringue (If Using)
If you’re skipping the meringue, you can cover the pudding with plastic wrap (let it cool a bit first if still very hot) and refrigerate. Serve chilled, perhaps with a dollop of fresh whipped cream.
- Preheat Oven: Preheat your oven to 350°F (175°C).
- Beat Egg Whites: In a very clean, grease-free bowl (glass or metal is best), beat the 3 large room-temperature egg whites and ¼ teaspoon of cream of tartar with an electric mixer on medium-high speed until soft peaks form. Soft peaks will droop over when you lift the beaters.
- Gradually Add Sugar: With the mixer still running, gradually add the 6 tablespoons of granulated sugar, one tablespoon at a time, beating well after each addition. Continue to beat until the meringue is stiff, glossy, and the sugar is completely dissolved. (Test by rubbing a bit between your fingers; it should feel smooth, not gritty).
- Add Vanilla: Beat in the ½ teaspoon of pure vanilla extract until just combined.
- Spread Meringue: Immediately spread the meringue evenly over the top of the warm banana pudding, ensuring it touches the edges of the dish all the way around. This helps prevent the meringue from shrinking. Create decorative swirls and peaks with the back of a spoon or a spatula.
- Bake: Bake in the preheated 350°F (175°C) oven for 10-15 minutes, or until the meringue is lightly golden brown on the peaks. Keep a close eye on it, as meringue can brown quickly.
- Cool and Chill: Remove the banana pudding from the oven. Let it cool on a wire rack at room temperature for at least 1 hour. Then, cover loosely with plastic wrap (try not to let it touch the meringue) and refrigerate for at least 4-6 hours, or preferably overnight, before serving. Chilling allows the flavors to meld and the pudding to set properly.
Nutrition Facts: A Look at What’s Inside
- Servings: This recipe typically yields 8-10 servings.
- Calories per serving (approximate): Around 350-450 calories per serving, depending on the exact serving size and if meringue is included. This is an estimate; actual values can vary based on specific ingredients and portion sizes.
(Note: This is a dessert and should be enjoyed in moderation as part of a balanced diet. The richness comes from whole milk, egg yolks, and sugar, which are essential for its classic taste and texture.)
Time Commitment: Preparation and Chill Time
Understanding the time involved helps in planning this delightful dessert:
- Active Preparation Time:
- Custard: 20-25 minutes
- Assembly: 10-15 minutes
- Meringue (if using): 10-15 minutes
- Total Active Prep Time: Approximately 40-55 minutes
- Baking Time (for meringue): 10-15 minutes
- Cooling & Chilling Time:
- Initial cooling at room temperature: At least 1 hour
- Refrigeration: Minimum 4-6 hours, ideally overnight (8+ hours) for best flavor and texture.
- Total Time (from start to serving): Minimum 5.5 hours, but best results are achieved with closer to 10+ hours due to extended chilling.
This is not a last-minute dessert, but the effort and patience are richly rewarded!
How to Serve Your Southern Banana Pudding Like a Pro
Serving banana pudding is generally straightforward, but a few touches can enhance the experience:
- Temperature is Key: Banana pudding is almost universally best served chilled. The coolness enhances the creamy texture of the custard and provides a refreshing contrast, especially after a hearty meal.
- Serving Vessel Options:
- Trifle Bowl: If you assembled it in a glass trifle bowl, serve it directly from there. The clear glass showcases the beautiful layers. Use a large serving spoon to scoop out portions, ensuring you get all the layers.
- Baking Dish: If made in a baking dish, you can also serve directly from the dish.
- Individual Portions: For a more elegant presentation or portion control, you can assemble the banana pudding in individual ramekins, small glass bowls, or even mason jars. If doing this, you might need to adjust layering slightly and potentially use broken wafers to fit smaller containers.
- Garnishes (Optional):
- If you skipped the meringue, a dollop of freshly whipped cream (lightly sweetened) is a popular alternative.
- A sprinkle of crushed Nilla Wafers on top just before serving can add a little textural contrast.
- A single, fresh Nilla Wafer stuck into each portion.
- Avoid garnishing with fresh banana slices far in advance, as they will brown. If you must, toss them in a tiny bit of lemon juice and add right before serving.
- When to Serve:
- It’s an excellent dessert for after a Southern-style meal (think fried chicken, collard greens, cornbread).
- Perfect for potlucks, barbecues, and family gatherings as it can be made ahead.
- A wonderful treat for holidays like Easter, Thanksgiving, or Christmas.
- Portioning: Use a large spoon that can reach the bottom of the dish to ensure each serving gets a good mix of custard, bananas, and wafers. Be gentle if serving with meringue to keep it looking its best.
Additional Tips for Banana Pudding Perfection (5 Tips)
- Banana Ripeness Matters: Use bananas that are ripe (yellow peel with a few brown speckles) but still firm. Overripe, mushy bananas will break down too much and can make the pudding watery. Underripe bananas will lack sweetness and have a starchy texture.
- Prevent a Weeping Meringue: To help prevent your meringue from “weeping” (developing sugary liquid beads or separating from the pudding), ensure the sugar is fully dissolved into the egg whites. Also, spreading the meringue onto a still-warm custard and sealing it to the edges of the dish helps stabilize it. Room temperature egg whites also whip up better.
- Embrace the Soft Wafer: Don’t be afraid of the Nilla Wafers softening! That’s part of the charm and classic texture of Southern Banana Pudding. They should absorb the custard and become tender, almost cake-like. Arrange them snugly but don’t pack them too tightly.
- Custard Consistency is Crucial: Make sure your custard is properly thickened on the stovetop. If it’s too thin, your pudding will be runny. Constant stirring and cooking until it coats the back of a spoon (and reaches the correct temperature if using a thermometer) are vital. Tempering the eggs correctly also ensures a smooth, not scrambled, result.
- Patience with Chilling: This cannot be stressed enough. Banana pudding needs time to chill. This allows the custard to fully set, the flavors to meld beautifully, and the wafers to soften perfectly. Rushing the chilling process will result in a less cohesive and less flavorful pudding. Overnight is truly best.
Frequently Asked Questions (FAQ) about Southern Banana Pudding
- Q: Can I use store-bought instant vanilla pudding mix instead of making homemade custard?
A: While you can, the taste and texture will be significantly different and less authentic. Homemade custard provides a richness, depth of flavor, and creamy consistency that instant pudding can’t replicate. For a truly “Classic Southern Banana Pudding,” homemade custard is highly recommended. - Q: How do I prevent my bananas from turning brown in the pudding?
A: Bananas will naturally oxidize and brown when exposed to air. Layering them quickly and covering them completely with custard helps minimize this. Some people toss banana slices in a tiny bit of lemon juice, but this can alter the flavor slightly. Honestly, a little browning within the layers is normal and doesn’t affect the taste much once everything melds. The key is good coverage with custard. - Q: My meringue always shrinks or weeps. What am I doing wrong?
A: Meringue can be finicky! For shrinkage, ensure you spread the meringue so it touches and seals against the edges of the dish all around. For weeping (liquid beads), make sure your sugar is completely dissolved in the egg whites (rub a bit between your fingers – it should be smooth, not gritty). Also, humidity can affect meringue; try to make it on a less humid day if possible. Applying meringue to warm custard can also help. - Q: How long does banana pudding last in the refrigerator? Can I freeze it?
A: Banana pudding is best enjoyed within 2-3 days when stored covered in the refrigerator. After that, the bananas can become overly mushy and the wafers too soggy. Freezing banana pudding is generally not recommended, as the custard can separate and the texture of the bananas and wafers will degrade significantly upon thawing. - Q: Can I make banana pudding ahead of time?
A: Absolutely! In fact, it’s best made ahead. Assembling it the day before you plan to serve it allows all the flavors to meld and the pudding to chill thoroughly, resulting in the perfect texture and taste. If making meringue, it’s generally best to add and bake it on the day you plan to serve, or the day before at most, as meringue can sometimes weep or soften over longer storage. However, many make it entirely the day before with good results.
Classic Southern Banana Pudding Recipe
Ingredients
For the Custard:
- ¾ cup granulated sugar
- ⅓ cup all-purpose flour
- ¼ teaspoon salt
- 3 large egg yolks (reserve whites for meringue)
- 2 ½ cups whole milk (do not use skim or low-fat for best results)
- 1 ½ teaspoons pure vanilla extract
- 2 tablespoons unsalted butter, cut into small pieces
For Assembly:
- 1 box (11-12 ounces) Nilla Wafers (or similar vanilla wafer cookies)
- 4–5 ripe but firm bananas, sliced about ¼-inch thick (you want them sweet, with a few brown spots on the peel, but not mushy)
For the Meringue Topping (Optional, but Classic):
- 3 large egg whites (from the eggs above), at room temperature
- ¼ teaspoon cream of tartar
- 6 tablespoons granulated sugar (or superfine sugar for easier dissolving)
- ½ teaspoon pure vanilla extract
Instructions
Part 1: Making the Luscious Homemade Custard
- Combine Dry Ingredients: In a medium, heavy-bottomed saucepan, whisk together ¾ cup of granulated sugar, ⅓ cup of all-purpose flour, and ¼ teaspoon of salt. This prevents lumps when you add the liquid.
- Prepare Egg Yolks: In a separate small bowl, lightly whisk the 3 large egg yolks.
- Gradually Add Milk: Slowly pour the 2 ½ cups of whole milk into the saucepan with the dry ingredients, whisking constantly until smooth and fully combined.
- Cook the Custard: Place the saucepan over medium heat. Cook, stirring constantly and scraping the bottom and corners of the pan with a heatproof spatula or whisk to prevent scorching and lumps. Bring the mixture to a gentle boil. Continue to cook and stir for 1-2 minutes more, or until the custard has noticeably thickened to a pudding-like consistency. It should coat the back of a spoon.
- Temper the Egg Yolks: This is a crucial step to prevent the yolks from scrambling. Remove the saucepan from the heat. Very slowly, pour about ½ cup of the hot milk mixture into the whisked egg yolks, whisking the yolks vigorously as you pour. This gently warms the yolks.
- Combine and Finish Cooking: Pour the tempered egg yolk mixture back into the saucepan with the remaining milk mixture. Return the saucepan to medium heat. Cook, stirring constantly, for another 2-3 minutes, until the custard is thick, bubbly around the edges, and has reached at least 160°F (71°C) on an instant-read thermometer. Do not overboil.
- Add Flavor and Richness: Remove the saucepan from the heat. Stir in the 2 tablespoons of unsalted butter (cut into pieces) and 1 ½ teaspoons of pure vanilla extract until the butter is melted and the custard is smooth and glossy.
- Cool Slightly (Optional but Recommended): To prevent the custard from cooking the bananas too much upon assembly, you can let it cool for about 10-15 minutes, stirring occasionally to prevent a skin from forming. Alternatively, press plastic wrap directly onto the surface of the custard while it cools.
Part 2: Assembling the Banana Pudding
- Prepare Your Dish: Choose a 2 to 2.5-quart baking dish (an 8×8 inch or 9×9 inch square dish, or a similar sized oval/round dish works well) or a glass trifle bowl for a beautiful presentation.
- First Layer of Wafers: Arrange a single layer of Nilla Wafers to cover the bottom of your chosen dish. You can break some wafers to fill in any gaps.
- First Layer of Bananas: Top the wafers with a single layer of sliced bananas. Try to cover the wafers as evenly as possible.
- First Layer of Custard: Pour about one-third of the warm (or slightly cooled) custard evenly over the bananas and wafers. Gently spread with a spatula if needed.
- Repeat Layers: Create another layer of Nilla Wafers, followed by another layer of sliced bananas, and then another third of the custard.
- Final Layers: Add a final layer of Nilla Wafers. Top with the remaining sliced bananas (if you have any left and want extra banana flavor, otherwise end with wafers before the final custard). Pour the remaining custard over the top, ensuring all wafers and bananas are covered. You might reserve a few whole wafers or crushed wafers for garnish if not making meringue.
Part 3: The Crowning Glory – Making the Meringue (If Using)
If you’re skipping the meringue, you can cover the pudding with plastic wrap (let it cool a bit first if still very hot) and refrigerate. Serve chilled, perhaps with a dollop of fresh whipped cream.
- Preheat Oven: Preheat your oven to 350°F (175°C).
- Beat Egg Whites: In a very clean, grease-free bowl (glass or metal is best), beat the 3 large room-temperature egg whites and ¼ teaspoon of cream of tartar with an electric mixer on medium-high speed until soft peaks form. Soft peaks will droop over when you lift the beaters.
- Gradually Add Sugar: With the mixer still running, gradually add the 6 tablespoons of granulated sugar, one tablespoon at a time, beating well after each addition. Continue to beat until the meringue is stiff, glossy, and the sugar is completely dissolved. (Test by rubbing a bit between your fingers; it should feel smooth, not gritty).
- Add Vanilla: Beat in the ½ teaspoon of pure vanilla extract until just combined.
- Spread Meringue: Immediately spread the meringue evenly over the top of the warm banana pudding, ensuring it touches the edges of the dish all the way around. This helps prevent the meringue from shrinking. Create decorative swirls and peaks with the back of a spoon or a spatula.
- Bake: Bake in the preheated 350°F (175°C) oven for 10-15 minutes, or until the meringue is lightly golden brown on the peaks. Keep a close eye on it, as meringue can brown quickly.
- Cool and Chill: Remove the banana pudding from the oven. Let it cool on a wire rack at room temperature for at least 1 hour. Then, cover loosely with plastic wrap (try not to let it touch the meringue) and refrigerate for at least 4-6 hours, or preferably overnight, before serving. Chilling allows the flavors to meld and the pudding to set properly.
Nutrition
- Serving Size: One Normal Portion
- Calories: 350-450


