


The first time the aroma of toasted coconut and bubbling caramel filled my kitchen while making this Coconut Caramel Flan, I knew I was onto something special. It wasn’t just the scent; it was the promise of a dessert that’s both exotically tropical and comfortingly classic. When I finally unmolded it, revealing that glistening, amber caramel cascading down the sides of the creamy, coconut-infused custard, my family gathered around with an almost reverent silence. The first bite was pure bliss – a silky, rich texture with a deep caramel counterpoint, and the unmistakable, gentle sweetness of coconut weaving through it all. It’s since become a requested favorite for special occasions, potlucks, and honestly, any time we crave a truly show-stopping yet surprisingly straightforward dessert. This isn’t just a recipe; it’s an experience, a little slice of paradise that I’m thrilled to share with you.
The Allure of Coconut Caramel Flan: A Tropical Dream
Flan, in its classic form, is a masterpiece of simplicity: eggs, milk, sugar, and vanilla transformed into a delicate, wobbly custard crowned with a liquid caramel crown. But when you introduce coconut into this equation, something magical happens. The inherent richness of coconut milk and the subtle chew of shredded coconut elevate the humble flan to new heights, lending it a distinctly tropical personality. The caramel, with its deep, slightly bitter notes, perfectly balances the sweetness of the coconut and the creamy custard, creating a symphony of flavors and textures that dance on the palate.
This Coconut Caramel Flan recipe is designed to be as foolproof as possible, guiding you through each step to ensure a perfectly smooth, beautifully set dessert every single time. It’s a dessert that looks incredibly impressive, making it ideal for entertaining, yet its preparation is methodical and satisfying. The anticipation as it chills, the dramatic moment of unmolding, and the first luscious spoonful make it a culinary adventure worth embarking on. Whether you’re a seasoned flan-maker or a curious novice, this recipe will help you create a dessert that will undoubtedly wow your friends and family.
Ingredients for Your Exquisite Coconut Caramel Flan
Crafting the perfect Coconut Caramel Flan requires quality ingredients. Here’s what you’ll need, broken down for clarity:
For the Luscious Caramel:
- Granulated Sugar: 1 cup (200g) – This is the star of our caramel, melting down into a beautiful amber liquid.
- Water: 1/4 cup (60ml) – Helps the sugar melt evenly and prevents it from burning too quickly.
For the Creamy Coconut Custard:
- Large Eggs: 4 whole – Provide structure and richness to the custard.
- Large Egg Yolks: 2 – For extra creaminess and a more decadent texture.
- Full-Fat Coconut Milk: 1 can (13.5 oz / 400ml), well-shaken – The heart of our coconut flavor and creamy base. Do not use light coconut milk.
- Sweetened Condensed Milk: 1 can (14 oz / 397g) – Adds sweetness and a signature creamy, dense texture to the flan.
- Evaporated Milk: 1/2 cup (120ml) – Contributes to the smooth, traditional flan texture. You can substitute with whole milk if necessary.
- Vanilla Extract: 1 ½ teaspoons – Enhances all the other flavors. Use pure vanilla extract for the best taste.
- Fine Sea Salt: 1/4 teaspoon – Balances the sweetness and brings out the depth of flavor.
- Sweetened Shredded Coconut: 1/2 cup (45g), lightly toasted (optional, but highly recommended) – Adds a lovely textural element and intensifies the coconut flavor. Toast it lightly in a dry skillet over medium-low heat until fragrant and golden.
Equipment Needed:
- A 9-inch round cake pan or pie dish (at least 2 inches deep) or individual ramekins.
- A larger baking pan (e.g., a roasting pan or 9×13 inch baking dish) to create a water bath (bain-marie).
- Whisk
- Spatula
- Fine-mesh sieve
Step-by-Step Instructions: Crafting Your Coconut Caramel Flan
Follow these instructions carefully for a flawless Coconut Caramel Flan. Patience is key, especially when making the caramel and chilling the flan.
Phase 1: Preparing the Golden Caramel
- Prepare the Pan: Have your 9-inch round cake pan or pie dish ready and nearby. Ensure it’s clean and dry.
- Melt the Sugar: In a medium-sized, heavy-bottomed saucepan, combine the 1 cup of granulated sugar and 1/4 cup of water. Stir gently just to moisten the sugar.
- Cook the Caramel: Place the saucepan over medium heat. Bring the mixture to a boil without stirring. As it boils, you can gently swirl the pan occasionally to ensure even cooking. The sugar will dissolve, and the mixture will turn clear, then gradually start to color, from light yellow to a deep amber. This process can take 5-10 minutes.
- Pro Tip: Keep a close eye on the caramel. It can go from perfect to burnt very quickly. You’re looking for a color similar to honey or amber.
- Coat the Pan: Once the caramel reaches the desired deep amber color, immediately remove it from the heat. Carefully and quickly pour the hot caramel into your prepared cake pan or pie dish.
- Swirl to Coat: Working swiftly (as the caramel will start to harden), tilt and swirl the pan to coat the bottom evenly with the caramel. If you’re using individual ramekins, divide the caramel among them and swirl each one. Set the pan aside to cool; the caramel will harden and may crackle, which is perfectly normal.
Phase 2: Making the Silky Coconut Custard
- Preheat Oven & Prepare Water Bath: Preheat your oven to 325°F (160°C). Place your larger baking pan (for the water bath) on the middle rack of the oven. Have a kettle of hot water ready.
- Whisk Wet Ingredients: In a large mixing bowl, gently whisk together the 4 whole eggs and 2 egg yolks until just combined. Do not over-whisk, as this can incorporate too much air, leading to a bubbly flan.
- Combine Milks and Flavorings: Gently whisk in the can of full-fat coconut milk, the can of sweetened condensed milk, and the 1/2 cup of evaporated milk.
- Add Vanilla and Salt: Stir in the 1 ½ teaspoons of vanilla extract and 1/4 teaspoon of fine sea salt until everything is well incorporated.
- Strain the Custard (Crucial Step): Pour the custard mixture through a fine-mesh sieve into another bowl or directly into the caramel-coated pan. This step is essential for achieving an ultra-smooth, silky flan, as it removes any potential bits of cooked egg or chalazae (the stringy bits in eggs).
- Stir in Toasted Coconut (Optional): If using, gently stir the 1/2 cup of lightly toasted sweetened shredded coconut into the strained custard mixture.
Phase 3: Assembling and Baking the Flan
- Pour Custard into Pan: Carefully pour the strained coconut custard mixture over the hardened caramel in your prepared baking dish.
- Set up the Bain-Marie (Water Bath): Place the flan-filled pan inside the larger baking pan already in the preheated oven. Carefully pour hot water from your kettle into the larger pan, around the flan pan, until the water reaches about halfway up the sides of the flan pan. Be cautious not to splash water into the custard.
- Why a water bath? The steam from the hot water creates a humid environment in the oven, allowing the custard to cook gently and evenly, preventing it from curdling, cracking, or becoming rubbery.
- Bake: Bake for 60-75 minutes for a large flan, or 35-45 minutes for individual ramekins. The flan is done when the edges are set, but the center still has a slight jiggle (like Jell-O) when you gently shake the pan. An instant-read thermometer inserted near the center should read about 170-175°F (77-79°C).
- Avoid Overbaking: Overbaking can result in a tough or curdled texture.
Phase 4: Cooling and Chilling (Patience is a Virtue!)
- Cool Gradually: Carefully remove the larger pan (with the flan still inside) from the oven. Let the flan cool in the water bath on a wire rack for about 1 hour. This gradual cooling helps prevent cracking.
- Remove from Water Bath: After 1 hour, carefully lift the flan pan out of the water bath. Let it cool completely to room temperature on the wire rack (another 1-2 hours).
- Chill Thoroughly: Once at room temperature, cover the flan pan loosely with plastic wrap (try not to let the plastic touch the surface of the flan). Refrigerate for at least 6 hours, but preferably overnight, or even up to 2 days. This chilling period is crucial for the flan to fully set and for the flavors to meld. Do not rush this step!
Phase 5: The Grand Unmolding and Serving
- Prepare for Unmolding: When ready to serve, remove the flan from the refrigerator about 20-30 minutes beforehand to take the chill off slightly, which can help the caramel liquefy a bit more.
- Loosen Edges: Run a thin knife or offset spatula carefully around the edges of the flan to loosen it from the pan.
- The Moment of Truth: Choose a serving platter with a rim (to catch the delicious caramel sauce). Place the serving platter upside down on top of the flan pan. In one swift, confident motion, invert both the pan and the platter.
- Release: The flan should release onto the platter. If it seems stuck, you can gently shake the pan or tap the bottom. If it’s really stubborn, you can try setting the bottom of the flan pan in a shallow dish of hot water for a minute or two to help melt the caramel slightly (be careful not to melt the flan itself!).
- Serve and Enjoy: Lift the pan away to reveal your beautiful Coconut Caramel Flan, with the luscious caramel sauce pooling around it. If some caramel remains in the pan, you can gently warm the pan over low heat to melt it, then pour it over the flan. Slice and serve immediately.
Nutritional Information (Approximate)
- Servings: 8-10 slices
- Calories per serving (approximate, based on 8 servings): 380-450 calories.
Disclaimer: Nutritional information is an estimate and can vary depending on the specific ingredients and brands used, as well as serving size.
Time Commitment: Preparation and Cooking Time
Understanding the time involved will help you plan accordingly:
- Preparation Time (Caramel & Custard): 25-30 minutes
- Baking Time: 60-75 minutes (for a large flan)
- Cooling Time (Room Temperature): 2-3 hours
- Chilling Time (Refrigerator): Minimum 6 hours, preferably overnight (8-12 hours)
- Total Time (including chilling): Approximately 10-17 hours (mostly inactive chilling time)
While the active prep and bake time is manageable, the extended chilling time is non-negotiable for the perfect flan texture. Plan to make this dessert a day ahead for best results.
How to Serve Your Decadent Coconut Caramel Flan
This Coconut Caramel Flan is stunning on its own, but a few simple garnishes can elevate its presentation:
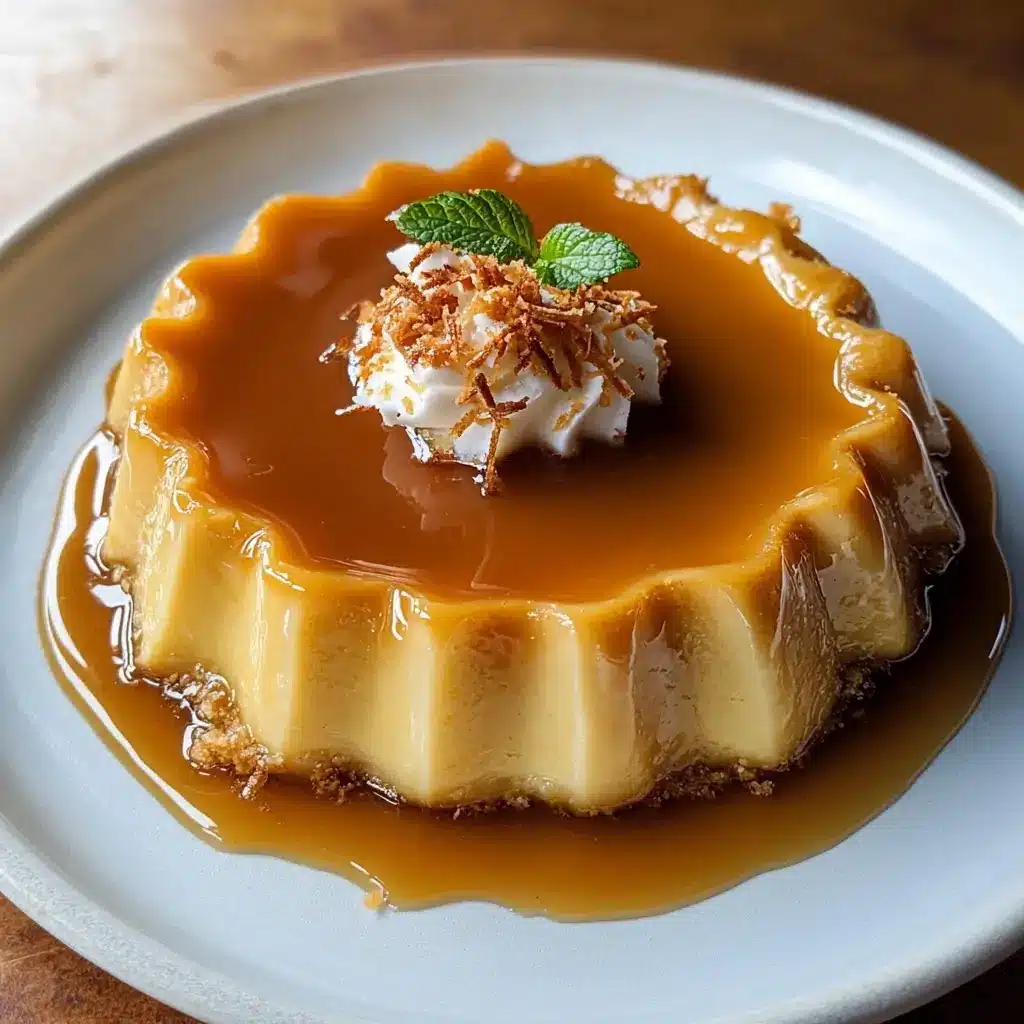
- Toasted Coconut Flakes: Sprinkle extra toasted coconut flakes (unsweetened or sweetened) over the top or around the base for added texture and visual appeal.
- Fresh Berries: A few fresh raspberries, strawberries, or blueberries provide a lovely color contrast and a tart counterpoint to the sweet flan.
- Tropical Fruit: Slices of mango, pineapple, or passion fruit pulp alongside the flan enhance its tropical character.
- Mint Sprig: A small sprig of fresh mint adds a touch of green and freshness.
- Whipped Cream: A dollop of lightly sweetened whipped cream or coconut whipped cream can add another layer of richness, though the flan is plenty rich on its own.
- Edible Flowers: For a truly elegant presentation, a few carefully placed edible flowers can make your flan look like it came from a high-end restaurant.
- Extra Caramel: If you love caramel, you can make a little extra and drizzle it over each slice just before serving.
Serving Tips:
- Use a sharp, thin knife dipped in hot water and wiped clean between each slice for the neatest cuts.
- Ensure each slice gets a generous drizzle of the caramel sauce from the platter.
Expert Tips for Flan Perfection
Achieve flan nirvana with these five essential tips:
- Don’t Rush the Caramel: Making caramel requires patience. Avoid stirring once it begins to boil; just swirl the pan. Watch for that perfect amber color. If it gets too dark, it will be bitter. If it’s too light, it won’t have enough depth of flavor.
- Strain the Custard – No Exceptions: This is the secret to an impeccably smooth, silky flan. Straining removes any tiny bits of cooked egg or undissolved ingredients, ensuring a velvety texture.
- Gentle Whisking for the Custard: When combining the custard ingredients, especially the eggs, whisk gently and just until combined. Over-whisking incorporates too much air, which can lead to air bubbles or a foamy texture in the baked flan.
- Embrace the Bain-Marie (Water Bath): Don’t skip the water bath! It provides gentle, even heat, preventing the eggs in the custard from curdling and the flan from cracking or becoming rubbery. It’s essential for that delicate, creamy consistency.
- Chill, Chill, Chill – And Then Chill Some More: This is perhaps the most crucial tip. The flan needs adequate time in the refrigerator (at least 6 hours, but overnight is best) to fully set and develop its flavors. Rushing the chilling process will likely result in a flan that doesn’t hold its shape or has a sub-optimal texture. Patience here pays off immensely!
Frequently Asked Questions (FAQ) About Coconut Caramel Flan
Q1: Why is my flan watery or not setting properly?
A: This can happen for a few reasons:
* Underbaking: The flan wasn’t cooked long enough. Ensure the center is just jiggly, not liquid.
* Incorrect Ingredient Ratios: Too much liquid or not enough eggs can affect setting.
* Insufficient Chilling: The flan needs ample time (at least 6 hours, preferably overnight) in the refrigerator to firm up completely.
* Water Bath Issues: If water from the bain-marie splashed into the custard, it could dilute it.
Q2: Can I make this flan dairy-free?
A: Yes, with some adjustments. The sweetened condensed milk is the trickiest part. You can look for dairy-free sweetened condensed coconut milk, which is increasingly available. For the evaporated milk, you can substitute it with more full-fat coconut milk or another rich plant-based milk like unsweetened cashew or oat milk. The result will be slightly different but still delicious.
Q3: My caramel hardened too quickly in the pan before I could swirl it. What did I do wrong?
A: Caramel cools and hardens very fast. You need to work quickly as soon as it’s off the heat. If it hardens too fast, you can try very gently warming the bottom of the pan over low heat for a few seconds to re-melt it slightly, allowing you to tilt and coat. Be extremely careful not to burn it further. Having the pan right next to the stove when the caramel is ready is key.
Q4: How long can I store Coconut Caramel Flan?
A: Leftover flan, covered well with plastic wrap, can be stored in the refrigerator for up to 3-4 days. The caramel sauce may continue to liquefy slightly over time, which is normal. It’s best enjoyed within the first couple of days for optimal texture. Freezing is generally not recommended as it can alter the delicate custard texture.
Q5: Why does my flan have bubbles or a “spongy” texture?
A: This is usually due to over-whisking the eggs or the custard mixture, which incorporates too much air. It can also be caused by baking the flan at too high a temperature, causing the liquids to boil and create steam pockets. Always whisk gently, strain the custard, and use a water bath with the correct oven temperature.

Coconut Caramel Flan Recipe
Ingredients
For the Luscious Caramel:
- Granulated Sugar: 1 cup (200g) – This is the star of our caramel, melting down into a beautiful amber liquid.
- Water: 1/4 cup (60ml) – Helps the sugar melt evenly and prevents it from burning too quickly.
For the Creamy Coconut Custard:
- Large Eggs: 4 whole – Provide structure and richness to the custard.
- Large Egg Yolks: 2 – For extra creaminess and a more decadent texture.
- Full-Fat Coconut Milk: 1 can (13.5 oz / 400ml), well-shaken – The heart of our coconut flavor and creamy base. Do not use light coconut milk.
- Sweetened Condensed Milk: 1 can (14 oz / 397g) – Adds sweetness and a signature creamy, dense texture to the flan.
- Evaporated Milk: 1/2 cup (120ml) – Contributes to the smooth, traditional flan texture. You can substitute with whole milk if necessary.
- Vanilla Extract: 1 ½ teaspoons – Enhances all the other flavors. Use pure vanilla extract for the best taste.
- Fine Sea Salt: 1/4 teaspoon – Balances the sweetness and brings out the depth of flavor.
- Sweetened Shredded Coconut: 1/2 cup (45g), lightly toasted (optional, but highly recommended) – Adds a lovely textural element and intensifies the coconut flavor. Toast it lightly in a dry skillet over medium-low heat until fragrant and golden.
Instructions
Phase 1: Preparing the Golden Caramel
- Prepare the Pan: Have your 9-inch round cake pan or pie dish ready and nearby. Ensure it’s clean and dry.
- Melt the Sugar: In a medium-sized, heavy-bottomed saucepan, combine the 1 cup of granulated sugar and 1/4 cup of water. Stir gently just to moisten the sugar.
- Cook the Caramel: Place the saucepan over medium heat. Bring the mixture to a boil without stirring. As it boils, you can gently swirl the pan occasionally to ensure even cooking. The sugar will dissolve, and the mixture will turn clear, then gradually start to color, from light yellow to a deep amber. This process can take 5-10 minutes.
- Pro Tip: Keep a close eye on the caramel. It can go from perfect to burnt very quickly. You’re looking for a color similar to honey or amber.
- Coat the Pan: Once the caramel reaches the desired deep amber color, immediately remove it from the heat. Carefully and quickly pour the hot caramel into your prepared cake pan or pie dish.
- Swirl to Coat: Working swiftly (as the caramel will start to harden), tilt and swirl the pan to coat the bottom evenly with the caramel. If you’re using individual ramekins, divide the caramel among them and swirl each one. Set the pan aside to cool; the caramel will harden and may crackle, which is perfectly normal.
Phase 2: Making the Silky Coconut Custard
- Preheat Oven & Prepare Water Bath: Preheat your oven to 325°F (160°C). Place your larger baking pan (for the water bath) on the middle rack of the oven. Have a kettle of hot water ready.
- Whisk Wet Ingredients: In a large mixing bowl, gently whisk together the 4 whole eggs and 2 egg yolks until just combined. Do not over-whisk, as this can incorporate too much air, leading to a bubbly flan.
- Combine Milks and Flavorings: Gently whisk in the can of full-fat coconut milk, the can of sweetened condensed milk, and the 1/2 cup of evaporated milk.
- Add Vanilla and Salt: Stir in the 1 ½ teaspoons of vanilla extract and 1/4 teaspoon of fine sea salt until everything is well incorporated.
- Strain the Custard (Crucial Step): Pour the custard mixture through a fine-mesh sieve into another bowl or directly into the caramel-coated pan. This step is essential for achieving an ultra-smooth, silky flan, as it removes any potential bits of cooked egg or chalazae (the stringy bits in eggs).
- Stir in Toasted Coconut (Optional): If using, gently stir the 1/2 cup of lightly toasted sweetened shredded coconut into the strained custard mixture.
Phase 3: Assembling and Baking the Flan
- Pour Custard into Pan: Carefully pour the strained coconut custard mixture over the hardened caramel in your prepared baking dish.
- Set up the Bain-Marie (Water Bath): Place the flan-filled pan inside the larger baking pan already in the preheated oven. Carefully pour hot water from your kettle into the larger pan, around the flan pan, until the water reaches about halfway up the sides of the flan pan. Be cautious not to splash water into the custard.
- Why a water bath? The steam from the hot water creates a humid environment in the oven, allowing the custard to cook gently and evenly, preventing it from curdling, cracking, or becoming rubbery.
- Bake: Bake for 60-75 minutes for a large flan, or 35-45 minutes for individual ramekins. The flan is done when the edges are set, but the center still has a slight jiggle (like Jell-O) when you gently shake the pan. An instant-read thermometer inserted near the center should read about 170-175°F (77-79°C).
- Avoid Overbaking: Overbaking can result in a tough or curdled texture.
Phase 4: Cooling and Chilling (Patience is a Virtue!)
- Cool Gradually: Carefully remove the larger pan (with the flan still inside) from the oven. Let the flan cool in the water bath on a wire rack for about 1 hour. This gradual cooling helps prevent cracking.
- Remove from Water Bath: After 1 hour, carefully lift the flan pan out of the water bath. Let it cool completely to room temperature on the wire rack (another 1-2 hours).
- Chill Thoroughly: Once at room temperature, cover the flan pan loosely with plastic wrap (try not to let the plastic touch the surface of the flan). Refrigerate for at least 6 hours, but preferably overnight, or even up to 2 days. This chilling period is crucial for the flan to fully set and for the flavors to meld. Do not rush this step!
Phase 5: The Grand Unmolding and Serving
- Prepare for Unmolding: When ready to serve, remove the flan from the refrigerator about 20-30 minutes beforehand to take the chill off slightly, which can help the caramel liquefy a bit more.
- Loosen Edges: Run a thin knife or offset spatula carefully around the edges of the flan to loosen it from the pan.
- The Moment of Truth: Choose a serving platter with a rim (to catch the delicious caramel sauce). Place the serving platter upside down on top of the flan pan. In one swift, confident motion, invert both the pan and the platter.
- Release: The flan should release onto the platter. If it seems stuck, you can gently shake the pan or tap the bottom. If it’s really stubborn, you can try setting the bottom of the flan pan in a shallow dish of hot water for a minute or two to help melt the caramel slightly (be careful not to melt the flan itself!).
- Serve and Enjoy: Lift the pan away to reveal your beautiful Coconut Caramel Flan, with the luscious caramel sauce pooling around it. If some caramel remains in the pan, you can gently warm the pan over low heat to melt it, then pour it over the flan. Slice and serve immediately.
Nutrition
- Serving Size: One Normal Portion
- Calories: 380-450


