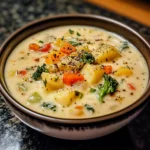
There are some dishes that instantly transport you, and for my family, this Coconut Curry Shrimp is one of them. The first time I made it, the aroma alone had everyone migrating towards the kitchen, asking what smelled so incredibly good. It was a chilly evening, and the combination of creamy coconut milk, fragrant ginger and garlic, and the gentle warmth of red curry paste felt like the ultimate comfort food. Seeing my kids, usually picky eaters, eagerly spooning the vibrant orange sauce over their rice and asking for seconds was a genuine win. My partner, a self-proclaimed curry fanatic, declared it restaurant-worthy, praising the perfect balance of sweetness, spice, and savory depth, and the tenderness of the shrimp. Since then, it’s become a staple in our rotation – quick enough for a busy weeknight but special enough for weekend guests. It’s that magical combination of exotic flavors and easy preparation that makes it a recipe I return to again and again, and one I’m truly excited to share. It’s more than just a meal; it’s a bowlful of warmth, comfort, and vibrant flavor that never fails to impress.
Ingredients for the Ultimate Coconut Curry Shrimp
Creating this stunningly flavorful dish doesn’t require an exhaustive list of obscure ingredients. Most items are readily available at standard supermarkets, particularly those with a decent international foods section. Using quality ingredients is key to achieving the best flavor profile. Here’s what you’ll need to serve approximately 4 people:
- Shrimp:
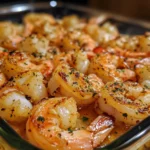
- 1 pound (about 450g) Large Shrimp: Choose shrimp labeled “large” (usually 26-30 count per pound) or “jumbo” (21-25 count). Opt for raw, peeled, and deveined shrimp to save significant prep time. If using frozen shrimp, ensure they are thoroughly thawed before cooking (more on thawing below). Tail-on looks aesthetically pleasing, but tail-off is easier to eat. Fresh, high-quality shrimp will yield the best texture – avoid any that smell overly fishy or ammonia-like.
- Aromatics & Flavor Base:
- 1 tablespoon Coconut Oil or Vegetable Oil: Coconut oil complements the curry beautifully, but a neutral vegetable oil like canola or grapeseed works perfectly well.
- 1 medium Yellow Onion (about 1 cup chopped): Finely chopped. Yellow onions provide a balanced sweetness when sautéed. Shallots can be substituted for a milder, slightly more refined flavor.
- 4-5 cloves Garlic (about 1.5 tablespoons minced): Fresh garlic is essential. Mince it finely or use a garlic press. Don’t skimp here; garlic is crucial for depth of flavor.
- 1 tablespoon Fresh Ginger (minced or grated): Use a microplane or fine grater for the best results, releasing maximum flavor and avoiding stringy bits. Fresh ginger provides a bright, zesty counterpoint to the richness.
- 2-4 tablespoons Thai Red Curry Paste: This is the heart of the curry flavor. The amount depends entirely on your spice preference and the brand of curry paste (some are much spicier than others). Start with 2 tablespoons for mild-medium heat and add more if desired. Mae Ploy, Maesri, and Thai Kitchen are common brands with varying heat levels. Always taste your paste beforehand if possible.
- The Creamy Curry Sauce:
- 1 can (13.5 oz / 400ml) Full-Fat Coconut Milk: Do not use light coconut milk or coconut beverage from a carton. Full-fat, canned coconut milk is crucial for the rich, creamy texture and authentic flavor. Shake the can well before opening as the cream often separates. Look for brands with minimal additives.
- ½ cup (120ml) Low-Sodium Chicken Broth or Vegetable Broth: This helps to thin the sauce slightly to the perfect consistency without diluting the coconut flavor too much. Water can be used in a pinch, but broth adds another layer of savory flavor.
- 1 tablespoon Fish Sauce (Nam Pla): This Thai staple adds essential umami depth and saltiness that balances the sweetness of the coconut milk. Don’t be intimidated by the smell; it transforms during cooking. Vegan fish sauce alternatives exist, or use soy sauce/tamari with a pinch more salt if necessary, though the flavor profile will differ slightly.
- 1-2 teaspoons Granulated Sugar or Brown Sugar: A touch of sweetness balances the spice and savoriness of the curry paste and fish sauce. Palm sugar is traditional, but regular sugar works fine. Adjust to taste.
- 1 tablespoon Lime Juice: Freshly squeezed lime juice added at the end brightens the entire dish, cutting through the richness and adding a necessary zing. Don’t use bottled lime juice if you can avoid it.
- Vegetables:
- 1 Red Bell Pepper: Cored, seeded, and thinly sliced or cut into 1-inch chunks. Adds sweetness, color, and a pleasant crunch. Other colors (yellow, orange) work well too.
- 1 cup Snow Peas or Sugar Snap Peas: Trimmed. These add a lovely fresh crunch and vibrant green color. Add them near the end of cooking to retain their crispness. Broccoli florets, green beans, bamboo shoots, or baby corn are also excellent additions or substitutions.
- Optional Garnishes:
- Fresh Cilantro: Roughly chopped leaves and tender stems. Adds essential freshness.
- Fresh Thai Basil: If available, Thai basil adds a unique anise-like flavor distinct from regular basil.
- Lime Wedges: For serving, allowing individuals to add more brightness.
- Sliced Red Chili (e.g., Thai chili or Fresno): For those who like extra heat.
- Chopped Roasted Peanuts or Cashews: For added texture.
- Toasted Coconut Flakes: Enhances the coconut theme.
Step-by-Step Instructions for Creamy Coconut Curry Shrimp
This recipe comes together surprisingly quickly once you have your ingredients prepped (mise en place). Follow these steps for curry perfection:
- Prepare the Shrimp (If Necessary): If your shrimp aren’t already peeled and deveined, do that now. If frozen, thaw them completely. The best way to thaw is overnight in the refrigerator. For quicker thawing, place the frozen shrimp in a colander and run cold (never warm or hot) water over them for 5-10 minutes, tossing occasionally, until thawed. Pat the thawed shrimp thoroughly dry with paper towels. This is crucial for getting a good sear and preventing them from steaming in the pan. Season lightly with a pinch of salt and pepper. Set aside.
- Prepare the Vegetables and Aromatics: Finely chop the onion. Mince the garlic and ginger. Slice the red bell pepper. Trim the snow peas. Having everything ready before you start cooking makes the process smooth and prevents ingredients from burning while you chop others.
- Sauté the Aromatics: Place a large skillet, wok, or Dutch oven over medium heat. Add the coconut oil (or vegetable oil) and let it heat up until shimmering slightly. Add the chopped onion and sauté for 4-5 minutes, stirring occasionally, until softened and translucent.
- Bloom the Curry Paste: Add the minced garlic and ginger to the skillet. Sauté for about 1 minute more, stirring constantly, until fragrant. Be careful not to burn the garlic. Push the onions, garlic, and ginger to one side of the pan. Add the red curry paste to the cleared space. Cook the paste, pressing it down gently with your spoon, for 1-2 minutes. This step, called “blooming,” toasts the spices in the paste, intensifying their flavor and aroma significantly. You’ll notice the paste darkens slightly and becomes very fragrant. Then, stir the paste into the onion mixture until well combined.
- Build the Curry Sauce: Pour in the well-shaken can of full-fat coconut milk and the chicken or vegetable broth. Whisk everything together, scraping up any bits stuck to the bottom of the pan. Bring the mixture to a gentle simmer over medium heat.
- Add Flavor Enhancers and Vegetables: Stir in the fish sauce and sugar. Add the sliced red bell pepper. Let the sauce simmer gently (don’t bring it to a rolling boil) for 5-7 minutes, uncovered, allowing the sauce to thicken slightly and the bell peppers to become tender-crisp.
- Cook the Shrimp: Add the prepared shrimp and the snow peas (or other quick-cooking vegetables) to the simmering sauce. Stir gently to ensure the shrimp are submerged. Cook for just 3-5 minutes, depending on the size of the shrimp. The shrimp will cook very quickly; they are done when they turn pink and opaque and curl into a “C” shape. Be very careful not to overcook them, as they will become rubbery and tough. Overcooked shrimp are the enemy of a great shrimp curry!
- Finish and Adjust Seasoning: Remove the skillet from the heat. Stir in the freshly squeezed lime juice. Taste the sauce carefully. Now is the time to adjust seasonings. Does it need more saltiness? Add a splash more fish sauce. More sweetness? Add a tiny bit more sugar. More spice? Stir in a little more curry paste (dissolve it in a tablespoon of hot sauce first to prevent clumps) or add some red pepper flakes. More brightness? A squeeze more lime juice.
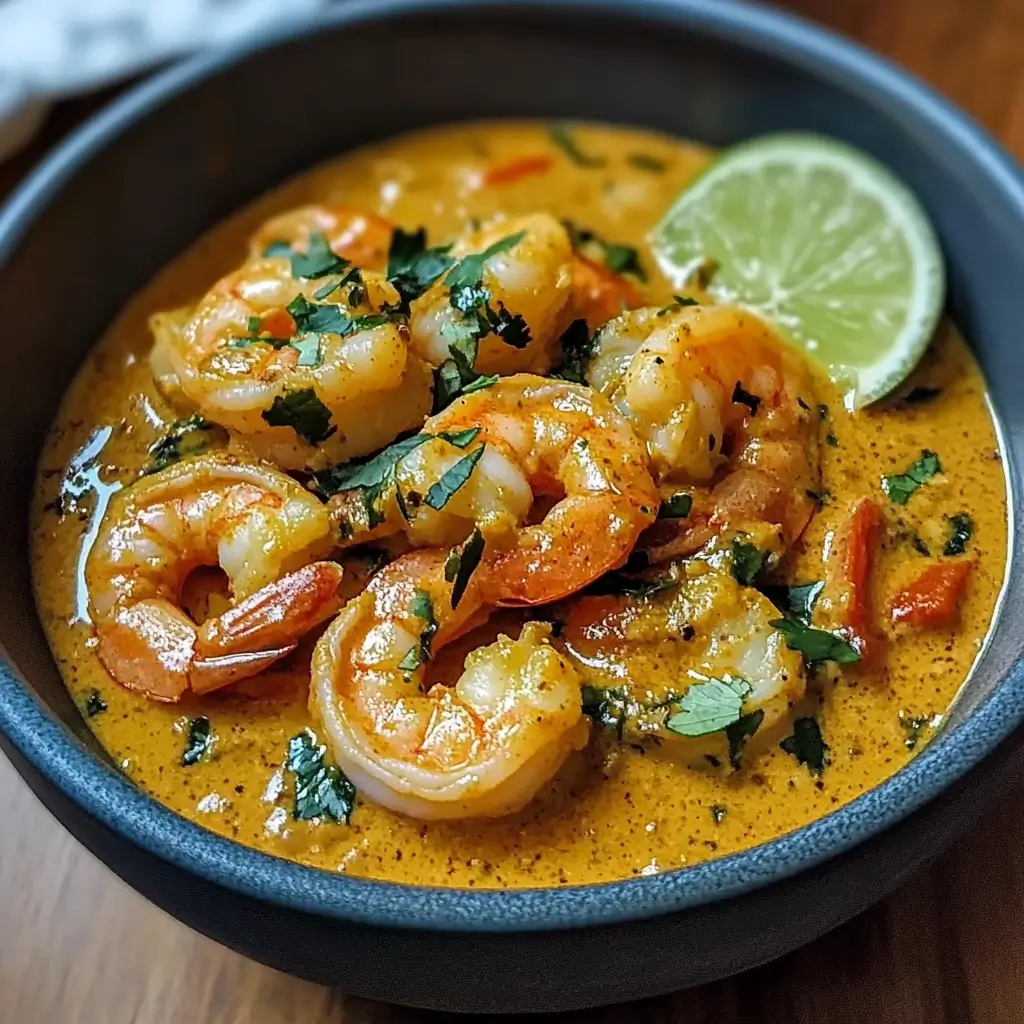
- Serve: Ladle the creamy coconut curry shrimp over cooked jasmine rice or your preferred base. Garnish generously with fresh cilantro and/or Thai basil. Offer extra lime wedges and sliced red chilies on the side. Serve immediately and enjoy the incredible flavors!
Nutrition Facts (Approximate)
Nutritional information for homemade dishes can vary based on specific ingredients used (e.g., brand of coconut milk, exact size of vegetables, amount of oil), and serving sizes. The following is an estimate based on the recipe yielding 4 servings, excluding rice or other accompaniments.
- Servings: 4
- Calories per Serving: Approximately 450-550 kcal
Breakdown Insights:
- Protein: Shrimp is an excellent source of lean protein.
- Fat: The majority of the fat comes from the full-fat coconut milk, which is primarily saturated fat of the medium-chain triglyceride (MCT) variety. While high in calories, full-fat coconut milk is essential for the authentic creamy texture and flavor.
- Carbohydrates: Primarily from the vegetables, sugar, and aromatics. The count will increase significantly depending on the serving size and type of rice or noodles served alongside.
- Sodium: Primarily from the fish sauce and broth. Using low-sodium broth helps control the overall sodium content.
- Vitamins & Minerals: Bell peppers provide Vitamin C, while aromatics and spices contribute various antioxidants and micronutrients.
Disclaimer: This nutritional information is a rough estimate calculated using standard nutritional databases. For precise information, it’s best to use a specific recipe nutrition calculator and input your exact ingredients and measurements. Remember that what you serve with the curry (rice, naan) will add substantially to the overall calorie and nutrient count.
Preparation and Cooking Time
One of the joys of this Coconut Curry Shrimp recipe is its relative speed, making it achievable even on a weeknight.
- Preparation Time: 15-20 minutes. This includes thawing shrimp (if needed and done quickly under cold water), peeling/deveining shrimp (if not pre-prepped), chopping the onion, mincing garlic and ginger, slicing the bell pepper, and measuring out other ingredients (mise en place). Using pre-peeled and deveined shrimp significantly reduces this time.
- Cooking Time: 20-25 minutes. This covers sautéing the aromatics, blooming the curry paste, simmering the sauce, cooking the vegetables, and finally, cooking the shrimp.
- Total Time: Approximately 35-45 minutes.
This timeframe makes it a fantastic option when you crave something flavorful and satisfying but are short on time. Efficiency in chopping and having all ingredients ready before starting to cook are key to keeping the total time minimal.
How to Serve Your Delicious Coconut Curry Shrimp
Serving this curry is all about complementing its rich, creamy, and spicy flavors. Presentation enhances the experience! Here are some excellent ways to serve it:
- The Base (Essential for Soaking Up Sauce):
- Jasmine Rice: The classic pairing. Its slightly sticky texture and fragrant aroma are perfect with Thai curries.
- Basmati Rice: Another aromatic long-grain option, slightly fluffier than jasmine.
- Brown Rice: A healthier, whole-grain option with a nuttier flavor and chewier texture.
- Quinoa: A protein-packed, gluten-free alternative.
- Cauliflower Rice: For a low-carb, keto-friendly option. Sauté it with a little garlic for extra flavor.
- Rice Noodles: Thin or medium rice noodles work beautifully, turning it into a noodle bowl experience.
- Garnishes (Add Freshness, Texture, and Visual Appeal):
- Mandatory:
- Fresh Cilantro: Generous amounts of roughly chopped leaves and tender stems add indispensable freshness.
- Lime Wedges: A squeeze of fresh lime juice right before eating brightens all the flavors.
- Highly Recommended:
- Fresh Thai Basil: If you can find it, its unique anise/licorice notes are incredible with red curry.
- Sliced Scallions (Green Onions): Adds a mild oniony bite and fresh green color.
- Optional Enhancements:
- Sliced Red Chilies: For those who crave extra heat (Thai bird’s eye chilies or Fresno chilies work well).
- Chopped Roasted Peanuts or Cashews: Adds a delightful crunch and nutty flavor. Toast them lightly for best results.
- Toasted Unsweetened Coconut Flakes: Reinforces the coconut flavor and adds texture.
- Crispy Fried Shallots: Adds an intensely savory crunch (available pre-made in Asian markets or make your own).
- Mandatory:
- Side Dishes (Complementary Flavors and Textures):
- Naan Bread or Roti: Perfect for scooping up every last bit of the delicious sauce. Garlic naan is particularly good.
- Simple Cucumber Salad: A quick mix of sliced cucumber, red onion, rice vinegar, and a pinch of sugar provides a cool, refreshing contrast.
- Steamed Greens: Plain steamed bok choy, spinach, or broccoli offers a simple, healthy counterpoint.
- Spring Rolls: Crispy vegetable spring rolls make a nice appetizer or side.
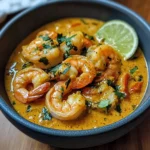
Presentation Tip: Serve the curry in shallow bowls over a bed of rice. Drizzle a little extra sauce over the top, then artfully arrange your chosen garnishes. The vibrant colors make it naturally appealing!
Pro Tips for Perfect Coconut Curry Shrimp Every Time
Elevate your curry from good to unforgettable with these five professional tips:
- Don’t Overcook the Shrimp: This is the cardinal rule of cooking shrimp. They cook incredibly fast, usually within 3-5 minutes in a simmering sauce. Look for the visual cues: they turn pink and opaque and curl from a straight or “U” shape into a “C” shape. An overcooked shrimp curls into a tight “O” and becomes rubbery and tough. Add them last and cook just until done. Remember they will continue to cook slightly from the residual heat even after removing the pan from the stove. It’s better to slightly undercook them than overcook them.
- Use Full-Fat Coconut Milk: The richness and creaminess of an authentic Thai curry come from full-fat coconut milk (typically 17-19% fat content). Light coconut milk or coconut milk beverages designed for drinking lack the necessary fat content and emulsifiers, resulting in a thin, watery, and less flavorful sauce. Shake the can vigorously before opening to combine the separated cream and water. For an extra rich start, some chefs scoop out the thick cream from the top of an unshaken can and sauté the curry paste directly in that before adding the remaining liquid.
- Bloom the Curry Paste: Don’t just stir the curry paste into the liquid. Take the extra minute or two to fry the paste in the hot oil after sautéing the aromatics. This process “blooms” the dried spices within the paste, releasing their essential oils and deepening their flavor profile exponentially. You’ll smell the difference immediately – it becomes much more aromatic. Cook until it darkens slightly and you can smell the fragrant spices.
- Master the “Taste and Adjust” Step: Curry is all about balance – spicy, sweet, sour, and salty. Canned curry pastes vary in saltiness and heat, coconut milk varies in sweetness, and personal preferences differ. The final “taste and adjust” step after adding the lime juice is crucial. Taste the sauce critically. Is it flat? Maybe more fish sauce (salty/umami) or lime juice (sour). Too spicy? A bit more coconut milk or sugar can temper the heat slightly (though major adjustments are hard at this stage). Not spicy enough? Add more curry paste (dissolved first) or chili flakes. Too rich? More lime juice. Getting this balance right transforms the dish.
- Prepare Your Ingredients Beforehand (Mise en Place): This is a relatively fast-cooking dish, especially once the shrimp go in. Having everything chopped, measured, and ready by the stovetop before you start cooking prevents frantic chopping while something else burns. It makes the entire cooking process calmer, more enjoyable, and ensures each component is added at the right time for optimal flavor and texture. Chop onions, mince garlic/ginger, slice peppers, trim peas, measure liquids, and have the shrimp patted dry and ready to go.
Frequently Asked Questions (FAQ) about Coconut Curry Shrimp
Here are answers to common questions about making this delicious dish:
- Q: Can I use green or yellow curry paste instead of red?
- A: Absolutely! Thai green, red, and yellow curry pastes have distinct flavor profiles based on their primary ingredients (green chilies, red chilies, turmeric/spices, respectively). Green curry is typically the spiciest and has strong notes of galangal, kaffir lime, and lemongrass. Yellow curry is generally milder, richer, and sweeter, often with turmeric, cumin, and sometimes potato. Substituting green or yellow paste will create a delicious, but distinctly different, curry. Feel free to experiment! Just be mindful of the spice level differences between brands and types.
- Q: How can I make this recipe vegetarian or vegan?
- A: This recipe adapts beautifully to a vegetarian or vegan version.
- Protein: Swap the shrimp for an equal weight of pressed extra-firm tofu (cubed and pan-fried or baked first for best texture), seitan, chickpeas, or a medley of vegetables like broccoli florets, zucchini, mushrooms, potatoes, or butternut squash (add heartier vegetables earlier with the bell peppers).
- Fish Sauce: Replace the fish sauce with a vegan fish sauce alternative (available online or in some specialty stores), or use soy sauce, tamari (for gluten-free), or coconut aminos. You may need to add a little extra salt to compensate for the umami difference.
- Broth: Ensure you use vegetable broth instead of chicken broth.
With these swaps, you’ll have a fantastic plant-based coconut curry.
- A: This recipe adapts beautifully to a vegetarian or vegan version.
- Q: Can I use frozen shrimp? Do I need to thaw them first?
- A: Yes, frozen shrimp work perfectly well and are often more convenient and sometimes even fresher (if flash-frozen shortly after harvest) than “fresh” shrimp at the counter, which may have been previously frozen anyway. However, you absolutely must thaw them completely before adding them to the curry. Adding frozen shrimp directly to the hot sauce will drastically lower the sauce’s temperature, potentially causing the shrimp to steam and cook unevenly, resulting in a rubbery texture. Thaw them overnight in the fridge or quickly under cold running water as described in the instructions, then pat them very dry.
- Q: How do I store and reheat leftover Coconut Curry Shrimp?
- A: Let the curry cool down completely, then store it in an airtight container in the refrigerator for up to 2-3 days. The flavors often meld and can taste even better the next day! To reheat, gently warm the curry in a saucepan over low-medium heat, stirring occasionally, until heated through. Avoid boiling, as this can make the coconut milk separate and overcook the shrimp further. If the sauce seems too thick, add a splash of broth or water. You can also reheat individual portions in the microwave, using medium power and stirring partway through. Serve reheated curry with fresh rice and garnishes. Freezing is possible but not ideal, as the texture of the shrimp and the coconut milk sauce can sometimes degrade upon thawing and reheating.
- Q: How can I adjust the spice level? My family prefers mild/extra spicy food.
- A: Adjusting the spice is easy:
- To Make it Milder: Start with the minimum amount of red curry paste recommended (e.g., 1.5-2 tablespoons). Choose a brand known for being milder (Thai Kitchen is often less potent than Mae Ploy or Maesri). You can also add a bit more coconut milk or a touch more sugar to balance the heat. Ensure you remove seeds from any fresh chilies used for garnish.
- To Make it Spicier: Use the higher amount of red curry paste (3-4 tablespoons or even more, depending on the brand and your tolerance). Choose a spicier brand. Add a pinch of cayenne pepper or red pepper flakes along with the curry paste. Include some sliced fresh Thai bird’s eye chilies or serrano peppers cooked into the sauce (add them with the bell peppers). Finally, offer plenty of fresh sliced chilies as a garnish for individuals to add at the table. Always taste and add heat incrementally – you can always add more, but it’s hard to take away!
- A: Adjusting the spice is easy:
Coconut Curry Shrimp Recipe
Ingredients
- Shrimp:
- 1 pound (about 450g) Large Shrimp: Choose shrimp labeled “large” (usually 26–30 count per pound) or “jumbo” (21–25 count). Opt for raw, peeled, and deveined shrimp to save significant prep time. If using frozen shrimp, ensure they are thoroughly thawed before cooking (more on thawing below). Tail-on looks aesthetically pleasing, but tail-off is easier to eat. Fresh, high-quality shrimp will yield the best texture – avoid any that smell overly fishy or ammonia-like.
- Aromatics & Flavor Base:
- 1 tablespoon Coconut Oil or Vegetable Oil: Coconut oil complements the curry beautifully, but a neutral vegetable oil like canola or grapeseed works perfectly well.
- 1 medium Yellow Onion (about 1 cup chopped): Finely chopped. Yellow onions provide a balanced sweetness when sautéed. Shallots can be substituted for a milder, slightly more refined flavor.
- 4–5 cloves Garlic (about 1.5 tablespoons minced): Fresh garlic is essential. Mince it finely or use a garlic press. Don’t skimp here; garlic is crucial for depth of flavor.
- 1 tablespoon Fresh Ginger (minced or grated): Use a microplane or fine grater for the best results, releasing maximum flavor and avoiding stringy bits. Fresh ginger provides a bright, zesty counterpoint to the richness.
- 2–4 tablespoons Thai Red Curry Paste: This is the heart of the curry flavor. The amount depends entirely on your spice preference and the brand of curry paste (some are much spicier than others). Start with 2 tablespoons for mild-medium heat and add more if desired. Mae Ploy, Maesri, and Thai Kitchen are common brands with varying heat levels. Always taste your paste beforehand if possible.
- The Creamy Curry Sauce:
- 1 can (13.5 oz / 400ml) Full-Fat Coconut Milk: Do not use light coconut milk or coconut beverage from a carton. Full-fat, canned coconut milk is crucial for the rich, creamy texture and authentic flavor. Shake the can well before opening as the cream often separates. Look for brands with minimal additives.
- ½ cup (120ml) Low-Sodium Chicken Broth or Vegetable Broth: This helps to thin the sauce slightly to the perfect consistency without diluting the coconut flavor too much. Water can be used in a pinch, but broth adds another layer of savory flavor.
- 1 tablespoon Fish Sauce (Nam Pla): This Thai staple adds essential umami depth and saltiness that balances the sweetness of the coconut milk. Don’t be intimidated by the smell; it transforms during cooking. Vegan fish sauce alternatives exist, or use soy sauce/tamari with a pinch more salt if necessary, though the flavor profile will differ slightly.
- 1–2 teaspoons Granulated Sugar or Brown Sugar: A touch of sweetness balances the spice and savoriness of the curry paste and fish sauce. Palm sugar is traditional, but regular sugar works fine. Adjust to taste.
- 1 tablespoon Lime Juice: Freshly squeezed lime juice added at the end brightens the entire dish, cutting through the richness and adding a necessary zing. Don’t use bottled lime juice if you can avoid it.
- Vegetables:
- 1 Red Bell Pepper: Cored, seeded, and thinly sliced or cut into 1-inch chunks. Adds sweetness, color, and a pleasant crunch. Other colors (yellow, orange) work well too.
- 1 cup Snow Peas or Sugar Snap Peas: Trimmed. These add a lovely fresh crunch and vibrant green color. Add them near the end of cooking to retain their crispness. Broccoli florets, green beans, bamboo shoots, or baby corn are also excellent additions or substitutions.
- Optional Garnishes:
- Fresh Cilantro: Roughly chopped leaves and tender stems. Adds essential freshness.
- Fresh Thai Basil: If available, Thai basil adds a unique anise-like flavor distinct from regular basil.
- Lime Wedges: For serving, allowing individuals to add more brightness.
- Sliced Red Chili (e.g., Thai chili or Fresno): For those who like extra heat.
- Chopped Roasted Peanuts or Cashews: For added texture.
- Toasted Coconut Flakes: Enhances the coconut theme.
Instructions
- Prepare the Shrimp (If Necessary): If your shrimp aren’t already peeled and deveined, do that now. If frozen, thaw them completely. The best way to thaw is overnight in the refrigerator. For quicker thawing, place the frozen shrimp in a colander and run cold (never warm or hot) water over them for 5-10 minutes, tossing occasionally, until thawed. Pat the thawed shrimp thoroughly dry with paper towels. This is crucial for getting a good sear and preventing them from steaming in the pan. Season lightly with a pinch of salt and pepper. Set aside.
- Prepare the Vegetables and Aromatics: Finely chop the onion. Mince the garlic and ginger. Slice the red bell pepper. Trim the snow peas. Having everything ready before you start cooking makes the process smooth and prevents ingredients from burning while you chop others.
- Sauté the Aromatics: Place a large skillet, wok, or Dutch oven over medium heat. Add the coconut oil (or vegetable oil) and let it heat up until shimmering slightly. Add the chopped onion and sauté for 4-5 minutes, stirring occasionally, until softened and translucent.
- Bloom the Curry Paste: Add the minced garlic and ginger to the skillet. Sauté for about 1 minute more, stirring constantly, until fragrant. Be careful not to burn the garlic. Push the onions, garlic, and ginger to one side of the pan. Add the red curry paste to the cleared space. Cook the paste, pressing it down gently with your spoon, for 1-2 minutes. This step, called “blooming,” toasts the spices in the paste, intensifying their flavor and aroma significantly. You’ll notice the paste darkens slightly and becomes very fragrant. Then, stir the paste into the onion mixture until well combined.
- Build the Curry Sauce: Pour in the well-shaken can of full-fat coconut milk and the chicken or vegetable broth. Whisk everything together, scraping up any bits stuck to the bottom of the pan. Bring the mixture to a gentle simmer over medium heat.
- Add Flavor Enhancers and Vegetables: Stir in the fish sauce and sugar. Add the sliced red bell pepper. Let the sauce simmer gently (don’t bring it to a rolling boil) for 5-7 minutes, uncovered, allowing the sauce to thicken slightly and the bell peppers to become tender-crisp.
- Cook the Shrimp: Add the prepared shrimp and the snow peas (or other quick-cooking vegetables) to the simmering sauce. Stir gently to ensure the shrimp are submerged. Cook for just 3-5 minutes, depending on the size of the shrimp. The shrimp will cook very quickly; they are done when they turn pink and opaque and curl into a “C” shape. Be very careful not to overcook them, as they will become rubbery and tough. Overcooked shrimp are the enemy of a great shrimp curry!
- Finish and Adjust Seasoning: Remove the skillet from the heat. Stir in the freshly squeezed lime juice. Taste the sauce carefully. Now is the time to adjust seasonings. Does it need more saltiness? Add a splash more fish sauce. More sweetness? Add a tiny bit more sugar. More spice? Stir in a little more curry paste (dissolve it in a tablespoon of hot sauce first to prevent clumps) or add some red pepper flakes. More brightness? A squeeze more lime juice.
- Serve: Ladle the creamy coconut curry shrimp over cooked jasmine rice or your preferred base. Garnish generously with fresh cilantro and/or Thai basil. Offer extra lime wedges and sliced red chilies on the side. Serve immediately and enjoy the incredible flavors!
Nutrition
- Serving Size: One Normal Portion
- Calories: 450-550 kcal