Introduction
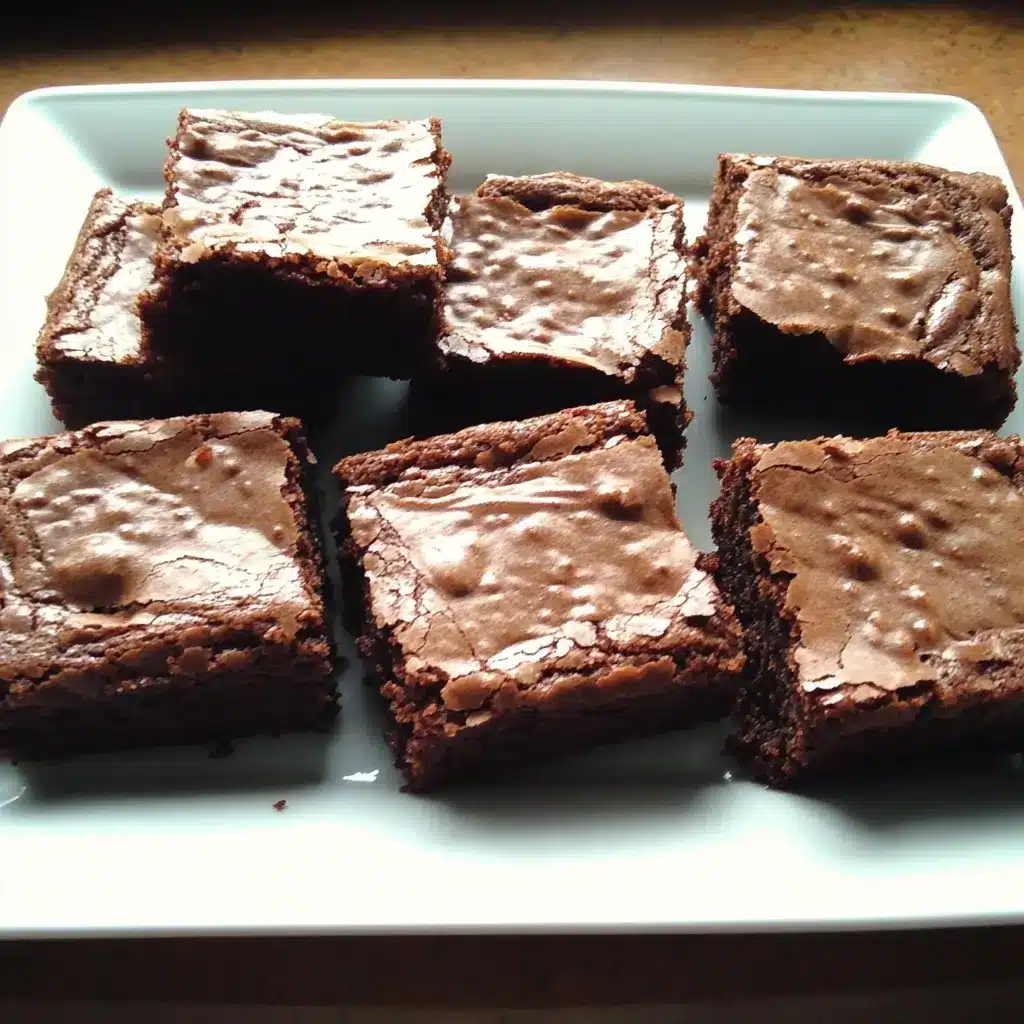
In our house, finding a dessert that satisfies both the sweet tooth and the health-conscious minds can sometimes feel like searching for a unicorn. That’s why these Date Brownies have become an absolute staple. From the first time I baked a batch, the rich, fudgy texture and naturally sweet flavor were an instant hit. Even my kids, usually suspicious of anything “healthy-ish” masquerading as dessert, devoured them. What’s even better is that these brownies are packed with wholesome ingredients, making them a treat you can feel good about serving and enjoying. Whether you’re looking for a healthier alternative to traditional brownies, or simply a delicious and easy dessert recipe, these Date Brownies are guaranteed to become a new favorite. The optional chocolate ganache takes them to another level of decadence, but they are equally delightful on their own, proving that healthy and delicious can absolutely coexist in perfect harmony.
Ingredients
The beauty of these Date Brownies lies in their simplicity and the wholesome nature of the ingredients. Each component plays a crucial role in creating the perfect texture and flavor profile. Let’s break down each ingredient and explore why it’s essential and potential substitutions you might consider.
For the Brownies:
- 1 cup Dates (pitted): Dates are the star of the show here, providing natural sweetness, moisture, and a wonderful chewy texture. Medjool dates are often recommended for their softness and caramel-like flavor, but Deglet Noor dates or even cheaper varieties will work just as well. The key is to ensure they are pitted for easy blending. Dates are packed with fiber, potassium, and antioxidants, contributing to the nutritional value of these brownies. Soaking them softens them further, ensuring a smooth batter and preventing any gritty texture.
- Hot Water (to cover dates): Hot water is crucial for softening the dates. The heat helps to break down the fibers and sugars in the dates, making them easier to blend into a smooth paste. Using hot water also enhances their natural sweetness, creating a richer flavor base for the brownies. Make sure the water is hot but not boiling to avoid any potential issues with the dates.
- 1/2 cup Nut or Seed Butter (such as almond butter, peanut butter, tahini, or sunflower seed butter): This ingredient is what gives the brownies their fudgy texture and adds a depth of flavor that complements the sweetness of the dates. The choice of nut or seed butter is entirely up to your preference and dietary needs.
- Almond butter: Offers a slightly nutty and sophisticated flavor. It’s rich in vitamin E, magnesium, and calcium.
- Peanut butter: Provides a classic, comforting flavor that pairs wonderfully with chocolate. It’s a good source of protein and healthy fats. For those with peanut allergies, this is not an option.
- Tahini (sesame seed butter): Adds a subtle, slightly bitter and nutty flavor that is surprisingly delicious in brownies. It’s a good source of calcium, iron, and magnesium. Tahini also contributes to a very smooth and creamy texture.
- Sunflower seed butter: A fantastic allergy-friendly option for those who can’t have nuts. It has a mild, slightly sweet flavor and is rich in vitamin E and magnesium.
- 1/3 cup Cocoa Powder (unsweetened): Cocoa powder is what gives these brownies their rich, chocolatey flavor and classic brownie color. Unsweetened cocoa powder allows you to control the sweetness of the brownies and provides a deep, intense chocolate taste.
- Natural Cocoa Powder: This is the most common type and has a more acidic flavor. It’s lighter in color and works best with baking soda (though this recipe uses baking powder).
- Dutch-Processed Cocoa Powder: This cocoa powder has been treated with an alkaline solution to neutralize its acidity. It has a smoother, less bitter flavor and a darker color. Either natural or Dutch-processed cocoa powder will work well in this recipe; Dutch-processed will yield a slightly darker and richer brownie.
- 1/2 teaspoon Baking Powder: Baking powder is a leavening agent that helps the brownies rise slightly and achieve a tender texture. Although these brownies are dense and fudgy, a touch of baking powder prevents them from becoming too heavy or cakey. Ensure your baking powder is fresh for optimal leavening power. If you don’t have baking powder, you can substitute with 1/4 teaspoon of baking soda, but the texture might be slightly denser.
- 3 tablespoons Honey: Honey is used as a natural sweetener in this recipe, adding a touch of sweetness and moisture. It also contributes to the chewy texture of the brownies and adds a subtle floral note.
- Alternatives to Honey: For a vegan option or if you prefer a different sweetener, you can substitute honey with:
- Maple Syrup: Adds a distinct maple flavor which can be delicious. Use pure maple syrup for the best taste.
- Agave Nectar: Has a more neutral sweetness than honey or maple syrup.
- Brown Rice Syrup: Less sweet than honey, so you might need to increase the amount slightly to achieve desired sweetness.
- Alternatives to Honey: For a vegan option or if you prefer a different sweetener, you can substitute honey with:
- 1 teaspoon Pure Vanilla Extract: Vanilla extract enhances the overall flavor of the brownies, adding warmth and depth. Pure vanilla extract is always recommended over imitation vanilla for the best taste. You can also use vanilla bean paste for an even more intense vanilla flavor, using about 1 teaspoon.
- 1/2 teaspoon Sea Salt: Sea salt is crucial for balancing the sweetness and enhancing the other flavors in the brownies. Salt doesn’t just make things salty; it actually intensifies sweet flavors and prevents them from being one-dimensional. Sea salt is preferred for its cleaner taste compared to iodized table salt. If you only have table salt, use slightly less (about 1/4 teaspoon).
For the Chocolate Ganache (optional):
- 1/3 cup Butter or Ghee: Butter or ghee forms the base of the ganache, providing richness, shine, and a smooth texture.
- Butter: Use unsalted butter to control the salt content. Butter contributes a classic, creamy flavor to the ganache.
- Ghee (clarified butter): Ghee has a richer, nuttier flavor than butter and is lactose-free for those with sensitivities. It also has a higher smoke point, but this is not relevant in this ganache as it’s not cooked at high temperatures. Ghee will make the ganache slightly richer and more intensely flavored.
- Vegan Alternatives: For a vegan ganache, you can use:
- Coconut Oil: Use refined coconut oil for a neutral flavor (unrefined will add a coconut taste). Coconut oil will make the ganache firmer when chilled.
- Vegan Butter Sticks: Many brands of vegan butter sticks work well for ganache, providing a similar texture and flavor to dairy butter.
- 1/3 cup Chocolate Chips: Chocolate chips add an extra layer of chocolatey indulgence to the brownies when used in the ganache.
- Type of Chocolate Chips: You can use semi-sweet, dark chocolate, or even milk chocolate chips depending on your preference for sweetness and intensity.
- Dark Chocolate Chips: Will create a richer, less sweet ganache that complements the sweetness of the brownies beautifully.
- Semi-Sweet Chocolate Chips: A good balance of sweetness and chocolate flavor, a classic choice for ganache.
- Milk Chocolate Chips: Will result in a sweeter and milder ganache, which might be preferred by those who prefer less intense chocolate flavor.
- Type of Chocolate Chips: You can use semi-sweet, dark chocolate, or even milk chocolate chips depending on your preference for sweetness and intensity.
Instructions
Making these Date Brownies is surprisingly straightforward and requires minimal equipment. Here’s a detailed step-by-step guide to ensure perfect brownies every time.
Brownies:
- Preheat your oven to 350°F (175°C). Preheating is crucial for even baking. Make sure your oven is at the correct temperature before you put the brownies in. An oven thermometer can be helpful to ensure accuracy, as oven temperatures can sometimes vary.
- Soak the dates in hot water for about 10 minutes to soften. Drain the water. Place the pitted dates in a bowl and cover them completely with hot water. Let them soak for about 10 minutes. This step is essential for softening the dates, making them easier to blend and ensuring a smooth brownie batter. After soaking, drain the water thoroughly. You can use the back of a spoon to gently press the dates and remove excess water.
- Put all ingredients in a blender or food processor and blend until smooth. Add a little water if needed. Combine the soaked and drained dates, nut or seed butter, cocoa powder, baking powder, honey, vanilla extract, and sea salt in a blender or food processor. Blend until completely smooth. If the mixture seems too thick and isn’t blending easily, add a tablespoon of water at a time until it reaches a smooth, pourable consistency. Be careful not to add too much water, as this can make the batter too thin. The goal is a thick, brownie-batter like texture. A high-speed blender or a powerful food processor will work best for achieving a completely smooth batter.
- Spread the mixture in a buttered square pan (8×8-inch). Grease an 8×8 inch square baking pan with butter or cooking spray to prevent the brownies from sticking. You can also line the pan with parchment paper, leaving an overhang on the sides, which makes it incredibly easy to lift the brownies out of the pan after baking. Pour the brownie batter into the prepared pan and spread it evenly using a spatula or the back of a spoon. Ensure the batter is distributed uniformly in the pan for even baking.
- Bake for about 20 minutes, until set. Place the pan in the preheated oven and bake for approximately 20 minutes. To check for doneness, insert a toothpick into the center of the brownies. It should come out with moist crumbs attached, not wet batter. The edges should be set, and the center should still be slightly fudgy. Baking time can vary slightly depending on your oven, so start checking for doneness around 18 minutes. Avoid overbaking, as this can make the brownies dry.
- Allow to cool completely before frosting with the Ganache. Once baked, remove the brownies from the oven and let them cool completely in the pan on a wire rack. Cooling is essential for the brownies to set properly and to prevent the ganache from melting if you choose to add it. Allowing them to cool completely also makes them easier to slice neatly.
Chocolate Ganache:
- Melt the butter in a bowl and add the chocolate chips. Stir until the chocolate chips are melted. In a heatproof bowl, melt the butter (or ghee or vegan alternative). You can do this in the microwave in short intervals (about 30 seconds at a time, stirring in between) or over a double boiler on the stovetop. Once the butter is melted, add the chocolate chips to the bowl. Let them sit for a minute to soften, then stir until the chocolate chips are completely melted and the mixture is smooth and glossy.
- Put the mixture in the freezer for about 20 minutes until set (but not completely frozen). Place the bowl of melted chocolate mixture in the freezer for about 20 minutes. This chilling process is crucial for achieving the right consistency for beating the ganache. You want the ganache to be set but not frozen solid. It should be firm enough to hold its shape but still slightly pliable.
- Beat the mixture with an electric mixer. It will become light brown and smooth. Remove the chilled ganache from the freezer. Using an electric mixer (hand mixer or stand mixer), beat the ganache on medium-high speed. As you beat, the ganache will lighten in color and become airy and smooth, almost like whipped frosting. This process incorporates air into the ganache, making it lighter and more spreadable.
- Spread over the brownies and slice into squares. Once the brownies are completely cooled, spread the whipped ganache evenly over the top. You can use a spatula or knife to create a smooth surface or swirls for a more decorative look. After frosting, slice the brownies into squares. An 8×8 inch pan will typically yield 9 to 16 brownies depending on the size you prefer. For clean slices, use a sharp knife and wipe it clean between each cut, especially if the ganache is still slightly soft.
Nutrition Facts
(Per serving, approximate and may vary based on specific ingredients used)
- Servings: 8
- Calories per serving: Approximately 250-350 calories (without ganache, likely closer to 250; with ganache, closer to 350).
Approximate Breakdown (per serving, without ganache):
- Fat: 15-20g (primarily healthy fats from nut/seed butter and dates)
- Saturated Fat: 2-3g (depending on the type of nut/seed butter)
- Cholesterol: 0mg
- Sodium: 100-150mg
- Carbohydrates: 30-40g (primarily from dates and honey, natural sugars and fiber)
- Fiber: 5-7g (high fiber content from dates and cocoa powder)
- Sugar: 20-25g (natural sugars from dates and honey)
- Protein: 5-7g (from nut/seed butter and dates)
Key Nutritional Benefits:
- High in Fiber: Dates are an excellent source of dietary fiber, which aids digestion and promotes satiety.
- Source of Healthy Fats: Nut and seed butters provide monounsaturated and polyunsaturated fats, which are beneficial for heart health.
- Rich in Antioxidants: Cocoa powder and dates are packed with antioxidants that help protect against cell damage.
- Natural Sweetness: Sweetened naturally with dates and honey, avoiding refined sugars.
- Good Source of Minerals: Dates and nut/seed butters provide essential minerals like potassium, magnesium, and iron.
Dietary Considerations:
- Gluten-Free: This recipe is naturally gluten-free as it doesn’t use any wheat flour.
- Dairy-Free (Brownies): The brownie base is dairy-free. To make the ganache dairy-free, use ghee or vegan butter and dairy-free chocolate chips.
- Vegan (with modifications): To make the entire recipe vegan, substitute honey with maple syrup or agave nectar and use vegan butter and dairy-free chocolate chips for the ganache.
- Nut-Free (with modifications): Use sunflower seed butter or tahini as a nut-free alternative. Always check labels to ensure ingredients are processed in nut-free facilities if allergies are severe.
Please note that these are estimations and can vary. For precise nutritional information, use a nutrition calculator with the specific brands and ingredients you use.
Preparation Time
These Date Brownies are wonderfully quick to prepare, perfect for when you need a delicious dessert without spending hours in the kitchen.
- Prep Time: 15 minutes
- Date Soaking: 10 minutes (passive time, can be done while prepping other ingredients)
- Ingredient Measuring and Gathering: 5 minutes
- Blending Batter: 3-5 minutes
- Spreading in Pan: 2 minutes
- Cook Time: 20 minutes
- Baking: 20 minutes (oven time)
- Cooling Time: 1-2 hours (for brownies to fully cool before frosting and slicing)
- Ganache Prep Time: 10 minutes
- Melting Chocolate: 5 minutes
- Freezing Ganache: 20 minutes (passive time)
- Beating Ganache: 3-5 minutes
- Frosting Brownies: 5 minutes
- Total Active Time (Brownies): Approximately 20-25 minutes
- Total Active Time (Brownies with Ganache): Approximately 30-35 minutes
Tips to Speed Up Prep:
- Pre-pit Dates: Purchase pre-pitted dates to save a few minutes.
- Measure Ingredients in Advance: Have all ingredients measured and ready to go before you start blending.
- Soak Dates in Very Hot Water: Using just-boiled water can slightly speed up the date softening process.
- Skip the Ganache: For an even quicker dessert, enjoy the brownies plain or simply dust them with cocoa powder or powdered sugar.
How to Serve
These Date Brownies are incredibly versatile and can be enjoyed in numerous ways. Here are some serving suggestions to elevate your brownie experience:
- Classic Dessert:
- Serve warm or at room temperature as a delightful dessert after dinner.
- Pair with a scoop of vanilla ice cream or a dollop of whipped cream for a classic brownie sundae.
- Dust with powdered sugar or cocoa powder for a simple yet elegant presentation.
- Elevated Dessert:
- Drizzle with caramel sauce or chocolate syrup for added richness.
- Garnish with fresh berries like raspberries, strawberries, or blueberries for a burst of freshness and color.
- Add a sprinkle of chopped nuts (walnuts, pecans, almonds) for extra crunch and flavor.
- Serve with a side of homemade fruit compote or a light custard sauce.
- Snack or Treat:
- Enjoy as a healthy-ish afternoon snack or a satisfying treat any time of day.
- Pack in lunchboxes for a wholesome dessert option.
- Pair with a glass of cold milk, almond milk, or a cup of coffee or tea.
- Party or Gathering Dessert:
- Cut into smaller squares or triangles for easy serving at parties.
- Arrange on a platter with other desserts for a beautiful dessert table spread.
- Make mini brownies in muffin tins for individual servings.
- Special Occasions:
- For birthdays, holidays, or special celebrations, decorate the ganache with sprinkles, chocolate shavings, or edible flowers.
- Layer brownies with whipped cream and berries in a trifle dish for a show-stopping dessert.
- Breakfast or Brunch (Less Traditional, but Possible):
- While richer than typical breakfast items, a small square can be enjoyed as a treat alongside brunch.
- Pair with fresh fruit and yogurt for a balanced brunch plate.
Serving Temperature:
- Warm: Slightly warmed brownies (a few seconds in the microwave) are extra fudgy and decadent.
- Room Temperature: Perfect for enjoying the full flavor and texture.
- Cold: Chilled brownies are firmer and can be refreshing, especially in warmer weather.
Additional Tips for Perfect Date Brownies
To ensure your Date Brownies are a resounding success every time, here are five additional tips and variations:
- Spice it Up: Enhance the flavor profile by adding spices to the brownie batter. A pinch of cinnamon, nutmeg, or cardamom can add warmth and complexity. For a richer chocolate flavor, try adding a teaspoon of instant espresso powder to the batter. You can also add a pinch of chili powder for a subtle kick. Experiment with different spice combinations to find your favorite.
- Nutty Additions: Incorporate chopped nuts or seeds into the brownie batter for added texture and flavor. Walnuts, pecans, almonds, or even toasted hazelnuts would be delicious additions. Roughly chop about 1/2 cup of your chosen nuts and fold them into the batter just before spreading it in the pan. You can also sprinkle some chopped nuts on top of the ganache for decoration and extra crunch. For seed additions, try chia seeds, flax seeds, or pumpkin seeds for added nutrients and a slight textural contrast.
- Vegan Adaptations & Sweetener Variations: As mentioned earlier, this recipe is easily adaptable to be fully vegan. Ensure you use plant-based butter or coconut oil for the ganache and substitute honey with maple syrup, agave, or brown rice syrup. When using maple syrup or agave, you might want to reduce the amount slightly as they can be sweeter than honey. Taste the batter and adjust sweetness as needed. For a less sweet brownie, reduce the honey or maple syrup by a tablespoon or two. For a richer, molasses-like sweetness, try using a tablespoon of blackstrap molasses in addition to the honey or maple syrup.
- Storage and Freezing Tips: Date Brownies store wonderfully and can even be made ahead of time. Store baked brownies in an airtight container at room temperature for up to 3-4 days, or in the refrigerator for up to a week. For longer storage, freeze the brownies (with or without ganache) in an airtight container or freezer-safe bag for up to 2-3 months. Thaw frozen brownies at room temperature for a few hours before serving. Freezing is a great way to keep brownies on hand for whenever a craving strikes. For best results when freezing ganache-topped brownies, freeze them in a single layer first until solid, then wrap them individually or stack them with parchment paper between layers to prevent sticking.
- Texture Customization: If you prefer a cakeier brownie, you can slightly increase the baking powder to 3/4 teaspoon. For an even fudgier brownie, you can add a tablespoon of cornstarch to the batter, which helps create a denser, chewier texture. If you want a more intense chocolate flavor in the brownie itself, you can melt a tablespoon of dark chocolate and add it to the batter along with the other ingredients. Experiment with baking time to adjust the fudginess. Slightly underbaked brownies will be more fudgy, while slightly longer baked brownies will be more cakey.
Frequently Asked Questions (FAQ)
Here are some common questions you might have about making Date Brownies:
Q1: Can I use different types of dates for this recipe?
A: Yes, you can use different types of dates. Medjool dates are ideal due to their soft texture and caramel-like flavor, but Deglet Noor dates or other readily available pitted dates will also work. If using drier dates like Deglet Noor, you might need to soak them for a bit longer to ensure they soften properly. The key is to ensure they are pitted and softened before blending.
Q2: Can I omit the chocolate ganache? Are the brownies good without it?
A: Absolutely! The Date Brownies are delicious even without the ganache. They are rich, fudgy, and flavorful on their own. Omit the ganache for a slightly healthier version or if you prefer a simpler brownie. You can dust them with cocoa powder, powdered sugar, or enjoy them plain. The ganache simply adds an extra layer of decadence, but it’s not essential for enjoying these brownies.
Q3: Can I use a different size pan if I don’t have an 8×8 inch pan?
A: Yes, you can use a different size pan, but you’ll need to adjust the baking time. If you use a 9×9 inch pan, the brownies will be slightly thinner and may bake a little faster, so start checking for doneness a few minutes earlier. If you use a smaller pan, like a 7×7 inch pan, the brownies will be thicker and may require a few extra minutes of baking time. Keep an eye on them and use the toothpick test to determine when they are done. Avoid using very large pans (like a 9×13 inch pan) as the batter might spread too thin and become dry.
Q4: How can I make these brownies sweeter or less sweet?
A: To make the brownies sweeter, you can increase the amount of honey (or maple syrup/agave) by a tablespoon or two. You can also add a tablespoon of brown sugar or coconut sugar to the batter for a touch more sweetness. For less sweet brownies, reduce the honey or maple syrup by a tablespoon or two. The natural sweetness of the dates is already quite prominent, so reducing the added sweetener can still result in a satisfyingly sweet brownie.
Q5: How do I ensure my brownies are not dry? What if they come out dry?
A: The key to moist Date Brownies is the soaking of the dates and not overbaking them. Ensure you soak the dates properly in hot water until they are softened. Do not overbake the brownies. Bake just until the edges are set and a toothpick inserted into the center comes out with moist crumbs. If you find your brownies are slightly dry after baking, you can try brushing them with a little bit of milk or almond milk while they are still warm. Storing them in an airtight container also helps retain moisture. Overbaking is the most common cause of dry brownies, so keep a close eye on them towards the end of the baking time.
These Date Brownies are a testament to the fact that healthy treats can be incredibly delicious and satisfying. Easy to make, packed with wholesome ingredients, and utterly irresistible, they are sure to become a go-to dessert for any occasion. So, preheat your oven, gather your ingredients, and get ready to bake a batch of guilt-free goodness that everyone will love! Don’t forget to share your baking adventures and any variations you try in the comments below – happy baking!
Print
Date Brownies Recipe
Ingredients
For the Brownies:
- 1 cup Dates (pitted): Dates are the star of the show here, providing natural sweetness, moisture, and a wonderful chewy texture. Medjool dates are often recommended for their softness and caramel-like flavor, but Deglet Noor dates or even cheaper varieties will work just as well. The key is to ensure they are pitted for easy blending. Dates are packed with fiber, potassium, and antioxidants, contributing to the nutritional value of these brownies. Soaking them softens them further, ensuring a smooth batter and preventing any gritty texture.
- Hot Water (to cover dates): Hot water is crucial for softening the dates. The heat helps to break down the fibers and sugars in the dates, making them easier to blend into a smooth paste. Using hot water also enhances their natural sweetness, creating a richer flavor base for the brownies. Make sure the water is hot but not boiling to avoid any potential issues with the dates.
- 1/2 cup Nut or Seed Butter (such as almond butter, peanut butter, tahini, or sunflower seed butter): This ingredient is what gives the brownies their fudgy texture and adds a depth of flavor that complements the sweetness of the dates. The choice of nut or seed butter is entirely up to your preference and dietary needs.
- Almond butter: Offers a slightly nutty and sophisticated flavor. It’s rich in vitamin E, magnesium, and calcium.
- Peanut butter: Provides a classic, comforting flavor that pairs wonderfully with chocolate. It’s a good source of protein and healthy fats. For those with peanut allergies, this is not an option.
- Tahini (sesame seed butter): Adds a subtle, slightly bitter and nutty flavor that is surprisingly delicious in brownies. It’s a good source of calcium, iron, and magnesium. Tahini also contributes to a very smooth and creamy texture.
- Sunflower seed butter: A fantastic allergy-friendly option for those who can’t have nuts. It has a mild, slightly sweet flavor and is rich in vitamin E and magnesium.
When choosing your nut or seed butter, opt for natural varieties without added sugar or salt whenever possible to control the sweetness and sodium content of your brownies. The consistency should be smooth and easily spreadable for optimal blending.
- 1/3 cup Cocoa Powder (unsweetened): Cocoa powder is what gives these brownies their rich, chocolatey flavor and classic brownie color. Unsweetened cocoa powder allows you to control the sweetness of the brownies and provides a deep, intense chocolate taste.
- Natural Cocoa Powder: This is the most common type and has a more acidic flavor. It’s lighter in color and works best with baking soda (though this recipe uses baking powder).
- Dutch-Processed Cocoa Powder: This cocoa powder has been treated with an alkaline solution to neutralize its acidity. It has a smoother, less bitter flavor and a darker color. Either natural or Dutch-processed cocoa powder will work well in this recipe; Dutch-processed will yield a slightly darker and richer brownie.
Cocoa powder is also a good source of antioxidants and adds to the overall nutritional profile of the brownies.
- 1/2 teaspoon Baking Powder: Baking powder is a leavening agent that helps the brownies rise slightly and achieve a tender texture. Although these brownies are dense and fudgy, a touch of baking powder prevents them from becoming too heavy or cakey. Ensure your baking powder is fresh for optimal leavening power. If you don’t have baking powder, you can substitute with 1/4 teaspoon of baking soda, but the texture might be slightly denser.
- 3 tablespoons Honey: Honey is used as a natural sweetener in this recipe, adding a touch of sweetness and moisture. It also contributes to the chewy texture of the brownies and adds a subtle floral note.
- Alternatives to Honey: For a vegan option or if you prefer a different sweetener, you can substitute honey with:
- Maple Syrup: Adds a distinct maple flavor which can be delicious. Use pure maple syrup for the best taste.
- Agave Nectar: Has a more neutral sweetness than honey or maple syrup.
- Brown Rice Syrup: Less sweet than honey, so you might need to increase the amount slightly to achieve desired sweetness.
Choose a good quality honey for the best flavor. Local honey can also add a unique touch.
- Alternatives to Honey: For a vegan option or if you prefer a different sweetener, you can substitute honey with:
- 1 teaspoon Pure Vanilla Extract: Vanilla extract enhances the overall flavor of the brownies, adding warmth and depth. Pure vanilla extract is always recommended over imitation vanilla for the best taste. You can also use vanilla bean paste for an even more intense vanilla flavor, using about 1 teaspoon.
- 1/2 teaspoon Sea Salt: Sea salt is crucial for balancing the sweetness and enhancing the other flavors in the brownies. Salt doesn’t just make things salty; it actually intensifies sweet flavors and prevents them from being one-dimensional. Sea salt is preferred for its cleaner taste compared to iodized table salt. If you only have table salt, use slightly less (about 1/4 teaspoon).
For the Chocolate Ganache (optional):
- 1/3 cup Butter or Ghee: Butter or ghee forms the base of the ganache, providing richness, shine, and a smooth texture.
- Butter: Use unsalted butter to control the salt content. Butter contributes a classic, creamy flavor to the ganache.
- Ghee (clarified butter): Ghee has a richer, nuttier flavor than butter and is lactose-free for those with sensitivities. It also has a higher smoke point, but this is not relevant in this ganache as it’s not cooked at high temperatures. Ghee will make the ganache slightly richer and more intensely flavored.
- Vegan Alternatives: For a vegan ganache, you can use:
- Coconut Oil: Use refined coconut oil for a neutral flavor (unrefined will add a coconut taste). Coconut oil will make the ganache firmer when chilled.
- Vegan Butter Sticks: Many brands of vegan butter sticks work well for ganache, providing a similar texture and flavor to dairy butter.
- 1/3 cup Chocolate Chips: Chocolate chips add an extra layer of chocolatey indulgence to the brownies when used in the ganache.
- Type of Chocolate Chips: You can use semi-sweet, dark chocolate, or even milk chocolate chips depending on your preference for sweetness and intensity.
- Dark Chocolate Chips: Will create a richer, less sweet ganache that complements the sweetness of the brownies beautifully.
- Semi-Sweet Chocolate Chips: A good balance of sweetness and chocolate flavor, a classic choice for ganache.
- Milk Chocolate Chips: Will result in a sweeter and milder ganache, which might be preferred by those who prefer less intense chocolate flavor.
High-quality chocolate chips will always yield a better-tasting ganache. Consider using chocolate chips with a higher cocoa percentage for a richer, more decadent ganache.
- Type of Chocolate Chips: You can use semi-sweet, dark chocolate, or even milk chocolate chips depending on your preference for sweetness and intensity.
Instructions
Brownies:
- Preheat your oven to 350°F (175°C). Preheating is crucial for even baking. Make sure your oven is at the correct temperature before you put the brownies in. An oven thermometer can be helpful to ensure accuracy, as oven temperatures can sometimes vary.
- Soak the dates in hot water for about 10 minutes to soften. Drain the water. Place the pitted dates in a bowl and cover them completely with hot water. Let them soak for about 10 minutes. This step is essential for softening the dates, making them easier to blend and ensuring a smooth brownie batter. After soaking, drain the water thoroughly. You can use the back of a spoon to gently press the dates and remove excess water.
- Put all ingredients in a blender or food processor and blend until smooth. Add a little water if needed. Combine the soaked and drained dates, nut or seed butter, cocoa powder, baking powder, honey, vanilla extract, and sea salt in a blender or food processor. Blend until completely smooth. If the mixture seems too thick and isn’t blending easily, add a tablespoon of water at a time until it reaches a smooth, pourable consistency. Be careful not to add too much water, as this can make the batter too thin. The goal is a thick, brownie-batter like texture. A high-speed blender or a powerful food processor will work best for achieving a completely smooth batter.
- Spread the mixture in a buttered square pan (8×8-inch). Grease an 8×8 inch square baking pan with butter or cooking spray to prevent the brownies from sticking. You can also line the pan with parchment paper, leaving an overhang on the sides, which makes it incredibly easy to lift the brownies out of the pan after baking. Pour the brownie batter into the prepared pan and spread it evenly using a spatula or the back of a spoon. Ensure the batter is distributed uniformly in the pan for even baking.
- Bake for about 20 minutes, until set. Place the pan in the preheated oven and bake for approximately 20 minutes. To check for doneness, insert a toothpick into the center of the brownies. It should come out with moist crumbs attached, not wet batter. The edges should be set, and the center should still be slightly fudgy. Baking time can vary slightly depending on your oven, so start checking for doneness around 18 minutes. Avoid overbaking, as this can make the brownies dry.
- Allow to cool completely before frosting with the Ganache. Once baked, remove the brownies from the oven and let them cool completely in the pan on a wire rack. Cooling is essential for the brownies to set properly and to prevent the ganache from melting if you choose to add it. Allowing them to cool completely also makes them easier to slice neatly.
Chocolate Ganache:
- Melt the butter in a bowl and add the chocolate chips. Stir until the chocolate chips are melted. In a heatproof bowl, melt the butter (or ghee or vegan alternative). You can do this in the microwave in short intervals (about 30 seconds at a time, stirring in between) or over a double boiler on the stovetop. Once the butter is melted, add the chocolate chips to the bowl. Let them sit for a minute to soften, then stir until the chocolate chips are completely melted and the mixture is smooth and glossy.
- Put the mixture in the freezer for about 20 minutes until set (but not completely frozen). Place the bowl of melted chocolate mixture in the freezer for about 20 minutes. This chilling process is crucial for achieving the right consistency for beating the ganache. You want the ganache to be set but not frozen solid. It should be firm enough to hold its shape but still slightly pliable.
- Beat the mixture with an electric mixer. It will become light brown and smooth. Remove the chilled ganache from the freezer. Using an electric mixer (hand mixer or stand mixer), beat the ganache on medium-high speed. As you beat, the ganache will lighten in color and become airy and smooth, almost like whipped frosting. This process incorporates air into the ganache, making it lighter and more spreadable.
- Spread over the brownies and slice into squares. Once the brownies are completely cooled, spread the whipped ganache evenly over the top. You can use a spatula or knife to create a smooth surface or swirls for a more decorative look. After frosting, slice the brownies into squares. An 8×8 inch pan will typically yield 9 to 16 brownies depending on the size you prefer. For clean slices, use a sharp knife and wipe it clean between each cut, especially if the ganache is still slightly soft.
Nutrition
- Serving Size: One Normal Portion
- Calories: 250-350
- Sugar: 20-25g
- Sodium: 100-150mg
- Fat: 15-20g
- Saturated Fat: 2-3g
- Carbohydrates: 30-40g
- Fiber: 5-7g
- Protein: 5-7g
- Cholesterol: 0mg