Of all the recipes that have become surprise hits in my kitchen, this Egg Pizza with Scallions stands out as a true champion. I first stumbled upon the idea on a hectic Tuesday morning, staring into the fridge with that familiar feeling of “what can I make that’s fast, healthy, and not just another bowl of cereal?” My kids, ever the critics, are wary of anything that deviates from their breakfast norms. When I announced we were having “pizza for breakfast,” their eyes lit up, only to be followed by a wave of suspicion when they saw me pull out a carton of eggs instead of dough. The beauty of this recipe, I soon discovered, is its deceptive simplicity and its incredible flavor payoff. The eggs form a wonderfully savory, protein-packed “crust” that’s firm enough to slice yet tender and fluffy. The scallions, cooked right into the base, release a mild, sweet oniony flavor that permeates every bite, while a generous blanket of melted cheese provides that irresistible pizza-like satisfaction. That first morning, the silence that fell over the breakfast table was all the review I needed. Slices disappeared, and my skeptical son even asked for a second piece of “egg pizza.” It has since become a staple not just for breakfast, but for quick lunches and light “brinner” (breakfast for dinner) nights. It’s the kind of dish that makes you feel like a culinary genius, even though it comes together in under 15 minutes. It’s a testament to the fact that delicious, satisfying meals don’t need to be complicated, and sometimes, the best recipes are born from a little bit of morning desperation and a handful of simple, quality ingredients.
The Ultimate Egg Pizza with Scallions Recipe
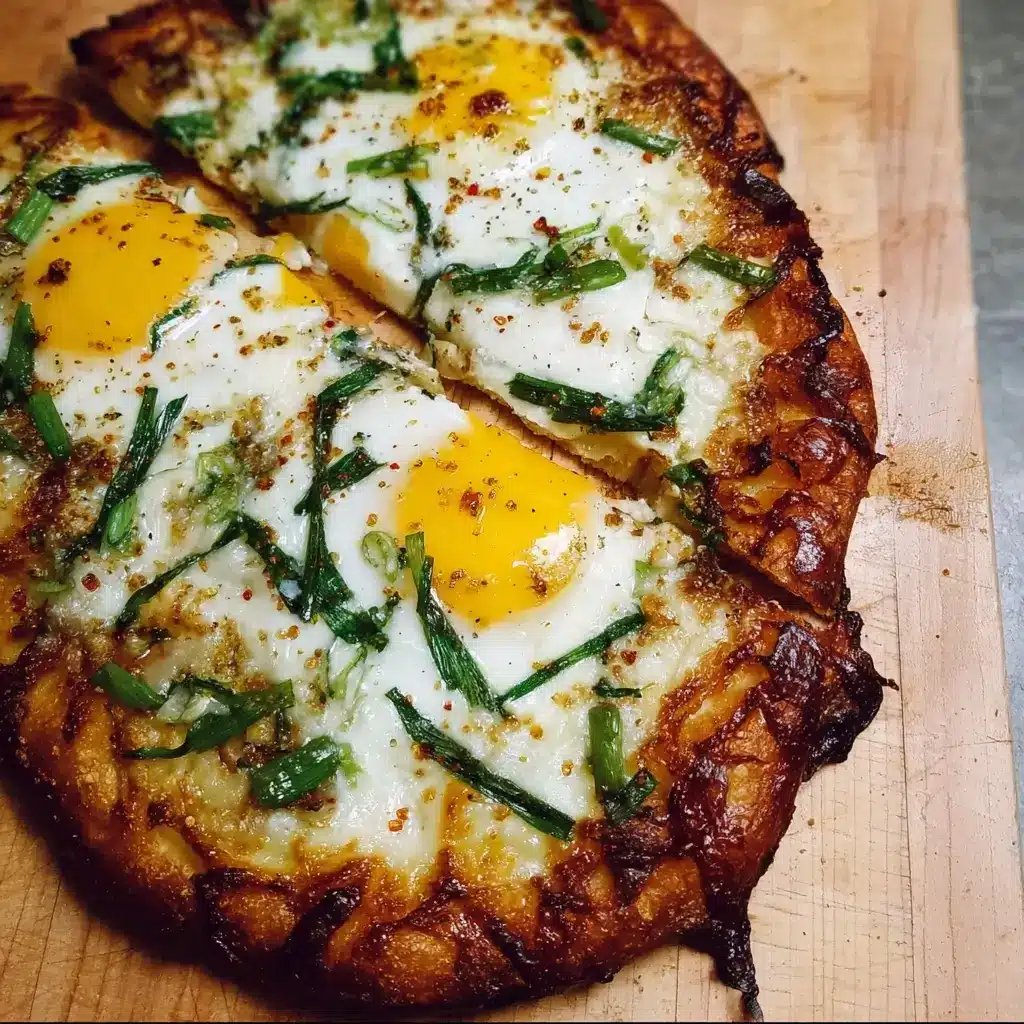
This recipe is your new secret weapon for a fast, flavorful, and incredibly versatile meal. It ditches the traditional flour crust for a high-protein, low-carb egg base, making it a fantastic gluten-free and keto-friendly option. It’s a canvas for your culinary creativity, but this classic combination of savory egg, sharp scallions, and gooey cheese is a perfect starting point.
Why You’ll Fall in Love with This Recipe
- Incredibly Fast: From cracking the eggs to sliding it onto a plate, you’re less than 15 minutes away from a satisfying meal.
- Healthy & High-Protein: Packed with protein from the eggs and cheese, it will keep you full and energized for hours.
- Endlessly Customizable: Think of this as a base recipe. You can add any of your favorite pizza toppings.
- Diet-Friendly: Naturally gluten-free, low-carb, and perfect for those following a ketogenic lifestyle.
- Minimal Ingredients: It relies on a few pantry and refrigerator staples, making it perfect for a last-minute meal.
Ingredients You Will Need
This recipe is designed for a 10-inch skillet and yields two to three generous servings.
- Large Eggs: 6
- Scallions (Green Onions): 4, thinly sliced (separate the white/light green parts from the dark green tops)
- Shredded Low-Moisture Mozzarella Cheese: 3/4 cup
- Grated Parmesan Cheese: 1/4 cup
- Heavy Cream or Milk: 2 tablespoons (optional, for a richer, more tender texture)
- Unsalted Butter or Olive Oil: 1 tablespoon
- Garlic Powder: 1/2 teaspoon
- Salt: 1/2 teaspoon (or to taste)
- Black Pepper: 1/4 teaspoon, freshly cracked
- Red Pepper Flakes: A pinch (optional, for a little heat)
Step-by-Step Instructions
Following these detailed steps will ensure your egg pizza has a perfectly cooked, fluffy base and a beautifully melted, cheesy top every single time. The key is to control your heat and not rush the process.
Step 1: Prepare Your Ingredients (Mise en Place)
Before you even think about turning on the stove, get all your ingredients ready. This recipe moves quickly, and having everything prepped and within reach is crucial. Thinly slice your scallions, separating the firmer white and light green parts from the more delicate dark green tops. Grate your cheeses if they aren’t pre-shredded. Measure out your seasonings. Crack the eggs into a medium-sized mixing bowl. This simple act of preparation will make the cooking process smooth and stress-free.
Step 2: Whisk the Egg Base
To the bowl with your cracked eggs, add the heavy cream (if using), garlic powder, salt, and black pepper. Using a whisk, beat the eggs vigorously for a full 30-45 seconds. You are not just combining them; you are incorporating air into the mixture. This is the secret to a light, fluffy “crust” rather than a dense, flat omelet. The mixture should be a uniform pale yellow color with small air bubbles on the surface.
Step 3: Sauté the Scallions
Place a 10-inch non-stick or well-seasoned cast-iron skillet over medium heat. Add the tablespoon of butter or olive oil. Once the butter has melted and is sizzling gently (or the oil shimmers), add the white and light green parts of the sliced scallions. Sauté for 1-2 minutes, stirring occasionally. You want to soften them and release their aromatic flavor, not brown them. This step infuses the entire dish with a foundational layer of savory, sweet oniony goodness.
Step 4: Cook the Egg “Crust”
Give your egg mixture one last quick whisk and pour it directly into the skillet over the sautéed scallions. Immediately reduce the heat to medium-low. This is a critical step. High heat will cook the bottom too quickly, making it tough and rubbery before the top has a chance to set. Let the eggs cook undisturbed for 3-4 minutes. As they cook, you can use a spatula to gently push the cooked edges toward the center, allowing the uncooked egg from the top to flow to the edges of the pan. This helps the pizza cook more evenly. Continue until the edges are set and the center is still slightly wet and jiggly.
Step 5: Add the Toppings and Melt
Once the egg base is mostly set, it’s time to turn it into a pizza. Sprinkle the shredded mozzarella cheese evenly over the entire surface, followed by the grated Parmesan cheese. Scatter the reserved dark green scallion tops over the cheese, and add a pinch of red pepper flakes if you desire a bit of spice.
Step 6: The Final Melt
You have two options for melting the cheese perfectly.
- The Lid Method: Place a tight-fitting lid on the skillet. The trapped steam will cook the last bit of runny egg on top and melt the cheese beautifully in about 2-3 minutes. This is the quickest and easiest method.
- The Broiler Method: For a more authentic “pizza” look with bubbly, slightly browned cheese, preheat your oven’s broiler while the eggs are setting. Once you’ve added the toppings, transfer the oven-safe skillet directly under the broiler for 1-2 minutes. Watch it like a hawk, as broilers can burn things in an instant! Remove it as soon as the cheese is melted and bubbly to your liking.
Step 7: Serve Immediately
Carefully slide the finished egg pizza from the skillet onto a cutting board. Let it rest for a minute before slicing it into wedges, just like a real pizza. Serve hot and enjoy the delicious results of your quick work.
A Look at the Nutrition
This is an approximation and can vary based on specific ingredients used (e.g., type of milk, exact cheese amounts).
- Servings: 2-3
- Calories per serving (if 3 servings): Approximately 315 kcal
This dish is a nutritional powerhouse. It’s rich in high-quality protein, which is essential for muscle repair and satiety. It’s also very low in carbohydrates, making it an excellent choice for anyone monitoring their carb intake. The addition of cheese provides calcium and healthy fats, contributing to a well-rounded and satisfying meal.
Quick and Efficient: Timing Your Egg Pizza
One of the best features of this recipe is its speed.
- Preparation Time: 5 minutes (This includes washing and slicing scallions, grating cheese, and whisking the eggs).
- Cook Time: 8-10 minutes
- Total Time: Approximately 15 minutes
This makes it a genuinely achievable meal for busy weekday mornings, a speedy work-from-home lunch, or a no-fuss weeknight dinner.
How to Serve Your Delicious Egg Pizza with Scallions
While it’s fantastic on its own, this egg pizza can be the star of a more elaborate meal. Here are some serving suggestions for any time of day:
- For a Complete Breakfast or Brunch Spread:
- Side of Protein: Serve alongside crispy bacon, breakfast sausage links, or Canadian bacon.
- Freshness: A bowl of mixed berries or a simple fruit salad provides a sweet, fresh contrast to the savory pizza.
- Healthy Fats: Slices of fresh avocado drizzled with lime juice and a sprinkle of sea salt.
- A Touch of Green: A handful of fresh arugula or baby spinach tossed in a light lemon vinaigrette on the side.
- Beverages: Pair with a hot cup of coffee, a frothy latte, or a tall glass of fresh-squeezed orange juice.
- As a Light and Healthy Lunch:
- Soup and Pizza: Pair a slice with a small cup of creamy tomato soup for a comforting and classic combination.
- Simple Salad: Serve with a large side salad of mixed greens, cucumber, and cherry tomatoes with your favorite dressing.
- With Toast: For those not concerned with carbs, a slice of hearty, buttered sourdough toast is a wonderful accompaniment.
- For a “Brinner” (Breakfast for Dinner) Night:
- Roasted Vegetables: Serve with a side of roasted asparagus, broccoli, or bell peppers.
- Potatoes: A side of crispy roasted breakfast potatoes or hash browns makes it a more substantial dinner.
- Finishing Touches: Offer a variety of hot sauces, a dollop of sour cream or plain Greek yogurt, or a drizzle of high-quality balsamic glaze on top.
Pro Tips for the Perfect Egg Pizza
Take your egg pizza from great to absolutely spectacular with these five expert tips.
- The Skillet is Your Most Important Tool. Success or failure often comes down to the pan. A high-quality non-stick skillet is your best bet for an easy release. Alternatively, a well-seasoned cast-iron skillet works beautifully and provides a fantastic, even heat. Ensure the pan is properly preheated with the fat before adding the eggs; this creates a barrier that prevents sticking. The size also matters: a 10-inch skillet creates a perfect thickness. A smaller skillet will result in a thicker, more frittata-like pizza, while a larger one will be thinner and cook faster.
- Don’t Dare Overcook the Eggs. The biggest mistake you can make is overcooking the egg base. Eggs are delicate and continue to cook from residual heat even after you remove them from the stove (this is called carryover cooking). Your goal is to cook them until they are just set. The center should still have a slight wobble when you add the cheese. This ensures the final product is tender and moist, not dry and rubbery.
- Pre-cook Heartier Toppings. While scallions are delicate enough to cook with the eggs, if you plan to customize your pizza with other ingredients, many of them need to be cooked first. Vegetables like mushrooms, bell peppers, and onions release a lot of water as they cook. Sautéing them beforehand not only prevents a soggy egg pizza but also concentrates their flavor. The same goes for raw meats like sausage or bacon; cook them fully before adding them as a topping.
- Embrace Cheese Exploration. Mozzarella is a classic choice for its superior melting qualities and mild flavor, but don’t be afraid to experiment! A sharp cheddar will add a bolder flavor. A mix of Provolone and Mozzarella will give you that classic “pizza pull.” Crumbled feta or goat cheese added at the end can provide a tangy, creamy counterpoint. Using a combination of a great melting cheese (like mozzarella) and a hard, flavorful cheese (like Parmesan) is the ultimate pro move.
- Control Your Heat. This can’t be stressed enough. The journey starts at medium heat to sauté the scallions, but it must be immediately lowered to medium-low or even low when the eggs go in. Gentle, even heat is the key to a tender custard-like texture. If the bottom of your egg pizza is brown and the top is still raw, your heat is too high. A patient, low-and-slow approach will always yield better results.
Frequently Asked Questions about Egg Pizza
Here are answers to some common questions you might have about this versatile recipe.
1. Can I make this egg pizza ahead of time?
While this recipe is undeniably best when served fresh and hot from the skillet, you can make it ahead of time. To store, let the egg pizza cool completely, then wrap it tightly in plastic wrap or store it in an airtight container in the refrigerator for up to 2 days. To reheat, avoid the microwave, which can make the eggs rubbery. Instead, place the slices on a baking sheet in a 350°F (175°C) oven for 5-7 minutes, or until warmed through. You can also gently reheat slices in a non-stick skillet over low heat.
2. Is this recipe really low-carb and keto-friendly?
Absolutely. This is one of its main advantages. By completely eliminating the traditional flour-based crust, the carbohydrate count is extremely low, coming primarily from the scallions and a trace amount in the cheese. It is high in protein and healthy fats, fitting perfectly within the macronutrient goals of a ketogenic or low-carb diet. It is also naturally gluten-free.
3. What other vegetables or proteins can I add?
The possibilities are nearly endless! Think of it as a standard pizza. For vegetables, try sautéed spinach (be sure to squeeze out all excess water), mushrooms, diced bell peppers, onions, jalapeños, or halved cherry tomatoes. For protein, add cooked and crumbled sausage, diced ham, pepperoni slices, or shredded cooked chicken. Just remember the pro tip: always pre-cook raw meats and watery vegetables before adding them.
4. My egg pizza stuck to the pan! What went wrong?
This is a common frustration that usually comes down to one of three things:
- The Pan: Your pan was not truly non-stick or well-seasoned.
- The Heat: Your pan was not hot enough when you added the eggs, so they bonded with the pan’s surface before they could start cooking.
- The Fat: You didn’t use enough butter or oil to create a protective layer between the eggs and the pan.
To fix this for next time, ensure your skillet is preheated properly over medium heat, add your fat and let it get hot, then turn the heat down to low right before pouring in the eggs.
5. How do I make my egg pizza extra fluffy?
There are a few tricks to achieving a fluffier texture. First, whisk the eggs more vigorously and for longer than you think you need to—at least 30-45 seconds. This forces air into the mixture. Second, adding a small amount of full-fat dairy, like the 2 tablespoons of heavy cream or whole milk in the recipe, adds fat and moisture, which interferes with the proteins tightening up too much, resulting in a more tender and custardy texture. Finally, cooking on a lower heat prevents the eggs from seizing up and becoming dense.

Egg Pizza with Scallions Recipe
Ingredients
- Large Eggs: 6
- Scallions (Green Onions): 4, thinly sliced (separate the white/light green parts from the dark green tops)
- Shredded Low-Moisture Mozzarella Cheese: 3/4 cup
- Grated Parmesan Cheese: 1/4 cup
- Heavy Cream or Milk: 2 tablespoons (optional, for a richer, more tender texture)
- Unsalted Butter or Olive Oil: 1 tablespoon
- Garlic Powder: 1/2 teaspoon
- Salt: 1/2 teaspoon (or to taste)
- Black Pepper: 1/4 teaspoon, freshly cracked
- Red Pepper Flakes: A pinch (optional, for a little heat)
Instructions
Step 1: Prepare Your Ingredients (Mise en Place)
Before you even think about turning on the stove, get all your ingredients ready. This recipe moves quickly, and having everything prepped and within reach is crucial. Thinly slice your scallions, separating the firmer white and light green parts from the more delicate dark green tops. Grate your cheeses if they aren’t pre-shredded. Measure out your seasonings. Crack the eggs into a medium-sized mixing bowl. This simple act of preparation will make the cooking process smooth and stress-free.
Step 2: Whisk the Egg Base
To the bowl with your cracked eggs, add the heavy cream (if using), garlic powder, salt, and black pepper. Using a whisk, beat the eggs vigorously for a full 30-45 seconds. You are not just combining them; you are incorporating air into the mixture. This is the secret to a light, fluffy “crust” rather than a dense, flat omelet. The mixture should be a uniform pale yellow color with small air bubbles on the surface.
Step 3: Sauté the Scallions
Place a 10-inch non-stick or well-seasoned cast-iron skillet over medium heat. Add the tablespoon of butter or olive oil. Once the butter has melted and is sizzling gently (or the oil shimmers), add the white and light green parts of the sliced scallions. Sauté for 1-2 minutes, stirring occasionally. You want to soften them and release their aromatic flavor, not brown them. This step infuses the entire dish with a foundational layer of savory, sweet oniony goodness.
Step 4: Cook the Egg “Crust”
Give your egg mixture one last quick whisk and pour it directly into the skillet over the sautéed scallions. Immediately reduce the heat to medium-low. This is a critical step. High heat will cook the bottom too quickly, making it tough and rubbery before the top has a chance to set. Let the eggs cook undisturbed for 3-4 minutes. As they cook, you can use a spatula to gently push the cooked edges toward the center, allowing the uncooked egg from the top to flow to the edges of the pan. This helps the pizza cook more evenly. Continue until the edges are set and the center is still slightly wet and jiggly.
Step 5: Add the Toppings and Melt
Once the egg base is mostly set, it’s time to turn it into a pizza. Sprinkle the shredded mozzarella cheese evenly over the entire surface, followed by the grated Parmesan cheese. Scatter the reserved dark green scallion tops over the cheese, and add a pinch of red pepper flakes if you desire a bit of spice.
Step 6: The Final Melt
You have two options for melting the cheese perfectly.
- The Lid Method: Place a tight-fitting lid on the skillet. The trapped steam will cook the last bit of runny egg on top and melt the cheese beautifully in about 2-3 minutes. This is the quickest and easiest method.
- The Broiler Method: For a more authentic “pizza” look with bubbly, slightly browned cheese, preheat your oven’s broiler while the eggs are setting. Once you’ve added the toppings, transfer the oven-safe skillet directly under the broiler for 1-2 minutes. Watch it like a hawk, as broilers can burn things in an instant! Remove it as soon as the cheese is melted and bubbly to your liking.
Step 7: Serve Immediately
Carefully slide the finished egg pizza from the skillet onto a cutting board. Let it rest for a minute before slicing it into wedges, just like a real pizza. Serve hot and enjoy the delicious results of your quick work.
Nutrition
- Serving Size: One Normal Portion
- Calories: 315 kcal