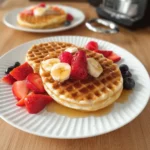
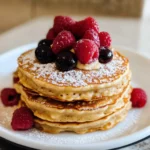
There are certain weekend mornings when only pancakes will do. You know the ones – slow, cozy mornings where the smell of something sweet cooking wafts through the house, drawing everyone to the kitchen. For the longest time, traditional pancakes were our go-to, but as our family started exploring healthier eating habits and navigating some gluten sensitivities, I found myself searching for an alternative that didn’t sacrifice taste or texture. That’s when I stumbled upon the magic of flourless oatmeal pancakes. Skeptical at first (pancakes without flour?), I blended up a batch of these Flourless Vanilla Oatmeal Pancakes, laced with the warm scent of vanilla. The result? Utterly transformative. They were surprisingly light, fluffy, and packed with wholesome oat goodness. The subtle sweetness and comforting vanilla flavor were an instant hit. Even my pickiest eaters devoured them, completely unaware they were eating something significantly more nutritious than our old standard. They’ve since become a staple, proving that healthy and delicious can absolutely go hand-in-hand for that perfect weekend breakfast treat. They cook up beautifully golden, stack impressively, and hold toppings like a dream. Honestly, we don’t miss the flour one bit!
Flourless Vanilla Oatmeal Pancakes: The Recipe
This recipe swaps traditional flour for wholesome rolled oats, blended into a fine meal to create the pancake base. The result is a tender, slightly nutty, and wonderfully satisfying pancake experience, enhanced by the comforting aroma and taste of pure vanilla. It’s naturally gluten-free (ensure certified gluten-free oats if necessary) and packed with fiber.
Yields: Approximately 8-10 medium pancakes
Prep time: 15 minutes (includes resting time)
Cook time: 15-20 minutes
Ingredients:
- Rolled Oats: 2 cups (Use certified gluten-free rolled oats if needed. Avoid steel-cut or instant oats)
- Milk: 1 ¼ cups (Any kind works – dairy milk like whole, 2%, or skim, or non-dairy like almond, soy, oat, or cashew milk. You might need slightly more or less depending on the milk type and oat absorbency)
- Large Eggs: 2 (Act as a binder and add richness and structure)
- Pure Maple Syrup: 2-3 tablespoons (Or honey, agave nectar, or your preferred liquid sweetener. Adjust to your desired sweetness level)
- Pure Vanilla Extract: 1 ½ teaspoons (Use good quality vanilla for the best flavor)
- Baking Powder: 1 tablespoon (Make sure it’s fresh for maximum lift; use gluten-free if necessary)
- Fine Sea Salt: ¼ teaspoon (Enhances all the other flavors)
- Optional: Melted Butter or Coconut Oil: 1-2 tablespoons (Adds richness and helps prevent sticking, can be omitted if using a good non-stick pan and cooking spray)
- For Cooking: Butter, coconut oil, or cooking spray for the griddle or pan
Step-by-Step Instructions
Making these flourless vanilla oatmeal pancakes is incredibly simple, especially with the help of a blender. The key steps involve creating your “oat flour,” mixing the batter, letting it rest, and cooking to golden perfection.
- Blend the Oats: Place the 2 cups of rolled oats into the carafe of a high-speed blender. Blend on high speed for about 30-60 seconds, or until the oats are ground into a relatively fine, flour-like consistency. It doesn’t need to be perfectly uniform like commercial oat flour, but you shouldn’t see many whole oat flakes remaining. Scrape down the sides if necessary.
- Add Wet Ingredients & Seasonings: To the blender with the ground oats, add the milk (starting with 1 ¼ cups), large eggs, maple syrup (or chosen sweetener), pure vanilla extract, baking powder, fine sea salt, and the optional melted butter or coconut oil (if using).
- Blend the Batter: Secure the lid on the blender. Blend again on medium-high speed for about 20-30 seconds, just until all ingredients are fully combined and the batter is smooth. Be careful not to over-blend at this stage. The batter should be thick but pourable, similar to traditional pancake batter, perhaps slightly thicker due to the oats. If it seems excessively thick (like paste), add another tablespoon or two of milk and blend briefly.
- Rest the Batter (Crucial Step!): Pour the batter from the blender into a bowl or leave it in the blender carafe. Let the batter rest for at least 10-15 minutes. This allows the oats to fully hydrate and absorb the liquid, and it gives the baking powder time to activate. This resting period is essential for achieving a lighter, fluffier texture and preventing dense or gummy pancakes. The batter will thicken slightly as it rests.
- Prepare the Cooking Surface: While the batter rests, heat a large non-stick skillet, griddle, or frying pan over medium heat. Getting the temperature right is key – too hot and the outside will burn before the inside cooks; too low and the pancakes won’t brown properly or become fluffy. A good test is to flick a drop of water onto the surface; it should sizzle and evaporate quickly.
- Grease the Pan: Once hot, lightly grease the pan with butter, coconut oil, or a light coating of cooking spray. Even non-stick pans benefit from a little grease for better browning and flavor.
- Cook the Pancakes: Give the rested batter a gentle stir (it might have settled). Pour or scoop the batter onto the hot, greased griddle, using about ¼ cup of batter per pancake. You can make them smaller or larger based on your preference, adjusting cook time accordingly. Don’t overcrowd the pan; cook in batches if necessary.
- Flip: Cook for about 2-4 minutes per side. You’ll know it’s time to flip when small bubbles start forming and popping on the surface of the pancake, the edges look set and slightly dry, and the underside is golden brown when you lift an edge gently with a spatula.
- Cook the Second Side: Carefully slide a thin spatula underneath the pancake and confidently flip it over. Cook the second side for another 1-3 minutes, or until it’s also golden brown and the pancake feels cooked through (it should spring back lightly when touched).
- Repeat: Transfer the cooked pancakes to a plate or a wire rack. Keep them warm in a low oven (around 200°F or 90°C) on an oven-safe plate if cooking multiple batches. Repeat the greasing and cooking process with the remaining batter, adjusting the heat slightly if needed (pans tend to get hotter over time).
- Serve: Serve the flourless vanilla oatmeal pancakes immediately with your favorite toppings.
Nutrition Facts (Approximate)
It’s important to remember that these nutritional values are estimates. The exact figures can vary significantly based on the specific ingredients used (e.g., type of milk, sweetener, addition of oil/butter) and, crucially, the toppings you add.
- Servings: This recipe makes approximately 4 servings.
- Serving Size: 2-3 medium pancakes per serving (depending on if the batch yields 8 or 10 total).
- Calories Per Serving (Pancakes Only): Approximately 250-350 calories.
Breakdown Considerations:
- Oats: Rolled oats are a good source of complex carbohydrates, dietary fiber (especially soluble fiber like beta-glucan, known for heart health benefits), and some protein.
- Eggs: Contribute protein and healthy fats.
- Milk: Adds protein, calcium, and vitamins (varies by type). Non-dairy milks offer different profiles (e.g., almond milk is lower calorie, soy milk offers more protein).
- Sweetener: Maple syrup adds natural sugars and some minerals, but contributes to the calorie and carb count.
- Added Fat (Optional): Melted butter or coconut oil will increase the calorie and fat content but can add to satiety and flavor.
- Toppings: This is where nutritional content can change drastically. Syrup, butter, chocolate chips, and whipped cream add significant calories, sugar, and fat. Fruit, yogurt, nuts, and seeds add nutrients but also calories.
For a more precise nutritional analysis, consider using an online recipe nutrition calculator and inputting your exact ingredients and quantities. These pancakes offer a more nutrient-dense profile compared to traditional white flour pancakes, primarily due to the whole grain oats providing fiber and sustained energy release.
Preparation & Cook Time
Understanding the time commitment helps plan your breakfast making!
- Preparation Time: 5-7 minutes (Measuring ingredients, blending oats and batter).
- Resting Time: 10-15 minutes (Essential step, done while the pan heats).
- Cook Time: 15-20 minutes (Cooking in batches, depending on pan size and number of pancakes).
- Total Time: Approximately 30-40 minutes from start to finish.
This timing makes them feasible for a relaxed weekend breakfast or even a slightly more ambitious weekday morning if you multitask effectively during the resting period. The active “hands-on” time is relatively short, split between blending and cooking.
How to Serve Your Flourless Vanilla Oatmeal Pancakes
These pancakes are a fantastic blank canvas! Their subtle vanilla and oat flavor pairs well with a wide range of toppings, from classic to creative. Here are some serving ideas:
- The Classics:
- A pat of Butter (dairy or plant-based) melting over the warm stack.
- A generous drizzle of pure Maple Syrup.
- A dollop of Whipped Cream (or coconut cream for a dairy-free option).
- Fruity & Fresh:
- A medley of Fresh Berries (strawberries, blueberries, raspberries, blackberries).
- Sliced Bananas (perhaps even caramelized bananas cooked briefly in butter and brown sugar).
- Warm Stewed Apples or Pears with cinnamon.
- A spoonful of Fruit Compote or Jam.
- Sliced Peaches or Mango when in season.
- Creamy & Tangy:
- A dollop of plain or vanilla Greek Yogurt or regular yogurt (adds protein and tang).
- Skyr or Cottage Cheese for a protein boost.
- Dairy-Free Yogurt alternatives (coconut, almond, soy).
- A drizzle of Crème Fraîche for richness.
- Crunchy & Nutty:
- A sprinkle of chopped Nuts (walnuts, pecans, almonds, pistachios).
- A scattering of Seeds (chia seeds, flax seeds, pumpkin seeds, sunflower seeds).
- A spoonful of Granola for extra texture.
- Toasted Coconut Flakes.
- Decadent & Sweet:
- A drizzle of melted Nut Butter (peanut, almond, cashew).
- Chocolate Chips (stirred into the batter before cooking or sprinkled on top).
- A drizzle of Melted Dark Chocolate or Nutella.
- A dusting of Powdered Sugar (use sparingly).
- Flavor Enhancers:
- A sprinkle of Cinnamon, Nutmeg, or Cardamom.
- A drizzle of Honey or Agave Nectar.
- A little bit of Lemon or Orange Zest for brightness.
- Savory Contrast (Optional):
- Serve alongside crispy Bacon or Breakfast Sausage.
- A side of Scrambled Eggs.
Think about combining elements for texture and flavor – like fresh berries with yogurt and a sprinkle of nuts, or banana slices with maple syrup and pecans. The possibilities are endless!
Top 5 Tips for Perfect Pancakes Every Time
Achieving pancake perfection, especially with a flourless recipe, involves a few key techniques. Follow these tips for the best results:
- Blend Oats Adequately, But Don’t Pulverize: Aim for a consistency resembling coarse flour or fine meal. Over-blending into a super-fine powder can sometimes lead to a gummier texture, while under-blending leaves large flakes that prevent a cohesive pancake. Find that sweet spot where most flakes are broken down but it still retains some oat character. Stop blending as soon as the batter is smooth to avoid over-processing.
- Embrace the Resting Period: Don’t skip the 10-15 minute rest after blending! This is arguably the most crucial step for flourless oatmeal pancakes. Oats need time to absorb the liquid fully. Skipping this step often results in thinner batter that spreads too much and pancakes that are denser, gummier, or have a slightly raw oat taste. Resting allows the batter to thicken naturally and lets the baking powder start working its magic, creating air pockets for a fluffier result.
- Master Medium Heat: Cooking temperature is critical. Medium heat is usually ideal. If the heat is too high, the outside of the pancakes will brown (or burn) too quickly, leaving the inside undercooked and potentially doughy. If the heat is too low, the pancakes won’t develop a nice golden crust, may absorb too much oil/butter, and won’t rise as well due to slow cooking. Adjust the heat as needed throughout the cooking process, especially if cooking multiple batches.
- Grease Smartly, Not Excessively: Use just enough butter, oil, or cooking spray to create a thin, even layer on your cooking surface. This prevents sticking and promotes even browning. Too much fat can lead to greasy pancakes with uneven color or fried edges. Re-grease lightly between batches as needed. A good non-stick pan might require very little added fat after the first batch.
- Look for the Bubbles & Edges: Resist the urge to flip too early! Wait for the signs. Small bubbles should appear across the surface of the pancake and begin to pop. The edges should start to look set and slightly dry, losing their wet sheen. Gently lift a corner with your spatula; the underside should be a beautiful golden brown. Flipping at the right time ensures the pancake is structurally sound enough to handle the flip and cooks evenly.
Frequently Asked Questions (FAQ)
Here are answers to some common questions about making Flourless Vanilla Oatmeal Pancakes:
- Q: Are these pancakes truly gluten-free?
- A: They can be, but it depends entirely on your oats. Oats are naturally gluten-free, but they are often processed in facilities that also handle wheat, barley, and rye, leading to cross-contamination. If you have celiac disease or a significant gluten sensitivity, you must use oats that are specifically labeled “Certified Gluten-Free” to ensure they are safe. Additionally, check that your baking powder is gluten-free, although most brands are.
- Q: Can I use different types of oats, like quick-cooking or steel-cut?
- A: Rolled oats (old-fashioned oats) are highly recommended for the best texture in this recipe. Quick-cooking oats might work in a pinch, as they are just rolled oats cut into smaller pieces. They absorb liquid faster, so you might need slightly less milk, and the resulting texture could be a bit mushier or less substantial. Steel-cut oats will not work for this recipe; they are too hard and require much longer cooking times and significantly more liquid. Blending them won’t create the right consistency for pancake batter. Stick with rolled oats for reliable results.
- Q: How do I store leftover pancakes, and can I make the batter ahead?
- A: Leftover Pancakes: Cool cooked pancakes completely on a wire rack. Store them in an airtight container in the refrigerator for up to 3-4 days. For longer storage, freeze them. Place cooled pancakes in a single layer on a baking sheet and freeze until solid, then transfer them to a freezer-safe bag or container, placing parchment paper between layers if desired to prevent sticking. They can be frozen for up to 2-3 months. Reheat refrigerated or frozen pancakes in a toaster, toaster oven, microwave (they might get slightly chewy), or briefly in a lightly greased pan over medium-low heat until warmed through.
- Make-Ahead Batter: While you can technically make the batter ahead and store it covered in the refrigerator overnight, it’s generally not recommended for the best texture. The baking powder will lose some of its leavening power over time, potentially resulting in flatter, denser pancakes. Additionally, the oats will continue to absorb liquid, making the batter very thick, possibly requiring significant thinning before cooking. For the fluffiest results, it’s best to make the batter just before cooking, including the crucial resting time.
- Q: Can I make substitutions for other ingredients like milk, eggs, or sweetener?
- A: Yes, this recipe is quite flexible!
- Milk: Absolutely. Any dairy milk (whole, 2%, skim) or non-dairy milk (almond, soy, oat, cashew, coconut beverage) works well. The type of milk might slightly affect the batter thickness and final flavor.
- Eggs: For a vegan version, you can try substituting the eggs with flax eggs (1 tbsp ground flaxseed + 3 tbsp water per egg, let sit for 5 minutes) or chia eggs. A commercial egg replacer or even unsweetened applesauce (about ¼ cup per egg) might also work, though the texture and binding properties will differ.
- Sweetener: Maple syrup can be swapped for honey, agave nectar, date syrup, or even a sugar-free liquid sweetener like erythritol or stevia blend (adjust amount to taste and according to the product’s sweetness level). You could also use mashed ripe banana (about ½ medium banana) for natural sweetness, though it will add banana flavor and might require adjusting the liquid slightly.
- Vanilla: While key to the vanilla flavor, you could omit it or swap it for almond extract (use less), or add spices like cinnamon or nutmeg instead.
- A: Yes, this recipe is quite flexible!
- Q: My pancakes came out gummy or dense. What went wrong?
- A: Several factors could cause gummy or dense flourless oatmeal pancakes:
- Skipping the Rest: Not allowing the batter to rest for 10-15 minutes is a common culprit. The oats need time to hydrate properly.
- Over-Blending: Blending the batter for too long after adding the wet ingredients can develop the oat starches too much, leading to a gummy texture. Blend just until combined.
- Incorrect Oat Type: Using instant oats can sometimes result in a mushier texture. Steel-cut oats definitely won’t work. Stick to rolled oats.
- Batter Too Thick/Thin: If the batter was extremely thick (like paste), the pancakes might be dense. If it was too thin, they might not hold their shape or rise well. Adjust liquid slightly as needed based on your ingredients.
- Cooking Temperature Issues: Cooking on heat that’s too low can make them dense as they don’t get the quick puff from the heat and leavening. Cooking too high can leave the inside undercooked and doughy. Aim for consistent medium heat.
- Old Baking Powder: Ensure your baking powder is fresh and active. Test it by dropping a little in hot water; it should fizz vigorously.
- A: Several factors could cause gummy or dense flourless oatmeal pancakes:
Flourless Vanilla Oatmeal Pancakes Recipe
Ingredients
- Rolled Oats: 2 cups (Use certified gluten-free rolled oats if needed. Avoid steel-cut or instant oats)
- Milk: 1 ¼ cups (Any kind works – dairy milk like whole, 2%, or skim, or non-dairy like almond, soy, oat, or cashew milk. You might need slightly more or less depending on the milk type and oat absorbency)
- Large Eggs: 2 (Act as a binder and add richness and structure)
- Pure Maple Syrup: 2-3 tablespoons (Or honey, agave nectar, or your preferred liquid sweetener. Adjust to your desired sweetness level)
- Pure Vanilla Extract: 1 ½ teaspoons (Use good quality vanilla for the best flavor)
- Baking Powder: 1 tablespoon (Make sure it’s fresh for maximum lift; use gluten-free if necessary)
- Fine Sea Salt: ¼ teaspoon (Enhances all the other flavors)
- Optional: Melted Butter or Coconut Oil: 1-2 tablespoons (Adds richness and helps prevent sticking, can be omitted if using a good non-stick pan and cooking spray)
- For Cooking: Butter, coconut oil, or cooking spray for the griddle or pan
Instructions
- Blend the Oats: Place the 2 cups of rolled oats into the carafe of a high-speed blender. Blend on high speed for about 30-60 seconds, or until the oats are ground into a relatively fine, flour-like consistency. It doesn’t need to be perfectly uniform like commercial oat flour, but you shouldn’t see many whole oat flakes remaining. Scrape down the sides if necessary.
- Add Wet Ingredients & Seasonings: To the blender with the ground oats, add the milk (starting with 1 ¼ cups), large eggs, maple syrup (or chosen sweetener), pure vanilla extract, baking powder, fine sea salt, and the optional melted butter or coconut oil (if using).
- Blend the Batter: Secure the lid on the blender. Blend again on medium-high speed for about 20-30 seconds, just until all ingredients are fully combined and the batter is smooth. Be careful not to over-blend at this stage. The batter should be thick but pourable, similar to traditional pancake batter, perhaps slightly thicker due to the oats. If it seems excessively thick (like paste), add another tablespoon or two of milk and blend briefly.
- Rest the Batter (Crucial Step!): Pour the batter from the blender into a bowl or leave it in the blender carafe. Let the batter rest for at least 10-15 minutes. This allows the oats to fully hydrate and absorb the liquid, and it gives the baking powder time to activate. This resting period is essential for achieving a lighter, fluffier texture and preventing dense or gummy pancakes. The batter will thicken slightly as it rests.
- Prepare the Cooking Surface: While the batter rests, heat a large non-stick skillet, griddle, or frying pan over medium heat. Getting the temperature right is key – too hot and the outside will burn before the inside cooks; too low and the pancakes won’t brown properly or become fluffy. A good test is to flick a drop of water onto the surface; it should sizzle and evaporate quickly.
- Grease the Pan: Once hot, lightly grease the pan with butter, coconut oil, or a light coating of cooking spray. Even non-stick pans benefit from a little grease for better browning and flavor.
- Cook the Pancakes: Give the rested batter a gentle stir (it might have settled). Pour or scoop the batter onto the hot, greased griddle, using about ¼ cup of batter per pancake. You can make them smaller or larger based on your preference, adjusting cook time accordingly. Don’t overcrowd the pan; cook in batches if necessary.
- Flip: Cook for about 2-4 minutes per side. You’ll know it’s time to flip when small bubbles start forming and popping on the surface of the pancake, the edges look set and slightly dry, and the underside is golden brown when you lift an edge gently with a spatula.
- Cook the Second Side: Carefully slide a thin spatula underneath the pancake and confidently flip it over. Cook the second side for another 1-3 minutes, or until it’s also golden brown and the pancake feels cooked through (it should spring back lightly when touched).
- Repeat: Transfer the cooked pancakes to a plate or a wire rack. Keep them warm in a low oven (around 200°F or 90°C) on an oven-safe plate if cooking multiple batches. Repeat the greasing and cooking process with the remaining batter, adjusting the heat slightly if needed (pans tend to get hotter over time).
- Serve: Serve the flourless vanilla oatmeal pancakes immediately with your favorite toppings.
Nutrition
- Serving Size: one normal portion
- Calories: 250-350
