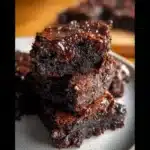
Of all the baked goods I’ve tackled in my vegan kitchen, none have been so elusive, so frustratingly difficult to perfect, as the brownie. For years, my attempts yielded results that were… fine. They were chocolatey squares, sure, but they were never it. They were either dry and crumbly, disappointingly cakey, or so oily they left a slick on the roof of your mouth. I was on a quest for the holy grail: a truly fudgy vegan brownie. One with a crackly, paper-thin top, dense and chewy edges, and a gooey, melt-in-your-mouth center that tasted of pure, unadulterated chocolate. I wanted the kind of brownie that silences a room, the kind that makes people’s eyes widen as they take their first bite. After countless bags of flour, mountains of cocoa powder, and more test batches than I care to admit, this is the recipe that finally did it. The first time I served these, I nervously watched my family take their squares. The usual chatter stopped. There was just the sound of chewing, followed by a collective, “Whoa.” This wasn’t just a good vegan brownie; it was a spectacular brownie, period. It’s rich, decadent, and has the perfect fudgy texture that will make even the most skeptical dairy-lover ask for the recipe. This isn’t just a set of instructions; it’s the treasure map to the best fudgy vegan brownies you will ever make.
The Ultimate Fudgy Vegan Brownies Recipe
This recipe has been meticulously tested to achieve the perfect balance of a crackly top and an intensely fudgy, gooey center. The key is in the ingredient ratios and the technique, particularly in creating a “flax egg” and melting the butter and chocolate together to form a glossy, rich base.
Essential Ingredients:
- Flax Egg:
- 2 tablespoons ground flaxseed
- 5 tablespoons warm water
- Wet Ingredients:
- 1 cup (226g or 2 sticks) vegan butter, cubed
- 4 ounces (113g) high-quality vegan dark chocolate (60-70% cacao), chopped
- 1 teaspoon pure vanilla extract
- Dry Ingredients:
- 1 ¼ cups (250g) granulated sugar
- ½ cup (100g) packed light brown sugar
- 1 cup (120g) all-purpose flour
- ¾ cup (75g) unsweetened Dutch-process cocoa powder (or natural, see notes)
- 1 teaspoon espresso powder (optional, but highly recommended)
- ½ teaspoon fine sea salt
- Mix-ins:
- 1 cup (170g) vegan chocolate chips or chunks
Recommended Equipment:
- 8×8 inch (20×20 cm) metal baking pan
- Parchment paper
- Small bowl (for the flax egg)
- Medium saucepan or microwave-safe bowl
- Large mixing bowl
- Whisk
- Rubber spatula
Step-by-Step Instructions for Flawless Brownies
Follow these instructions precisely for the best results. The enemy of a fudgy brownie is over-mixing and over-baking. We will guide you to avoid both pitfalls.
- Preheat and Prepare the Pan: First things first, preheat your oven to 350°F (175°C). To ensure your brownies come out of the pan cleanly, prepare an 8×8 inch metal baking pan. A metal pan conducts heat more effectively and will give you those desirable chewy edges. Create a parchment paper “sling” by cutting two pieces of parchment paper to fit the width of the pan, leaving an overhang on two opposite sides. Lightly grease the pan, place the parchment inside, and then grease the parchment itself. This double-greasing and sling method is foolproof for easy removal.
- Make the Flax Egg: In your small bowl, combine the 2 tablespoons of ground flaxseed with 5 tablespoons of warm water. Whisk them together vigorously for about 30 seconds. Set the mixture aside for at least 10-15 minutes to thicken. It should develop a gelatinous, egg-like consistency. This is your binder, and allowing it to fully “gel” is crucial for the structure of the brownies.
- Melt the Chocolate and Butter: While the flax egg is setting, it’s time to create the decadent chocolate base. In a medium-sized, heavy-bottomed saucepan over low heat, melt the cubed vegan butter and the chopped dark chocolate. Stir constantly with a rubber spatula to prevent scorching. The goal is a smooth, glossy, completely integrated mixture. Alternatively, you can do this in the microwave. Place the butter and chocolate in a microwave-safe bowl and heat in 30-second increments, stirring well after each one, until fully melted and smooth. Remove from the heat as soon as it’s melted.
- Combine Sugars and Wet Ingredients: Pour the melted chocolate and butter mixture into your large mixing bowl. Add both the granulated sugar and the light brown sugar. Whisk vigorously for about one full minute. The mixture will look slightly grainy at first, but as you whisk, it will become darker, thicker, and glossier. This step is vital for creating that signature crackly brownie top. The vigorous whisking helps dissolve the sugar, which then rises to the surface during baking to form that beautiful crust. Once whisked, stir in your prepared flax egg and the teaspoon of pure vanilla extract until just combined.
- Incorporate the Dry Ingredients: Place a fine-mesh sieve over your large bowl. Sift the all-purpose flour, Dutch-process cocoa powder, optional espresso powder, and fine sea salt directly into the wet ingredients. Sifting is non-negotiable; it aerates the ingredients and removes any lumps from the cocoa powder, ensuring a smooth, uniform batter. Using a rubber spatula, gently fold the dry ingredients into the wet. Be very careful here: DO NOT OVERMIX. Mix only until the last streaks of flour disappear. Over-mixing develops gluten in the flour, which is the number one cause of cakey, tough brownies. The final batter should be very thick, dense, and shiny.
- Fold in the Chocolate Chips: Gently fold in your 1 cup of vegan chocolate chips or chunks. These add extra pockets of melted chocolate and enhance the overall texture.
- Bake to Perfection: Scrape the thick batter into your prepared baking pan. Use your spatula to spread it evenly into the corners. The batter will be thick, so take your time to get an even layer. Bake on the center rack of your preheated oven for 30-35 minutes. The baking time is critical. Vegan brownies can be deceptive. They will look underdone in the middle when they are ready. To check for doneness, insert a toothpick into the center. For truly fudgy brownies, you want the toothpick to come out with moist, sticky crumbs attached, not clean. If it comes out with wet batter, it needs a few more minutes. If it comes out clean, it has gone too far and will be cakey. Start checking at the 28-minute mark.
- The Crucial Cooling Period: This is perhaps the most important and most difficult step: you must let the brownies cool completely. Remove the pan from the oven and place it on a wire rack. Let the brownies cool in the pan for at least 1-2 hours at room temperature. They will continue to set as they cool, transforming from a molten state to a dense, fudgy one. For even cleaner cuts and a chewier texture, you can then transfer the pan to the refrigerator for another hour before slicing. Once completely cooled, use the parchment paper overhangs to lift the entire slab of brownies out of the pan and onto a cutting board. Use a large, sharp knife to cut into 16 squares. For the cleanest cuts, wipe the knife with a damp cloth between each slice.
The Science Behind the Fudginess: A Deep Dive into Our Ingredients
Understanding why certain ingredients are used will not only make you a better baker but will also help you appreciate the craft behind this specific recipe. Every component plays a role in achieving that perfect fudgy texture.
The Flax Egg (The Binder): In traditional baking, eggs provide structure, leavening, and moisture. In vegan baking, we need a replacement that can replicate these functions. The flax egg is a powerhouse binder. When ground flaxseed is mixed with water, it releases mucilage, a gel-like substance that effectively holds the ingredients together, preventing a crumbly mess. For fudgy brownies, it’s superior to other replacers like applesauce or banana, which can add too much moisture and a competing flavor, often leading to a cakey texture. The flax egg provides structure without adding significant leavening, which is exactly what we want.
Vegan Butter (The Fat): Fat is the soul of a fudgy brownie. It coats the flour proteins, inhibiting gluten development, which keeps the brownies tender and dense rather than tough and bready. It also delivers flavor and contributes to that satisfying, melt-in-your-mouth quality. For this recipe, a stick-form vegan butter (like Miyoko’s Kitchen Cultured Vegan Butter or Melt Organic Vegan Butter) is highly recommended over a soft-tub margarine. Stick butters have a higher fat content and lower water content, which is crucial for a rich, non-greasy result.
The Double Chocolate Method (The Foundation): Using both melted chocolate and cocoa powder is a technique for achieving deep, complex chocolate flavor.
- Melted Dark Chocolate: This is the primary source of fat and cocoa solids. Using a chopped baking bar with 60-70% cacao provides a rich, foundational flavor and contributes significantly to the gooey, fudgy texture. Chocolate chips often contain stabilizers that help them keep their shape, which can interfere with the final texture, so a good quality bar is preferred for the melting stage.
- Dutch-Process Cocoa Powder: While melted chocolate provides the fudginess, cocoa powder provides the intense, deep chocolate flavor. Dutch-process cocoa has been treated with an alkali to neutralize its acidity. This results in a darker color and a smoother, less bitter flavor that is perfect for brownies. It dissolves more easily, creating a more uniform and less gritty batter.
The Sugars (The Sweetness and Texture): The combination of white and brown sugar isn’t just for sweetness; it’s a textural decision.
- Granulated Sugar: Melts and dissolves into the fat, and when properly whisked, it helps create that iconic shiny, crackly crust on top.
- Brown Sugar: Contains molasses, which adds moisture and a slight acidity. This moisture is key to keeping the brownies soft and fudgy for days. The molasses also contributes a subtle caramel-like depth of flavor that complements the chocolate.
All-Purpose Flour (The Structure): Flour provides the basic structure, but for fudgy brownies, less is more. We use just enough flour to give the brownies body and prevent them from being a pan of chocolate pudding. The goal is to minimize gluten development. This is why we stress measuring correctly (spoon and level, don’t scoop and pack) and, most importantly, not over-mixing once the flour is added.
Nutrition Facts: A Guideline
Please note that these values are an estimate and can vary depending on the specific brands of ingredients used.
- Servings: 16 brownies
- Calories Per Serving: Approximately 280-320 kcal
This is a decadent dessert, rich in fats and sugars from the chocolate, vegan butter, and sugars. It’s meant to be an indulgent treat, best enjoyed in moderation.
Timing is Everything: Preparation and Baking Time
Properly planning your time is key, especially accounting for the non-negotiable cooling period.
- Active Preparation Time: 20 minutes (chopping chocolate, mixing ingredients)
- Baking Time: 30-35 minutes
- Cooling Time: 2-3 hours (minimum)
Total Time: Approximately 3 to 4 hours. Do not rush the cooling process! Attempting to cut into warm brownies will result in a gooey mess. The structure and fudginess develop as the brownies cool and set completely. Patience is the final, secret ingredient.
How to Serve Your Fudgy Vegan Brownies
These brownies are a spectacular standalone treat, but they can also be the star of a more elaborate dessert. Here are some of our favorite ways to serve them:
- The Purist:
- Slightly warmed in the microwave for 10-15 seconds to get the chocolate chips melty again.
- Served with a tall glass of cold, unsweetened almond or oat milk.
- Classic A La Mode:
- Place a warm brownie in a bowl.
- Top with a generous scoop of your favorite vegan vanilla bean ice cream. The contrast between the warm, rich brownie and the cold, creamy ice cream is heavenly.
- The Ultimate Brownie Sundae:
- Start with a brownie as the base.
- Add two scoops of different flavored vegan ice cream (e.g., chocolate and salted caramel).
- Drizzle with vegan chocolate sauce or caramel sauce.
- Sprinkle with chopped nuts (pecans or walnuts are fantastic), and a few extra chocolate chips.
- Finish with a dollop of whipped coconut cream and a cherry on top.
- For the Coffee Lover:
- Serve a brownie alongside a hot cup of black coffee or a freshly made Americano. The slight bitterness of the coffee cuts through the richness of the brownie perfectly.
- Party Platter Perfection:
- Cut the brownies into small, one-inch-square “bites.”
- Arrange them on a platter with fresh berries (raspberries, strawberries) and other small treats for an elegant dessert offering.
Pro Tips for Brownie Perfection
After making these dozens of times, I’ve gathered a few extra tips that will elevate your brownies from great to unforgettable.
- Embrace the Under-bake: The single biggest mistake people make is over-baking brownies. Remember, you are looking for moist, fudgy crumbs on your toothpick, not a clean one. The residual heat from the pan will continue to cook the brownies as they cool. Trust the process and pull them out when they still look slightly gooey in the very center.
- Espresso Powder is Your Secret Weapon: The teaspoon of espresso or instant coffee powder is listed as optional, but it’s a game-changer. You won’t taste coffee, but it will dramatically amplify and deepen the chocolate flavor, making the brownies taste more intensely “chocolatey.”
- The Bang-the-Pan Trick: For an even denser, chewier texture and to help create that crackly top, you can try this trick. Halfway through baking (around the 15-minute mark), open the oven, lift the pan a few inches, and drop it flat on the rack. Do this once or twice. This action forces air out of the batter, collapsing it slightly and resulting in a denser final product.
- The Fridge is Your Friend for Cutting: While you can cut the brownies after they’ve cooled at room temperature, chilling the entire slab in the fridge for an hour makes a world of difference. The cold firms up the brownies, allowing for incredibly sharp, clean, professional-looking squares without smearing.
- Let Them Age (If You Can!): As difficult as it may be to resist, these fudgy vegan brownies are often even better on day two. Storing them in an airtight container allows the flavors to meld and deepen, and the texture becomes even denser and fudgier.
Frequently Asked Questions (FAQ)
1. Can I make these brownies gluten-free?
Yes, you can! For the best results, substitute the all-purpose flour with a high-quality, 1-to-1 gluten-free baking flour blend that contains xanthan gum. Brands like Bob’s Red Mill 1-to-1 Baking Flour or King Arthur Measure for Measure Gluten Free Flour work very well. Do not substitute with a single-ingredient flour like almond or coconut flour, as the ratios and liquid absorption will be completely different. The texture may be slightly different but will still be delicious and fudgy.
2. My brownies came out cakey instead of fudgy. What went wrong?
This is the most common brownie problem and it almost always comes down to two things: too much flour or over-mixing.
- Too much flour: Did you scoop the flour directly from the bag with your measuring cup? This compacts the flour, and you can end up with 25% more than the recipe calls for. Always spoon the flour into the measuring cup and level it off.
- Over-mixing: Once you added the dry ingredients, did you mix with a whisk or an electric mixer until it was perfectly smooth? This develops gluten, which creates a cake-like structure. Only fold the flour in with a spatula until the last streaks disappear. Lumps are okay!
3. Can I use coconut oil instead of vegan butter?
You can, but it will change the final product. Using melted coconut oil (the same amount by weight or volume) will still result in a fudgy brownie, but you will lose the “buttery” flavor that vegan butter provides. The texture may also be slightly greasier. If you use coconut oil, ensure it is refined unless you want a distinct coconut flavor in your brownies. For the best flavor and texture as intended by this recipe, stick with a good quality vegan butter.
4. How should I store these brownies and how long will they last?
These brownies have excellent keeping qualities thanks to their high moisture content. Store them in an airtight container at room temperature for up to 4 days. They will become even fudgier on the second day. You can also store them in the refrigerator for up to a week, which will make them very dense and chewy (like a truffle!). For longer storage, you can freeze them. Cut them into individual squares, wrap each one tightly in plastic wrap, and then place them in a freezer-safe bag or container. They will last for up to 3 months in the freezer. Thaw at room temperature or gently warm in the microwave.
5. What is the best kind of vegan chocolate to use?
The quality of your chocolate directly impacts the final flavor. For the melted portion, use a vegan dark chocolate baking bar with a cacao percentage between 60% and 70%. Brands like Guittard, Scharffen Berger, or even high-quality store brands work well (always check ingredients for milkfat or whey). For the mix-ins, you can use a chopped bar or high-quality vegan chocolate chips like those from Enjoy Life or Guittard. Using a darker chocolate (70% or higher) will result in a less sweet, more intensely dark brownie.
Fudgy Vegan Brownies Recipe
Ingredients
- Flax Egg:
- 2 tablespoons ground flaxseed
- 5 tablespoons warm water
- Wet Ingredients:
- 1 cup (226g or 2 sticks) vegan butter, cubed
- 4 ounces (113g) high-quality vegan dark chocolate (60-70% cacao), chopped
- 1 teaspoon pure vanilla extract
- Dry Ingredients:
- 1 ¼ cups (250g) granulated sugar
- ½ cup (100g) packed light brown sugar
- 1 cup (120g) all-purpose flour
- ¾ cup (75g) unsweetened Dutch-process cocoa powder (or natural, see notes)
- 1 teaspoon espresso powder (optional, but highly recommended)
- ½ teaspoon fine sea salt
- Mix-ins:
- 1 cup (170g) vegan chocolate chips or chunks
Instructions
- Preheat and Prepare the Pan: First things first, preheat your oven to 350°F (175°C). To ensure your brownies come out of the pan cleanly, prepare an 8×8 inch metal baking pan. A metal pan conducts heat more effectively and will give you those desirable chewy edges. Create a parchment paper “sling” by cutting two pieces of parchment paper to fit the width of the pan, leaving an overhang on two opposite sides. Lightly grease the pan, place the parchment inside, and then grease the parchment itself. This double-greasing and sling method is foolproof for easy removal.
- Make the Flax Egg: In your small bowl, combine the 2 tablespoons of ground flaxseed with 5 tablespoons of warm water. Whisk them together vigorously for about 30 seconds. Set the mixture aside for at least 10-15 minutes to thicken. It should develop a gelatinous, egg-like consistency. This is your binder, and allowing it to fully “gel” is crucial for the structure of the brownies.
- Melt the Chocolate and Butter: While the flax egg is setting, it’s time to create the decadent chocolate base. In a medium-sized, heavy-bottomed saucepan over low heat, melt the cubed vegan butter and the chopped dark chocolate. Stir constantly with a rubber spatula to prevent scorching. The goal is a smooth, glossy, completely integrated mixture. Alternatively, you can do this in the microwave. Place the butter and chocolate in a microwave-safe bowl and heat in 30-second increments, stirring well after each one, until fully melted and smooth. Remove from the heat as soon as it’s melted.
- Combine Sugars and Wet Ingredients: Pour the melted chocolate and butter mixture into your large mixing bowl. Add both the granulated sugar and the light brown sugar. Whisk vigorously for about one full minute. The mixture will look slightly grainy at first, but as you whisk, it will become darker, thicker, and glossier. This step is vital for creating that signature crackly brownie top. The vigorous whisking helps dissolve the sugar, which then rises to the surface during baking to form that beautiful crust. Once whisked, stir in your prepared flax egg and the teaspoon of pure vanilla extract until just combined.
- Incorporate the Dry Ingredients: Place a fine-mesh sieve over your large bowl. Sift the all-purpose flour, Dutch-process cocoa powder, optional espresso powder, and fine sea salt directly into the wet ingredients. Sifting is non-negotiable; it aerates the ingredients and removes any lumps from the cocoa powder, ensuring a smooth, uniform batter. Using a rubber spatula, gently fold the dry ingredients into the wet. Be very careful here: DO NOT OVERMIX. Mix only until the last streaks of flour disappear. Over-mixing develops gluten in the flour, which is the number one cause of cakey, tough brownies. The final batter should be very thick, dense, and shiny.
- Fold in the Chocolate Chips: Gently fold in your 1 cup of vegan chocolate chips or chunks. These add extra pockets of melted chocolate and enhance the overall texture.
- Bake to Perfection: Scrape the thick batter into your prepared baking pan. Use your spatula to spread it evenly into the corners. The batter will be thick, so take your time to get an even layer. Bake on the center rack of your preheated oven for 30-35 minutes. The baking time is critical. Vegan brownies can be deceptive. They will look underdone in the middle when they are ready. To check for doneness, insert a toothpick into the center. For truly fudgy brownies, you want the toothpick to come out with moist, sticky crumbs attached, not clean. If it comes out with wet batter, it needs a few more minutes. If it comes out clean, it has gone too far and will be cakey. Start checking at the 28-minute mark.
- The Crucial Cooling Period: This is perhaps the most important and most difficult step: you must let the brownies cool completely. Remove the pan from the oven and place it on a wire rack. Let the brownies cool in the pan for at least 1-2 hours at room temperature. They will continue to set as they cool, transforming from a molten state to a dense, fudgy one. For even cleaner cuts and a chewier texture, you can then transfer the pan to the refrigerator for another hour before slicing. Once completely cooled, use the parchment paper overhangs to lift the entire slab of brownies out of the pan and onto a cutting board. Use a large, sharp knife to cut into 16 squares. For the cleanest cuts, wipe the knife with a damp cloth between each slice.
Nutrition
- Serving Size: One Normal Portion
- Calories: 280-320