

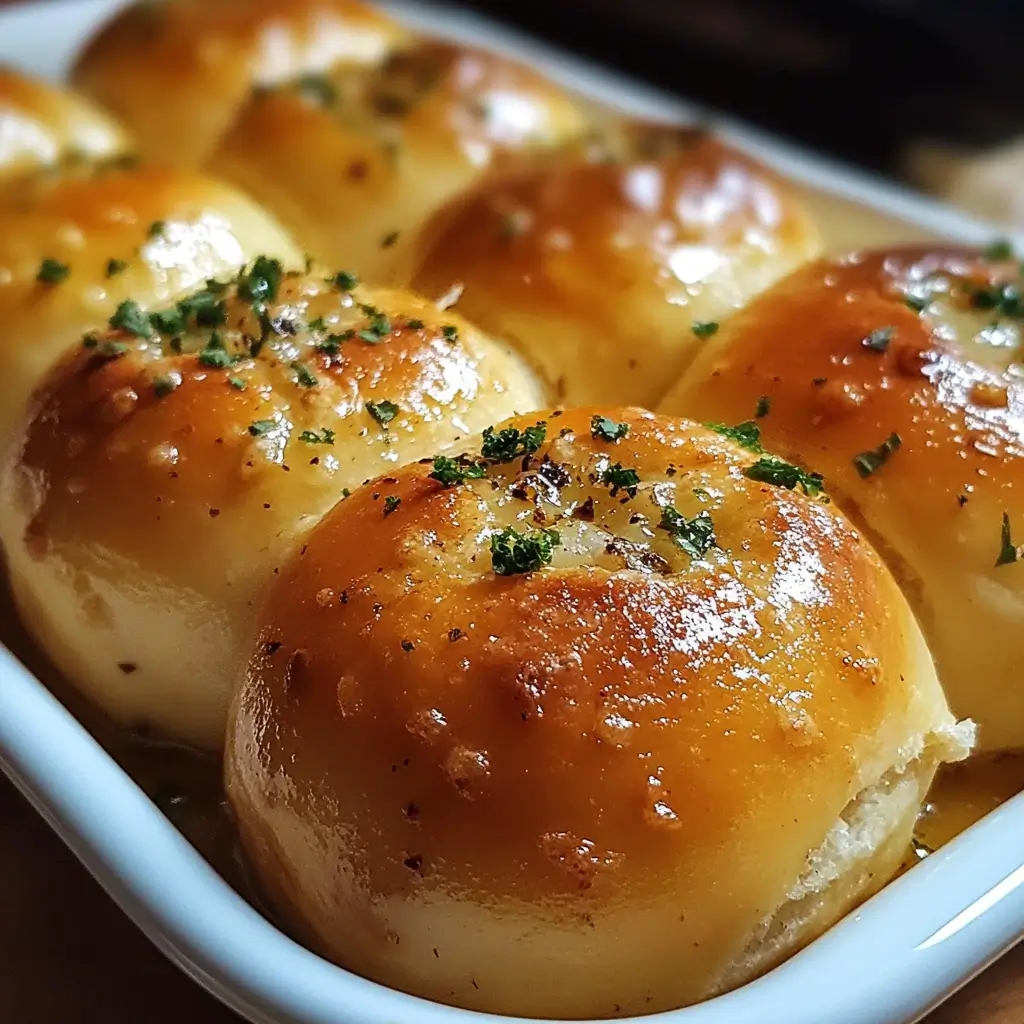

There’s something truly magical about the smell of baking bread filling your home. It’s a scent that evokes warmth, comfort, and a sense of togetherness. Recently, I decided to try my hand at making garlic butter bread rolls, and let me tell you, the experience was nothing short of delightful. From the initial mixing of ingredients to the final golden-brown reveal, the process was surprisingly simple and incredibly rewarding. My family, usually a tough crowd to please, devoured these rolls with gusto, their eyes widening with each buttery, garlicky bite. The soft, fluffy texture combined with the savory topping was an absolute winner. These rolls aren’t just food; they’re an experience, a way to bring a little bit of homemade happiness to your table. Whether you’re planning a cozy family dinner, a holiday feast, or simply want to elevate your everyday meals, these garlic butter bread rolls are guaranteed to be a crowd-pleaser. Get ready to embark on a baking adventure that will fill your kitchen with the most enticing aroma and your heart with the joy of creating something truly special.
Ingredients: The Building Blocks of Delicious Garlic Butter Bread Rolls
The secret to truly exceptional garlic butter bread rolls lies in the quality and balance of the ingredients. Each component plays a crucial role in achieving that perfect texture, flavor, and aroma. Let’s delve into each ingredient and understand its contribution to this delightful recipe.
3 Cups All-Purpose Flour: The Foundation of Fluffiness
All-purpose flour forms the structural backbone of our bread rolls. It’s a versatile type of flour, milled from a blend of soft and hard wheat, making it suitable for a wide range of baking applications, including bread making. The protein content in all-purpose flour, when hydrated and kneaded, develops gluten. Gluten is what gives bread its elasticity and chewiness, trapping the gases produced by the yeast and allowing the dough to rise and create that desirable fluffy texture.
For this recipe, all-purpose flour is ideal as it strikes a good balance between structure and tenderness. While bread flour, with its higher protein content, could be used, it might result in a slightly chewier roll. Pastry flour, on the other hand, would be too low in protein, leading to rolls that are too tender and lack structure. Using high-quality all-purpose flour ensures that your rolls will be both fluffy and sturdy enough to hold their shape and the delicious garlic butter topping.
2 ¼ Teaspoons Active Dry Yeast (1 Packet): The Magic of Leavening
Active dry yeast is the leavening agent in this recipe, responsible for making the dough rise and become light and airy. Yeast is a single-celled microorganism that, when activated, consumes sugars and releases carbon dioxide gas. This gas gets trapped within the gluten network of the dough, causing it to expand and double or even triple in size.
Active dry yeast needs to be “activated” or proofed before being added to the dry ingredients. This process involves dissolving the yeast in warm liquid (in this case, warm milk) with a little sugar. The warmth and sugar provide the ideal environment for the yeast to become active and start producing carbon dioxide. You’ll know your yeast is active when the mixture becomes frothy or bubbly, usually within 5-10 minutes. Using fresh, active yeast is crucial for successful bread making. Expired or inactive yeast will not leaven the dough properly, resulting in dense and flat rolls.
2 Tablespoons Sugar: Sweetness and Yeast Fuel
Sugar plays a dual role in this recipe. Firstly, it provides a touch of sweetness that balances the savory flavors of garlic and butter, enhancing the overall taste profile of the rolls. Secondly, and perhaps more importantly, sugar acts as food for the yeast. Yeast feeds on sugar during the activation process and throughout the dough’s rise, accelerating its activity and promoting a faster and more robust rise.
While granulated sugar is commonly used, you can also use other forms of sugar like caster sugar or even honey. However, granulated sugar is readily available and works perfectly well in this recipe. The amount of sugar is carefully measured to provide enough fuel for the yeast without making the rolls overly sweet.
1 Teaspoon Salt: Flavor Enhancer and Gluten Regulator
Salt is an essential ingredient in bread making, often underestimated but incredibly important. It serves several crucial functions. Firstly, salt enhances the flavor of the bread, bringing out the subtle nuances of the flour and other ingredients. Without salt, bread can taste bland and flat. Secondly, salt plays a vital role in controlling yeast activity. It slows down the fermentation process, preventing the dough from rising too quickly and becoming overly acidic. This controlled fermentation contributes to a more complex flavor development and a better texture.
Furthermore, salt strengthens the gluten network in the dough, making it more elastic and easier to handle. It also helps to retain moisture in the dough, resulting in bread rolls that are soft and moist rather than dry and crumbly. It’s important to use the correct amount of salt as too little can lead to flat, flavorless bread, while too much can inhibit yeast activity and result in dense rolls.
1 Cup Warm Milk (110°F or 45°C): Hydration and Richness
Warm milk is the liquid component in this recipe, contributing both hydration and richness to the dough. Milk provides moisture necessary for the flour to absorb and form gluten. The warmth of the milk is crucial for activating the yeast. Yeast thrives in a warm environment, ideally between 105°F and 115°F (40°C and 46°C). Milk that is too hot can kill the yeast, while milk that is too cold will slow down its activity. Using a kitchen thermometer is recommended to ensure the milk is at the correct temperature.
Milk also adds richness and a slightly softer texture to the rolls compared to using water alone. The fats and proteins in milk contribute to a more tender crumb and a slightly richer flavor. You can use whole milk, 2% milk, or even non-dairy milk alternatives like almond milk or soy milk, although the flavor and texture might be slightly altered.
¼ Cup Unsalted Butter, Melted (for dough): Tenderness and Flavor
Melted unsalted butter is added directly to the dough, contributing tenderness, flavor, and richness. Butter, being fat, inhibits gluten development to a certain extent, resulting in a more tender crumb. It also adds a subtle buttery flavor that complements the other ingredients beautifully.
Unsalted butter is preferred over salted butter in baking recipes as it gives you more control over the salt content. Melted butter is incorporated into the dough to ensure it’s evenly distributed and contributes to a smoother dough consistency.
1 Large Egg: Structure, Color, and Richness
A large egg is another key ingredient that adds structure, color, and richness to the bread rolls. The proteins in the egg contribute to the dough’s structure, helping to bind the ingredients together and create a more stable dough. The egg yolk, rich in fats, adds richness and a tender texture to the rolls. Eggs also contribute to the golden-brown color of the baked rolls, thanks to the Maillard reaction that occurs during baking.
Use a large egg as specified in the recipe for the best results. Using a smaller egg might slightly affect the dough’s hydration and structure, while a very large egg might make the dough too wet.
4 Tablespoons Unsalted Butter, Softened (for garlic topping): Flavor Carrier and Richness
Softened unsalted butter is the base for the flavorful garlic topping. Softened butter is crucial for creating a smooth and spreadable garlic butter mixture that coats the rolls evenly. Butter acts as a carrier for the garlic and herbs, infusing the rolls with their delicious flavors. The richness of the butter also adds a luxurious mouthfeel to the rolls.
Ensure the butter is softened to room temperature, making it easy to cream together with the garlic and herbs. Avoid melting the butter as it will make the garlic butter mixture too runny and difficult to apply evenly to the rolls.
4 Cloves Garlic, Minced: The Star Flavor
Fresh garlic is the star flavor in these garlic butter bread rolls. Minced garlic releases its pungent and aromatic oils, infusing the butter with its distinctive flavor. Fresh garlic is preferred over garlic powder for its more intense and complex flavor. The amount of garlic can be adjusted to your preference, but 4 cloves provide a good balance of garlic flavor without being overpowering.
Mincing the garlic finely ensures that it distributes evenly throughout the butter and releases its flavor effectively. You can use a garlic press or finely chop the garlic with a knife.
1 Tablespoon Fresh Parsley, Chopped: Freshness and Visual Appeal
Fresh parsley adds a touch of freshness and herbaceousness to the garlic butter topping. It also provides a beautiful visual contrast with its vibrant green color against the golden-brown rolls. Parsley’s mild, slightly peppery flavor complements the garlic and butter perfectly.
Fresh parsley is preferred for its brighter flavor and visual appeal. However, if fresh parsley is unavailable, you can use dried parsley as a substitute, although the flavor will be less pronounced. Make sure to chop the parsley finely so it distributes evenly in the garlic butter mixture.
½ Teaspoon Italian Seasoning: Aromatic Complexity
Italian seasoning is a blend of dried herbs, typically including oregano, basil, rosemary, thyme, and marjoram. It adds a layer of aromatic complexity to the garlic butter topping, enhancing the overall flavor profile. The combination of these herbs creates a warm and savory aroma that complements the garlic and butter beautifully.
You can find Italian seasoning readily available in most grocery stores. If you don’t have Italian seasoning, you can create your own blend using dried oregano, basil, and thyme.
½ Teaspoon Fresh Ground Black Pepper: Depth and Spice
Fresh ground black pepper adds depth and a subtle spicy kick to the garlic butter topping. Freshly ground pepper has a more intense and aromatic flavor compared to pre-ground pepper. The pepper’s subtle spice balances the richness of the butter and garlic, adding another layer of complexity to the flavor.
Freshly grinding black peppercorns right before use releases their full aroma and flavor. You can use a pepper grinder to grind the pepper directly into the garlic butter mixture.
Instructions: Step-by-Step Guide to Baking Perfect Garlic Butter Bread Rolls
Baking these garlic butter bread rolls is a rewarding process, and following these step-by-step instructions will ensure your success. Each step is crucial in achieving those soft, fluffy, and flavorful rolls you’re craving.
1. Activate the Yeast: The Foundation of Fluffy Rolls
In a bowl, combine 1 cup of warm milk (110°F or 45°C), 2 tablespoons of sugar, and 2 ¼ teaspoons of active dry yeast (1 packet). Gently stir to combine the ingredients and let it sit for about 5-10 minutes, or until the mixture becomes frothy and bubbly. This frothy appearance indicates that the yeast is active and ready to leaven the dough.
Why this step is important: Activating the yeast ensures that it is alive and capable of producing carbon dioxide, which is essential for the dough to rise. Warm milk provides the ideal temperature for yeast activity, while sugar provides food for the yeast to consume and start fermenting. If the yeast doesn’t become frothy, it might be expired or the milk might not be at the correct temperature. If this happens, it’s best to start with fresh yeast and ensure the milk is warm but not hot.
2. Prepare the Dough: Combining Ingredients for Success
In a large mixing bowl, whisk together 3 cups of all-purpose flour and 1 teaspoon of salt. Make a well in the center of the dry ingredients. Pour in the frothy yeast mixture, ¼ cup of melted unsalted butter, and 1 large egg.
Using a wooden spoon or a dough hook attachment on a stand mixer, mix the ingredients until a shaggy dough forms. The dough will initially be sticky and slightly messy.
Tips for this step: Ensure the melted butter has cooled slightly before adding it to the yeast mixture, as hot butter can kill the yeast. Adding the wet ingredients to a well in the dry ingredients helps to prevent lumps and ensures even mixing. If using a stand mixer, start on low speed and gradually increase to medium speed as the dough comes together.
3. Knead the Dough: Developing Gluten for Texture
Transfer the dough to a lightly floured surface. Knead the dough for about 8-10 minutes, until it becomes smooth, elastic, and no longer sticky. To knead, push the dough away from you with the heel of your hand, fold it in half towards you, and repeat. Rotate the dough as you knead to work it evenly.
Alternatively, if using a stand mixer, knead the dough with the dough hook for about 6-8 minutes on medium speed until it pulls away from the sides of the bowl and forms a smooth, elastic ball.
Place the kneaded dough in a lightly greased bowl, turning it to coat all sides with grease. Cover the bowl with a clean kitchen towel or plastic wrap and let it rise in a warm place for about 1 hour, or until doubled in size.
Why kneading is crucial: Kneading develops gluten, the protein in flour that gives bread its structure and chewiness. Proper kneading results in a smooth and elastic dough that can trap the gases produced by the yeast, leading to light and fluffy rolls. The “windowpane test” is a good indicator of well-kneaded dough: you should be able to stretch a small piece of dough into a thin, translucent membrane without it tearing.
4. Make the Garlic Butter Mixture: Flavor Infusion
While the dough is rising, prepare the garlic butter mixture. In a small bowl, combine 4 tablespoons of softened unsalted butter, 4 cloves of minced garlic, 1 tablespoon of fresh chopped parsley, ½ teaspoon of Italian seasoning, and ½ teaspoon of fresh ground black pepper. Mix well with a fork or spatula until all ingredients are evenly combined and the mixture is smooth and spreadable. Set aside at room temperature.
Tips for the garlic butter: Ensure the butter is softened to room temperature for easy mixing. Mince the garlic finely to release its flavor effectively. You can adjust the amount of garlic to your preference. Feel free to add other herbs to the garlic butter mixture, such as chives or rosemary, for variation.
5. Shape the Rolls: Creating Uniform Delights
Once the dough has doubled in size, gently punch it down to release the air. Turn the dough out onto a lightly floured surface. Divide the dough into 12 equal pieces. You can use a kitchen scale to ensure even portions for uniform rolls.
Roll each piece of dough into a smooth ball by tucking the edges underneath and rolling it between your palms. Place the shaped rolls in a greased 9×13 inch baking dish, arranging them evenly.
Tips for shaping: Dividing the dough into equal pieces ensures that the rolls bake evenly. Rolling the dough into smooth balls helps to create a uniform shape and texture. Place the rolls slightly apart in the baking dish to allow for expansion during the second rise and baking.
6. Second Rise: The Final Puff
Cover the baking dish with the shaped rolls loosely with a kitchen towel or plastic wrap. Let them rise again in a warm place for about 30 minutes, or until they become puffy and almost double in size again. This second rise is crucial for achieving light and airy rolls.
Why the second rise is important: The second rise allows the dough to relax and rise further after being shaped. This final rise contributes to the ultimate fluffiness and tenderness of the baked rolls. Don’t skip the second rise for the best results.
7. Preheat the Oven: Setting the Stage for Baking
While the rolls are undergoing their second rise, preheat your oven to 350°F (175°C). Ensure the oven is fully preheated before placing the rolls inside to ensure even baking.
Importance of preheating: Preheating the oven to the correct temperature is essential for proper baking. It ensures that the rolls bake evenly and rise properly in the oven.
8. Apply Garlic Butter: The Flavor Crown
Once the rolls have completed their second rise and are puffy, gently brush the garlic butter mixture generously over the top and sides of each roll, ensuring they are evenly coated. Use all of the garlic butter mixture for maximum flavor.
Tips for applying garlic butter: Brushing the garlic butter generously ensures that each roll is infused with flavor and has a beautiful golden-brown crust. Use a pastry brush to apply the garlic butter evenly.
9. Bake: Achieving Golden Perfection
Bake the garlic butter bread rolls in the preheated oven for 18-20 minutes, or until they are golden brown on top and cooked through. The internal temperature of the rolls should reach around 200-210°F (93-99°C). You can check for doneness by inserting a toothpick into the center of a roll – it should come out clean.
Tips for baking: Baking time may vary slightly depending on your oven. Keep an eye on the rolls and adjust baking time as needed. If the tops are browning too quickly, you can loosely tent the baking dish with foil to prevent over-browning.
10. Serve: Enjoying Warm, Garlicky Goodness
Remove the baked garlic butter bread rolls from the oven and brush them with any remaining garlic butter while they are still hot. This extra brushing adds even more flavor and shine. Let them cool slightly in the baking dish for a few minutes before serving warm. Enjoy your delicious homemade garlic butter bread rolls immediately for the best taste and texture!
Serving suggestion: These garlic butter bread rolls are best enjoyed warm and fresh from the oven. Serve them as a side dish to soups, salads, pasta dishes, roasted meats, or as part of a holiday feast. They are also delicious on their own as a snack or appetizer.
Nutritional Information: Fueling Your Body with Deliciousness
Understanding the nutritional content of your food can be helpful for making informed dietary choices. Here’s an approximate nutritional breakdown for one garlic butter bread roll, based on this recipe. Please note that these are estimates and can vary depending on specific ingredient brands and portion sizes.
- Serving Size: 1 roll
- Servings Per Recipe: 12 rolls
Approximate Nutrition Facts per Serving:
- Calories: 220-250 kcal
- Fat: 10-12g
- Saturated Fat: 6-8g
- Unsaturated Fat: 3-4g
- Cholesterol: 30-40mg
- Sodium: 200-250mg
- Carbohydrates: 28-32g
- Fiber: 1-2g
- Sugar: 4-6g
- Protein: 4-5g
Key Nutrients:
- Vitamin A: From butter and egg
- Vitamin D: From milk and egg
- Calcium: From milk
- Iron: From flour
- Some B Vitamins: From yeast and flour
Important Note: These values are estimations and can vary. Garlic butter bread rolls are a treat and should be enjoyed in moderation as part of a balanced diet.
Prep Time and Total Time: Plan Your Baking Schedule
Planning your baking time is essential for efficient and stress-free cooking. Here’s a breakdown of the time involved in making these garlic butter bread rolls:
- Prep Time: 15 minutes (This includes measuring ingredients, activating yeast, and making the garlic butter mixture)
- Rise Time (First Rise): 1 hour
- Shaping and Second Rise: 45 minutes (15 minutes shaping + 30 minutes second rise)
- Bake Time: 18-20 minutes
- Total Time: Approximately 1 hour and 50 minutes
Time Management Tips:
- Active Time: The active time, where you are directly involved in the process, is around 30-40 minutes.
- Inactive Time: The majority of the time is inactive rise time, allowing you to do other things while the dough rises.
- Make-Ahead Option: You can prepare the dough up to the shaping stage a day ahead. After the first rise, punch down the dough, wrap it tightly in plastic wrap, and refrigerate overnight. Let it come to room temperature for about an hour before shaping and proceeding with the second rise and baking.
Serving Suggestions: Complementing Your Garlic Butter Bread Rolls
Garlic butter bread rolls are incredibly versatile and can enhance a wide variety of meals. Here are some delightful ways to serve them:
- Soups and Stews: Pair them with hearty soups like tomato soup, French onion soup, or creamy potato soup for dipping and soaking up the delicious broth.
- Salads: Serve alongside fresh salads like Caesar salad, garden salad, or Caprese salad to add a warm and comforting element to your meal.
- Pasta Dishes: Complement pasta dishes like spaghetti with marinara sauce, lasagna, or creamy Alfredo pasta with these flavorful rolls for mopping up the sauce.
- Roasted Meats and Poultry: Serve them as a side dish with roasted chicken, beef, pork, or lamb to balance the richness of the meat with the savory rolls.
- Holiday Dinners: Garlic butter bread rolls are a perfect addition to holiday feasts like Thanksgiving, Christmas, or Easter, adding a touch of homemade comfort to the celebration.
- Appetizer Platters: Include them on appetizer platters with cheeses, olives, cured meats, and dips for a crowd-pleasing starter.
- Breakfast or Brunch: Enjoy them warm with scrambled eggs, omelets, or alongside a breakfast casserole for a savory and satisfying start to the day.
Expert Tips for Baking the Best Garlic Butter Bread Rolls
To ensure your garlic butter bread rolls are truly exceptional, consider these expert tips:
- 1. Use Fresh, High-Quality Ingredients: Start with fresh, active yeast and good quality all-purpose flour. Fresh garlic and parsley will make a noticeable difference in flavor.
- 2. Ensure Milk is at the Correct Temperature: Use a kitchen thermometer to ensure the milk is between 105°F and 115°F (40°C and 46°C) for optimal yeast activation.
- 3. Don’t Over-Knead or Under-Knead the Dough: Knead the dough for the recommended time until it is smooth and elastic. Over-kneading can make the rolls tough, while under-kneading can result in dense rolls.
- 4. Allow Sufficient Rise Time in a Warm Place: Provide a warm, draft-free environment for the dough to rise properly. A slightly warm oven (turned off) or a warm spot in your kitchen works well.
- 5. Don’t Overbake: Bake the rolls until they are golden brown on top and cooked through, but avoid overbaking, which can make them dry. Check for doneness with a toothpick.
- 6. Brush with Extra Garlic Butter After Baking: For an extra burst of flavor and shine, brush the rolls with any remaining garlic butter as soon as they come out of the oven.
- 7. Store Properly: Store leftover rolls in an airtight container at room temperature for up to 2-3 days or in the freezer for longer storage. Reheat gently to restore their warmth and softness.
Frequently Asked Questions: Your Garlic Butter Bread Rolls Queries Answered
Here are some common questions related to ingredients and baking garlic butter bread rolls:
Q1: Can I use bread flour instead of all-purpose flour?
A: Yes, you can use bread flour, but the texture will be slightly chewier due to the higher protein content. All-purpose flour provides a good balance of fluffiness and structure for these rolls. If using bread flour, you might need to add a tablespoon or two of extra liquid if the dough seems too dry.
Q2: Can I use instant yeast instead of active dry yeast?
A: Yes, you can substitute instant yeast (also called rapid-rise yeast) for active dry yeast. Use the same amount (2 ¼ teaspoons or 1 packet). However, instant yeast doesn’t require activation in warm milk. You can add it directly to the dry ingredients. The rest of the recipe instructions remain the same, but the rising time might be slightly shorter with instant yeast.
Q3: Can I use salted butter instead of unsalted butter?
A: While it’s generally recommended to use unsalted butter in baking to control the salt content, you can use salted butter if that’s what you have on hand. In this case, reduce the amount of added salt in the dough to ½ teaspoon instead of 1 teaspoon to avoid overly salty rolls.
Q4: Can I use garlic powder instead of fresh garlic?
A: Fresh garlic is highly recommended for its superior flavor and aroma in garlic butter bread rolls. However, if fresh garlic is unavailable, you can use garlic powder as a substitute. Use about 1-2 teaspoons of garlic powder in the garlic butter mixture. Keep in mind that the flavor will be less intense and nuanced compared to fresh garlic.
Q5: Can I omit parsley or Italian seasoning?
A: Parsley and Italian seasoning enhance the flavor profile of the garlic butter topping, but you can omit them if you don’t have them or prefer a simpler garlic butter flavor. The rolls will still be delicious with just garlic and butter. You can also experiment with other herbs like chives, rosemary, or thyme for different flavor variations.
Print
Garlic Butter Bread Rolls Recipe
Ingredients
3 Cups All-Purpose Flour: The Foundation of Fluffiness
All-purpose flour forms the structural backbone of our bread rolls. It’s a versatile type of flour, milled from a blend of soft and hard wheat, making it suitable for a wide range of baking applications, including bread making. The protein content in all-purpose flour, when hydrated and kneaded, develops gluten. Gluten is what gives bread its elasticity and chewiness, trapping the gases produced by the yeast and allowing the dough to rise and create that desirable fluffy texture.
For this recipe, all-purpose flour is ideal as it strikes a good balance between structure and tenderness. While bread flour, with its higher protein content, could be used, it might result in a slightly chewier roll. Pastry flour, on the other hand, would be too low in protein, leading to rolls that are too tender and lack structure. Using high-quality all-purpose flour ensures that your rolls will be both fluffy and sturdy enough to hold their shape and the delicious garlic butter topping.
2 ¼ Teaspoons Active Dry Yeast (1 Packet): The Magic of Leavening
Active dry yeast is the leavening agent in this recipe, responsible for making the dough rise and become light and airy. Yeast is a single-celled microorganism that, when activated, consumes sugars and releases carbon dioxide gas. This gas gets trapped within the gluten network of the dough, causing it to expand and double or even triple in size.
Active dry yeast needs to be “activated” or proofed before being added to the dry ingredients. This process involves dissolving the yeast in warm liquid (in this case, warm milk) with a little sugar. The warmth and sugar provide the ideal environment for the yeast to become active and start producing carbon dioxide. You’ll know your yeast is active when the mixture becomes frothy or bubbly, usually within 5-10 minutes. Using fresh, active yeast is crucial for successful bread making. Expired or inactive yeast will not leaven the dough properly, resulting in dense and flat rolls.
2 Tablespoons Sugar: Sweetness and Yeast Fuel
Sugar plays a dual role in this recipe. Firstly, it provides a touch of sweetness that balances the savory flavors of garlic and butter, enhancing the overall taste profile of the rolls. Secondly, and perhaps more importantly, sugar acts as food for the yeast. Yeast feeds on sugar during the activation process and throughout the dough’s rise, accelerating its activity and promoting a faster and more robust rise.
While granulated sugar is commonly used, you can also use other forms of sugar like caster sugar or even honey. However, granulated sugar is readily available and works perfectly well in this recipe. The amount of sugar is carefully measured to provide enough fuel for the yeast without making the rolls overly sweet.
1 Teaspoon Salt: Flavor Enhancer and Gluten Regulator
Salt is an essential ingredient in bread making, often underestimated but incredibly important. It serves several crucial functions. Firstly, salt enhances the flavor of the bread, bringing out the subtle nuances of the flour and other ingredients. Without salt, bread can taste bland and flat. Secondly, salt plays a vital role in controlling yeast activity. It slows down the fermentation process, preventing the dough from rising too quickly and becoming overly acidic. This controlled fermentation contributes to a more complex flavor development and a better texture.
Furthermore, salt strengthens the gluten network in the dough, making it more elastic and easier to handle. It also helps to retain moisture in the dough, resulting in bread rolls that are soft and moist rather than dry and crumbly. It’s important to use the correct amount of salt as too little can lead to flat, flavorless bread, while too much can inhibit yeast activity and result in dense rolls.
1 Cup Warm Milk (110°F or 45°C): Hydration and Richness
Warm milk is the liquid component in this recipe, contributing both hydration and richness to the dough. Milk provides moisture necessary for the flour to absorb and form gluten. The warmth of the milk is crucial for activating the yeast. Yeast thrives in a warm environment, ideally between 105°F and 115°F (40°C and 46°C). Milk that is too hot can kill the yeast, while milk that is too cold will slow down its activity. Using a kitchen thermometer is recommended to ensure the milk is at the correct temperature.
Milk also adds richness and a slightly softer texture to the rolls compared to using water alone. The fats and proteins in milk contribute to a more tender crumb and a slightly richer flavor. You can use whole milk, 2% milk, or even non-dairy milk alternatives like almond milk or soy milk, although the flavor and texture might be slightly altered.
¼ Cup Unsalted Butter, Melted (for dough): Tenderness and Flavor
Melted unsalted butter is added directly to the dough, contributing tenderness, flavor, and richness. Butter, being fat, inhibits gluten development to a certain extent, resulting in a more tender crumb. It also adds a subtle buttery flavor that complements the other ingredients beautifully.
Unsalted butter is preferred over salted butter in baking recipes as it gives you more control over the salt content. Melted butter is incorporated into the dough to ensure it’s evenly distributed and contributes to a smoother dough consistency.
1 Large Egg: Structure, Color, and Richness
A large egg is another key ingredient that adds structure, color, and richness to the bread rolls. The proteins in the egg contribute to the dough’s structure, helping to bind the ingredients together and create a more stable dough. The egg yolk, rich in fats, adds richness and a tender texture to the rolls. Eggs also contribute to the golden-brown color of the baked rolls, thanks to the Maillard reaction that occurs during baking.
Use a large egg as specified in the recipe for the best results. Using a smaller egg might slightly affect the dough’s hydration and structure, while a very large egg might make the dough too wet.
4 Tablespoons Unsalted Butter, Softened (for garlic topping): Flavor Carrier and Richness
Softened unsalted butter is the base for the flavorful garlic topping. Softened butter is crucial for creating a smooth and spreadable garlic butter mixture that coats the rolls evenly. Butter acts as a carrier for the garlic and herbs, infusing the rolls with their delicious flavors. The richness of the butter also adds a luxurious mouthfeel to the rolls.
Ensure the butter is softened to room temperature, making it easy to cream together with the garlic and herbs. Avoid melting the butter as it will make the garlic butter mixture too runny and difficult to apply evenly to the rolls.
4 Cloves Garlic, Minced: The Star Flavor
Fresh garlic is the star flavor in these garlic butter bread rolls. Minced garlic releases its pungent and aromatic oils, infusing the butter with its distinctive flavor. Fresh garlic is preferred over garlic powder for its more intense and complex flavor. The amount of garlic can be adjusted to your preference, but 4 cloves provide a good balance of garlic flavor without being overpowering.
Mincing the garlic finely ensures that it distributes evenly throughout the butter and releases its flavor effectively. You can use a garlic press or finely chop the garlic with a knife.
1 Tablespoon Fresh Parsley, Chopped: Freshness and Visual Appeal
Fresh parsley adds a touch of freshness and herbaceousness to the garlic butter topping. It also provides a beautiful visual contrast with its vibrant green color against the golden-brown rolls. Parsley’s mild, slightly peppery flavor complements the garlic and butter perfectly.
Fresh parsley is preferred for its brighter flavor and visual appeal. However, if fresh parsley is unavailable, you can use dried parsley as a substitute, although the flavor will be less pronounced. Make sure to chop the parsley finely so it distributes evenly in the garlic butter mixture.
½ Teaspoon Italian Seasoning: Aromatic Complexity
Italian seasoning is a blend of dried herbs, typically including oregano, basil, rosemary, thyme, and marjoram. It adds a layer of aromatic complexity to the garlic butter topping, enhancing the overall flavor profile. The combination of these herbs creates a warm and savory aroma that complements the garlic and butter beautifully.
You can find Italian seasoning readily available in most grocery stores. If you don’t have Italian seasoning, you can create your own blend using dried oregano, basil, and thyme.
½ Teaspoon Fresh Ground Black Pepper: Depth and Spice
Fresh ground black pepper adds depth and a subtle spicy kick to the garlic butter topping. Freshly ground pepper has a more intense and aromatic flavor compared to pre-ground pepper. The pepper’s subtle spice balances the richness of the butter and garlic, adding another layer of complexity to the flavor.
Instructions
In a bowl, combine 1 cup of warm milk (110°F or 45°C), 2 tablespoons of sugar, and 2 ¼ teaspoons of active dry yeast (1 packet). Gently stir to combine the ingredients and let it sit for about 5-10 minutes, or until the mixture becomes frothy and bubbly. This frothy appearance indicates that the yeast is active and ready to leaven the dough.
Why this step is important: Activating the yeast ensures that it is alive and capable of producing carbon dioxide, which is essential for the dough to rise. Warm milk provides the ideal temperature for yeast activity, while sugar provides food for the yeast to consume and start fermenting. If the yeast doesn’t become frothy, it might be expired or the milk might not be at the correct temperature. If this happens, it’s best to start with fresh yeast and ensure the milk is warm but not hot.
In a large mixing bowl, whisk together 3 cups of all-purpose flour and 1 teaspoon of salt. Make a well in the center of the dry ingredients. Pour in the frothy yeast mixture, ¼ cup of melted unsalted butter, and 1 large egg.
Using a wooden spoon or a dough hook attachment on a stand mixer, mix the ingredients until a shaggy dough forms. The dough will initially be sticky and slightly messy.
Tips for this step: Ensure the melted butter has cooled slightly before adding it to the yeast mixture, as hot butter can kill the yeast. Adding the wet ingredients to a well in the dry ingredients helps to prevent lumps and ensures even mixing. If using a stand mixer, start on low speed and gradually increase to medium speed as the dough comes together.
Transfer the dough to a lightly floured surface. Knead the dough for about 8-10 minutes, until it becomes smooth, elastic, and no longer sticky. To knead, push the dough away from you with the heel of your hand, fold it in half towards you, and repeat. Rotate the dough as you knead to work it evenly.
Alternatively, if using a stand mixer, knead the dough with the dough hook for about 6-8 minutes on medium speed until it pulls away from the sides of the bowl and forms a smooth, elastic ball.
Place the kneaded dough in a lightly greased bowl, turning it to coat all sides with grease. Cover the bowl with a clean kitchen towel or plastic wrap and let it rise in a warm place for about 1 hour, or until doubled in size.
Why kneading is crucial: Kneading develops gluten, the protein in flour that gives bread its structure and chewiness. Proper kneading results in a smooth and elastic dough that can trap the gases produced by the yeast, leading to light and fluffy rolls. The “windowpane test” is a good indicator of well-kneaded dough: you should be able to stretch a small piece of dough into a thin, translucent membrane without it tearing.
While the dough is rising, prepare the garlic butter mixture. In a small bowl, combine 4 tablespoons of softened unsalted butter, 4 cloves of minced garlic, 1 tablespoon of fresh chopped parsley, ½ teaspoon of Italian seasoning, and ½ teaspoon of fresh ground black pepper. Mix well with a fork or spatula until all ingredients are evenly combined and the mixture is smooth and spreadable. Set aside at room temperature.
Tips for the garlic butter: Ensure the butter is softened to room temperature for easy mixing. Mince the garlic finely to release its flavor effectively. You can adjust the amount of garlic to your preference. Feel free to add other herbs to the garlic butter mixture, such as chives or rosemary, for variation.
Once the dough has doubled in size, gently punch it down to release the air. Turn the dough out onto a lightly floured surface. Divide the dough into 12 equal pieces. You can use a kitchen scale to ensure even portions for uniform rolls.
Roll each piece of dough into a smooth ball by tucking the edges underneath and rolling it between your palms. Place the shaped rolls in a greased 9×13 inch baking dish, arranging them evenly.
Tips for shaping: Dividing the dough into equal pieces ensures that the rolls bake evenly. Rolling the dough into smooth balls helps to create a uniform shape and texture. Place the rolls slightly apart in the baking dish to allow for expansion during the second rise and baking.
Cover the baking dish with the shaped rolls loosely with a kitchen towel or plastic wrap. Let them rise again in a warm place for about 30 minutes, or until they become puffy and almost double in size again. This second rise is crucial for achieving light and airy rolls.
Why the second rise is important: The second rise allows the dough to relax and rise further after being shaped. This final rise contributes to the ultimate fluffiness and tenderness of the baked rolls. Don’t skip the second rise for the best results.
While the rolls are undergoing their second rise, preheat your oven to 350°F (175°C). Ensure the oven is fully preheated before placing the rolls inside to ensure even baking.
Importance of preheating: Preheating the oven to the correct temperature is essential for proper baking. It ensures that the rolls bake evenly and rise properly in the oven.
Once the rolls have completed their second rise and are puffy, gently brush the garlic butter mixture generously over the top and sides of each roll, ensuring they are evenly coated. Use all of the garlic butter mixture for maximum flavor.
Tips for applying garlic butter: Brushing the garlic butter generously ensures that each roll is infused with flavor and has a beautiful golden-brown crust. Use a pastry brush to apply the garlic butter evenly.
Bake the garlic butter bread rolls in the preheated oven for 18-20 minutes, or until they are golden brown on top and cooked through. The internal temperature of the rolls should reach around 200-210°F (93-99°C). You can check for doneness by inserting a toothpick into the center of a roll – it should come out clean.
Nutrition
- Serving Size: One Normal Portion
- Calories: 220-250 kcal
- Sugar: 4-6g
- Sodium: 200-250mg
- Fat: 10-12g
- Saturated Fat: 6-8g
- Unsaturated Fat: 3-4g
- Carbohydrates: 28-32g
- Fiber: 1-2g
- Protein: 4-5g
- Cholesterol: 30-40mg


