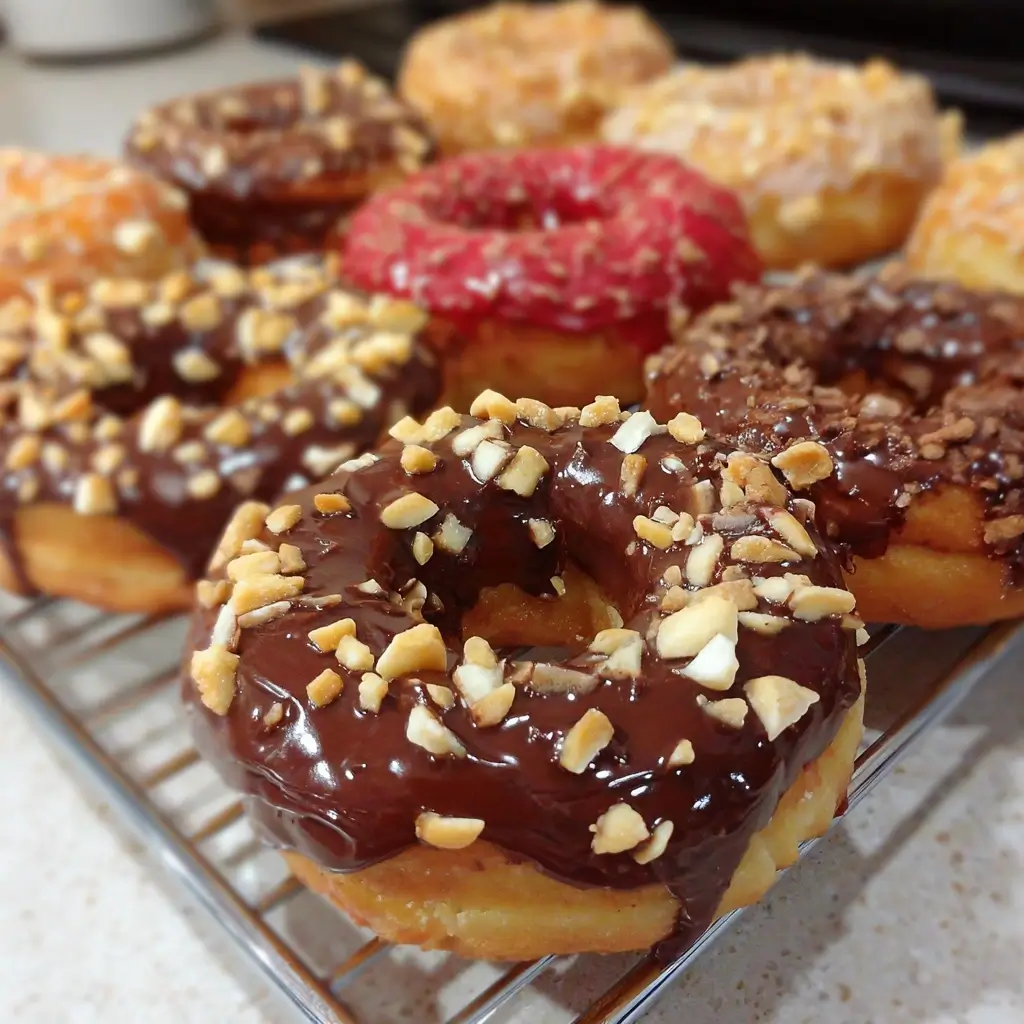

There are certain smells that instantly signal comfort, and for my family, the warm, sweet aroma of freshly baked donuts wafting from the kitchen is at the top of the list. For years, the idea of making donuts at home seemed like a monumental task, reserved for professionals with deep fryers and a tolerance for splattering oil. That all changed when I discovered the magic of homemade baked donuts. This recipe is the culmination of countless weekend experiments, a quest to create a donut that is unbelievably soft, perfectly moist, and endlessly customizable, all without the fuss and fat of frying. The first time I pulled a tray of these golden-brown beauties from the oven, my kids’ eyes widened with pure joy. Dipping them into a simple vanilla glaze and covering them in a rainbow of sprinkles, we created not just a delicious treat, but a core memory. These aren’t just donuts; they’re a canvas for creativity, a healthier indulgence, and the easiest way to make any morning feel like a special occasion.
Why You’ll Fall in Love with This Baked Donut Recipe
Before we dive into the flour and sugar, let’s talk about what makes this specific recipe a game-changer in the world of home baking. While fried donuts have their own unique charm, baked donuts offer a host of benefits that make them a superior choice for the home cook.
First and foremost is the health aspect. By baking instead of deep-frying, you eliminate a significant amount of oil and saturated fat. This transforms the donut from a heavy, once-in-a-while indulgence into a lighter treat you can feel good about serving your family. They have a wonderfully soft, cake-like texture that melts in your mouth, reminiscent of a perfect little muffin top, but with the undeniable fun and shape of a donut.
Second, the cleanup is an absolute dream. There’s no giant pot of used oil to deal with, no greasy splatters on your stovetop, and no lingering fried smell in your house for days. Everything is contained within a mixing bowl and the donut pan, making this a wonderfully low-mess, low-stress recipe.
Finally, the simplicity and safety are unparalleled. This recipe is incredibly straightforward and forgiving, making it a perfect project for baking with kids. You don’t have to worry about the dangers of hot oil, which opens up the fun of decorating to even the youngest of helpers. The batter comes together in minutes, and the baking time is short, meaning you can go from craving to consumption in under 30 minutes. This recipe delivers all the joy of a donut shop visit, right from the comfort and ease of your own kitchen.
Essential Equipment for Perfect Baked Donuts
While this recipe is simple, having the right tools will guarantee flawless results every time. The good news is that you likely have most of these items in your kitchen already.
- Donut Pan: This is the one non-negotiable piece of equipment. A standard non-stick metal donut pan with 6 or 12 cavities is the gold standard. Metal pans conduct heat evenly, giving your donuts a beautiful, uniform golden-brown color. Silicone donut pans also work, but they can sometimes result in a paler, slightly steamier donut. If using silicone, place it on a sturdy baking sheet before filling and baking to provide stability.
- Mixing Bowls: You will need at least two: one medium-sized bowl for the dry ingredients and one larger bowl for the wet ingredients.
- Whisk and Spatula: A whisk is perfect for combining the dry ingredients and aerating the flour. A flexible silicone spatula is essential for gently folding the wet and dry ingredients together without overmixing, and for scraping every last bit of batter from the bowl.
- Piping Bag (or Ziplock Bag): This is the secret weapon for filling the donut pan neatly and evenly. While you can try to spoon the batter in, it’s often messy and results in unevenly shaped donuts. Using a piping bag (or a large Ziplock bag with the corner snipped off) gives you complete control and ensures perfect rings every time.
- Wire Cooling Rack: This is crucial for allowing air to circulate around the donuts after they come out of the pan. Placing them directly on a plate or counter will trap steam, making the bottoms soggy. A cooling rack ensures they cool properly and maintain their perfect texture.
The Ultimate Homemade Baked Donuts
This recipe creates a classic vanilla-scented cake donut that serves as the perfect base for any glaze or topping you can dream of. The batter is enriched with buttermilk and a touch of nutmeg for that authentic, old-fashioned bakery flavor.
Ingredients
For the Baked Donuts (Yields 12 donuts):
- 2 cups (250g) All-Purpose Flour
- ¾ cup (150g) Granulated Sugar
- 2 teaspoons Baking Powder
- ¼ teaspoon Baking Soda
- 1 teaspoon Ground Cinnamon
- ½ teaspoon Ground Nutmeg
- ½ teaspoon Salt
- 1 large Egg, at room temperature
- 1 cup (240ml) Buttermilk, at room temperature
- 2 tablespoons Unsalted Butter, melted and slightly cooled
- 2 teaspoons Pure Vanilla Extract
For the Classic Vanilla Glaze:
- 1 ½ cups (180g) Powdered Sugar, sifted
- 3-4 tablespoons Milk or Cream
- ½ teaspoon Pure Vanilla Extract
For the Rich Chocolate Glaze:
- 1 cup (120g) Powdered Sugar, sifted
- ¼ cup (22g) Unsweetened Cocoa Powder, sifted
- 3-4 tablespoons Milk or Cream
- ½ teaspoon Pure Vanilla Extract
For Cinnamon Sugar Topping:
- ½ cup (100g) Granulated Sugar
- 1 ½ teaspoons Ground Cinnamon
- 4 tablespoons Unsalted Butter, melted
Instructions
Follow these step-by-step instructions for donut perfection. The key is to work gently and avoid overmixing the batter for the most tender and fluffy results.
Step 1: Preparation
- Preheat and Prep: Preheat your oven to 350°F (175°C). Generously grease your 12-cavity donut pan with non-stick cooking spray or by brushing it with melted butter. Make sure to get into all the crevices, including the center post, to prevent sticking.
- Combine Dry Ingredients: In a medium bowl, whisk together the all-purpose flour, granulated sugar, baking powder, baking soda, cinnamon, nutmeg, and salt. Whisking not only combines the ingredients but also aerates the flour, contributing to a lighter donut.
Step 2: Making the Batter
- Combine Wet Ingredients: In a separate large bowl, whisk the room-temperature egg until it’s light and frothy. Add the buttermilk, melted butter, and vanilla extract. Whisk until everything is smoothly combined. Using room-temperature ingredients is crucial as it helps the batter emulsify properly, creating a uniform and tender crumb.
- Combine Wet and Dry: Pour the dry ingredients into the bowl with the wet ingredients. Using a silicone spatula, gently fold the ingredients together until they are just combined. It is extremely important not to overmix! A few small lumps in the batter are perfectly fine. Overmixing develops the gluten in the flour, which will result in tough, dense donuts instead of light and cakey ones.
- Transfer to Piping Bag: Carefully spoon the batter into a large piping bag or a Ziplock bag. This step is the key to perfectly shaped donuts.
Step 3: Filling the Pan and Baking
- Pipe the Batter: Snip off the corner of the bag (about a ½-inch opening). Carefully pipe the batter into each cavity of the prepared donut pan. Fill each cavity about ½ to ⅔ full. Do not overfill, as the donuts will rise significantly during baking. Overfilling will cause the batter to bake over the center hole.
- Bake: Place the donut pan in the preheated oven on the center rack. Bake for 10-12 minutes. The donuts are done when they are golden brown and a wooden skewer or toothpick inserted into the center of a donut comes out clean. They should also spring back when you gently press on them.
- Cool: Allow the donuts to cool in the pan for 5-7 minutes. This helps them set and makes them easier to remove. After a few minutes, carefully invert the pan onto a wire cooling rack. The donuts should fall right out. Let them cool completely on the wire rack before glazing or topping.
Step 4: Glazing and Decorating
- Prepare Your Chosen Topping: While the donuts are cooling, prepare your glaze or cinnamon-sugar mixture.
- For Vanilla or Chocolate Glaze: In a small bowl, whisk together the sifted powdered sugar (and cocoa powder, if making chocolate) with 3 tablespoons of milk and the vanilla extract. Whisk until smooth. If the glaze is too thick, add more milk, one teaspoon at a time. If it’s too thin, add more powdered sugar. The ideal consistency should be thick enough to coat the donut but thin enough to drip slightly.
- For Cinnamon Sugar: In a shallow bowl or dish, mix the granulated sugar and cinnamon together. In a separate small bowl, melt the butter.
- Decorate the Donuts:
- For Glazing: Once the donuts are completely cool, dip the top of each donut into the glaze. Allow the excess to drip off before placing it back on the wire rack. If you’re adding sprinkles, do so immediately after glazing before the glaze sets.
- For Cinnamon Sugar: Brush the entire surface of a cooled donut with melted butter. Immediately press the buttered donut into the cinnamon-sugar mixture, ensuring it’s coated on all sides.
Nutrition Facts
- Servings: 12 donuts
- Calories per serving: Approximately 210 kcal per unfrosted donut.
Disclaimer: The nutritional information provided is an estimate and will vary based on the specific ingredients used, the type and amount of glaze or toppings, and the final serving size. This estimate is for one plain, unfrosted donut.
Preparation Time
- Prep Time: 15 minutes
- Cook Time: 12 minutes
- Cooling & Decorating Time: 20 minutes
- Total Time: Approximately 47 minutes
How to Serve Your Homemade Baked Donuts
These donuts are delightful on their own, but a little thoughtful presentation can elevate them to a truly special treat. Here are some wonderful ways to serve them:
- The Classic Coffee Shop Experience:
- Serve them fresh and warm alongside a cup of freshly brewed coffee, a creamy latte, or a frothy cappuccino.
- For kids (and kids at heart), a tall glass of cold milk or a mug of hot chocolate is the perfect pairing.
- As a Brunch Centerpiece:
- Arrange a variety of decorated donuts on a large platter or a multi-tiered cake stand.
- Offer different glazes (vanilla, chocolate, maple) and a small bowl of sprinkles so guests can customize their own.
- Serve alongside a fresh fruit salad, yogurt, and a savory dish like quiche or a breakfast casserole for a complete brunch spread.
- For Parties and Celebrations:
- Create a “Donut Wall” by hanging the donuts on a pegboard for a fun, interactive dessert display at a birthday party or gathering.
- Package them in small bakery boxes tied with ribbon as a delightful party favor or a thoughtful gift for neighbors and friends.
- Color your vanilla glaze with food coloring to match a party’s theme (e.g., pastels for Easter, red and green for Christmas).
- As a Dessert Treat:
- Serve a warm donut with a scoop of vanilla bean ice cream and a drizzle of chocolate or caramel sauce for an indulgent dessert.
- Crumble a plain donut over a bowl of yogurt and berries for a fun twist on a parfait.
5 Additional Tips for Donut Perfection
- The Room Temperature Rule is Key: We mentioned it in the instructions, but it bears repeating. Using room temperature egg and buttermilk is critical. Cold ingredients don’t emulsify well with the melted butter, which can lead to a dense, oily texture. Set your egg and buttermilk on the counter for about 30 minutes before you begin baking for the best results.
- Don’t Substitute the Buttermilk (If You Can Help It): Buttermilk is the secret to an incredibly tender and moist crumb. Its acidity reacts with the baking soda to create extra lift, making the donuts light and fluffy. If you don’t have buttermilk, you can make a quick substitute: add 1 tablespoon of lemon juice or white vinegar to 1 cup of regular milk, stir, and let it sit for 5-10 minutes until it slightly curdles.
- Sift Your Dry Ingredients for Glazes: For the smoothest, most professional-looking glaze, always sift your powdered sugar and cocoa powder. This removes any small lumps and allows the ingredients to dissolve seamlessly into the liquid, preventing a gritty texture. It’s a small step that makes a huge difference in the final product.
- Master the Double Dip: For a thicker, more opaque glaze like you see in professional bakeries, try a double-dipping technique. Dip the donut once, let the glaze set for about 10-15 minutes, and then dip it a second time. This creates a rich, substantial layer of frosting that is both visually appealing and delicious.
- Cool Completely Before Glazing: Patience is a virtue, especially when it comes to glazing. If you try to glaze warm donuts, the heat will melt the glaze, causing it to run off the sides and become thin and transparent. For a thick, beautiful coating that sets properly, ensure your donuts have cooled completely to room temperature on a wire rack.
Frequently Asked Questions (FAQ)
Q1: Can I make these donuts without a donut pan?
A: Yes, you can! While a donut pan provides the classic shape, you can make “donut muffins” using a standard muffin tin. Simply grease the muffin tin well and fill each cup about halfway with batter. Bake for 12-15 minutes, or until a toothpick comes out clean. You can then dip the tops in glaze just like you would with regular donuts. Another trick is to use a muffin tin and place a small, rolled-up ball of aluminum foil in the center of each cup to create a hole, though the shape won’t be as perfect.
Q2: How do I store leftover baked donuts?
A: Baked donuts are best enjoyed the day they are made. However, you can store them in an airtight container at room temperature for up to 2 days. If they have a simple glaze or cinnamon-sugar topping, they will hold up fairly well. Avoid refrigerating them, as the cold air can dry them out and make them stale faster.
Q3: Can I make these donuts gluten-free?
A: Absolutely. You can substitute the all-purpose flour with a high-quality, 1-to-1 gluten-free baking flour blend (one that contains xanthan gum). Follow the recipe as written, keeping a close eye on the baking time as gluten-free flours can sometimes bake faster. The texture will be slightly different but still delicious.
Q4: Can I freeze these donuts for later?
A: Yes, baked donuts freeze surprisingly well! For best results, freeze the donuts plain, without any glaze or toppings. Let them cool completely, then place them in a single layer in a freezer-safe bag or airtight container. They can be frozen for up to 2 months. To serve, let them thaw at room temperature for about an hour. Once thawed, you can warm them gently in the microwave for 10-15 seconds before glazing and decorating as desired.
Q5: Why did my baked donuts turn out dry or dense?
A: The two most common culprits for dry or dense baked donuts are overmixing the batter and overbaking. When you mix the batter too much after combining the wet and dry ingredients, you overdevelop the gluten, resulting in a tough, chewy texture instead of a light, cakey one. Always mix until just combined. Secondly, since these are small and bake quickly, even an extra minute or two in the oven can dry them out. Start checking for doneness at the 10-minute mark. As soon as a toothpick comes out clean, they are ready.
Print
Homemade Baked Donuts Recipe
Ingredients
For the Baked Donuts (Yields 12 donuts):
- 2 cups (250g) All-Purpose Flour
- ¾ cup (150g) Granulated Sugar
- 2 teaspoons Baking Powder
- ¼ teaspoon Baking Soda
- 1 teaspoon Ground Cinnamon
- ½ teaspoon Ground Nutmeg
- ½ teaspoon Salt
- 1 large Egg, at room temperature
- 1 cup (240ml) Buttermilk, at room temperature
- 2 tablespoons Unsalted Butter, melted and slightly cooled
- 2 teaspoons Pure Vanilla Extract
For the Classic Vanilla Glaze:
- 1 ½ cups (180g) Powdered Sugar, sifted
- 3–4 tablespoons Milk or Cream
- ½ teaspoon Pure Vanilla Extract
For the Rich Chocolate Glaze:
- 1 cup (120g) Powdered Sugar, sifted
- ¼ cup (22g) Unsweetened Cocoa Powder, sifted
- 3–4 tablespoons Milk or Cream
- ½ teaspoon Pure Vanilla Extract
For Cinnamon Sugar Topping:
- ½ cup (100g) Granulated Sugar
- 1 ½ teaspoons Ground Cinnamon
- 4 tablespoons Unsalted Butter, melted
Instructions
Step 1: Preparation
- Preheat and Prep: Preheat your oven to 350°F (175°C). Generously grease your 12-cavity donut pan with non-stick cooking spray or by brushing it with melted butter. Make sure to get into all the crevices, including the center post, to prevent sticking.
- Combine Dry Ingredients: In a medium bowl, whisk together the all-purpose flour, granulated sugar, baking powder, baking soda, cinnamon, nutmeg, and salt. Whisking not only combines the ingredients but also aerates the flour, contributing to a lighter donut.
Step 2: Making the Batter
- Combine Wet Ingredients: In a separate large bowl, whisk the room-temperature egg until it’s light and frothy. Add the buttermilk, melted butter, and vanilla extract. Whisk until everything is smoothly combined. Using room-temperature ingredients is crucial as it helps the batter emulsify properly, creating a uniform and tender crumb.
- Combine Wet and Dry: Pour the dry ingredients into the bowl with the wet ingredients. Using a silicone spatula, gently fold the ingredients together until they are just combined. It is extremely important not to overmix! A few small lumps in the batter are perfectly fine. Overmixing develops the gluten in the flour, which will result in tough, dense donuts instead of light and cakey ones.
- Transfer to Piping Bag: Carefully spoon the batter into a large piping bag or a Ziplock bag. This step is the key to perfectly shaped donuts.
Step 3: Filling the Pan and Baking
- Pipe the Batter: Snip off the corner of the bag (about a ½-inch opening). Carefully pipe the batter into each cavity of the prepared donut pan. Fill each cavity about ½ to ⅔ full. Do not overfill, as the donuts will rise significantly during baking. Overfilling will cause the batter to bake over the center hole.
- Bake: Place the donut pan in the preheated oven on the center rack. Bake for 10-12 minutes. The donuts are done when they are golden brown and a wooden skewer or toothpick inserted into the center of a donut comes out clean. They should also spring back when you gently press on them.
- Cool: Allow the donuts to cool in the pan for 5-7 minutes. This helps them set and makes them easier to remove. After a few minutes, carefully invert the pan onto a wire cooling rack. The donuts should fall right out. Let them cool completely on the wire rack before glazing or topping.
Step 4: Glazing and Decorating
- Prepare Your Chosen Topping: While the donuts are cooling, prepare your glaze or cinnamon-sugar mixture.
- For Vanilla or Chocolate Glaze: In a small bowl, whisk together the sifted powdered sugar (and cocoa powder, if making chocolate) with 3 tablespoons of milk and the vanilla extract. Whisk until smooth. If the glaze is too thick, add more milk, one teaspoon at a time. If it’s too thin, add more powdered sugar. The ideal consistency should be thick enough to coat the donut but thin enough to drip slightly.
- For Cinnamon Sugar: In a shallow bowl or dish, mix the granulated sugar and cinnamon together. In a separate small bowl, melt the butter.
- Decorate the Donuts:
- For Glazing: Once the donuts are completely cool, dip the top of each donut into the glaze. Allow the excess to drip off before placing it back on the wire rack. If you’re adding sprinkles, do so immediately after glazing before the glaze sets.
- For Cinnamon Sugar: Brush the entire surface of a cooled donut with melted butter. Immediately press the buttered donut into the cinnamon-sugar mixture, ensuring it’s coated on all sides.
Nutrition
- Serving Size: One Normal Portion
- Calories: 210