
I’ll never forget the first time I made homemade frozen yogurt. The kids had been begging for a trip to the local fro-yo shop, the one with the wall of a hundred-plus toppings. While I love a good treat, the thought of the sugar overload and the expense sent me searching for a better way. I was skeptical, I’ll admit. My previous attempts at homemade ice cream had often ended up as an icy, disappointing rock in the back of the freezer. But this time was different. Armed with a new ice cream maker and a determination to crack the code, I whipped up a batch of this simple vanilla bean frozen yogurt. The result was nothing short of a revelation. It was tangy, unbelievably creamy, and had that perfect soft-serve texture right out of the churn. Watching my family’s eyes light up as they piled on fresh berries and a drizzle of honey was pure magic. It wasn’t just a dessert; it was an experience. We had created our own little fro-yo bar right in our kitchen, and this recipe has since become our official taste of summer, a healthier indulgence that feels every bit as special as the store-bought kind.
The Ultimate Homemade Vanilla Bean Frozen Yogurt Recipe
This recipe is designed to be the perfect base: creamy, tangy, and endlessly customizable. The key to its superior texture lies in using full-fat Greek yogurt and a small amount of an invert sugar (like corn syrup or honey) to prevent large ice crystals from forming.
Ingredients You’ll Need
- Full-Fat Greek Yogurt: 3 cups (about 700g), plain. Do not use low-fat or non-fat for the best results.
- Granulated Sugar: ¾ cup (150g). You can adjust slightly to your taste.
- Heavy Cream: ½ cup (120ml). This adds richness and is crucial for a creamy texture.
- Light Corn Syrup or Honey: 2 tablespoons. This is a secret weapon against iciness.
- Vanilla Bean Paste or Pure Vanilla Extract: 2 teaspoons. Paste will give you those beautiful vanilla flecks.
- Fresh Lemon Juice: 1 teaspoon. This brightens the yogurt’s natural tang.
- Pinch of Salt: Just a small pinch to balance the sweetness.
Required Equipment
- Ice Cream Maker (1.5-quart capacity or larger)
- Large Mixing Bowl
- Whisk
- Spatula
- Airtight, freezer-safe container (a loaf pan covered tightly with plastic wrap works well)
Step-by-Step Instructions for Perfect Fro-Yo
Following these steps precisely will ensure your frozen yogurt is smooth and creamy, not hard and icy. The chilling process is the most important part, so don’t skip it!
Step 1: Create the Yogurt Base
In a large mixing bowl, combine the granulated sugar and the pinch of salt. Pour in the heavy cream and whisk vigorously for about 1-2 minutes, or until the sugar has completely dissolved. You can test this by rubbing a small amount of the mixture between your fingers; it should feel smooth, not gritty.
Step 2: Incorporate the Yogurt and Flavorings
Add the full-fat Greek yogurt, corn syrup (or honey), vanilla paste (or extract), and fresh lemon juice to the sugar-cream mixture. Switch to a spatula and gently fold everything together until it is just combined. Be careful not to over-mix, as this can break down the yogurt’s texture. The goal is a smooth, homogenous base.
Step 3: The Crucial Chilling Stage
This is the most important step for a creamy final product. Cover the bowl with plastic wrap, pressing it directly onto the surface of the yogurt mixture to prevent a skin from forming. Place the bowl in the coldest part of your refrigerator and let it chill for a minimum of 4 hours, but preferably overnight. The colder the base is before it goes into the ice cream maker, the smaller the ice crystals will be, resulting in a much smoother texture.
Step 4: Churn Your Frozen Yogurt
Once your base is thoroughly chilled, it’s time to churn. Make sure your ice cream maker’s freezer bowl is completely frozen according to the manufacturer’s instructions (this usually requires at least 15-24 hours in the freezer).
Set up your ice cream maker. Pour the chilled yogurt base into the frozen bowl and start the machine. Let it churn for 20-25 minutes. The mixture will gradually thicken and increase in volume. It’s ready when it has the consistency of thick, soft-serve ice cream.
Step 5: The Ripening Stage (Optional but Recommended)
While you can enjoy the frozen yogurt straight from the churn as a soft-serve treat, it will be even better after “ripening.” This allows the flavors to meld and the texture to firm up.
Use a spatula to transfer the churned frozen yogurt into your airtight, freezer-safe container. Smooth the top and press a piece of parchment paper or plastic wrap directly onto the surface to prevent ice crystals. Seal the container and place it in the freezer for at least 2-4 hours to firm up to a scoopable consistency.
Nutrition Facts
- Servings: 8
- Calories per serving: Approximately 240 kcal (This can vary based on the specific brands of yogurt and cream used).
Preparation Time
- Active Prep Time: 10 minutes
- Chilling Time: 4 hours to overnight
- Churning Time: 20-25 minutes
- Freezing/Ripening Time: 2-4 hours
- Total Time: Approximately 7 hours (mostly hands-off)
The Science of Creamy Frozen Yogurt: A Deep Dive
Ever wondered why some homemade frozen desserts are creamy dreams and others are icy nightmares? The difference lies in the science of ice crystal formation. Understanding these principles will empower you to troubleshoot and perfect your recipe every time.
The goal of making any frozen dessert is to create the smallest ice crystals possible. Large ice crystals are what give a dessert that crunchy, icy texture. Small, microscopic crystals result in a smooth, creamy mouthfeel. Here’s how each component of our recipe works to achieve this:
- Fat: Fat molecules get in the way of water molecules, physically obstructing them from joining together to form large ice crystals. This is why our recipe calls for full-fat Greek yogurt and a splash of heavy cream. The higher fat content creates a richer, smoother product. Using non-fat yogurt is a one-way ticket to an ice block.
- Sugar: Sugar does more than just add sweetness; it’s a crucial textural element. Sugar lowers the freezing point of water. This means the mixture stays “softer” at colder temperatures, preventing it from freezing into a solid, impenetrable brick. It keeps the dessert scoopable and palatable right out of the freezer.
- Stabilizers (The Secret Weapon): This is where our corn syrup or honey comes in. These are “invert sugars” that are fantastic stabilizers. They have a more complex molecular structure than regular granulated sugar, which makes them incredibly effective at interfering with ice crystal growth. Just a small amount dramatically improves the final texture and shelf-life of your frozen yogurt. Other stabilizers used in commercial products include gums (guar gum, xanthan gum) or gelatin, but corn syrup is the most accessible and effective home solution.
- Aeration and Churning: The process of churning does two things. First, it constantly scrapes the freezing mixture off the sides of the frozen bowl, breaking up ice crystals as they form. Second, it incorporates air into the base. This aeration, known as “overrun” in the commercial world, makes the final product lighter, less dense, and contributes to that classic soft-serve feel.
By chilling your base thoroughly before churning, you give the process a head start. A colder base freezes faster, and a faster freeze means less time for large ice crystals to grow. Every element of this recipe is a deliberate step toward controlling the science of freezing for a delicious outcome.
Choosing Your Base: The Yogurt Matters
The “yogurt” in frozen yogurt is the star, and your choice will define the final product’s flavor and texture.
- Full-Fat Greek Yogurt (The Gold Standard): This is the top recommendation for a reason. Greek yogurt is strained, which removes much of the whey (the watery part of milk). This results in a much thicker, denser, and higher-protein product. The thickness means less water content, which is your primary enemy in preventing iciness. Its inherent creaminess and pronounced tang create the quintessential frozen yogurt flavor profile.
- Full-Fat Regular Yogurt: You can use regular, unstrained yogurt, but the result will be slightly less creamy and a bit icier due to the higher water content. If you choose this route, it’s even more critical to not skip the heavy cream and corn syrup. To improve its texture, you can strain regular yogurt yourself by placing it in a cheesecloth-lined sieve over a bowl in the refrigerator for a few hours.
- Skyr: This Icelandic cultured dairy product is even thicker and higher in protein than Greek yogurt. It makes a fantastic, incredibly dense, and tangy frozen yogurt.
- Non-Dairy Yogurts (Almond, Coconut, Soy): You can absolutely make dairy-free frozen yogurt! For the best results, choose the thickest, creamiest non-dairy yogurt available, often labeled as “Greek-style.” Coconut-based yogurts are often the best choice as the natural fat content in coconut contributes to a smoother texture. Be aware that the flavor of the base yogurt (especially coconut) will come through in the final product.
How to Serve Your Homemade Frozen Yogurt
The best part of making fro-yo at home is creating your own custom dessert experience. Here are some ideas to get you started, from simple scoops to elaborate creations.
- The Classic Scoop
- In a Chilled Bowl: The simplest and purest way to enjoy it.
- In a Waffle Cone or Bowl: Adds a delightful crunch and turns it into a classic handheld treat.
- Soft-Serve Style: Serve it immediately after churning for the ultimate soft-serve texture.
- Topping Extravaganza (Create a Toppings Bar!)
- Fresh & Fruity:
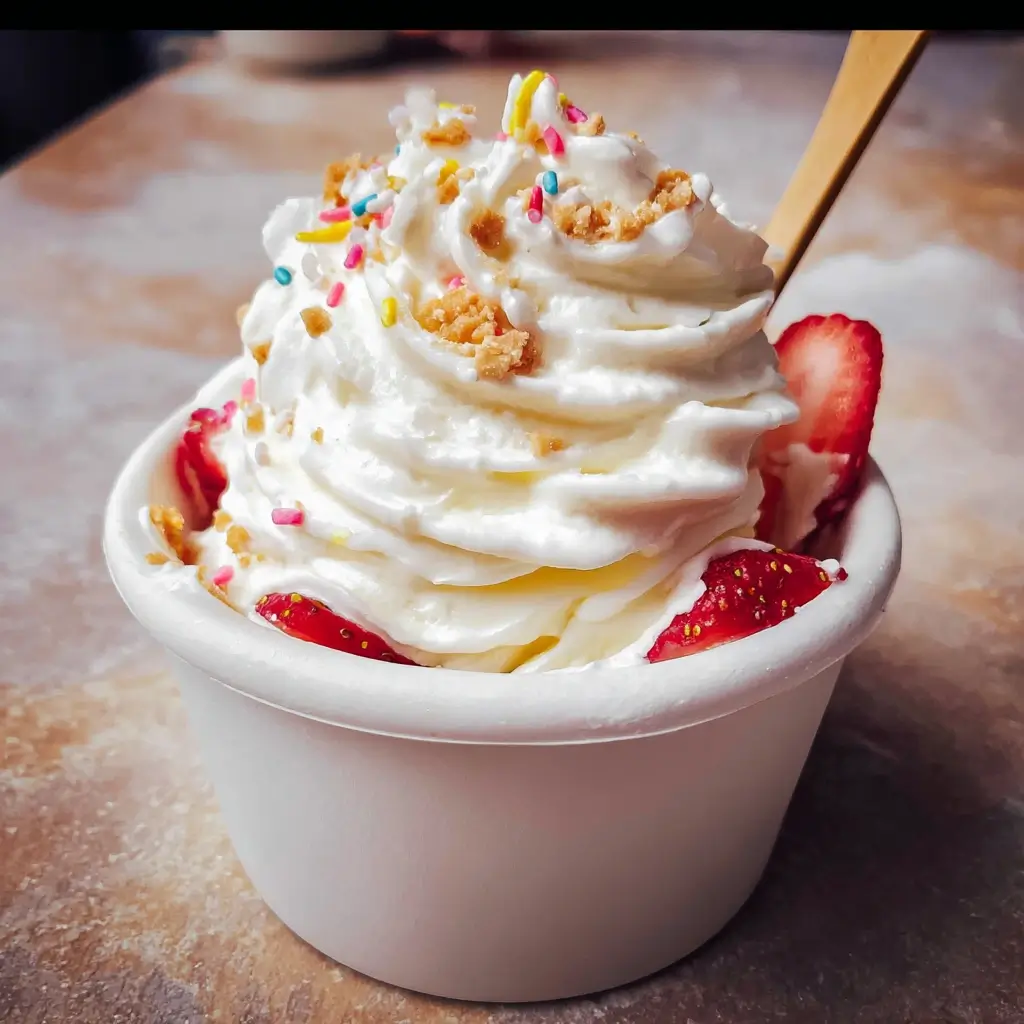
- Sliced strawberries, raspberries, blueberries, blackberries
- Diced mango, pineapple, or kiwi
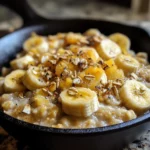
- Sliced bananas or peaches
- Pomegranate seeds
- Sweet & Saucy:
- Hot fudge or chocolate sauce
- Caramel or butterscotch sauce
- Honey or maple syrup
- Fruit coulis (raspberry is a classic)
- Crunchy & Nutty:
- Granola
- Chopped almonds, walnuts, or pecans
- Mini chocolate chips or cacao nibs
- Toasted coconut flakes
- Crushed cookies (like Oreos or Biscoff)
- Sprinkles
- Fun & Indulgent:
- Mini M&M’s or Reese’s Pieces
- Gummy bears
- Brownie chunks
- Cheesecake bites
- Fresh & Fruity:
- Creative Serving Ideas
- Frozen Yogurt Parfait: Layer the frozen yogurt in a tall glass with granola and fresh berries for a beautiful and delicious presentation.
- Fro-Yo Sandwiches: Scoop softened frozen yogurt between two of your favorite cookies (chocolate chip, oatmeal, or brownie cookies work well) and freeze until firm.
- On Top of Other Desserts: A scoop of tangy frozen yogurt is the perfect complement to a rich dessert like a warm brownie, a slice of apple pie, or a fruit crumble.
5 Pro Tips for Creamy, Dreamy Frozen Yogurt
- Full-Fat is Your Friend: It bears repeating: do not use low-fat or non-fat dairy. The fat content is the number one defense against an icy texture. The small amount of heavy cream in this recipe significantly boosts the creaminess factor. Embrace the fat for a superior result.
- Don’t Skimp on Sugar: While it’s tempting to reduce the sugar for a healthier treat, remember that sugar does more than sweeten. It lowers the freezing point of the mixture, which is essential for a soft, scoopable texture. If you must reduce it, do so sparingly, and know that your fro-yo may freeze harder.
- Chill, Chill, and Chill Again: A thoroughly cold base is the secret to success. Chilling the mixture overnight is ideal. This ensures it freezes quickly in the machine, minimizing the time for large ice crystals to form. Also, ensure your machine’s freezer bowl is frozen solid—shake it, and if you hear any liquid sloshing, it’s not ready.
- Manage Your Expectations for Storage: Homemade frozen yogurt is at its absolute best within the first 48 hours. Because it lacks the commercial-grade stabilizers and preservatives, it will eventually become harder and icier over time. For the best experience, plan to make it a day or two before you intend to serve it.
- Let it Temper Before Serving: If your frozen yogurt has been in the freezer for more than a few hours and is rock-hard, don’t despair. Just take it out and let it sit on the counter for 5-10 minutes (or in the fridge for 15-20 minutes) to soften up before scooping.
Flavor Variations: Beyond Vanilla
Once you’ve mastered the vanilla base, the possibilities are endless. Use the main recipe as your foundation and add these ingredients during Step 2 (before chilling).
Rich Chocolate Frozen Yogurt
- Add ½ cup (45g) of high-quality unsweetened cocoa powder and 4 ounces (113g) of bittersweet chocolate, melted and cooled slightly. Sift the cocoa powder in with the sugar to prevent lumps. Drizzle in the cooled melted chocolate while whisking the base to create fine flecks, or fold it in gently for thicker ribbons.
Fresh Strawberry Frozen Yogurt
- Take 1 pound (450g) of fresh or frozen strawberries. Hull and slice them. In a saucepan, combine the strawberries with 2 tablespoons of sugar and 1 tablespoon of lemon juice. Cook over medium heat until the berries break down and the sauce thickens, about 10-15 minutes. For a smooth texture, blend the mixture and strain it through a fine-mesh sieve to remove the seeds. Chill this strawberry puree completely before adding it to the yogurt base.
Tangy Lemon Frozen Yogurt
- This is a bright and refreshing option. Add the zest of 2 large lemons and ¼ cup (60ml) of fresh-squeezed lemon juice to the base mixture. The extra acidity works beautifully with the yogurt’s natural tang.
Coffee Frozen Yogurt
- Dissolve 2 tablespoons of high-quality instant espresso powder in 2 tablespoons of hot water. Let the mixture cool completely, then whisk it into the yogurt base. For a more intense flavor, you can also steep coarsely ground coffee beans in the heavy cream as it warms to dissolve the sugar, then strain them out.
FAQ: Frequently Asked Questions About Homemade Fro-Yo
1. Why is my frozen yogurt icy instead of creamy?
This is the most common issue and it’s almost always due to one of three things: 1) Not enough fat: You used low-fat or non-fat yogurt. 2) Large ice crystals: Your base wasn’t cold enough before churning, or your ice cream maker bowl wasn’t fully frozen. 3) Lack of a stabilizer: You skipped the corn syrup or honey, which is key to preventing ice crystal growth, especially for longer-term storage.
2. Can I make this recipe without an ice cream maker?
Yes, you can! The texture will be slightly denser and less airy, but still delicious. This is the “no-churn” method:
- Prepare the base as directed and chill it.
- Pour the chilled mixture into a shallow, freezer-safe dish (like a 9×5 loaf pan or a metal baking pan).
- Freeze for 45 minutes. Remove from the freezer and use a fork or a hand mixer to vigorously stir the mixture, breaking up any ice crystals, especially around the edges.
- Return to the freezer. Repeat this process of stirring every 30-45 minutes for about 3-4 hours, or until the yogurt is frozen but still scoopable. This manual agitation mimics the churning process.
- Once it reaches the desired consistency, transfer it to an airtight container for storage.
3. How long does homemade frozen yogurt last in the freezer?
For the best texture and flavor, homemade frozen yogurt should be consumed within 1-2 weeks. It is at its absolute peak in the first 48 hours. After that, it will gradually begin to develop more ice crystals and become harder, even with the right ingredients. Always store it in a high-quality airtight container with plastic wrap pressed against the surface.
4. Can I use a sugar substitute like Stevia or Erythritol?
You can, but it will significantly impact the texture. Artificial sweeteners do not have the same properties as sugar when it comes to lowering the freezing point. Your frozen yogurt will freeze much harder and will likely be icier. If you use a sugar substitute, your fro-yo will need more time to temper on the counter before it becomes scoopable.
5. Is homemade frozen yogurt healthier than store-bought or regular ice cream?
Generally, yes. You have complete control over the ingredients. This recipe uses significantly less sugar and fewer processed ingredients than most commercial frozen yogurts, which often contain a long list of gums, stabilizers, and corn syrup solids. Compared to traditional ice cream, frozen yogurt is typically lower in fat and calories and offers the bonus of probiotics from the live and active cultures in the yogurt.
Homemade Frozen Yogurt Recipe
Ingredients
- Full-Fat Greek Yogurt: 3 cups (about 700g), plain. Do not use low-fat or non-fat for the best results.
- Granulated Sugar: ¾ cup (150g). You can adjust slightly to your taste.
- Heavy Cream: ½ cup (120ml). This adds richness and is crucial for a creamy texture.
- Light Corn Syrup or Honey: 2 tablespoons. This is a secret weapon against iciness.
- Vanilla Bean Paste or Pure Vanilla Extract: 2 teaspoons. Paste will give you those beautiful vanilla flecks.
- Fresh Lemon Juice: 1 teaspoon. This brightens the yogurt’s natural tang.
- Pinch of Salt: Just a small pinch to balance the sweetness.
Instructions
Step 1: Create the Yogurt Base
In a large mixing bowl, combine the granulated sugar and the pinch of salt. Pour in the heavy cream and whisk vigorously for about 1-2 minutes, or until the sugar has completely dissolved. You can test this by rubbing a small amount of the mixture between your fingers; it should feel smooth, not gritty.
Step 2: Incorporate the Yogurt and Flavorings
Add the full-fat Greek yogurt, corn syrup (or honey), vanilla paste (or extract), and fresh lemon juice to the sugar-cream mixture. Switch to a spatula and gently fold everything together until it is just combined. Be careful not to over-mix, as this can break down the yogurt’s texture. The goal is a smooth, homogenous base.
Step 3: The Crucial Chilling Stage
This is the most important step for a creamy final product. Cover the bowl with plastic wrap, pressing it directly onto the surface of the yogurt mixture to prevent a skin from forming. Place the bowl in the coldest part of your refrigerator and let it chill for a minimum of 4 hours, but preferably overnight. The colder the base is before it goes into the ice cream maker, the smaller the ice crystals will be, resulting in a much smoother texture.
Step 4: Churn Your Frozen Yogurt
Once your base is thoroughly chilled, it’s time to churn. Make sure your ice cream maker’s freezer bowl is completely frozen according to the manufacturer’s instructions (this usually requires at least 15-24 hours in the freezer).
Set up your ice cream maker. Pour the chilled yogurt base into the frozen bowl and start the machine. Let it churn for 20-25 minutes. The mixture will gradually thicken and increase in volume. It’s ready when it has the consistency of thick, soft-serve ice cream.
Step 5: The Ripening Stage (Optional but Recommended)
While you can enjoy the frozen yogurt straight from the churn as a soft-serve treat, it will be even better after “ripening.” This allows the flavors to meld and the texture to firm up.
Use a spatula to transfer the churned frozen yogurt into your airtight, freezer-safe container. Smooth the top and press a piece of parchment paper or plastic wrap directly onto the surface to prevent ice crystals. Seal the container and place it in the freezer for at least 2-4 hours to firm up to a scoopable consistency.
Nutrition
- Serving Size: One Normal Portion
- Calories: 240 kcal