


The aroma alone is enough to transport me back to bustling family dinners, cozy Sunday suppers, and those impromptu get-togethers where something simple yet utterly satisfying was needed. This homemade garlic bread recipe isn’t just a side dish; it’s a centerpiece of comfort, a crowd-pleaser that never fails to elicit “oohs” and “aahs.” For years, I tinkered with store-bought versions and various quick fixes, but nothing ever quite matched the sheer delight of garlic bread made from scratch. The first time I truly nailed this version, my family devoured an entire loaf before the main course even hit the table. The kids, usually picky, were reaching for seconds and thirds, their fingers glistening with garlic butter, wide smiles on their faces. It’s the perfect balance of crispy, golden-brown crust, a soft, chewy interior, and that incredible, aromatic garlic butter seeping into every nook and cranny. This isn’t just a recipe; it’s an experience, and one I’m thrilled to share with you. Prepare for your kitchen to be filled with the most intoxicating scent, and for this garlic bread to become your new go-to.
The Ultimate Homemade Garlic Bread: A Symphony of Flavor
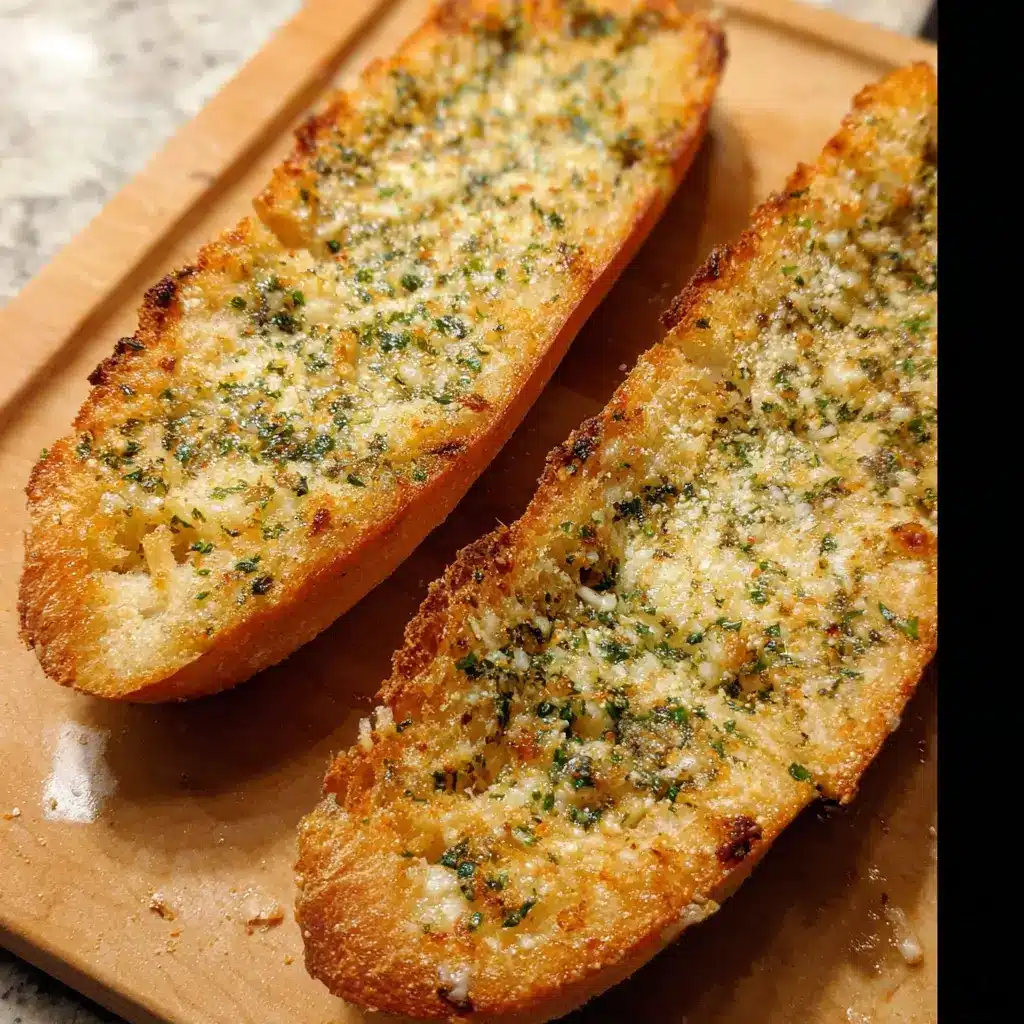
Forget those pre-made, often underwhelming garlic breads from the supermarket freezer aisle. Crafting your own is not only incredibly easy but also infinitely more delicious and customizable. This recipe focuses on achieving that perfect texture – a delightful crunch on the outside giving way to a soft, fluffy, butter-soaked interior – and an explosion of robust garlic and fresh herb flavor. We’re going for garlic bread nirvana here, a recipe so good it might just steal the show from your main course. The secret lies in using good quality ingredients and a simple technique that yields consistently amazing results. Whether you’re serving it alongside a hearty pasta dish, a comforting soup, or simply enjoying it on its own, this garlic bread is guaranteed to impress.
Here’s what you’ll need to create this masterpiece:
Ingredients:
- Bread:
- 1 large loaf of French baguette (approx. 16-20 inches long), or 1 large Italian loaf (rustic, round, or long)
- Note on bread: Choose a bread with a good, crusty exterior and a relatively soft, airy interior. Day-old bread works wonderfully as it tends to be a bit firmer and holds up better to the butter.
- Butter Mixture:
- 1 cup (227g or 2 sticks) unsalted butter, softened to room temperature
- 6-8 large cloves of garlic, finely minced or pressed (use more or less to your taste – we like it garlicky!)
- 1/2 cup freshly grated Parmesan cheese (optional, but highly recommended for an extra savory kick)
- 1/4 cup fresh parsley, finely chopped
- 1 tablespoon fresh chives, finely snipped (optional, for a mild oniony note)
- 1 teaspoon dried oregano (or 1 tablespoon fresh, chopped)
- 1/2 teaspoon salt (adjust if using salted butter, or to taste)
- 1/4 teaspoon black pepper, freshly ground
- Pinch of red pepper flakes (optional, for a tiny hint of warmth)
This combination of ingredients ensures a rich, flavorful, and aromatic garlic butter that will transform your loaf of bread into something truly special. The fresh herbs make a significant difference, but good quality dried herbs can be substituted in a pinch (use about 1/3 of the amount for dried).
Step-by-Step Instructions to Garlic Bread Perfection
Follow these detailed instructions carefully, and you’ll be rewarded with the best homemade garlic bread you’ve ever tasted. The process is straightforward, but attention to detail will elevate your final product.
- Preheat Your Oven and Prepare the Baking Sheet:
Preheat your oven to 375°F (190°C). Position an oven rack in the middle of the oven for even baking. Line a large baking sheet with parchment paper or aluminum foil for easy cleanup. If you’re using foil, you can wrap the bread directly in it later. - Prepare the Bread:
- For Baguette (Traditional Slices): Using a serrated bread knife, slice the baguette diagonally or straight across into 1-inch thick slices. You can either slice all the way through to make individual pieces or slice about 3/4 of the way through, leaving the bottom crust intact to create a “pull-apart” style loaf. The pull-apart method is great for keeping the loaf together and allowing the butter to meld beautifully.
- For Italian Loaf (Open-Faced or Halved): If using a wider Italian loaf, you have a couple of options. You can slice it horizontally in half, like opening a book, to create two large, flat surfaces for the garlic butter. Alternatively, you can cut it into thick, 1 to 1.5-inch slices, similar to the baguette.
- Create the Magical Garlic Butter Spread:
In a medium-sized mixing bowl, combine the softened unsalted butter, minced garlic, grated Parmesan cheese (if using), chopped fresh parsley, snipped chives (if using), dried oregano, salt, black pepper, and red pepper flakes (if using).
Using a fork or a small spatula, mash and mix all the ingredients together until they are thoroughly combined and the mixture is relatively smooth. It should be a vibrant, fragrant paste. Taste a tiny bit (if you’re comfortable) and adjust seasoning if necessary – perhaps more salt or another pinch of garlic.
Why softened butter? Softened butter is crucial. If it’s too cold, it won’t mix well. If it’s melted, it will make the bread soggy rather than creating that beautiful, rich layer. Room temperature butter whips up beautifully and spreads easily. - Apply the Garlic Butter to the Bread:
- For Sliced Baguette/Loaf (Individual or Pull-Apart): Generously spread the garlic butter mixture on one or both cut sides of each slice of bread. If you’ve made pull-apart slices, gently separate them and spread the butter down into the crevices. Be liberal with the butter – this is where the magic happens! Ensure every nook and cranny gets some love.
- For Halved Italian Loaf: Spread the garlic butter evenly and generously over the entire cut surface of both halves of the bread.
- Assemble for Baking:
- Individual Slices: Arrange the buttered slices in a single layer on the prepared baking sheet.
- Pull-Apart Loaf or Halved Loaf: Reassemble the loaf if you made pull-apart slices. Carefully place the buttered loaf (or halves) onto the baking sheet. For an extra soft interior and crispy edges, you can wrap the entire loaf loosely in aluminum foil, leaving the top slightly open for the last few minutes of baking if you want it crispier. If you prefer a very crispy crust all over, you can bake it unwrapped.
- Bake to Golden Perfection:
Place the baking sheet in the preheated oven.- Baking Time:
- Unwrapped Slices/Halves: Bake for 10-15 minutes, or until the butter is melted and bubbly, and the edges of the bread are golden brown and crispy.
- Foil-Wrapped Loaf: Bake for 15-20 minutes wrapped in foil. This steams the bread slightly, making it incredibly soft inside. Then, carefully open the foil to expose the top of the bread and bake for another 3-5 minutes, or until the top is golden brown and slightly crisp.
Keep a close eye on it during the last few minutes, as garlic bread can go from perfectly golden to burnt quite quickly, especially the edges and the Parmesan cheese if used.
- Baking Time:
- Optional Broil for Extra Crispiness:
If you like your garlic bread extra crispy and beautifully browned on top, you can switch the oven to the broil setting for the last 1-2 minutes of cooking. Watch it very carefully during this stage, as the broiler can burn things in seconds. The bread should be about 6 inches from the heating element. - Rest and Serve:
Once baked to perfection, carefully remove the garlic bread from the oven. Let it rest for a minute or two before serving – it will be incredibly hot! If you made a pull-apart loaf, guests can simply tear off pieces. If you made individual slices or halved a large loaf, you might want to cut the large halves into more manageable serving portions. Garnish with a little extra fresh parsley, if desired, for a pop of color.
Nutrition Facts
- Servings: This recipe typically yields about 8-12 servings, depending on the size of your loaf and how thickly you slice the bread (or how large your portions are). A standard baguette will likely give you around 16-20 one-inch slices. Let’s estimate based on 10 generous servings from a large loaf.
- Calories per serving (approximate): Around 250-350 calories per serving.
Disclaimer: Nutritional information is an estimate and can vary significantly based on the exact type and brand of bread used, the precise amount of butter and cheese, and serving size.
- Key Contributors to Calories: The main calorie contributors are the bread itself (carbohydrates) and the butter (fats). Parmesan cheese also adds fat and protein.
- Making it Lighter (Optional):
- Use a whole wheat baguette or loaf for added fiber.
- Reduce the amount of butter slightly (though this will impact richness).
- Go lighter on or omit the Parmesan cheese.
- Focus on portion control.
This garlic bread is a treat, so while it’s good to be mindful, it’s also designed to be indulgent and delicious!
Preparation Time
Understanding the time commitment helps in planning your meal preparation seamlessly.
- Preparation Time (Active): 15-20 minutes
- This includes mincing garlic, chopping herbs, mixing the garlic butter, and slicing and buttering the bread. Your speed with knife skills will influence this.
- Cooking Time (Baking): 10-25 minutes
- This varies depending on whether you bake slices unwrapped, or a whole loaf wrapped in foil then unwrapped.
- Total Time: Approximately 25-45 minutes
- From starting your prep to pulling gloriously golden garlic bread out of the oven.
This relatively short time investment yields a huge payoff in terms of flavor and satisfaction, making it a perfect addition to weeknight dinners or more elaborate weekend feasts.
How to Serve Your Amazing Homemade Garlic Bread
This versatile garlic bread can accompany a wide array of dishes or even be the star of a snack attack. Here are some serving suggestions to inspire you:
- Classic Pasta Pairings:
- Spaghetti and Meatballs: The ultimate comfort combo. Use the garlic bread to mop up every last bit of tomato sauce.
- Lasagna: Layers of cheesy pasta goodness demand a side of equally impressive garlic bread.
- Fettuccine Alfredo: The rich, creamy sauce is beautifully complemented by the garlicky, herby bread.
- Pesto Pasta: The vibrant pesto and the savory garlic bread are a match made in heaven.
- Baked Ziti or Penne alla Vodka.
- With Soups and Stews:
- Tomato Soup: A classic pairing. Dip the crispy garlic bread into creamy tomato soup.
- Minestrone Soup: The hearty vegetables and beans in minestrone are perfectly complemented.
- French Onion Soup: While traditionally served with a cheesy crouton, a side of garlic bread is never unwelcome.
- Hearty Beef Stew or Chili: For soaking up those rich, savory sauces.
- As an Appetizer:
- Serve warm slices on a platter, perhaps with a side of marinara sauce for dipping.
- Cut into smaller, bite-sized pieces for easy mingling.
- Top with a bruschetta mixture (diced tomatoes, basil, balsamic) after baking for a gourmet twist.
- Alongside Salads:
- Caesar Salad: Turn a simple salad into a more substantial meal.
- Large Garden Salad with Grilled Chicken: The garlic bread adds a satisfying carbohydrate element.
- With Grilled or Roasted Meats and Fish:
- Serve with grilled steak, roasted chicken, or baked salmon for a complete and flavorful meal.
- It’s fantastic with BBQ ribs or pulled pork.
- On Its Own:
- Honestly, it’s so good, sometimes a few warm slices are all you need for a satisfying snack or light meal.
- Party Food:
- Make a double batch for potlucks or gatherings – it’s always one of the first things to disappear!
No matter how you choose to serve it, ensure it’s warm for the best experience. The melted butter, fragrant garlic, and crisp-yet-soft texture are at their peak right out of the oven.
Additional Tips for Next-Level Garlic Bread
Take your homemade garlic bread from great to absolutely unforgettable with these expert tips:
- Roast Your Garlic for Deeper Flavor:
For a sweeter, milder, and more complex garlic flavor, try roasting the garlic cloves before mincing them. To do this, cut off the top of a whole head of garlic, drizzle with olive oil, wrap in foil, and roast at 400°F (200°C) for 30-40 minutes until soft and caramelized. Squeeze out the roasted cloves and mash them into your butter. This adds a subtle smoky depth that is truly exceptional. - Experiment with Cheeses:
While Parmesan is classic, don’t be afraid to experiment!- Mozzarella: Add shredded mozzarella on top during the last 5-7 minutes of baking for a gooey, cheesy garlic bread experience.
- Asiago or Pecorino Romano: These offer sharper, saltier alternatives to Parmesan.
- A Blend: Try a mix of Parmesan for saltiness and mozzarella for meltiness.
Ensure any melting cheeses are added towards the end of baking to prevent them from burning before the bread is perfectly toasted.
- Achieve the Perfect Butter Consistency:
The goal is a spreadable paste, not liquid butter. If your butter is too cold, it will be difficult to mix and spread, and might tear the bread. If it’s fully melted, it will soak into the bread too much and can make it greasy or soggy. Softened, room temperature butter is key. If you’re short on time, you can cut cold butter into small cubes and microwave it in very short bursts (5-7 seconds), checking frequently, until just softened but not melted. Alternatively, beat cold butter cubes with an electric mixer until softened and creamy. - Make-Ahead and Freezing Instructions:
Garlic bread is fantastic for meal prepping!- Refrigerate: You can prepare the garlic bread (slice, butter, and wrap in foil) up to 1-2 days in advance. Store it in the refrigerator and bake straight from the fridge, adding a few extra minutes to the baking time.
- Freeze: For longer storage, wrap the buttered loaf (or individual slices separated by parchment paper) tightly in plastic wrap, then in aluminum foil or place in a freezer-safe bag. It can be frozen for up to 3 months. Bake directly from frozen, adding about 10-15 minutes to the wrapped baking time, then unwrap and bake until crispy as usual.
- Herb Variations and Freshness:
Fresh herbs truly elevate garlic bread. While parsley is a staple, consider:- Rosemary: Finely chopped fresh rosemary adds a wonderful piney aroma, especially good if serving with roasted meats.
- Thyme: Fresh thyme leaves contribute a delicate, earthy flavor.
- Basil: If serving with Italian dishes heavy on tomato and basil, a little fresh basil in the garlic butter can tie flavors together beautifully. Add fresh basil towards the end or after baking, as its flavor is more delicate.
If using dried herbs, remember the general rule: use about one-third the amount of dried herbs compared to fresh (e.g., 1 tablespoon fresh = 1 teaspoon dried).
Frequently Asked Questions (FAQ) About Homemade Garlic Bread
Here are answers to some common questions you might have about making the perfect garlic bread:
- Q: What is the absolute best type of bread for garlic bread?
A: The “best” bread often comes down to personal preference, but generally, you want a bread with a sturdy, crisp crust and a somewhat airy, chewy interior. French baguettes are a classic choice due to their excellent crust-to-crumb ratio. Italian loaves (like ciabatta, rustic round loaves, or long pane di casa) are also fantastic. Sourdough can offer a tangy twist. Day-old bread is often preferred as it’s slightly drier and absorbs the butter beautifully without becoming soggy, and it slices more easily. Avoid overly soft, enriched breads like sandwich bread, as they can become too greasy or fall apart. - Q: Can I use garlic powder instead of fresh garlic?
A: Yes, you can use garlic powder in a pinch, but fresh garlic provides a significantly brighter, more robust, and nuanced flavor. If using garlic powder, a general substitution is about 1/4 to 1/2 teaspoon of garlic powder per clove of fresh garlic called for. So, for this recipe (6-8 cloves), you’d use about 1.5 to 4 teaspoons of garlic powder. Start with less and add more to taste. You might also consider adding a pinch of onion powder to complement it. However, for the ultimate garlic bread, fresh minced or pressed garlic is highly recommended. - Q: How do I prevent my garlic bread from getting soggy?
A: Several factors help prevent sogginess:- Use crusty, day-old bread: It has less moisture.
- Use softened, not melted, butter: Melted butter soaks in too deeply. A paste sits more on the surface while still seeping in.
- Don’t over-saturate: Be generous, but don’t drown the bread.
- Bake at a moderate-to-high temperature: 375°F (190°C) is good for crisping the exterior.
- Uncover for crispiness: If you wrap it in foil for initial baking (to keep the inside soft), always unwrap it for the last few minutes to allow the exterior to crisp up. Broiling briefly can also help.
- Q: How should I store leftover garlic bread, and how do I reheat it?
A: Store leftover garlic bread in an airtight container or wrapped tightly in foil at room temperature for up to 2 days, or in the refrigerator for 3-4 days. For longer storage, freeze it (as per Tip #4 above).- To Reheat: The best way to reheat garlic bread and revive its crispiness is in the oven or a toaster oven. Preheat to 350°F (175°C) and bake for 5-10 minutes, or until warmed through and crispy again. You can also use an air fryer for a few minutes. Avoid the microwave if possible, as it tends to make the bread chewy and tough. If you must use a microwave, do so in very short bursts and expect a softer result.
- Q: Can I make this garlic bread recipe vegan or dairy-free?
A: Absolutely! It’s quite easy to adapt:- Butter: Substitute the dairy butter with a good quality vegan butter alternative. Choose one that has a good flavor and melts well. Miyoko’s Kitchen Cultured Vegan Butter or Earth Balance Vegan Buttery Sticks are popular choices.
- Parmesan Cheese: Omit the Parmesan cheese entirely, or substitute it with a vegan Parmesan alternative. Many store-bought options are available, or you can make a simple version at home using nutritional yeast, cashews or almonds, garlic powder, and salt, blended until fine. Nutritional yeast on its own will also add a cheesy, umami flavor.
The bread itself is often vegan, but always double-check the ingredients list, as some commercial breads may contain dairy or honey.
This homemade garlic bread is more than just a recipe; it’s a celebration of simple ingredients transformed into something extraordinarily delicious. Enjoy the process, the aroma, and most importantly, the incredible taste!
Print
Homemade Garlic Bread Recipe
Ingredients
- Bread:
- 1 large loaf of French baguette (approx. 16–20 inches long), or 1 large Italian loaf (rustic, round, or long)
- Note on bread: Choose a bread with a good, crusty exterior and a relatively soft, airy interior. Day-old bread works wonderfully as it tends to be a bit firmer and holds up better to the butter.
- Butter Mixture:
- 1 cup (227g or 2 sticks) unsalted butter, softened to room temperature
- 6–8 large cloves of garlic, finely minced or pressed (use more or less to your taste – we like it garlicky!)
- 1/2 cup freshly grated Parmesan cheese (optional, but highly recommended for an extra savory kick)
- 1/4 cup fresh parsley, finely chopped
- 1 tablespoon fresh chives, finely snipped (optional, for a mild oniony note)
- 1 teaspoon dried oregano (or 1 tablespoon fresh, chopped)
- 1/2 teaspoon salt (adjust if using salted butter, or to taste)
- 1/4 teaspoon black pepper, freshly ground
- Pinch of red pepper flakes (optional, for a tiny hint of warmth)
Instructions
- Preheat Your Oven and Prepare the Baking Sheet:
Preheat your oven to 375°F (190°C). Position an oven rack in the middle of the oven for even baking. Line a large baking sheet with parchment paper or aluminum foil for easy cleanup. If you’re using foil, you can wrap the bread directly in it later. - Prepare the Bread:
- For Baguette (Traditional Slices): Using a serrated bread knife, slice the baguette diagonally or straight across into 1-inch thick slices. You can either slice all the way through to make individual pieces or slice about 3/4 of the way through, leaving the bottom crust intact to create a “pull-apart” style loaf. The pull-apart method is great for keeping the loaf together and allowing the butter to meld beautifully.
- For Italian Loaf (Open-Faced or Halved): If using a wider Italian loaf, you have a couple of options. You can slice it horizontally in half, like opening a book, to create two large, flat surfaces for the garlic butter. Alternatively, you can cut it into thick, 1 to 1.5-inch slices, similar to the baguette.
- Create the Magical Garlic Butter Spread:
In a medium-sized mixing bowl, combine the softened unsalted butter, minced garlic, grated Parmesan cheese (if using), chopped fresh parsley, snipped chives (if using), dried oregano, salt, black pepper, and red pepper flakes (if using).
Using a fork or a small spatula, mash and mix all the ingredients together until they are thoroughly combined and the mixture is relatively smooth. It should be a vibrant, fragrant paste. Taste a tiny bit (if you’re comfortable) and adjust seasoning if necessary – perhaps more salt or another pinch of garlic.
Why softened butter? Softened butter is crucial. If it’s too cold, it won’t mix well. If it’s melted, it will make the bread soggy rather than creating that beautiful, rich layer. Room temperature butter whips up beautifully and spreads easily. - Apply the Garlic Butter to the Bread:
- For Sliced Baguette/Loaf (Individual or Pull-Apart): Generously spread the garlic butter mixture on one or both cut sides of each slice of bread. If you’ve made pull-apart slices, gently separate them and spread the butter down into the crevices. Be liberal with the butter – this is where the magic happens! Ensure every nook and cranny gets some love.
- For Halved Italian Loaf: Spread the garlic butter evenly and generously over the entire cut surface of both halves of the bread.
- Assemble for Baking:
- Individual Slices: Arrange the buttered slices in a single layer on the prepared baking sheet.
- Pull-Apart Loaf or Halved Loaf: Reassemble the loaf if you made pull-apart slices. Carefully place the buttered loaf (or halves) onto the baking sheet. For an extra soft interior and crispy edges, you can wrap the entire loaf loosely in aluminum foil, leaving the top slightly open for the last few minutes of baking if you want it crispier. If you prefer a very crispy crust all over, you can bake it unwrapped.
- Bake to Golden Perfection:
Place the baking sheet in the preheated oven.- Baking Time:
- Unwrapped Slices/Halves: Bake for 10-15 minutes, or until the butter is melted and bubbly, and the edges of the bread are golden brown and crispy.
- Foil-Wrapped Loaf: Bake for 15-20 minutes wrapped in foil. This steams the bread slightly, making it incredibly soft inside. Then, carefully open the foil to expose the top of the bread and bake for another 3-5 minutes, or until the top is golden brown and slightly crisp.
Keep a close eye on it during the last few minutes, as garlic bread can go from perfectly golden to burnt quite quickly, especially the edges and the Parmesan cheese if used.
- Baking Time:
- Optional Broil for Extra Crispiness:
If you like your garlic bread extra crispy and beautifully browned on top, you can switch the oven to the broil setting for the last 1-2 minutes of cooking. Watch it very carefully during this stage, as the broiler can burn things in seconds. The bread should be about 6 inches from the heating element. - Rest and Serve:
Once baked to perfection, carefully remove the garlic bread from the oven. Let it rest for a minute or two before serving – it will be incredibly hot! If you made a pull-apart loaf, guests can simply tear off pieces. If you made individual slices or halved a large loaf, you might want to cut the large halves into more manageable serving portions. Garnish with a little extra fresh parsley, if desired, for a pop of color.
Nutrition
- Serving Size: One Normal Portion
- Calories: 250-350


