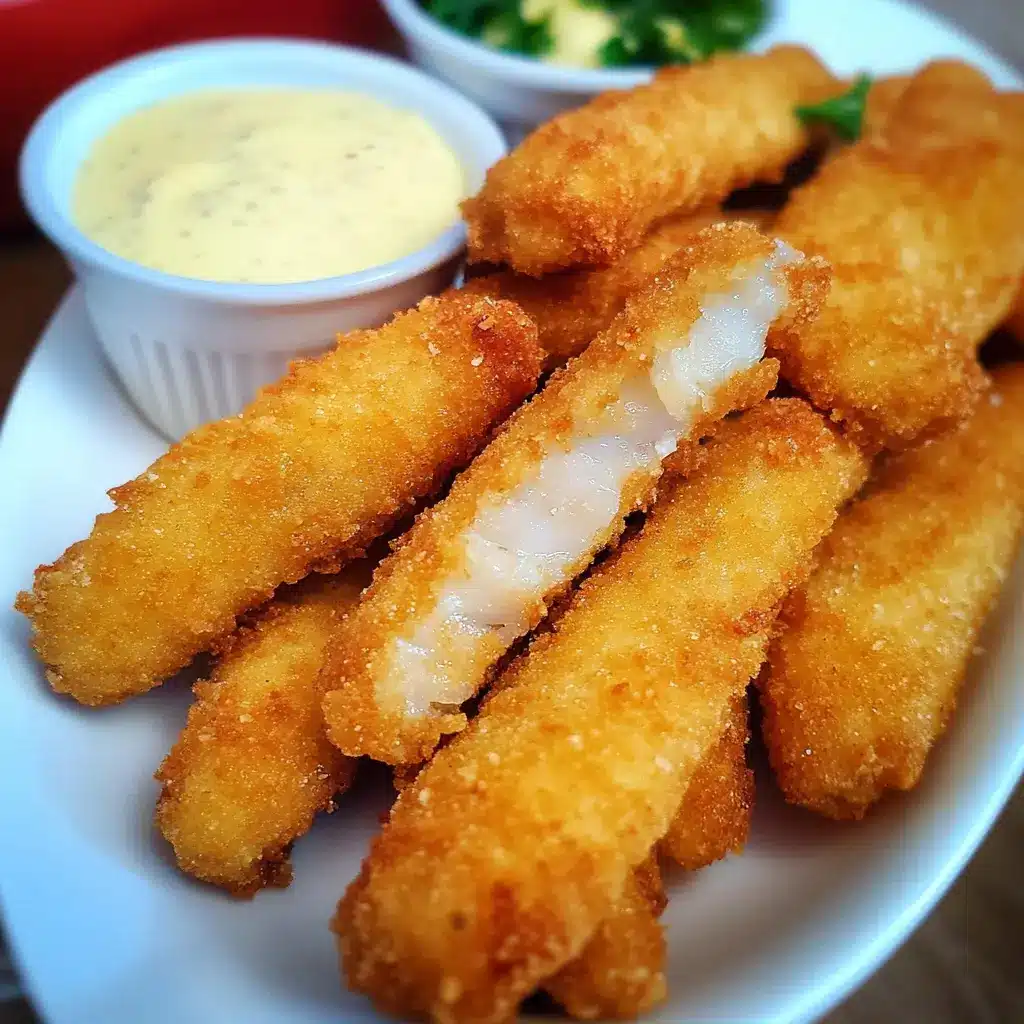
Let me tell you, the quest for the perfect gluten-free fish stick has been a long and often disappointing one in our household. My youngest was diagnosed with celiac disease a few years back, and finding kid-friendly meals that everyone enjoys, without that tell-tale “gluten-free” taste or texture, became my mission. Store-bought options were often either exorbitantly priced, had a cardboard-like texture, or simply didn’t pass the taste test with the discerning palates of my children (or my own, if I’m being honest!). So, I rolled up my sleeves and decided to conquer the homemade gluten-free fish stick. After countless experiments – some too soggy, others with breading that stubbornly refused to stick – this recipe emerged as the undisputed champion. The first time I served these, there was a moment of stunned silence, followed by enthusiastic munching and declarations of “Mom, these are even better than the regular ones!” The exterior is incredibly crispy, the fish inside perfectly flaky and moist, and the seasoning is just right. They’ve become a weekly staple, a testament to the fact that gluten-free can be absolutely delicious and satisfying for the whole family.
Why You’ll Fall in Love with These Homemade Gluten-Free Fish Sticks
Before we dive into the nitty-gritty of making these golden beauties, let’s talk about why this recipe will become your new go-to. Firstly, flavor and texture. These aren’t your average, bland fish sticks. We’re talking a perfectly seasoned, incredibly crispy coating that gives way to tender, flaky fish. The secret lies in the combination of gluten-free flour and panko-style breadcrumbs, creating a crunch that rivals any traditional fish stick.
Secondly, they are surprisingly easy to make. While “homemade” might sound daunting, the process is straightforward. A simple three-step breading station and your choice of cooking method (baking for healthier, pan-frying for extra crispiness, or even air frying!) means you can have these on the table with minimal fuss. This makes them perfect for busy weeknights when you need a quick, satisfying meal that doesn’t compromise on quality or taste.
Thirdly, they are healthier than most store-bought alternatives. By making them at home, you have complete control over the ingredients. You choose the quality of the fish, the type of oil, and you can be certain there are no hidden gluten-containing additives, excessive sodium, or unnecessary preservatives. This is particularly crucial for those managing celiac disease or gluten sensitivity, providing peace of mind alongside a delicious meal.
Fourthly, they are incredibly versatile and kid-approved. Fish sticks are a classic childhood favorite, and this gluten-free version ensures no one misses out. They are perfect on their own, with a simple dip, or as part of a larger meal. Plus, you can customize the seasonings to suit your family’s preferences – add a pinch of cayenne for a little kick or some dried herbs for an aromatic twist.
Finally, there’s the satisfaction of homemade. There’s something truly rewarding about creating a delicious, wholesome meal from scratch that your loved ones adore. These gluten-free fish sticks aren’t just food; they’re a testament to how adaptable and enjoyable gluten-free cooking can be. Say goodbye to disappointing freezer-aisle options and hello to your new family favorite!
Ingredients for Perfect Gluten-Free Fish Sticks
Gathering the right ingredients is key to achieving that perfect balance of crispy coating and tender fish. Here’s what you’ll need:
- For the Fish:
- 1.5 lbs (approx. 680g) firm white fish fillets (such as cod, haddock, pollock, or tilapia), skinless and boneless
- 1 tablespoon fresh lemon juice
- Pinch of salt and black pepper (for seasoning fish directly)
- For the Gluten-Free Breading Station:
- Bowl 1 (Flour Dredge):
- 1/2 cup (60g) all-purpose gluten-free flour blend (make sure it contains xanthan gum, or add 1/4 teaspoon if it doesn’t)
- 1 teaspoon paprika (sweet or smoked)
- 1/2 teaspoon garlic powder
- 1/2 teaspoon onion powder
- 1/4 teaspoon salt
- 1/4 teaspoon black pepper
- Bowl 2 (Egg Wash):
- 2 large eggs
- 1 tablespoon water or unsweetened almond milk
- Bowl 3 (Crispy Coating):
- 1.5 cups (150g) gluten-free panko breadcrumbs (for best results) or finely crushed gluten-free cornflakes/rice cakes
- 1/2 teaspoon salt
- 1/4 teaspoon black pepper
- Optional: 1 tablespoon nutritional yeast for a cheesy flavor, or 1 teaspoon dried parsley for color
- Bowl 1 (Flour Dredge):
- For Cooking:
- If Baking: 2-3 tablespoons olive oil, avocado oil, or melted coconut oil (for drizzling/spraying)
- If Pan-Frying: 1/4 to 1/2 cup light olive oil, avocado oil, or other high smoke point oil (enough for a shallow fry)
A Note on Gluten-Free Flour and Breadcrumbs:
The market for gluten-free products has exploded, which is fantastic news! For the all-purpose flour blend, choose one designed for general cooking and baking. Brands like Bob’s Red Mill Gluten-Free 1-to-1 Baking Flour, King Arthur Gluten-Free Measure for Measure Flour, or similar blends work well. Ensure it contains xanthan gum, which helps with binding, or add a small amount yourself.
For gluten-free panko breadcrumbs, these are a game-changer for achieving that super crispy texture. Brands like Kikkoman Gluten-Free Panko, Ian’s Gluten-Free Panko, or Aleia’s Gluten-Free Panko Breadcrumbs are excellent choices. If you can’t find GF panko, finely crushing gluten-free cornflakes or plain rice cakes in a food processor can be a good substitute, though the texture will be slightly different.
Step-by-Step Instructions for Homemade Gluten-Free Fish Sticks
Let’s get cooking! Follow these steps for perfectly crispy and delicious gluten-free fish sticks.
1. Prepare the Fish:
* Gently pat the fish fillets dry with paper towels. This is a crucial step to help the breading adhere properly.
* Place the fish on a clean cutting board. Using a sharp knife, cut the fillets into “stick” shapes, approximately 1 inch wide and 3-4 inches long. Try to keep them relatively uniform in size for even cooking.
* Place the fish sticks in a bowl, drizzle with the fresh lemon juice, and lightly season with a pinch of salt and pepper. Gently toss to coat. The lemon juice not only adds a subtle brightness but can also help firm up the fish slightly. Set aside for a few minutes while you prepare the breading station.
2. Set Up Your Breading Station:
This classic three-step breading process ensures maximum adhesion and crispiness. You’ll need three shallow dishes or pie plates.
* Dish 1 (Flour Dredge): In the first shallow dish, combine the all-purpose gluten-free flour, paprika, garlic powder, onion powder, 1/4 teaspoon salt, and 1/4 teaspoon black pepper. Whisk thoroughly to ensure the seasonings are evenly distributed.
* Dish 2 (Egg Wash): In the second shallow dish, crack the two large eggs. Add the tablespoon of water or almond milk and whisk vigorously until the yolks and whites are fully combined and slightly frothy.
* Dish 3 (Crispy Coating): In the third shallow dish, combine the gluten-free panko breadcrumbs, 1/2 teaspoon salt, 1/4 teaspoon black pepper, and any optional additions like nutritional yeast or dried parsley. Mix well.
3. Bread the Fish Sticks:
Work with one fish stick at a time to ensure each one is perfectly coated. It’s helpful to use one hand for the dry ingredients (flour and breadcrumbs) and the other hand for the wet ingredients (egg wash) to prevent your fingers from becoming overly clumpy.
* Dredge in Flour: Take a fish stick and lightly coat it on all sides with the seasoned gluten-free flour mixture from Dish 1. Shake off any excess flour. This initial flour coating gives the egg wash something to cling to.
* Dip in Egg Wash: Transfer the floured fish stick to Dish 2 and dip it into the egg wash, ensuring it’s completely moistened. Allow any excess egg to drip off for a second or two.
* Coat with Panko: Immediately transfer the egg-washed fish stick to Dish 3, containing the gluten-free panko breadcrumbs. Press the breadcrumbs firmly onto all sides of the fish stick, ensuring a thick, even coating. This pressing action is key for a crispy crust that stays put.
* Set Aside: Place the breaded fish stick on a clean baking sheet lined with parchment paper or a wire rack. Repeat this process with all the remaining fish sticks, arranging them in a single layer without touching.
4. Cook the Fish Sticks (Choose Your Method):
*   **Option A: Baking (Healthier):**
    *   Preheat your oven to 400°F (200°C). Line a large baking sheet with parchment paper for easy cleanup.
    *   Arrange the breaded fish sticks in a single layer on the prepared baking sheet, ensuring they are not overcrowded (use two sheets if necessary). Overcrowding will steam the fish sticks instead of making them crispy.
    *   Lightly drizzle or spray the tops of the fish sticks with olive oil, avocado oil, or melted coconut oil. This helps them achieve a golden-brown color and extra crispiness.
    *   Bake for 15-20 minutes, flipping them gently halfway through, until they are golden brown, crispy, and the fish is cooked through (internal temperature of 145°F or 63°C). Cooking time may vary slightly depending on the thickness of your fish sticks and your oven's accuracy.

*   **Option B: Pan-Frying (Extra Crispy):**
    *   Place a large skillet (cast iron works wonderfully) over medium-high heat. Add enough oil to create a shallow layer, about 1/4 to 1/2 inch deep.
    *   Heat the oil until it shimmers or a small piece of breadcrumb dropped in sizzles immediately (around 350°F or 175°C). Don't let the oil smoke.
    *   Carefully place the breaded fish sticks into the hot oil in a single layer, being cautious not to overcrowd the pan. Work in batches if necessary.
    *   Fry for 2-4 minutes per side, until golden brown and crispy, and the fish is cooked through. The exact time will depend on the thickness of the fish and the oil temperature.
    *   Once cooked, remove the fish sticks from the skillet using a slotted spoon or tongs and transfer them to a wire rack lined with paper towels to drain any excess oil. The wire rack allows air to circulate, keeping the bottoms crispy. Season immediately with a tiny pinch of extra salt if desired, while they are still hot.

*   **Option C: Air Frying (Crispy with Less Oil):**
    *   Preheat your air fryer to 400°F (200°C).
    *   Lightly spray the air fryer basket with cooking oil.
    *   Arrange the breaded fish sticks in a single layer in the air fryer basket, ensuring there's space between them for air circulation. Work in batches if needed.
    *   Lightly spray the tops of the fish sticks with oil.
    *   Air fry for 10-12 minutes, flipping them halfway through, until golden brown, crispy, and cooked through.
No matter which cooking method you choose, the goal is gloriously golden, irresistibly crispy gluten-free fish sticks!
Nutrition Facts (Approximate)
Please note that these nutritional values are an approximation and can vary based on the specific brands of ingredients used, the exact size of the fish sticks, and the cooking method (pan-frying will absorb more oil, increasing fat and calorie content).
Servings: This recipe makes approximately 4-6 servings (assuming 4-6 fish sticks per serving, depending on size).
Approximate Calories per Serving (based on 4 servings, baked method):
- Calories: 350-450 kcal
- Protein: 35-45g
- Fat: 10-18g (this will be higher if pan-fried)
- Saturated Fat: 2-4g
- Carbohydrates: 25-35g
- Fiber: 2-4g
- Sugars: <2g
- Sodium: 400-600mg (can vary greatly depending on salt added and breadcrumb brand)
Key Considerations for Nutrition:
- Fish Type: Cod and haddock are lean sources of protein.
- Gluten-Free Flour/Panko: These contribute carbohydrates. Look for whole-grain GF options if available for more fiber.
- Oil: Baking or air frying uses significantly less oil than pan-frying, reducing overall fat and calories. If pan-frying, allowing the fish sticks to drain well on a wire rack helps remove some excess oil.
- Portion Size: Adjust serving sizes based on individual dietary needs.
To get a more precise nutritional breakdown, you can use online recipe nutrition calculators and input your specific ingredients and quantities.
Preparation and Cooking Time
Understanding the time commitment helps you plan your meal prep efficiently.
- Preparation Time: 20-25 minutes
- Cutting the fish: 5-7 minutes
- Setting up the breading station: 5 minutes
- Breading all the fish sticks: 10-13 minutes
- Cooking Time:
- Baking: 15-20 minutes (plus oven preheating time, approx. 10-15 minutes)
- Pan-Frying: 4-8 minutes per batch (if doing 2 batches, this could be 10-16 minutes, plus oil heating time, approx. 5 minutes)
- Air Frying: 10-12 minutes per batch (plus air fryer preheating time, approx. 3-5 minutes)
- Total Estimated Time (from start to serving, using baking method as an example): Approximately 45-60 minutes, including oven preheat. If you’re efficient, you might shave off a few minutes. Pan-frying in batches might take a similar amount of total time when considering oil heating and multiple batches.
This makes it a manageable recipe for a weeknight dinner, especially if you have a helper for the breading process!
Delicious Ways to Serve Your Gluten-Free Fish Sticks
These crispy gluten-free fish sticks are wonderfully versatile! Here are some fantastic ways to serve them, catering to both kids and adults:
- Classic Fish and Chips (Gluten-Free Style):
- Serve alongside homemade baked potato wedges or sweet potato fries (ensure they are also prepared gluten-free).
- A side of mushy peas (traditional!) or simple steamed green peas.
- Plenty of lemon wedges for squeezing over the fish.
- With Dipping Sauces:
- Homemade Tartar Sauce: Mix gluten-free mayonnaise, finely chopped pickles or capers, a squeeze of lemon juice, fresh dill or parsley, and a pinch of salt and pepper.
- Ketchup: A kid-friendly classic.
- Honey Mustard Dip: Combine gluten-free Dijon mustard, honey, and a touch of mayonnaise.
- Sriracha Mayo: For those who like a bit of spice, mix gluten-free mayonnaise with sriracha to taste.
- Garlic Aioli: Blend gluten-free mayonnaise with minced garlic, lemon juice, and a pinch of salt.
- In Gluten-Free Tacos or Wraps:
- Use gluten-free corn tortillas or lettuce wraps.
- Add shredded cabbage or coleslaw mix.
- Top with a creamy sauce (like chipotle mayo or avocado crema).
- Add salsa, chopped cilantro, and a squeeze of lime.
- As a Protein-Packed Salad Topper:
- Place warm, crispy fish sticks on a bed of mixed greens.
- Add cherry tomatoes, cucumber, bell peppers, and your favorite gluten-free salad dressing.
- Simple and Healthy Sides:
- Steamed broccoli or green beans.
- A fresh cucumber and tomato salad.
- Quinoa or brown rice (for a more substantial meal).
- Kid’s Platter:
- Arrange fish sticks with carrot sticks, cucumber slices, cherry tomatoes, and a small pot of their favorite dip.
- Add some fruit like apple slices or grapes for a balanced meal.
- Fish Stick Sandwich/Sub:
- Use your favorite gluten-free bread rolls or baguette.
- Layer with lettuce, tomato, and tartar sauce or mayonnaise.
No matter how you choose to serve them, these gluten-free fish sticks are sure to be a hit! The key is to complement their crispy texture and savory flavor with fresh, vibrant accompaniments.
Top Tips for Extra Crispy & Flavorful Fish Sticks
Want to elevate your gluten-free fish stick game even further? Here are five expert tips:
- Pat the Fish Thoroughly Dry: This is a non-negotiable step! Excess moisture on the fish will create steam and prevent the flour from adhering properly, leading to a soggy coating that can slide off during cooking. Use paper towels and pat each piece dry before seasoning and breading.
- Don’t Skip the Double Seasoning: Season the fish itself lightly with salt, pepper, and lemon juice. Then, ensure your gluten-free flour mixture and your gluten-free panko breadcrumbs are also well-seasoned. Building layers of flavor at each stage makes a significant difference to the final taste. Don’t be afraid to taste a tiny pinch of your seasoned flour or panko (before it touches raw fish, of course!) to check the seasoning levels.
- Optimize Your Breading Technique & Press Firmly:
- Use the “dry hand, wet hand” method: one hand for transferring fish into and out of the dry flour and breadcrumbs, and the other hand for the egg wash. This prevents your fingers from becoming a clumpy, breaded mess.
- After dipping in egg, let excess drip off. Then, when coating with panko, really press the breadcrumbs onto the fish stick. This ensures a thick, even coating that adheres well and becomes super crispy.
- Ensure Proper Oil Temperature & Avoid Overcrowding:
- For Pan-Frying: The oil must be hot enough (around 350°F/175°C) before adding the fish. If it’s too cool, the fish sticks will absorb too much oil and become greasy. If it’s too hot, the outside will burn before the inside cooks.
- For Baking/Air Frying: Preheating your oven or air fryer is essential for crispiness.
- All Methods: Do NOT overcrowd the pan, baking sheet, or air fryer basket. Cook in batches if necessary. Overcrowding lowers the temperature and causes the fish to steam rather than crisp up. Give each fish stick some personal space!
- Rest on a Wire Rack, Not Paper Towels (After Frying): While paper towels are good for an initial blot if pan-frying, transferring fried fish sticks to a wire rack allows air to circulate all around them. This prevents the bottom from becoming soggy as they cool. If baking, you can often serve them directly from the parchment-lined baking sheet. For pan-fried, a wire rack set over a baking sheet is ideal.
By implementing these tips, you’ll consistently achieve gluten-free fish sticks that are exceptionally crispy, full of flavor, and hold their delicious coating perfectly.
Frequently Asked Questions (FAQ)
Here are answers to some common questions you might have about making these gluten-free fish sticks:
Q1: Can I use a different type of fish?
A: Absolutely! While firm white fish like cod, haddock, pollock, or tilapia are recommended for their mild flavor and flaky texture, you could experiment with other fish. Salmon could work for a richer flavor, though its texture is different. Catfish is another option. Just ensure the fish is firm enough to hold its shape when cut into sticks and cooked. Adjust cooking times as needed based on the thickness and type of fish.
Q2: Can I make these fish sticks in an air fryer?
A: Yes, definitely! Air fryers are fantastic for making crispy fish sticks with less oil. Follow the breading instructions as usual. Preheat your air fryer to 400°F (200°C). Lightly spray the breaded fish sticks and the air fryer basket with oil. Cook for about 10-12 minutes, flipping halfway, until golden brown and cooked through. You may need to work in batches depending on the size of your air fryer.
Q3: How do I store and reheat leftover fish sticks?
A: Store leftover cooked fish sticks in an airtight container in the refrigerator for up to 2-3 days. To reheat and maintain crispiness, the oven or air fryer is best. Preheat to 350-375°F (175-190°C) and bake/air fry for 5-10 minutes, or until heated through and crispy again. Microwaving is not recommended as it will make them soggy.
Q4: Can I prepare these ahead of time or freeze them?
A: Yes, you have a couple of options:
* Freeze Uncooked: Bread the fish sticks as directed. Place them in a single layer on a parchment-lined baking sheet and freeze until solid (about 1-2 hours). Then, transfer them to a freezer-safe bag or container. They can be frozen for up to 2-3 months. Cook from frozen, adding a few extra minutes to the baking or air frying time. You might need to slightly lower the temperature for the initial part of cooking from frozen to ensure they cook through without burning.
* Freeze Cooked: Allow cooked fish sticks to cool completely. Freeze them in a single layer on a baking sheet, then transfer to a freezer-safe bag. Reheat from frozen in the oven or air fryer as described above until hot and crispy.
Q5: What makes these fish sticks crispy without using gluten? My gluten-free breadings often turn out soft.
A: Several factors contribute to the crispiness:
* Gluten-Free Panko: Using gluten-free panko-style breadcrumbs is key. Panko crumbs are larger and flakier than regular breadcrumbs, creating a much crunchier texture.
* Dry Fish: Patting the fish dry ensures the breading sticks well and doesn’t get weighed down by moisture.
* Three-Step Breading: The flour-egg-breadcrumb sequence creates a robust coating.
* Hot Oil/Oven/Air Fryer: Cooking at the right temperature ensures the exterior crisps up quickly.
* Not Overcrowding: Allows hot air or oil to circulate and crisp all sides.
* Optional Oil Spray (for baking/air frying): A light spray of oil helps the panko “fry” and turn golden and crispy.