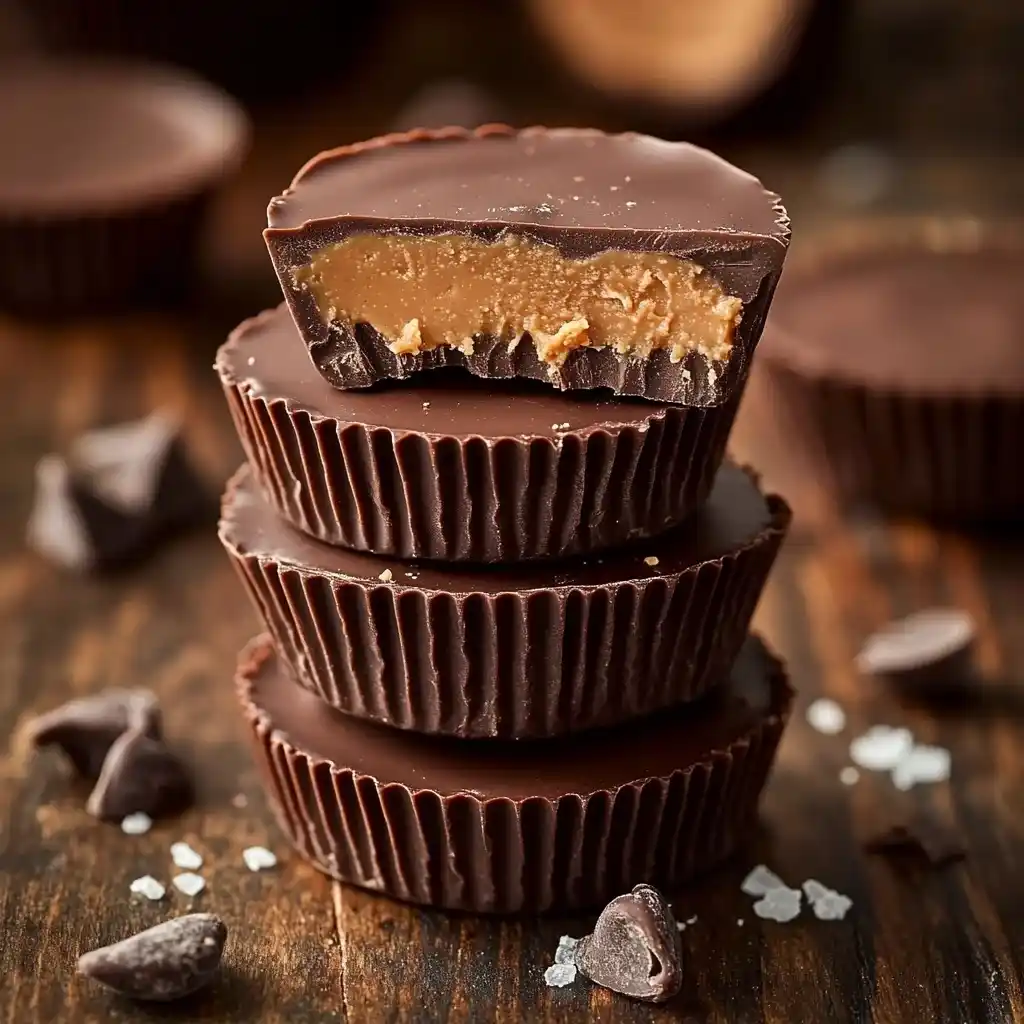

If you’re a fan of the classic combination of chocolate and peanut butter, then this homemade peanut butter cups recipe is perfect for you! Not only are these treats incredibly tasty, but they are also easy to make with just a handful of ingredients. Impress your friends and family with these delightful homemade sweets that rival any store-bought version. Let’s dive into the delicious world of homemade peanut butter cups!
Ingredients
To make these mouthwatering peanut butter cups, you will need the following ingredients:
- 1 cup chocolate chips (dark or milk): Choose high-quality chocolate for the best flavor. Dark chocolate offers a rich, slightly bitter contrast to the sweetness of the filling, while milk chocolate provides a creamier, sweeter taste.
- 1/2 cup creamy peanut butter: Creamy peanut butter gives a smooth texture that’s essential for the filling. You can also use crunchy peanut butter if you prefer a little extra texture.
- 1/4 cup powdered sugar: This adds sweetness and helps to thicken the peanut butter filling, making it easier to handle.
- 1/4 teaspoon vanilla extract: A touch of vanilla enhances the overall flavor, making the peanut butter taste richer.
- Pinch of salt: Salt elevates the flavors, balancing the sweetness and enhancing the chocolate and peanut butter notes.
- Mini muffin liners: These are crucial for shaping and serving your peanut butter cups easily. They come in various colors and designs, adding a festive touch to your treats.
Instructions
Creating these delectable treats is a breeze. Follow these simple steps to make your own homemade peanut butter cups:
1. Melt the Chocolate Chips:
Begin by placing the chocolate chips in a microwave-safe bowl. Heat them in 30-second intervals, stirring in between, until the chocolate is smooth and fully melted. Be cautious not to overheat, as burnt chocolate can become grainy and lose its luster.
2. Prepare the Liners:
Take your mini muffin liners and spoon a small amount of the melted chocolate into each one. Use the back of a spoon or a small spatula to spread the chocolate evenly across the bottom, ensuring there is enough chocolate to cover the bottom of the liner. This forms the base of your peanut butter cup.
3. Make the Peanut Butter Filling:
In a separate mixing bowl, combine the creamy peanut butter, powdered sugar, vanilla extract, and a pinch of salt. Stir the mixture until it is smooth and well combined. For an added flavor twist, consider mixing in a tablespoon of honey or maple syrup for natural sweetness.
4. Assemble the Cups:
Drop spoonfuls of the peanut butter mixture onto the chocolate layer in each liner. Aim to keep the filling centered for an even layer, but don’t worry if it’s not perfect—imperfections add character!
5. Seal with Chocolate:
Cover the peanut butter filling with more melted chocolate. Ensure that the chocolate completely seals the peanut butter to create a smooth top. This layer not only provides a beautiful finish but also keeps the peanut butter filling from spilling out.
6. Chill the Peanut Butter Cups:
Place the assembled peanut butter cups in the refrigerator for about 30 minutes, or until they are firm and set. If you’re in a hurry, you can also place them in the freezer for about 10-15 minutes, but be careful not to freeze them solid.
7. Enjoy Your Homemade Treats:
Once firm, remove the peanut butter cups from the refrigerator and enjoy this delightful homemade treat! They can be eaten straight from the fridge or allowed to come to room temperature for a softer bite.
Nutrition Facts
Homemade peanut butter cups are not only delicious but also come with a nutritional profile that lets you indulge without too much guilt. Here’s what you can expect per cup:
- Calories: 150
- Protein: 4g
- Fat: 10g
- Carbs: 12g
- Sugar: 8g
While it’s always good to indulge mindfully, these treats can be a part of a balanced diet, especially when made with quality ingredients.
How to Serve
Homemade peanut butter cups are not only a delectable treat but also incredibly versatile when it comes to serving them. Their rich, creamy filling and smooth chocolate coating make them a favorite for various occasions. Here are some detailed suggestions on how to serve these delightful confections to maximize their appeal and enjoyment.
As a Dessert
Homemade peanut butter cups can be an elegant finishing touch to any meal. To serve them as a dessert, consider the following ideas:
- Presentation: Use small dessert plates or ramekins to present each peanut butter cup. You can garnish the plate with a dusting of cocoa powder or a drizzle of melted chocolate to enhance the visual appeal.
- Pairing Options: These treats pair beautifully with a variety of beverages. A robust cup of coffee or a soothing herbal tea can complement the rich flavors of the peanut butter cups. If you prefer something colder, a glass of milk or a milkshake can provide a delightful contrast to the sweetness.
- Accompaniments: For an elevated experience, serve your peanut butter cups alongside a scoop of vanilla or chocolate ice cream. The combination of warm and cold, along with the rich flavors, creates an indulgent dessert that guests will love.
Party Treats
When it comes to entertaining, homemade peanut butter cups can be the star of the show. Here’s how to make them the perfect party treat:
- Display: Arrange the peanut butter cups on a decorative platter or tiered stand. You can enhance the presentation by adding colorful garnishes such as fresh berries or edible flowers around the cups.
- Themed Serving: If your gathering has a theme (like a birthday party or holiday celebration), consider customizing the peanut butter cups. Use colored chocolate to dip them or sprinkle festive toppings, such as crushed candy canes for Christmas or pastel sprinkles for Easter.
- Serving Size: Their bite-sized nature makes them ideal for sharing. Consider cutting them into halves or quarters for guests who might want to sample a variety of treats without overindulging.
Gift Idea
Homemade peanut butter cups make thoughtful and personalized gifts for friends and family. Here’s how to package and present them beautifully:
- Creative Packaging: Use cellophane bags or small gift boxes to wrap the peanut butter cups. Adding a layer of decorative tissue paper can elevate the presentation.
- Personal Touch: Tie the bags with colorful ribbons or twine and attach a handwritten note or tag. You could include a simple recipe card or a heartfelt message to make the gift even more special.
- Seasonal Considerations: Consider making themed gifts for various occasions. For example, use red and pink ribbons for Valentine’s Day, or gold and silver for New Year’s celebrations. This attention to detail will make your gift stand out and show that you care.
Snack Time
Homemade peanut butter cups are not just for special occasions; they’re also a fantastic snack option that can be enjoyed any time of day. Here are some ideas for incorporating them into your snacking routine:
- Quick Energy Boost: Keep a stash of peanut butter cups in your pantry or fridge for a quick energy boost. They can be a perfect post-workout treat, providing a mix of protein and carbohydrates that help replenish your energy levels.
- Lunchbox Addition: For a fun surprise, include a peanut butter cup in your child’s lunchbox or your own for a sweet treat during the day. Their compact size makes them easy to transport, and they are sure to bring a smile to anyone’s face.
- Mix and Match: Pair them with healthier snacks, such as sliced apples or carrot sticks, to create a balanced snack plate. The combination of sweet and savory will satisfy both your sweet cravings and nutritional needs.
By exploring these various serving options for homemade peanut butter cups, you can enhance the experience for yourself and others, turning a simple treat into a versatile and memorable addition to any occasion. Whether enjoyed as a dessert, shared at a gathering, given as a gift, or savored as a snack, these delightful confections are sure to please.
Additional Tips
Creating homemade peanut butter cups can be a delightful culinary adventure, and incorporating a few additional tips can elevate your treats to new heights. Here are some detailed suggestions to ensure your peanut butter cups turn out perfectly every time:
1. Chocolate Choice
The type of chocolate you use is crucial to the flavor profile of your peanut butter cups. Here are some options to consider:
- Dark Chocolate: Rich and slightly bitter, dark chocolate enhances the sweetness of the peanut butter filling. Opt for chocolate with a cocoa content of 60% or higher for a more intense flavor. This choice pairs well for those who enjoy a deeper taste.
- Milk Chocolate: For a classic, sweeter option, milk chocolate delivers a creamy texture and a familiar taste that appeals to both adults and children alike. Its sweetness complements the saltiness of the peanut butter beautifully.
- White Chocolate: Although technically not chocolate since it doesn’t contain cocoa solids, white chocolate offers a creamy and sweet flavor that can contrast nicely with the savory peanut butter. This option can be especially appealing for those looking for a milder taste.
- Flavored Chocolate: Don’t hesitate to explore chocolate chips infused with flavors, such as mint or orange, which can add a surprising twist to your peanut butter cups. These variations can make your treats stand out at gatherings or special occasions.
2. Nut Butter Varieties
While traditional peanut butter is a beloved choice, experimenting with different nut butters can yield exciting results:
- Almond Butter: With a slightly sweeter and nuttier flavor than peanut butter, almond butter can add a unique taste and a touch of sophistication to your cups. It’s also a great option for those with peanut allergies.
- Cashew Butter: Known for its creamy texture and mild flavor, cashew butter can create a rich filling that complements the chocolate beautifully. Its subtlety allows the chocolate to shine while still providing a nutty undertone.
- Blended Nut Butters: For an adventurous twist, consider blending various nut butters. A mix of peanut and almond butter, for instance, can create a complex flavor profile that’s both comforting and intriguing.
- Add-ins: Incorporate ingredients like honey, maple syrup, or vanilla extract into your nut butter for added sweetness and flavor. Additionally, a pinch of sea salt can enhance the overall taste, balancing the sweetness of the chocolate.
3. Texture Variation
Adding texture to your peanut butter cups can significantly enhance the eating experience:
- Crushed Nuts: Chopped peanuts, almonds, or hazelnuts can be stirred into the peanut butter filling. This not only adds a delightful crunch but also intensifies the nutty flavor.
- Crispy Rice Cereal: Mixing in crispy rice cereal or even crushed graham crackers can introduce a satisfying crunch that contrasts wonderfully with the smooth chocolate and creamy filling. This is a popular choice for those who enjoy a bit of crunch in their sweets.
- Toffee Bits or Pretzel Crumbles: For a sweet and salty combination, consider adding toffee bits or crushed pretzels into your filling. This combination can create a delicious sweet-salty flavor profile that is hard to resist.
4. Storage
Proper storage is key to maintaining the quality and freshness of your homemade peanut butter cups:
- Refrigeration: Store your peanut butter cups in an airtight container in the refrigerator. This not only helps them retain their shape but also keeps the chocolate from melting, especially in warmer climates. They can typically last for up to two weeks in the fridge.
- Freezing: For longer storage, you can freeze your peanut butter cups. Place them in a single layer on a baking sheet until frozen, then transfer them to an airtight container or freezer bag. They can be stored in the freezer for up to three months. When you’re ready to enjoy them, allow them to thaw slightly at room temperature for the best texture.
- Serving Suggestions: For a fun presentation, consider serving your peanut butter cups on a decorative platter, perhaps drizzled with melted chocolate or sprinkled with sea salt. This can make them an enticing dessert option for parties or special occasions.
By incorporating these additional tips into your peanut butter cup-making process, you can create a batch that not only satisfies your sweet tooth but also impresses your family and friends with its unique flavors and textures. Happy baking!
FAQs
Q: Can I use natural peanut butter for this recipe?
A: Yes, natural peanut butter can be used, but be sure to stir it well to incorporate any separated oils before mixing it with other ingredients. This will ensure a smooth filling.
Q: How long do these peanut butter cups last?
A: When stored in an airtight container in the refrigerator, these peanut butter cups can last up to two weeks. They may not last that long, though, as they’re often too tempting to resist!
Q: Can I make these cups vegan?
A: Absolutely! Use dairy-free chocolate chips and ensure your peanut butter is vegan-friendly to make this recipe suitable for a vegan diet. You can also explore vegan powdered sugar options.
Q: Is it possible to make these cups without a microwave?
A: Yes, you can melt the chocolate using a double boiler on the stovetop if you prefer not to use a microwave. This method allows for better temperature control and prevents burning.
Conclusion
Homemade peanut butter cups are a simple yet decadent treat that you can easily make at home. With minimal ingredients and straightforward instructions, you can enjoy these delicious sweets anytime you crave a chocolate and peanut butter fix. Whether you’re making them for yourself, a party, or as gifts, these homemade delights are sure to be a hit. So gather your ingredients, prepare your mini muffin liners, and indulge in the delightful world of homemade peanut butter cups today!