

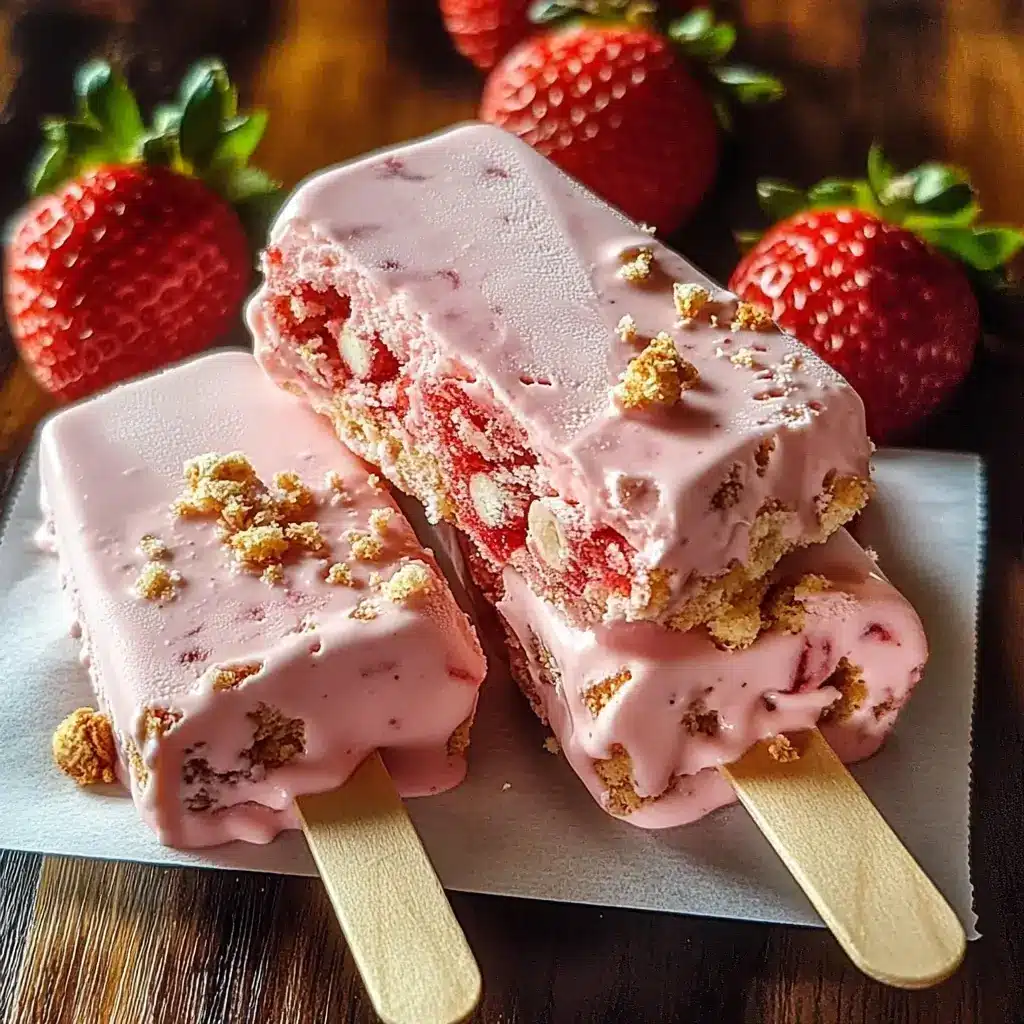

Oh, these Strawberry Shortcake Ice Cream Bars! Let me tell you, they are an absolute game-changer in our household. The first time I made them, I was aiming to recreate that beloved childhood treat, you know, the one from the ice cream truck with the pink and white crumbles? But I wanted it better – with real strawberry flavor, a truly buttery shortcake crunch, and creamy, dreamy ice cream. The verdict? My family went absolutely wild! The kids declared them “way better than the store ones,” and my husband, who’s usually a chocolate-or-nothing kind of guy, was caught sneaking seconds from the freezer. There’s something incredibly satisfying about biting into that perfectly balanced combination of sweet strawberry, rich vanilla ice cream, and that signature crumbly coating that just melts in your mouth. It’s a little bit of effort, yes, but the payoff is a freezer stocked with pure, unadulterated joy. These bars aren’t just a dessert; they’re a nostalgia trip, a crowd-pleaser, and a testament to how homemade always wins.
The Ultimate Homemade Strawberry Shortcake Ice Cream Bars Recipe
Get ready to embark on a delicious journey to create the most irresistible Strawberry Shortcake Ice Cream Bars you’ve ever tasted. This recipe breaks down the process into manageable steps, ensuring a stunning and delicious result that will have everyone asking for your secret. We’re focusing on real ingredients, vibrant flavors, and that iconic texture that makes these bars a timeless classic.
Ingredients You’ll Need
Crafting the perfect Strawberry Shortcake Ice Cream Bar involves a few key components: a luscious strawberry swirl, a buttery shortcake crumble, creamy vanilla ice cream, and an optional (but highly recommended!) white chocolate coating to bring it all together.
For the Vibrant Strawberry Swirl:
- Fresh or Frozen Strawberries: 2 cups (about 1 pound or 450g), hulled and roughly chopped (if using frozen, no need to thaw)
- Granulated Sugar: 1/2 cup (100g), adjust to strawberry sweetness
- Lemon Juice: 1 tablespoon, freshly squeezed (enhances flavor and helps with setting)
- Cornstarch: 1 teaspoon (optional, for a thicker swirl if desired), mixed with 1 tablespoon cold water
For the Buttery Shortcake Crumble:
- All-Purpose Flour: 1 ½ cups (180g)
- Granulated Sugar: 1/2 cup (100g)
- Freeze-Dried Strawberries: 1/2 cup (about 15-20g), finely ground into a powder (this is key for color and intense strawberry flavor in the crumble!)
- Unsalted Butter: 1/2 cup (113g or 1 stick), cold and cut into small cubes
- Salt: 1/4 teaspoon
- Vanilla Extract: 1/2 teaspoon (optional, for added depth)
For the Creamy Ice Cream Layer:
- Good Quality Vanilla Ice Cream: 1.5 quarts (6 cups or about 1.4 liters), slightly softened (let it sit at room temperature for 10-15 minutes)
For the White Chocolate Coating (Optional, but Recommended for that Classic Finish):
- Good Quality White Chocolate Chips or Chopped Bar: 12 ounces (340g)
- Refined Coconut Oil or Vegetable Oil: 2 tablespoons (helps the chocolate flow smoothly and set with a nice snap)
Equipment Needed:
- 9×13 inch baking pan
- Parchment paper
- Saucepan
- Food processor (optional, for crumble and freeze-dried strawberries)
- Mixing bowls
- Spatula
- Sharp knife
Step-by-Step Instructions
Follow these detailed instructions to assemble your incredible homemade Strawberry Shortcake Ice Cream Bars. Patience during freezing stages is key!
Phase 1: Prepare the Strawberry Swirl
- Cook the Strawberries: In a medium saucepan, combine the chopped strawberries, granulated sugar, and lemon juice. Cook over medium heat, stirring occasionally, until the strawberries break down and the mixture begins to simmer and thicken slightly, about 10-15 minutes. Mash the strawberries with a potato masher or fork as they cook for a smoother sauce, or leave them chunkier if you prefer.
- Thicken (Optional): If using cornstarch for a thicker swirl, whisk the cornstarch slurry into the simmering strawberry mixture. Continue to cook, stirring constantly, for another 1-2 minutes until the sauce visibly thickens.
- Cool Completely: Remove the strawberry swirl from the heat and transfer it to a heatproof bowl. Allow it to cool to room temperature, then cover and refrigerate until thoroughly chilled (at least 1-2 hours, or overnight). This step is crucial; adding warm swirl to ice cream will melt it.
Phase 2: Make the Shortcake Crumble
- Preheat & Prep: Preheat your oven to 350°F (175°C). Line a baking sheet with parchment paper.
- Process Freeze-Dried Strawberries: If you haven’t already, place the freeze-dried strawberries into a food processor or a spice grinder and pulse until they form a fine powder. This vibrant powder is the secret to the crumble’s flavor and color.
- Combine Dry Ingredients: In a medium mixing bowl, whisk together the all-purpose flour, granulated sugar, powdered freeze-dried strawberries, and salt.
- Cut in the Butter: Add the cold, cubed butter to the dry ingredients. Using a pastry blender, your fingertips, or a food processor on pulse mode, cut the butter into the flour mixture until it resembles coarse crumbs with some pea-sized pieces of butter remaining. If using, stir in the vanilla extract.
- Bake the Crumble: Spread the crumble mixture evenly onto the prepared baking sheet. Bake for 12-15 minutes, or until it’s lightly golden and fragrant. Stir it halfway through baking to ensure even browning.
- Cool and Crumble Further: Let the baked shortcake mixture cool completely on the baking sheet. Once cooled, break it up with your fingers into smaller crumbles. If you want a finer texture, you can pulse it a few times in a food processor, but be careful not to over-process it into dust. You want a variety of crumb sizes for texture. Set aside.
Phase 3: Assemble the Ice Cream Bars
- Prepare the Pan: Line a 9×13 inch baking pan with parchment paper, leaving an overhang on two opposite sides. This overhang will act as “handles” to easily lift the bars out later.
- First Crumble Layer: Take about half of your cooled shortcake crumble and press it evenly into the bottom of the prepared pan, creating a firm base.
- Ice Cream Layer: Spread the slightly softened vanilla ice cream evenly over the crumble layer. Work quickly to prevent the ice cream from melting too much. Use an offset spatula for best results.
- Strawberry Swirl Layer: Dollop the chilled strawberry swirl randomly over the ice cream layer. Then, using a knife or a skewer, gently swirl the strawberry sauce into the ice cream. Don’t overmix; you want distinct ribbons of strawberry.
- Second Crumble Layer: Sprinkle the remaining shortcake crumble evenly over the top of the strawberry-swirled ice cream. Gently press the crumble into the ice cream so it adheres.
- Freeze Solid: Cover the pan tightly with plastic wrap, then a layer of foil (to prevent freezer burn). Freeze for at least 6-8 hours, or preferably overnight, until completely firm. This extended freezing time is crucial for clean cuts and easy handling.
Phase 4: Cut and (Optionally) Coat the Bars
- Prepare for Cutting: Once frozen solid, remove the pan from the freezer. Use the parchment paper overhangs to lift the entire slab of ice cream dessert onto a cutting board.
- Cut the Bars: Working quickly, use a large, sharp knife to cut the slab into bars of your desired size. For classic bars, you might cut 3 rows by 4 rows to get 12 bars, or 4 rows by 5 rows for 20 smaller bars. Dip the knife in hot water and wipe it dry between cuts for cleaner edges.
- Optional – Prepare White Chocolate Coating: If coating, place the cut bars back on a parchment-lined baking sheet and return them to the freezer immediately while you prepare the chocolate.
- In a microwave-safe bowl or over a double boiler, melt the white chocolate chips with the coconut oil. If using a microwave, heat in 30-second intervals, stirring well after each, until smooth and fully melted. Be careful not to overheat white chocolate as it can seize. The coconut oil will make it thinner and easier to dip. Let it cool slightly so it’s not piping hot but still very fluid.
- Optional – Coat the Bars:
- Dipping Method: Working with one bar at a time (keep the rest in the freezer), quickly dip each bar into the melted white chocolate, allowing excess to drip off. Immediately sprinkle with a little extra reserved crumble (if you saved some) or some of the loose crumble from cutting. Place on a parchment-lined baking sheet.
- Drizzling Method: Alternatively, you can drizzle the white chocolate over the tops of the bars and then sprinkle with extra crumble.
- Final Freeze: Return the coated bars to the freezer for at least 30 minutes to an hour for the chocolate to set completely.
Storing: Once fully set, wrap the individual Strawberry Shortcake Ice Cream Bars in plastic wrap or place them in an airtight freezer-safe container. They will keep well in the freezer for up to 2-3 weeks for best quality.
Nutritional Snapshot
Understanding the nutritional aspect of homemade treats can be helpful. Please note that these values are an approximation and can vary based on specific ingredients used, brands, and final portion sizes.
Servings
This recipe yields approximately 12-16 standard-sized bars, depending on how you cut them. For a 9×13 pan, cutting into 12 bars (3×4 grid) results in generously sized treats.
Calories Per Serving
A single Strawberry Shortcake Ice Cream Bar (assuming 1/12th of the recipe, including the white chocolate coating) is estimated to be around 350-450 calories.
Breakdown (Approximate):
- Crumble: High in carbs and fats from flour, sugar, and butter.
- Ice Cream: Contributes significantly to fat and sugar content.
- Strawberry Swirl: Adds natural sugars and some vitamins.
- White Chocolate Coating: Adds sugars and fats.
While these are indulgent treats, making them at home allows you to control the quality of ingredients. You can make slight modifications, like reducing sugar in the swirl or using a lower-fat ice cream, but this will alter the taste and texture. Enjoy them as a special, delightful dessert!
Time Commitment: From Prep to Perfection
Creating these delightful Strawberry Shortcake Ice Cream Bars is a labor of love, with most of the time dedicated to chilling and freezing. Here’s a breakdown:
Preparation Time (Active Work)
- Strawberry Swirl: 15-20 minutes cooking + 5 minutes prep
- Shortcake Crumble: 15 minutes prep + 12-15 minutes baking
- Assembly: 20-25 minutes
- Cutting & Coating (Optional): 20-30 minutes
- Total Active Preparation Time: Approximately 1 hour 15 minutes to 1 hour 45 minutes (spread out)
Chilling & Freezing Time (Inactive)
- Strawberry Swirl Cooling: At least 2 hours (or overnight)
- Crumble Cooling: At least 30-45 minutes
- Initial Freezing of Assembled Bars: At least 6-8 hours (preferably overnight)
- Final Freeze (if coated): 30 minutes – 1 hour
Total Time
From start to enjoying your first bar, you’re looking at a minimum of 10-12 hours, with the majority of this being hands-off chilling and freezing time. It’s best to plan to make these a day ahead of when you want to serve them.
Serving Your Strawberry Shortcake Masterpieces
These homemade Strawberry Shortcake Ice Cream Bars are delightful on their own, but here are a few ways to elevate the serving experience:
- Straight from the Freezer: The classic way! Simply unwrap and enjoy the perfect blend of textures and temperatures. This is ideal for a quick, refreshing treat on a hot day.
- With Fresh Berries: Serve a bar alongside a small bowl of fresh, sliced strawberries or a mixed berry medley. The freshness of the fruit beautifully complements the richness of the ice cream bar.
- A Dollop of Whipped Cream: For an extra touch of indulgence, add a small dollop of freshly whipped cream on the side or on top. A sprig of mint can add a pop of color.
- At Summer Parties & BBQs: These are guaranteed crowd-pleasers. Arrange them on a chilled platter (perhaps nestled in a bed of ice if it’s very hot) for guests to help themselves. They make a fantastic dessert for outdoor gatherings.
- Kid’s Birthday Parties: A definite hit with the younger crowd. You can make them slightly smaller for little hands. Insert popsicle sticks before the final freeze (after cutting but before coating) for easier, less messy eating for children.
- Dessert Charcuterie Board: Include these bars as a star component on a dessert board, surrounded by fresh fruits, cookies, chocolate-covered pretzels, and small bowls of sauces like chocolate or caramel.
- With a Light Sauce Drizzle: For a more plated dessert presentation, you could lightly drizzle some leftover (or freshly made) strawberry sauce or a thin chocolate ganache on the plate before placing the bar.
Important Serving Tip: Due to the nature of ice cream, these bars melt relatively quickly, especially in warmer weather. Serve them immediately after taking them out of the freezer for the best experience. If serving at a party, bring them out in batches.
Pro Tips for Bar-Making Brilliance
Elevate your Strawberry Shortcake Ice Cream Bar game with these five essential tips:
- Embrace Freeze-Dried Strawberries for the Crumble: This is non-negotiable for achieving that intense, authentic strawberry flavor and beautiful pink hue in your crumble without adding moisture that would make it soggy. Grind them into a fine powder for the best distribution. Don’t skimp here; it makes a world of difference compared to just using food coloring or fresh fruit in the baked component.
- Patience with Chilling and Freezing is Paramount: Do not rush the cooling of the strawberry swirl or the freezing stages. A thoroughly chilled swirl prevents ice cream melt. A rock-solid frozen block of the assembled dessert ensures clean, sharp cuts. Trying to cut semi-frozen bars will result in a messy, frustrating experience. Overnight freezing for the main assembly is highly recommended.
- Work Quickly with the Ice Cream: Have all your components (crumble, chilled swirl, prepared pan) ready to go before you take the ice cream out to soften. Soften it just enough to be spreadable – too melted, and it will be icy when refrozen. Once you start assembling the ice cream layer, move efficiently to get it back in the freezer.
- Don’t Over-Process the Crumble After Baking: You want a delightful mix of textures in your crumble – some finer bits, some slightly larger, buttery chunks. After baking and cooling, gently break it apart. If you use a food processor for this step, use very short pulses. Turning it into dust will rob you of that satisfying shortcake crunch.
- Use Parchment Paper Liberally: Line your baking pan with an overhang for easy removal of the frozen slab. Line your baking sheets when baking the crumble and when freezing cut bars (especially if coating). This prevents sticking, makes cleanup a breeze, and helps in handling the frozen treats. It’s a simple step that saves a lot of hassle.
Frequently Asked Questions (FAQ)
Q1: Can I use frozen strawberries instead of fresh for the swirl?
A1: Absolutely! Frozen strawberries work wonderfully for the strawberry swirl. There’s no need to thaw them before cooking; simply add them to the saucepan with the sugar and lemon juice. They might release a bit more liquid, so you may need to cook the swirl a few minutes longer to reach the desired consistency, or definitely consider using the cornstarch slurry option for thickening.
Q2: Can I make the shortcake crumble without baking it (no-bake version)?
A2: While the baked crumble offers the best texture and toasted flavor, you can make a no-bake version. To do this, you’d typically use crushed Nilla wafers or Golden Oreos (filling removed) mixed with melted butter and the freeze-dried strawberry powder. It will have a different texture – more sandy like a cheesecake crust – but can still be delicious. The traditional recipe relies on baking flour, sugar, and butter for that authentic shortcake taste.
Q3: How long will these Strawberry Shortcake Ice Cream Bars last in the freezer?
A3: When properly stored, these homemade bars will maintain their best quality for up to 2-3 weeks in the freezer. Wrap each bar individually in plastic wrap, and then place them in an airtight freezer-safe container or a heavy-duty freezer bag. This double protection helps prevent freezer burn and keeps them tasting fresh. Beyond 3 weeks, they are still safe to eat but might start to develop ice crystals or lose some flavor intensity.
Q4: Can I make these gluten-free?
A4: Yes, you can adapt this recipe to be gluten-free. For the shortcake crumble, substitute the all-purpose flour with a good quality gluten-free all-purpose baking blend (one that contains xanthan gum, or add it if your blend doesn’t). The texture might be slightly different, but it should still yield a delicious crumble. Ensure your vanilla ice cream and any other processed ingredients (like white chocolate) are also certified gluten-free.
Q5: Can I use a different flavor of ice cream?
A5: Definitely! While classic vanilla ice cream is traditional for strawberry shortcake, feel free to experiment. Strawberry ice cream would intensify the berry flavor. A cheesecake-flavored ice cream could be a decadent twist. Even a light lemon or sweet cream ice cream could work beautifully. Consider how the ice cream flavor will pair with the strawberry swirl and shortcake crumble.
Homemade Strawberry Shortcake Ice Cream Bars Recipe
Ingredients
For the Vibrant Strawberry Swirl:
- Fresh or Frozen Strawberries: 2 cups (about 1 pound or 450g), hulled and roughly chopped (if using frozen, no need to thaw)
- Granulated Sugar: 1/2 cup (100g), adjust to strawberry sweetness
- Lemon Juice: 1 tablespoon, freshly squeezed (enhances flavor and helps with setting)
- Cornstarch: 1 teaspoon (optional, for a thicker swirl if desired), mixed with 1 tablespoon cold water
For the Buttery Shortcake Crumble:
- All-Purpose Flour: 1 ½ cups (180g)
- Granulated Sugar: 1/2 cup (100g)
- Freeze-Dried Strawberries: 1/2 cup (about 15-20g), finely ground into a powder (this is key for color and intense strawberry flavor in the crumble!)
- Unsalted Butter: 1/2 cup (113g or 1 stick), cold and cut into small cubes
- Salt: 1/4 teaspoon
- Vanilla Extract: 1/2 teaspoon (optional, for added depth)
For the Creamy Ice Cream Layer:
- Good Quality Vanilla Ice Cream: 1.5 quarts (6 cups or about 1.4 liters), slightly softened (let it sit at room temperature for 10-15 minutes)
For the White Chocolate Coating (Optional, but Recommended for that Classic Finish):
- Good Quality White Chocolate Chips or Chopped Bar: 12 ounces (340g)
- Refined Coconut Oil or Vegetable Oil: 2 tablespoons (helps the chocolate flow smoothly and set with a nice snap)
Instructions
Phase 1: Prepare the Strawberry Swirl
- Cook the Strawberries: In a medium saucepan, combine the chopped strawberries, granulated sugar, and lemon juice. Cook over medium heat, stirring occasionally, until the strawberries break down and the mixture begins to simmer and thicken slightly, about 10-15 minutes. Mash the strawberries with a potato masher or fork as they cook for a smoother sauce, or leave them chunkier if you prefer.
- Thicken (Optional): If using cornstarch for a thicker swirl, whisk the cornstarch slurry into the simmering strawberry mixture. Continue to cook, stirring constantly, for another 1-2 minutes until the sauce visibly thickens.
- Cool Completely: Remove the strawberry swirl from the heat and transfer it to a heatproof bowl. Allow it to cool to room temperature, then cover and refrigerate until thoroughly chilled (at least 1-2 hours, or overnight). This step is crucial; adding warm swirl to ice cream will melt it.
Phase 2: Make the Shortcake Crumble
- Preheat & Prep: Preheat your oven to 350°F (175°C). Line a baking sheet with parchment paper.
- Process Freeze-Dried Strawberries: If you haven’t already, place the freeze-dried strawberries into a food processor or a spice grinder and pulse until they form a fine powder. This vibrant powder is the secret to the crumble’s flavor and color.
- Combine Dry Ingredients: In a medium mixing bowl, whisk together the all-purpose flour, granulated sugar, powdered freeze-dried strawberries, and salt.
- Cut in the Butter: Add the cold, cubed butter to the dry ingredients. Using a pastry blender, your fingertips, or a food processor on pulse mode, cut the butter into the flour mixture until it resembles coarse crumbs with some pea-sized pieces of butter remaining. If using, stir in the vanilla extract.
- Bake the Crumble: Spread the crumble mixture evenly onto the prepared baking sheet. Bake for 12-15 minutes, or until it’s lightly golden and fragrant. Stir it halfway through baking to ensure even browning.
- Cool and Crumble Further: Let the baked shortcake mixture cool completely on the baking sheet. Once cooled, break it up with your fingers into smaller crumbles. If you want a finer texture, you can pulse it a few times in a food processor, but be careful not to over-process it into dust. You want a variety of crumb sizes for texture. Set aside.
Phase 3: Assemble the Ice Cream Bars
- Prepare the Pan: Line a 9×13 inch baking pan with parchment paper, leaving an overhang on two opposite sides. This overhang will act as “handles” to easily lift the bars out later.
- First Crumble Layer: Take about half of your cooled shortcake crumble and press it evenly into the bottom of the prepared pan, creating a firm base.
- Ice Cream Layer: Spread the slightly softened vanilla ice cream evenly over the crumble layer. Work quickly to prevent the ice cream from melting too much. Use an offset spatula for best results.
- Strawberry Swirl Layer: Dollop the chilled strawberry swirl randomly over the ice cream layer. Then, using a knife or a skewer, gently swirl the strawberry sauce into the ice cream. Don’t overmix; you want distinct ribbons of strawberry.
- Second Crumble Layer: Sprinkle the remaining shortcake crumble evenly over the top of the strawberry-swirled ice cream. Gently press the crumble into the ice cream so it adheres.
- Freeze Solid: Cover the pan tightly with plastic wrap, then a layer of foil (to prevent freezer burn). Freeze for at least 6-8 hours, or preferably overnight, until completely firm. This extended freezing time is crucial for clean cuts and easy handling.
Phase 4: Cut and (Optionally) Coat the Bars
- Prepare for Cutting: Once frozen solid, remove the pan from the freezer. Use the parchment paper overhangs to lift the entire slab of ice cream dessert onto a cutting board.
- Cut the Bars: Working quickly, use a large, sharp knife to cut the slab into bars of your desired size. For classic bars, you might cut 3 rows by 4 rows to get 12 bars, or 4 rows by 5 rows for 20 smaller bars. Dip the knife in hot water and wipe it dry between cuts for cleaner edges.
- Optional – Prepare White Chocolate Coating: If coating, place the cut bars back on a parchment-lined baking sheet and return them to the freezer immediately while you prepare the chocolate.
- In a microwave-safe bowl or over a double boiler, melt the white chocolate chips with the coconut oil. If using a microwave, heat in 30-second intervals, stirring well after each, until smooth and fully melted. Be careful not to overheat white chocolate as it can seize. The coconut oil will make it thinner and easier to dip. Let it cool slightly so it’s not piping hot but still very fluid.
- Optional – Coat the Bars:
- Dipping Method: Working with one bar at a time (keep the rest in the freezer), quickly dip each bar into the melted white chocolate, allowing excess to drip off. Immediately sprinkle with a little extra reserved crumble (if you saved some) or some of the loose crumble from cutting. Place on a parchment-lined baking sheet.
- Drizzling Method: Alternatively, you can drizzle the white chocolate over the tops of the bars and then sprinkle with extra crumble.
- Final Freeze: Return the coated bars to the freezer for at least 30 minutes to an hour for the chocolate to set completely.
Nutrition
- Serving Size: One Normal Portion
- Calories: 350-450


