


Thanksgiving at our house is a symphony of flavors, aromas, and laughter, but if I’m honest, there’s one element that consistently steals the show – the gravy. Not just any gravy, mind you, but this gravy. For years, I relied on store-bought versions, always a little too salty, a little too thin, and ultimately, a little disappointing. Then, a few years ago, I stumbled upon this incredibly simple homemade turkey gravy recipe, and it was a game-changer. The first time I made it, the transformation was palpable. The rich, savory aroma filled the kitchen, a promise of culinary delight. And the taste? Oh, the taste! Velvety smooth, deeply flavorful, and perfectly complementing every bite of turkey, stuffing, and mashed potatoes. My family, usually polite but reserved in their food praise, erupted in compliments. “This gravy is incredible!” my son exclaimed, while my usually quiet mother-in-law declared it “the best gravy I’ve ever had.” Since then, this recipe has become a non-negotiable part of our holiday feast, and honestly, it’s so easy, I make it year-round to elevate even simple weeknight meals. If you’re looking for a gravy that will impress your guests, elevate your holiday dinner, and become a cherished family favorite, look no further. This delicious homemade turkey gravy recipe is foolproof, fast, and guaranteed to be a hit. Get ready to experience gravy like never before!
Ingredients: The Simple Magic Behind Delicious Gravy
This recipe champions simplicity without sacrificing flavor. With just a handful of readily available ingredients, you can create a gravy that tastes like it took hours to perfect. Let’s break down each component and understand why they are essential for achieving gravy perfection:
- ½ cup (1 stick) Unsalted Butter: Butter is the foundation of our roux, the thickening agent for this gravy. Unsalted butter is crucial as it gives you complete control over the saltiness of the final dish, especially when you are using potentially salty pan drippings. The fat in the butter also contributes to the rich, luxurious texture of the gravy. Feel free to use a good quality butter for a richer flavor. If you only have salted butter, you can use it, but be extra cautious when adding salt later in the recipe, tasting frequently. For a slightly different flavor profile, you could experiment with brown butter for a nutty depth, but for a classic turkey gravy, unsalted butter is the gold standard.
- 1 teaspoon Black Pepper: Don’t underestimate the power of freshly ground black pepper in gravy! It adds a subtle warmth and spice that cuts through the richness and enhances the savory notes. Freshly ground pepper is always preferred for its brighter, more aromatic flavor. If you only have pre-ground pepper, that will work in a pinch, but consider grinding some fresh pepper for an extra layer of deliciousness. You can also adjust the amount of pepper to your liking. If you prefer a milder gravy, start with ½ teaspoon and taste as you go. For a bolder flavor, you can increase it slightly. White pepper is another option for a less visually noticeable spice, but black pepper offers a more robust flavor profile that complements turkey beautifully.
- ½ cup All-Purpose Flour: All-purpose flour is the traditional thickening agent for gravy. It reacts with the melted butter to create a roux, which is the base of our gravy. The flour absorbs the fat and then, when liquid is added, it swells and thickens the mixture, creating that signature gravy texture. Make sure your flour is fresh for the best results. If you are looking for a gluten-free option, you can substitute with a gluten-free all-purpose flour blend. However, be mindful that gluten-free flours can sometimes behave differently than wheat flour. You might need to adjust the amount slightly or cook the roux for a bit longer to ensure it properly thickens the gravy. Cornstarch or arrowroot powder are other gluten-free alternatives, but they are typically used as a slurry (mixed with cold water) and added at the end of cooking rather than creating a roux.
- 4 cups Turkey Pan Drippings (Strained) or Chicken Broth: This is where the magic truly happens! Turkey pan drippings are the liquid gold left in the roasting pan after you’ve cooked your turkey. They are packed with concentrated turkey flavor, rendered fat, and browned bits, all of which contribute to the unparalleled depth of flavor in homemade turkey gravy. Straining the drippings is essential to remove any solids or burnt bits, ensuring a smooth and velvety gravy. If you don’t have enough pan drippings (sometimes turkeys don’t produce a lot), supplement with chicken broth to reach the 4-cup mark. Low-sodium chicken broth is recommended so you can control the salt level. If you are making this gravy without roasting a turkey, high-quality chicken broth is an excellent substitute. For an even richer flavor when using broth, consider using homemade chicken broth or bone broth. You can also enhance store-bought broth by simmering it with some turkey or chicken bones, vegetable scraps (like onion skins, carrot peels, and celery ends), and herbs for about 30 minutes and then straining it. This will infuse the broth with more depth and complexity.
Optional Ingredient Enhancements (For the Gravy Enthusiast):
- 1-2 tablespoons Dry Sherry or White Wine (Dry): Adding a splash of dry sherry or white wine to the gravy after the roux is made and before adding the broth can add a layer of sophistication and complexity. The alcohol cooks off, leaving behind a subtle depth of flavor that complements the savory notes of the turkey.
- 1-2 teaspoons Fresh Herbs (Thyme, Sage, Rosemary): Finely chopped fresh herbs like thyme, sage, or rosemary can elevate the gravy with bright, aromatic notes. Add them towards the end of cooking to preserve their fresh flavor.
- 1-2 cloves Garlic (Minced): For a slightly garlicky gravy, sauté minced garlic in the butter for a minute before adding the flour. This adds a subtle savory depth.
- Onion Powder or Garlic Powder: For a quick flavor boost, a pinch of onion powder or garlic powder can be added to the roux along with the black pepper.
By understanding the role of each ingredient and considering these optional enhancements, you can create a truly exceptional homemade turkey gravy that will impress everyone at your table.
Instructions: Step-by-Step Guide to Gravy Perfection
Making delicious homemade turkey gravy is easier than you might think! This recipe breaks down the process into simple, manageable steps, ensuring gravy success every time.
Step 1: Melt the Butter and Bloom the Pepper (Flavor Foundation)
- In a large, heavy-bottomed saucepan (cast iron or stainless steel works well), melt ½ cup (1 stick) of unsalted butter over medium-low heat. The key here is medium-low heat. You want the butter to melt gently without browning or burning, which can impart a bitter taste to your gravy.
- Once the butter is completely melted and shimmering, add 1 teaspoon of freshly ground black pepper. Stir the pepper into the melted butter and let it “bloom” for about 30 seconds to a minute. Blooming the pepper in the hot butter releases its aromatic oils and intensifies its flavor, creating a more flavorful base for your gravy. You’ll notice the aroma of the pepper become more pronounced.
Step 2: Create the Roux (The Thickening Magic)
- This is the most crucial step in making smooth, lump-free gravy. Slowly add ½ cup of all-purpose flour to the melted butter and pepper mixture. Slowly is the operative word here. Adding the flour gradually allows it to incorporate smoothly into the butter without clumping.
- Immediately begin whisking continuously as you add the flour. Use a whisk (a wire whisk is ideal) to ensure you are breaking up any clumps and creating a smooth mixture. Continue whisking constantly for about 2-3 minutes, or until the mixture is smooth and pale golden in color. This is called a roux. Cooking the roux for a few minutes is important because it cooks out the raw flour taste and helps to develop its thickening power. Don’t rush this step! A well-made roux is the secret to smooth gravy. The roux should have a slightly nutty aroma and a smooth, paste-like consistency.
Step 3: Incorporate the Liquid (Flavor and Texture Development)
- Now it’s time to add the liquid, which will transform the roux into gravy. Slowly whisk in 4 cups of strained turkey pan drippings (or chicken broth). Again, slowly is key. Adding the liquid gradually and whisking continuously prevents lumps from forming. Start by adding about ½ cup of liquid at a time, whisking it in completely until smooth before adding the next ½ cup.
- Continue whisking constantly as you add the remaining liquid. Make sure to scrape the bottom and sides of the saucepan to prevent any roux from sticking and burning.
Step 4: Simmer and Thicken (Achieving Gravy Perfection)
- Once all the liquid is incorporated, bring the gravy to a simmer over medium heat, still whisking occasionally to prevent sticking. As the gravy heats up, it will begin to thicken.
- Reduce the heat to low and continue to simmer gently for about 5-7 minutes, or until the gravy reaches your desired consistency. The longer it simmers, the thicker it will become. Stir occasionally during simmering to ensure even cooking and prevent sticking.
- Taste the gravy and adjust seasoning as needed. You may need to add salt (especially if using chicken broth instead of pan drippings, or if your pan drippings were low in salt). Add salt gradually and taste after each addition. You can also add more black pepper if desired. This is also the time to add any optional flavor enhancers like sherry, herbs, or garlic (if you haven’t already).
Step 5: Serve and Enjoy! (Gravy Bliss)
- Once the gravy has reached your desired thickness and flavor, it’s ready to serve! Serve immediately over turkey, mashed potatoes, stuffing, biscuits, or any other dishes you desire.
- If you are not serving immediately, you can keep the gravy warm on low heat, stirring occasionally to prevent a skin from forming on the surface. You can also place a lid slightly ajar on the saucepan to help prevent skin formation. If the gravy becomes too thick while keeping warm, you can whisk in a little extra broth or water to thin it out to the desired consistency.
By following these step-by-step instructions and paying attention to the key techniques (medium-low heat, slow addition of flour and liquid, continuous whisking), you will be rewarded with a smooth, flavorful, and utterly delicious homemade turkey gravy that will be the star of your meal.
Nutrition Facts (Estimated)
(Note: Nutritional information is an estimate and can vary based on specific ingredients and serving sizes.)
Serving Size: Approximately ½ cup (120ml)
Servings Per Recipe: Approximately 8 servings (assuming recipe yields about 4 cups of gravy)
Estimated Nutritional Information per Serving:
- Calories: 220-250 kcal
- Fat: 18-22g
- Saturated Fat: 12-15g
- Cholesterol: 60-70mg
- Sodium: Varies greatly depending on pan drippings/broth used (can range from 100mg to 500mg or more)
- Carbohydrates: 8-10g
- Fiber: <1g
- Sugar: <1g
- Protein: 2-3g
Important Considerations:
- These are estimates based on standard nutritional values for butter, all-purpose flour, and chicken broth/turkey drippings. Actual values may vary.
- The sodium content can fluctuate significantly based on whether you use pan drippings or chicken broth, and whether you use low-sodium broth. Pan drippings can be naturally salty.
- This gravy is relatively high in fat due to the butter content.
- For more precise nutritional information, you can use online nutrition calculators and input the specific brands and quantities of ingredients you use.
This nutritional information provides a general guideline to help you understand the approximate caloric and macronutrient content of this homemade turkey gravy recipe. Enjoy in moderation as part of a balanced meal!
Preparation Time: Quick and Easy Gravy in Minutes
This recipe is a dream for busy cooks, especially during the holidays. It’s designed to be quick and efficient without compromising on flavor.
- Prep Time: 10 minutes
- This includes gathering your ingredients, measuring them out, straining your pan drippings (if using), and any optional chopping of herbs or garlic. The prep is minimal and straightforward.
- Cook Time: 10 minutes
- This encompasses the time to melt the butter, create the roux, incorporate the liquid, and simmer the gravy until thickened to perfection. The cooking process itself is quite rapid.
- Total Time: 20 minutes
- From start to finish, you can have a pot of delicious homemade turkey gravy ready in just 20 minutes! This makes it an ideal recipe for last-minute additions to your meal or for when you need a quick and flavorful gravy for any occasion.
The speed and ease of this recipe are truly remarkable, especially considering the incredible flavor payoff. It’s proof that you don’t need to spend hours in the kitchen to create restaurant-quality gravy. This recipe is perfect for both experienced cooks and beginners alike, offering a stress-free way to elevate your meal with homemade goodness.
How to Serve: Gravy Beyond Turkey
While this gravy is undeniably perfect with roasted turkey, its versatility extends far beyond the Thanksgiving table. Here are some delicious ways to serve this homemade gravy:
- Classic Thanksgiving/Holiday Feast:
- Roasted Turkey: The quintessential pairing! Drizzle generously over slices of roasted turkey for moistness and flavor.
- Mashed Potatoes: A must-have! Spoon warm gravy over creamy mashed potatoes for ultimate comfort food.
- Stuffing/Dressing: Moistens and enhances the flavor of stuffing or dressing.
- Biscuits or Rolls: Perfect for soaking up every last drop of gravy.
- Green Bean Casserole: Adds richness and depth to green bean casserole.
- Everyday Meals:
- Chicken Fried Steak: A classic Southern pairing.
- Meatloaf: Elevates simple meatloaf to a gourmet level.
- Roasted Chicken or Pork: Delicious over roasted chicken, pork chops, or pork tenderloin.
- Open-Faced Sandwiches: Use gravy as a sauce for hot open-faced sandwiches like hot turkey or roast beef.
- Poutine (Canadian Dish): A key component of authentic poutine (french fries, cheese curds, and gravy).
- Breakfast Biscuits & Gravy: Transform this turkey gravy into a delicious breakfast gravy by adding cooked sausage or crumbled bacon.
- Vegetable Dishes (Vegetarian Adaptations – using vegetable broth):
- Mashed Cauliflower: Adds richness and flavor to mashed cauliflower.
- Roasted Root Vegetables: Drizzle over roasted carrots, parsnips, or sweet potatoes.
- Lentil Loaf or Vegetarian Meatloaf: Complements vegetarian main dishes beautifully.
- Polenta: Serve gravy over creamy polenta for a comforting and flavorful vegetarian meal.
Serving Tips:
- Serve Warm: Gravy is best served warm. Keep it warm in a saucepan over low heat or in a gravy boat.
- Gravy Boat Presentation: Use a gravy boat to serve the gravy at the table for elegant presentation and easy pouring.
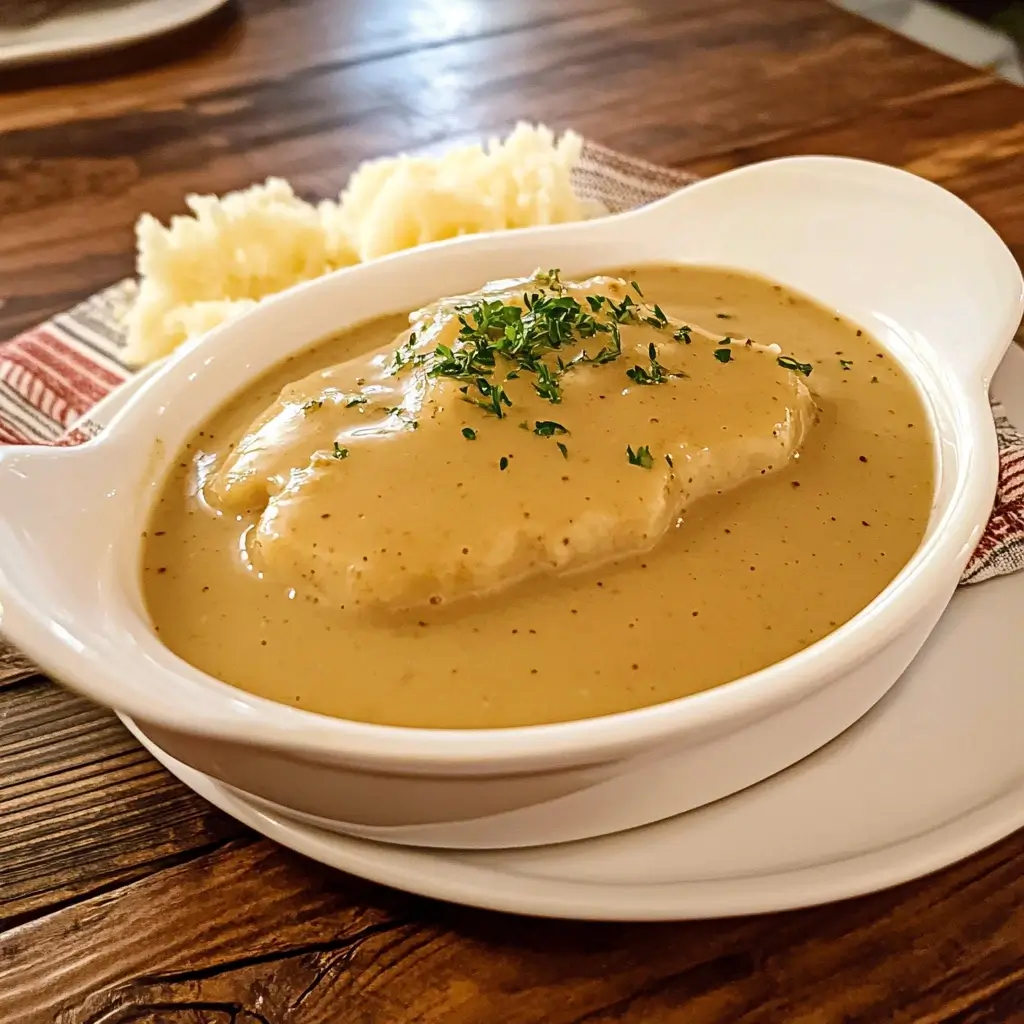
- Garnish (Optional): Garnish with a sprinkle of fresh herbs like chopped parsley or thyme for a touch of freshness and visual appeal.
- Accompanying Dishes: Ensure you have plenty of side dishes that complement gravy, like mashed potatoes, stuffing, and vegetables.
No matter how you choose to serve it, this homemade turkey gravy is guaranteed to enhance your meal and bring smiles to everyone’s faces. Its rich flavor and velvety texture make it a truly versatile and beloved sauce.
Additional Tips for Gravy Success
To ensure your homemade turkey gravy is absolutely perfect every time, here are 5 essential tips:
- Strain Your Pan Drippings (If Using): This is crucial for smooth gravy. After roasting your turkey, carefully pour the pan drippings through a fine-mesh sieve lined with cheesecloth (optional, but helps for extra clarity) into a heatproof bowl or measuring cup. This will remove any solids, burnt bits, or herb sprigs, resulting in a silky smooth gravy. If you don’t have enough drippings, supplement with chicken broth.
- Don’t Rush the Roux: Creating a proper roux is the foundation of lump-free gravy. Cook the butter and flour mixture over medium-low heat for 2-3 minutes, whisking constantly, until it’s smooth and pale golden and has a slightly nutty aroma. Cooking the roux properly cooks out the raw flour taste and enhances its thickening power.
- Whisk Continuously When Adding Liquid: Lumps are the enemy of gravy! Prevent them by slowly adding the liquid (drippings or broth) to the roux, whisking continuously and vigorously as you pour. Add the liquid in stages, about ½ cup at a time, ensuring each addition is fully incorporated and smooth before adding more.
- Simmer for Flavor Development: Once all the liquid is added, simmer the gravy gently for at least 5-7 minutes (or longer if you want a thicker gravy). Simmering allows the flavors to meld and deepen, and it also helps to thicken the gravy further. Don’t boil vigorously, as this can cause the gravy to separate or become gluey.
- Taste and Season Adjust: Gravy seasoning is personal preference. Always taste your gravy towards the end of cooking and adjust seasoning as needed. Start with salt and pepper, and then consider other flavor enhancers like a pinch of herbs, a dash of sherry, or a squeeze of lemon juice. Remember, you can always add more seasoning, but you can’t take it away, so add gradually and taste frequently.
By following these tips, you’ll be well on your way to making consistently delicious and lump-free homemade turkey gravy that will impress everyone at your table.
FAQ: Your Gravy Questions Answered
Q1: My gravy is lumpy! How do I fix it?
A: Lumpy gravy is a common problem, but easily fixable! The most effective method is to strain the gravy through a fine-mesh sieve. Pour the gravy through the sieve into another saucepan, pressing gently on any lumps with a spoon to help them pass through. This will remove the lumps and leave you with smooth gravy. Alternatively, you can try using an immersion blender to blend the lumps smooth directly in the saucepan. Be careful not to over-blend, as this can make the gravy gluey.
Q2: How do I make gravy thicker?
A: If your gravy is too thin, you have several options to thicken it:
- Simmer Longer: Continue to simmer the gravy over low heat for a few more minutes, stirring occasionally. The longer it simmers, the more it will reduce and thicken.
- Cornstarch Slurry: In a small bowl, whisk together 1 tablespoon of cornstarch with 2 tablespoons of cold water until smooth. Slowly whisk this slurry into the simmering gravy. Simmer for another minute or two until thickened. Be careful not to add too much cornstarch, as it can make the gravy taste starchy.
- Flour Slurry: Similar to cornstarch, you can make a slurry with 1 tablespoon of flour and 2 tablespoons of cold water. Whisk until smooth and add to the gravy. Simmer and stir until thickened.
Q3: Can I make gravy ahead of time?
A: Yes, you can definitely make gravy ahead of time! Prepare the gravy as directed, let it cool slightly, and then store it in an airtight container in the refrigerator for up to 2-3 days. When ready to serve, reheat the gravy gently in a saucepan over low heat, stirring frequently. You may need to add a little extra broth or water to thin it out to the desired consistency as it may thicken upon cooling.
Q4: Can I freeze leftover gravy?
A: Yes, gravy freezes well! Let the gravy cool completely, then pour it into freezer-safe containers or freezer bags. Freeze for up to 2-3 months. To thaw, place the frozen gravy in the refrigerator overnight or thaw in the microwave on a low setting. Reheat gently in a saucepan, stirring frequently, and add a little broth or water if needed to thin it out. Freezing can sometimes slightly alter the texture of gravy, but it will still be delicious.
Q5: I don’t have turkey pan drippings. Can I still make this gravy?
A: Absolutely! If you don’t have turkey pan drippings, high-quality chicken broth is an excellent substitute. For a richer flavor, you can enhance store-bought chicken broth by simmering it with some chicken or turkey bones, vegetable scraps, and herbs for about 30 minutes and then straining it. You can also use beef broth for a different flavor profile, or vegetable broth for a vegetarian option. While turkey drippings provide the most authentic turkey flavor, using broth still results in a delicious and savory gravy.


