It was one of those hectic weekday afternoons, the kind where the after-school hunger pangs hit my kids (and frankly, me too!) like a ton of bricks. I needed something quick, something relatively healthy, and something that wouldn’t involve turning on the oven in the already warm kitchen. That’s when I remembered a scribbled note for “Vanilla Bliss Balls.” I’d been meaning to try them, drawn by the promise of simplicity and the universally loved flavour of vanilla. Skeptical but hopeful, I gathered the few pantry staples required. To my absolute delight, these little orbs of deliciousness came together in minutes. The aroma of vanilla filled the kitchen as I rolled them, and my kids, initially eyeing my concoction with suspicion, were instantly won over by their sweet, chewy texture and the comforting vanilla taste. They devoured half the batch before I even had a chance to store them properly! Since then, these Vanilla Bliss Balls have become a household hero – our go-to for a quick energy boost, a guilt-free dessert, or a lunchbox treat. They are incredibly versatile, satisfying, and so easy to whip up that even the kids can help.
The Allure of Homemade Vanilla Bliss Balls
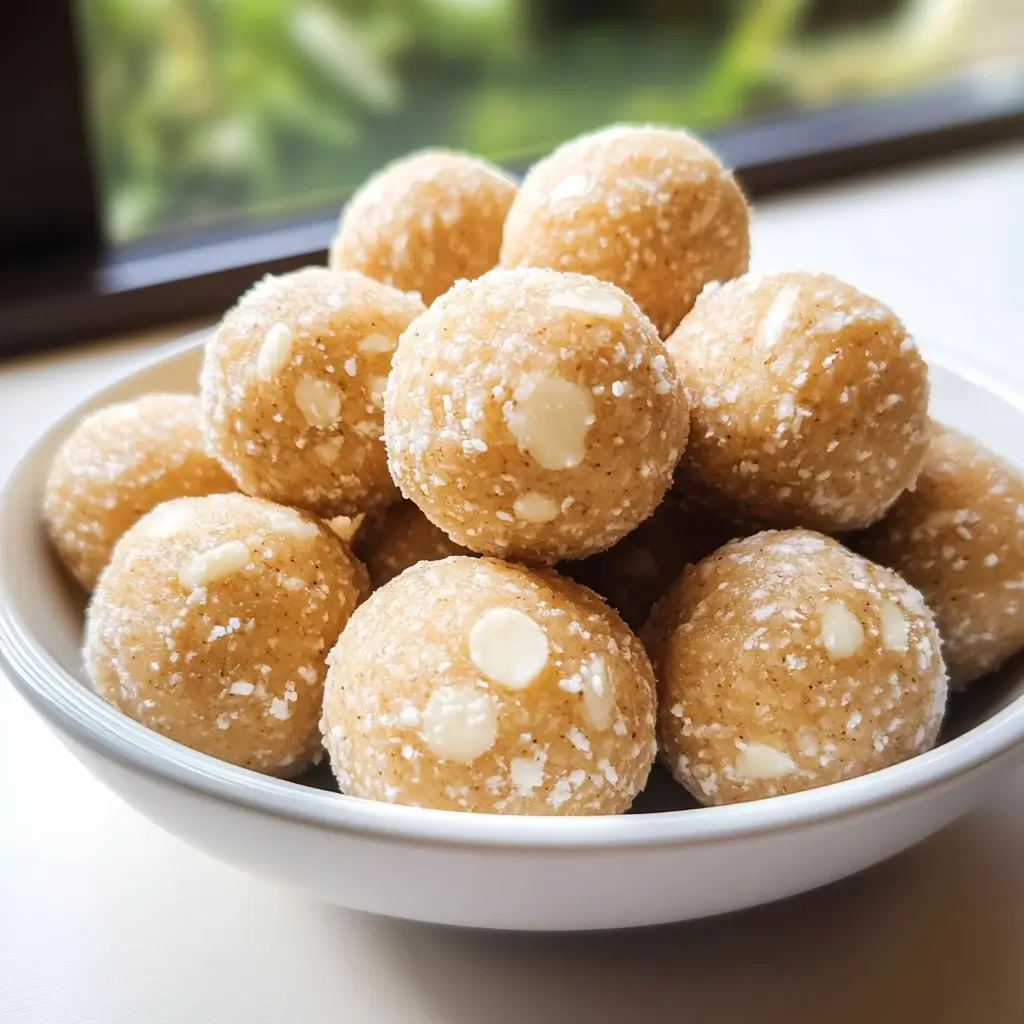
In a world saturated with overly processed snacks, there’s a unique satisfaction that comes from creating something wholesome and delicious in your own kitchen. Vanilla Bliss Balls, also known as energy bites or protein balls, are the epitome of this. They are simple, no-bake wonders packed with natural ingredients, offering a burst of energy and flavour without any artificial additives, refined sugars (depending on your specific additions), or complicated baking processes. The star of this particular recipe, vanilla, brings a comforting warmth and aromatic sweetness that elevates these simple spheres from merely functional to truly blissful. Whether you’re a busy parent looking for healthy kid-friendly snacks, an athlete needing a pre or post-workout boost, or simply someone craving a sweet treat without the guilt, these Vanilla Bliss Balls are your answer. They are endlessly customizable, forgiving for beginner cooks, and a fantastic way to incorporate more whole foods into your diet. Their delightful chewiness, combined with the pure, fragrant essence of vanilla, makes them an irresistible treat that you can feel good about enjoying and sharing.
Ingredients for Your Vanilla Bliss Balls
Crafting these delightful Vanilla Bliss Balls requires just a handful of wholesome ingredients, most of which you might already have in your pantry. The magic lies in their simplicity and the quality of what you choose.
- Medjool Dates: 1 cup (pitted, about 10-12 large dates). These are the natural sweetener and binder of our bliss balls. Their soft, caramel-like texture is crucial. If your dates are a bit dry, soak them in hot water for 10 minutes, then drain well.
- Rolled Oats: 1 cup. Use traditional rolled oats for the best texture. For a gluten-free version, ensure you use certified gluten-free rolled oats. Oats provide fibre and a lovely chewiness.
- Raw Cashews: 1/2 cup (or almonds, walnuts, or pecans). Cashews lend a creamy, mild flavour that complements vanilla beautifully. Almonds will give a slightly more robust flavour and texture.
- Desiccated Coconut: 1/2 cup, plus an extra 1/4 cup for rolling (optional). Unsweetened desiccated coconut adds a lovely tropical note and texture.
- High-Quality Vanilla Extract: 2 teaspoons. This is the star of the show! Use a good quality pure vanilla extract for the best flavour. Vanilla bean paste (1 teaspoon) can also be used for an even more intense vanilla speckle and aroma.
- Coconut Oil: 1 tablespoon (melted, optional). This helps bind the mixture and adds a subtle richness. If your dates are very moist, you might not need it.
- Pinch of Sea Salt: 1/4 teaspoon. Salt enhances all the other flavours, especially the sweetness of the dates and the aroma of vanilla.
- Water or Milk (optional): 1-2 tablespoons, only if the mixture is too dry and crumbly to come together. Use water, almond milk, or any milk of your choice.
Crafting Your Vanilla Bliss: Step-by-Step Instructions
Making these Vanilla Bliss Balls is incredibly straightforward. The main piece of equipment you’ll need is a food processor.
- Prepare the Dates: Ensure your Medjool dates are pitted. If they feel a bit hard or dry, place them in a bowl and cover them with hot water for about 10-15 minutes. Drain them thoroughly and pat them dry before using. This step makes them much easier to blend into a smooth paste.
- Process the Nuts and Oats: Add the rolled oats and cashews (or your nut of choice) to the bowl of your food processor. Pulse several times until the nuts are finely chopped and the oats are slightly broken down. You’re looking for a coarse meal-like consistency, not a fine flour. This provides texture to the bliss balls.
- Add Remaining Ingredients: To the food processor, add the soaked and drained Medjool dates, 1/2 cup of desiccated coconut, vanilla extract, melted coconut oil (if using), and the pinch of sea salt.
- Blend Until Combined: Process the mixture continuously until it starts to come together into a sticky dough. This might take a minute or two. You may need to stop and scrape down the sides of the food processor bowl a couple of times to ensure everything is well incorporated. The mixture should be sticky enough to hold its shape when pressed together.
- Troubleshooting Texture: If the mixture seems too dry and crumbly, add a teaspoon of water or milk at a time, pulsing in between, until it reaches the desired consistency. Be careful not to add too much liquid, or it will become too sticky to roll. If it’s too wet, you can add a little more oats or desiccated coconut.
- Roll into Balls: Take about 1 tablespoon of the mixture at a time and roll it between your palms to form a smooth ball, about 1-inch in diameter. If the mixture is very sticky, slightly dampen your hands with water to prevent sticking.
- Coat (Optional): If you like, place the extra 1/4 cup of desiccated coconut on a small plate or shallow bowl. Roll each bliss ball in the coconut to coat it evenly. This adds a nice visual appeal and extra coconut flavour.
- Chill to Set: Place the finished Vanilla Bliss Balls on a plate or baking sheet lined with parchment paper. Transfer them to the refrigerator for at least 30 minutes to firm up. This step is important as it helps them hold their shape and enhances their texture.
- Store: Once firm, store your Vanilla Bliss Balls in an airtight container in the refrigerator.
Nutritional Snapshot: What’s Inside?
While the exact nutritional values can vary based on the specific ingredients used (e.g., type of nuts, size of dates) and the size of the bliss balls, here’s an approximate breakdown:
- Servings: This recipe makes approximately 15-18 bliss balls.
- Calories per serving (1 bliss ball): Approximately 90-120 calories.
These bliss balls are a good source of:
- Natural Sugars: Primarily from the dates, providing quick energy.
- Healthy Fats: From the nuts and coconut oil, contributing to satiety.
- Fibre: From the oats, dates, and nuts, aiding digestion.
- Minor amounts of Protein: From the nuts and oats.
Disclaimer: The nutritional information provided is an estimate and should not be considered a substitute for a professional nutritionist’s advice.
Quick & Easy: Preparation Time
One of the best things about Vanilla Bliss Balls is how quickly they come together!
- Preparation Time: 15-20 minutes (this includes pitting dates and measuring ingredients).
- Chilling Time: At least 30 minutes (though they are often sneak-eaten before then!).
- Total Time (excluding extensive chilling): Approximately 35-50 minutes.
This makes them an ideal recipe for when you need a healthy snack in a hurry or want to involve kids in the kitchen without a lengthy or complicated process.
Serving Your Vanilla Bliss Balls: Ideas & Inspiration
These versatile Vanilla Bliss Balls can be enjoyed in numerous ways, fitting seamlessly into various parts of your day. Here are some ideas:
- As a Quick Breakfast Boost:
- Grab one or two with your morning coffee or tea for a light, energizing start.
- Crumble one over your yoghurt or oatmeal for added texture and sweetness.
- Pre or Post-Workout Fuel:
- Their natural sugars from dates provide quick energy before exercise.
- The combination of carbs and healthy fats helps with recovery after a workout.
- Healthy Lunchbox Treat:
- A perfect addition to kids’ or adults’ lunchboxes for a nutritious sweet treat.
- They are relatively stable at room temperature for a few hours.
- Afternoon Pick-Me-Up:
- Beat the 3 PM slump with a bliss ball instead of reaching for a sugary candy bar.
- Pair with a piece of fruit for a more substantial snack.
- Guilt-Free Dessert:
- Enjoy one or two after dinner to satisfy your sweet tooth in a healthier way.
- Serve alongside fresh berries or a dollop of coconut cream for a more elegant dessert.
- On-the-Go Snacking:
- Pack them for road trips, hikes, or busy days running errands.
- They are portable and don’t require refrigeration for short periods.
- Party Platter Addition:
- Arrange them on a platter with other healthy treats like fruit skewers or dark chocolate squares for gatherings.
- Their bite-sized nature makes them perfect for sharing.
- With a Hot Beverage:
- The warm vanilla notes pair exceptionally well with coffee, chai tea, or even a simple herbal infusion. The slight melt-in-your-mouth quality when enjoyed with a warm drink is divine.
Elevate Your Bliss: Additional Tips for Perfection
While this recipe is simple, a few extra tips can help you achieve Vanilla Bliss Ball perfection every time and even customize them to your liking:
- Date Quality Matters: Use soft, plump Medjool dates for the best flavour and texture. If your dates are dry, don’t skip the soaking step – it’s crucial for a smooth, cohesive mixture. Deglet Noor dates can be used, but you might need more of them as they are smaller and less moist, and soaking will almost certainly be required.
- Experiment with Nut Butters: For an even creamier texture and added flavour, consider adding a tablespoon of cashew butter, almond butter, or even tahini (for a nut-free, sesame twist) to the mixture. This can also help bind the ingredients if your mixture is a bit dry.
- Spice it Up or Add Zest: While vanilla is the star, don’t be afraid to add complementary spices. A pinch of cinnamon, nutmeg, or cardamom can add warmth. A little bit of lemon or orange zest can provide a lovely fresh counterpoint to the sweetness. Start with 1/4 teaspoon of spice or 1/2 teaspoon of zest and adjust to taste.
- Boost with Superfoods: Enhance the nutritional profile by adding a tablespoon of chia seeds, flaxseed meal, hemp seeds, or even a scoop of your favourite unflavoured or vanilla protein powder. If adding dry ingredients like protein powder, you might need an extra touch of liquid (water or melted coconut oil) to maintain the right consistency.
- Get Creative with Coatings & Add-ins:
- Coatings: Beyond desiccated coconut, try rolling your bliss balls in finely chopped nuts (pistachios for colour!), hemp seeds, cocoa powder (for a vanilla-chocolate vibe), or even freeze-dried raspberry powder for a tangy, colourful finish.
- Add-ins: Fold in mini dark chocolate chips, cacao nibs, finely chopped dried cranberries, or goji berries into the mixture after processing for extra texture and flavour bursts. Do this by hand or with a few short pulses so they remain chunky.
Your Vanilla Bliss Ball Questions Answered: FAQ
Here are some common questions you might have about making and enjoying these Vanilla Bliss Balls:
- Q: Can I make these Vanilla Bliss Balls nut-free?
- A: Absolutely! To make them nut-free, substitute the cashews (or other nuts) with an equal amount of sunflower seeds, pepitas (pumpkin seeds), or a combination of both. You could also use more rolled oats. If using seeds, you might find that adding a tablespoon of tahini (sesame seed paste) or sunflower seed butter helps with binding and creaminess. Always ensure all your ingredients, especially oats, are certified nut-free if catering to severe allergies.
- Q: How long do Vanilla Bliss Balls last, and how should I store them?
- A: Stored in an airtight container in the refrigerator, Vanilla Bliss Balls will stay fresh for up to one week. Their flavour and texture are often best within the first 3-4 days. They firm up nicely in the fridge, which many people prefer.
- Q: Can I freeze Vanilla Bliss Balls?
- A: Yes, they freeze wonderfully! Place them in a single layer on a baking sheet to freeze individually for about an hour, then transfer them to a freezer-safe bag or container. They can be frozen for up to 3 months. Thaw them in the refrigerator or at room temperature for about 15-20 minutes before enjoying. This is a great way to have a healthy snack ready at a moment’s notice.
- Q: My mixture is too sticky or too dry. What can I do?
- A: This is a common and easily fixable issue.
- Too Dry/Crumbly: The most common reason is dry dates or not enough binding liquid. Add a teaspoon of water, melted coconut oil, or nut butter at a time, pulsing in the food processor until the mixture just comes together.
- Too Sticky/Wet: This usually means your dates were very moist, or you added a bit too much liquid. Add a tablespoon more of rolled oats, desiccated coconut, or almond flour/meal to the food processor and pulse until the mixture is easier to handle. Chilling the mixture for 15-20 minutes before rolling can also help significantly if it’s too sticky.
- A: This is a common and easily fixable issue.
- Q: Can I use a different sweetener instead of dates?
- A: Medjool dates are integral to this specific recipe as they provide not only sweetness but also the primary binding and chewy texture characteristic of bliss balls. Replacing them entirely would fundamentally change the recipe. If you want to reduce the date content slightly, you could try using fewer dates and adding a touch of liquid sweetener like maple syrup or agave nectar, but you’d also need to add more dry ingredients (like oats or almond flour) to compensate for the lost bulk and binding power of the dates. For the best classic bliss ball texture and natural sweetness, dates are highly recommended.

Homemade Vanilla Bliss Balls Recipe
Ingredients
- Medjool Dates: 1 cup (pitted, about 10-12 large dates). These are the natural sweetener and binder of our bliss balls. Their soft, caramel-like texture is crucial. If your dates are a bit dry, soak them in hot water for 10 minutes, then drain well.
- Rolled Oats: 1 cup. Use traditional rolled oats for the best texture. For a gluten-free version, ensure you use certified gluten-free rolled oats. Oats provide fibre and a lovely chewiness.
- Raw Cashews: 1/2 cup (or almonds, walnuts, or pecans). Cashews lend a creamy, mild flavour that complements vanilla beautifully. Almonds will give a slightly more robust flavour and texture.
- Desiccated Coconut: 1/2 cup, plus an extra 1/4 cup for rolling (optional). Unsweetened desiccated coconut adds a lovely tropical note and texture.
- High-Quality Vanilla Extract: 2 teaspoons. This is the star of the show! Use a good quality pure vanilla extract for the best flavour. Vanilla bean paste (1 teaspoon) can also be used for an even more intense vanilla speckle and aroma.
- Coconut Oil: 1 tablespoon (melted, optional). This helps bind the mixture and adds a subtle richness. If your dates are very moist, you might not need it.
- Pinch of Sea Salt: 1/4 teaspoon. Salt enhances all the other flavours, especially the sweetness of the dates and the aroma of vanilla.
- Water or Milk (optional): 1-2 tablespoons, only if the mixture is too dry and crumbly to come together. Use water, almond milk, or any milk of your choice.
Instructions
- Prepare the Dates: Ensure your Medjool dates are pitted. If they feel a bit hard or dry, place them in a bowl and cover them with hot water for about 10-15 minutes. Drain them thoroughly and pat them dry before using. This step makes them much easier to blend into a smooth paste.
- Process the Nuts and Oats: Add the rolled oats and cashews (or your nut of choice) to the bowl of your food processor. Pulse several times until the nuts are finely chopped and the oats are slightly broken down. You’re looking for a coarse meal-like consistency, not a fine flour. This provides texture to the bliss balls.
- Add Remaining Ingredients: To the food processor, add the soaked and drained Medjool dates, 1/2 cup of desiccated coconut, vanilla extract, melted coconut oil (if using), and the pinch of sea salt.
- Blend Until Combined: Process the mixture continuously until it starts to come together into a sticky dough. This might take a minute or two. You may need to stop and scrape down the sides of the food processor bowl a couple of times to ensure everything is well incorporated. The mixture should be sticky enough to hold its shape when pressed together.
- Troubleshooting Texture: If the mixture seems too dry and crumbly, add a teaspoon of water or milk at a time, pulsing in between, until it reaches the desired consistency. Be careful not to add too much liquid, or it will become too sticky to roll. If it’s too wet, you can add a little more oats or desiccated coconut.
- Roll into Balls: Take about 1 tablespoon of the mixture at a time and roll it between your palms to form a smooth ball, about 1-inch in diameter. If the mixture is very sticky, slightly dampen your hands with water to prevent sticking.
- Coat (Optional): If you like, place the extra 1/4 cup of desiccated coconut on a small plate or shallow bowl. Roll each bliss ball in the coconut to coat it evenly. This adds a nice visual appeal and extra coconut flavour.
- Chill to Set: Place the finished Vanilla Bliss Balls on a plate or baking sheet lined with parchment paper. Transfer them to the refrigerator for at least 30 minutes to firm up. This step is important as it helps them hold their shape and enhances their texture.
- Store: Once firm, store your Vanilla Bliss Balls in an airtight container in the refrigerator.
Nutrition
- Serving Size: One Normal Portion
- Calories: 90-120