

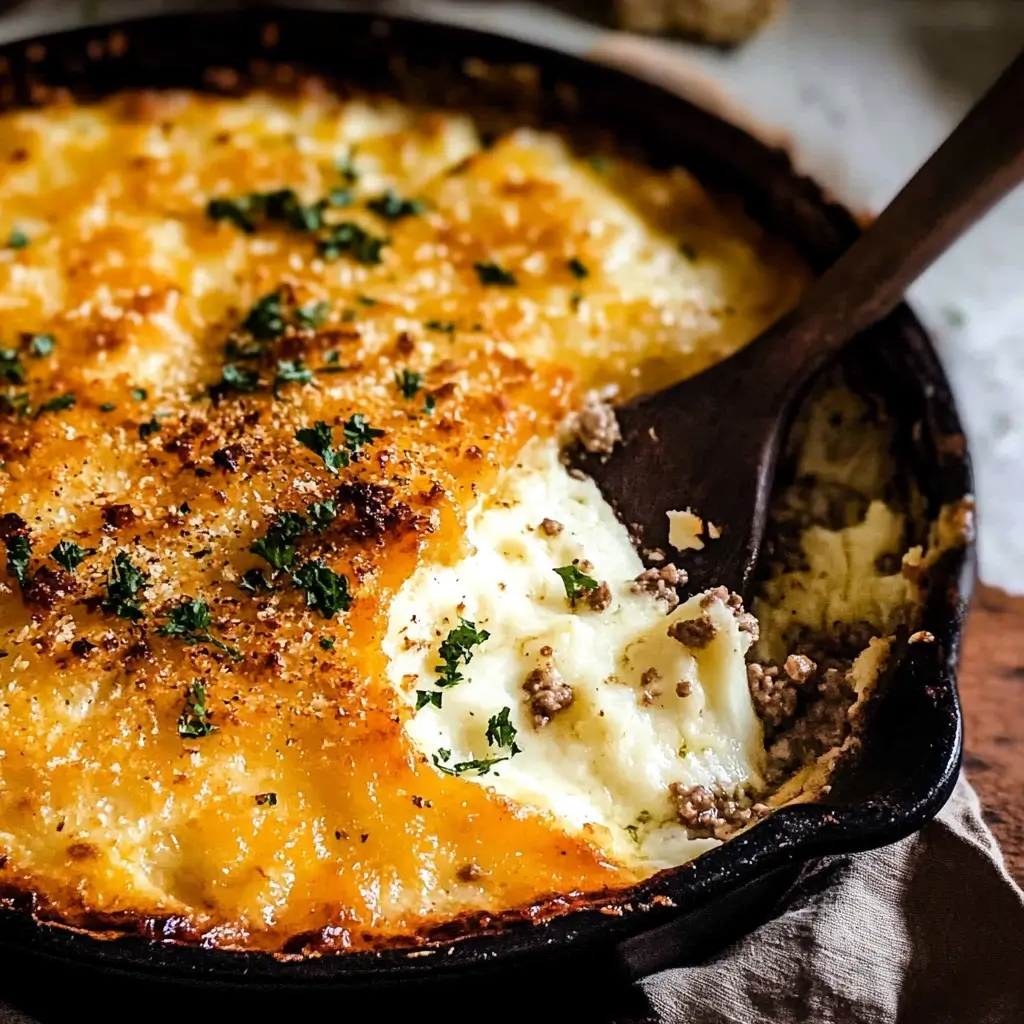

The first time I decided to tackle a Keto Shepherd’s Pie, I’ll admit, I was skeptical. Shepherd’s Pie is a classic comfort food in our household, a go-to on chilly evenings, and the thought of replacing that fluffy, carby potato topping with cauliflower? Well, let’s just say my family raised a collective eyebrow. Potatoes are, after all, the heart of a traditional shepherd’s pie topping. But, committed to our lower-carb lifestyle, I forged ahead. The aroma that filled the kitchen as the rich meat filling simmered and the cheesy cauliflower topping browned was the first sign that this might actually work. When I finally pulled it from the oven, golden and bubbling, even the staunchest potato-lover in our family was intrigued. The verdict? An absolute triumph! The savory, deeply flavored meat base, packed with vegetables and a rich gravy, was perfectly complemented by the creamy, cheesy, and surprisingly satisfying cauliflower mash. It wasn’t just a “good keto substitute”; it was genuinely delicious in its own right. It’s since become a staple, proving that comfort food can indeed be healthy, low-carb, and utterly irresistible. This Keto Shepherd’s Pie recipe is a testament to how a few smart swaps can transform a classic into a guilt-free indulgence that the whole family adores.
Ingredients for Your Keto Shepherd’s Pie
This recipe balances rich flavors with keto-friendly ingredients to create a truly satisfying meal.
For the Rich Meat Filling:
- Ground Meat: 2 lbs (900g) ground lamb (traditional) or ground beef (80/20 or 85/15 recommended for flavor and fat)
- Fat for Sautéing: 2 tablespoons olive oil or avocado oil (or bacon grease for extra flavor)
- Aromatics:
- 1 medium yellow onion, finely chopped
- 2-3 cloves garlic, minced
- 2 celery stalks, finely chopped
- 1 medium carrot, finely chopped (use sparingly, or omit for stricter keto, adds about 7g net carbs per medium carrot)
- Flavor Enhancers:
- 2 tablespoons tomato paste
- 1 tablespoon Worcestershire sauce (check for low-sugar/keto-friendly versions, or use coconut aminos as a substitute)
- 1 teaspoon dried rosemary
- 1 teaspoon dried thyme
- 1/2 teaspoon salt (or to taste)
- 1/4 teaspoon black pepper (or to taste)
- Liquid & Thickener:
- 1 cup beef broth or bone broth
- 1/2 cup dry red wine (optional, adds depth; ensure it’s a dry variety like Merlot or Cabernet Sauvignon, or replace with more broth)
- 1 teaspoon xanthan gum (optional, for a thicker gravy – sprinkle over filling and stir well before simmering)
- Vegetables (Low-Carb):
- 1 cup frozen peas (optional, adds about 14g net carbs per cup; omit for stricter keto or use green beans, chopped)
- 1/2 cup chopped mushrooms (cremini or button)
For the Creamy Cauliflower Topping:
- Cauliflower: 2 large heads (about 2.5 – 3 lbs or 1.2 – 1.4 kg), cut into florets
- Fats & Creaminess:
- 4 tablespoons (1/2 stick or 56g) unsalted butter, cut into pieces
- 4 oz (113g) cream cheese, softened and cut into pieces
- 1/4 cup heavy cream
- 1/2 cup grated Parmesan cheese
- Flavor & Cheese:
- 1 cup shredded sharp cheddar cheese (or a blend like Colby Jack), divided
- 1/2 teaspoon garlic powder
- Salt and freshly ground black pepper to taste
- Pinch of nutmeg (optional, enhances creamy flavors)
Instructions: Crafting Your Keto Shepherd’s Pie
Follow these steps methodically for a perfectly assembled and delicious Keto Shepherd’s Pie.
Part 1: Prepare the Cauliflower Topping
- Cook the Cauliflower: Place the cauliflower florets in a large pot. Add about an inch of water, cover, and bring to a boil. Reduce heat to medium and steam for 10-15 minutes, or until the cauliflower is very tender and easily pierced with a fork. Alternatively, you can steam it in a microwave-safe bowl with a little water, covered, for 8-12 minutes.
- Drain Thoroughly: Once tender, drain the cauliflower very well. This is crucial to avoid a watery topping. You can even pat the florets dry with paper towels or return them to the hot pot for a minute over low heat to evaporate excess moisture.
- Mash the Cauliflower: Transfer the drained cauliflower to a large bowl or back into the dry pot. Add the butter, softened cream cheese, heavy cream, Parmesan cheese, garlic powder, salt, pepper, and optional nutmeg.
- Blend to Smoothness: Use an immersion blender to blend the cauliflower mixture until smooth and creamy. You can also use a food processor (work in batches if necessary) or a traditional potato masher, though an immersion blender or food processor yields the smoothest results. Avoid over-processing, which can make it gummy.
- Incorporate Cheese: Stir in 1/2 cup of the shredded cheddar cheese into the warm cauliflower mash. Taste and adjust seasonings if needed. Set aside.
Part 2: Cook the Meat Filling
- Sauté Aromatics: Heat the olive oil (or chosen fat) in a large, deep skillet or Dutch oven over medium-high heat. Add the chopped onion, celery, and carrot (if using). Sauté for 5-7 minutes, until softened and the onion is translucent.
- Add Garlic: Stir in the minced garlic and cook for another minute until fragrant, being careful not to burn it.
- Brown the Meat: Add the ground lamb or beef to the skillet. Break it up with a spoon and cook, stirring occasionally, until browned all over (about 8-10 minutes). Drain off any excess fat if there’s a lot.
- Build Flavor: Stir in the tomato paste and cook for 2-3 minutes, allowing it to caramelize slightly. This deepens the flavor. Add the Worcestershire sauce (or coconut aminos), dried rosemary, and dried thyme. Stir well to combine.
- Deglaze & Simmer (if using wine): If using red wine, pour it into the skillet and scrape up any browned bits from the bottom of the pan. Let it simmer for 2-3 minutes, allowing the alcohol to cook off and the liquid to reduce slightly.
- Add Broth & Thicken: Pour in the beef broth. If using xanthan gum for a thicker gravy, sprinkle it evenly over the meat mixture now and stir vigorously to incorporate without lumps. Bring the mixture to a gentle simmer.
- Simmer to Perfection: Reduce the heat to low, cover, and let the meat filling simmer for at least 15-20 minutes (or up to 30 minutes for even deeper flavor), allowing the flavors to meld and the sauce to thicken. If it becomes too thick, add a splash more broth.
- Stir in Vegetables: If using frozen peas or chopped mushrooms, stir them into the meat filling during the last 5-10 minutes of simmering, until heated through.
- Taste and Adjust: Season the meat filling with salt and black pepper to your taste. Remember, the cauliflower topping will also be seasoned, so aim for a well-balanced flavor.
Part 3: Assemble and Bake Your Keto Shepherd’s Pie
- Preheat Oven: Preheat your oven to 375°F (190°C).
- Layer the Filling: Pour the prepared meat filling into a 9×13 inch baking dish or a similar-sized oven-safe casserole dish. Spread it out into an even layer.
- Top with Cauliflower Mash: Carefully spoon the prepared cauliflower mash over the meat filling. Spread it gently to cover the meat completely, sealing the edges if possible to prevent the filling from bubbling over too much. You can create a rustic, swirled pattern with the back of a spoon or use a fork to create ridges, which will crisp up nicely.
- Add Remaining Cheese: Sprinkle the remaining 1/2 cup of shredded cheddar cheese evenly over the cauliflower topping.
- Bake to Golden Perfection: Place the baking dish in the preheated oven. Bake for 25-30 minutes, or until the topping is golden brown and the filling is bubbly around the edges. If the topping starts to brown too quickly, you can loosely tent it with aluminum foil.
- Rest Before Serving: Once baked, remove the Keto Shepherd’s Pie from the oven and let it rest for 10-15 minutes before serving. This allows the filling to set slightly and makes it easier to serve. It will also be very hot!
Nutrition Facts
- Servings: This recipe yields approximately 6-8 generous servings.
- Calories per Serving (Approximate): Depending on the exact ingredients used (especially the fat content of the meat and amount of cheese), each serving will be approximately 450-600 calories.
- Disclaimer: This is an estimate. For precise nutritional information, it’s best to use an online calculator with your specific brand ingredients and quantities.
- Net carbs will also vary but should be significantly lower than traditional Shepherd’s Pie, likely in the range of 10-15g net carbs per serving, depending on vegetable choices (like carrots and peas).
Preparation Time
- Prep Time: 30-40 minutes (chopping vegetables, preparing cauliflower)
- Cook Time: 50-60 minutes (simmering filling, baking pie)
- Total Time: Approximately 1 hour 20 minutes to 1 hour 40 minutes (plus resting time)
How to Serve Your Delicious Keto Shepherd’s Pie
This Keto Shepherd’s Pie is a hearty meal on its own, but here are some serving suggestions to complete your low-carb feast:
- Simply As Is: Serve a generous scoop directly onto plates. The rich flavors are often enough!
- With a Fresh Green Salad:
- A simple side salad with mixed greens, cucumber, and a light vinaigrette (olive oil, apple cider vinegar, Dijon mustard) provides a refreshing contrast to the richness of the pie.
- Steamed Low-Carb Vegetables:
- Serve alongside steamed green beans, asparagus, or broccoli tossed with a little butter and salt.
- Garnish with Fresh Herbs:
- A sprinkle of fresh parsley or chives over the top just before serving adds a touch of color and freshness.
- A Dollop of Sour Cream (Optional):
- For an extra touch of creaminess, a small dollop of full-fat sour cream on the side can be a nice addition for those who enjoy it.
- Keto Bread or Rolls:
- If you have a favorite keto bread or roll recipe, a slice on the side can be perfect for mopping up any delicious leftover gravy from the plate.
Additional Tips for the Perfect Keto Shepherd’s Pie
- Don’t Skimp on Draining Cauliflower: This is the most critical step for a non-watery topping. Squeeze out excess moisture if you can, or let it sit in a colander for a good 10-15 minutes after steaming. Some even roast their cauliflower florets before mashing for a nuttier flavor and less moisture.
- Vary Your Ground Meat: While lamb is traditional for “Shepherd’s Pie” (and beef for “Cottage Pie”), feel free to use ground turkey, chicken, or even a plant-based ground alternative for a different take. Ensure you add enough fat if using leaner meats.
- Boost Umami Flavors: To enhance the savory depth of the meat filling, consider adding a teaspoon of miso paste (dissolved in a little warm broth), a dash of fish sauce (it won’t taste fishy in small amounts), or finely chopped mushrooms sautéed with the aromatics.
- Make-Ahead Magic: You can prepare the meat filling and the cauliflower topping separately a day in advance. Store them covered in the refrigerator. When ready to bake, assemble the pie and you might need to add 10-15 minutes to the baking time if assembling cold.
- Cheese Variations for Topping: Experiment with different cheeses in and on your cauliflower mash. Smoked gouda, Gruyère, or a spicy pepper jack can add exciting new flavor dimensions. For an extra crispy top, broil for the last 1-2 minutes, watching carefully to prevent burning.
Frequently Asked Questions (FAQ) about Keto Shepherd’s Pie
Q1: Can I make this Keto Shepherd’s Pie dairy-free?
A: Yes, with some adjustments. For the cauliflower topping, you can use dairy-free butter (like Miyoko’s Kitchen brand), a dairy-free cream cheese alternative (like Kite Hill), and unsweetened almond milk or coconut cream instead of heavy cream. Omit the Parmesan and cheddar, or use your favorite dairy-free cheese shreds. The flavor profile will change, but it can still be delicious.
Q2: Is this recipe freezer-friendly?
A: Absolutely! You can freeze the fully assembled and baked (and cooled) Shepherd’s Pie, or freeze it unbaked. Wrap it tightly in plastic wrap and then foil, or store in a freezer-safe container for up to 3 months. To reheat, thaw in the refrigerator overnight, then bake at 350°F (175°C) until heated through (30-45 minutes if thawed, longer if from frozen). The cauliflower topping might be slightly more watery after freezing and thawing, but it’s generally still very good.
Q3: What other low-carb vegetables can I add to the meat filling?
A: Great question! Feel free to incorporate other keto-friendly vegetables like chopped bell peppers (any color), zucchini, green beans, or even finely chopped broccoli stems. Sauté them along with the onions and celery. This is a fantastic way to add more nutrients and vary the texture.
Q4: Why is my cauliflower topping watery?
A: The most common culprit is not draining the steamed cauliflower thoroughly enough. Cauliflower holds a lot of water. Ensure you let it drain well, pat it dry, or even briefly return it to the hot, empty pot to steam off excess moisture before mashing. Also, avoid adding too much liquid (like heavy cream) to the mash.
Q5: Can I use pre-riced cauliflower for the topping?
A: Yes, you can use pre-riced cauliflower, either fresh or frozen. If using frozen, cook it according to package directions and then ensure it’s extremely well-drained (squeezing out excess water in a cheesecloth or nut milk bag is highly recommended for frozen riced cauliflower). You might need slightly less added liquid in the mash as riced cauliflower can sometimes retain more moisture. The texture might be slightly different but still effective.

Keto Shepherd’s Pie Recipe
Ingredients
For the Rich Meat Filling:
- Ground Meat: 2 lbs (900g) ground lamb (traditional) or ground beef (80/20 or 85/15 recommended for flavor and fat)
- Fat for Sautéing: 2 tablespoons olive oil or avocado oil (or bacon grease for extra flavor)
- Aromatics:
- 1 medium yellow onion, finely chopped
- 2–3 cloves garlic, minced
- 2 celery stalks, finely chopped
- 1 medium carrot, finely chopped (use sparingly, or omit for stricter keto, adds about 7g net carbs per medium carrot)
- Flavor Enhancers:
- 2 tablespoons tomato paste
- 1 tablespoon Worcestershire sauce (check for low-sugar/keto-friendly versions, or use coconut aminos as a substitute)
- 1 teaspoon dried rosemary
- 1 teaspoon dried thyme
- 1/2 teaspoon salt (or to taste)
- 1/4 teaspoon black pepper (or to taste)
- Liquid & Thickener:
- 1 cup beef broth or bone broth
- 1/2 cup dry red wine (optional, adds depth; ensure it’s a dry variety like Merlot or Cabernet Sauvignon, or replace with more broth)
- 1 teaspoon xanthan gum (optional, for a thicker gravy – sprinkle over filling and stir well before simmering)
- Vegetables (Low-Carb):
- 1 cup frozen peas (optional, adds about 14g net carbs per cup; omit for stricter keto or use green beans, chopped)
- 1/2 cup chopped mushrooms (cremini or button)
For the Creamy Cauliflower Topping:
- Cauliflower: 2 large heads (about 2.5 – 3 lbs or 1.2 – 1.4 kg), cut into florets
- Fats & Creaminess:
- 4 tablespoons (1/2 stick or 56g) unsalted butter, cut into pieces
- 4 oz (113g) cream cheese, softened and cut into pieces
- 1/4 cup heavy cream
- 1/2 cup grated Parmesan cheese
- Flavor & Cheese:
- 1 cup shredded sharp cheddar cheese (or a blend like Colby Jack), divided
- 1/2 teaspoon garlic powder
- Salt and freshly ground black pepper to taste
- Pinch of nutmeg (optional, enhances creamy flavors)
Instructions
Part 1: Prepare the Cauliflower Topping
- Cook the Cauliflower: Place the cauliflower florets in a large pot. Add about an inch of water, cover, and bring to a boil. Reduce heat to medium and steam for 10-15 minutes, or until the cauliflower is very tender and easily pierced with a fork. Alternatively, you can steam it in a microwave-safe bowl with a little water, covered, for 8-12 minutes.
- Drain Thoroughly: Once tender, drain the cauliflower very well. This is crucial to avoid a watery topping. You can even pat the florets dry with paper towels or return them to the hot pot for a minute over low heat to evaporate excess moisture.
- Mash the Cauliflower: Transfer the drained cauliflower to a large bowl or back into the dry pot. Add the butter, softened cream cheese, heavy cream, Parmesan cheese, garlic powder, salt, pepper, and optional nutmeg.
- Blend to Smoothness: Use an immersion blender to blend the cauliflower mixture until smooth and creamy. You can also use a food processor (work in batches if necessary) or a traditional potato masher, though an immersion blender or food processor yields the smoothest results. Avoid over-processing, which can make it gummy.
- Incorporate Cheese: Stir in 1/2 cup of the shredded cheddar cheese into the warm cauliflower mash. Taste and adjust seasonings if needed. Set aside.
Part 2: Cook the Meat Filling
- Sauté Aromatics: Heat the olive oil (or chosen fat) in a large, deep skillet or Dutch oven over medium-high heat. Add the chopped onion, celery, and carrot (if using). Sauté for 5-7 minutes, until softened and the onion is translucent.
- Add Garlic: Stir in the minced garlic and cook for another minute until fragrant, being careful not to burn it.
- Brown the Meat: Add the ground lamb or beef to the skillet. Break it up with a spoon and cook, stirring occasionally, until browned all over (about 8-10 minutes). Drain off any excess fat if there’s a lot.
- Build Flavor: Stir in the tomato paste and cook for 2-3 minutes, allowing it to caramelize slightly. This deepens the flavor. Add the Worcestershire sauce (or coconut aminos), dried rosemary, and dried thyme. Stir well to combine.
- Deglaze & Simmer (if using wine): If using red wine, pour it into the skillet and scrape up any browned bits from the bottom of the pan. Let it simmer for 2-3 minutes, allowing the alcohol to cook off and the liquid to reduce slightly.
- Add Broth & Thicken: Pour in the beef broth. If using xanthan gum for a thicker gravy, sprinkle it evenly over the meat mixture now and stir vigorously to incorporate without lumps. Bring the mixture to a gentle simmer.
- Simmer to Perfection: Reduce the heat to low, cover, and let the meat filling simmer for at least 15-20 minutes (or up to 30 minutes for even deeper flavor), allowing the flavors to meld and the sauce to thicken. If it becomes too thick, add a splash more broth.
- Stir in Vegetables: If using frozen peas or chopped mushrooms, stir them into the meat filling during the last 5-10 minutes of simmering, until heated through.
- Taste and Adjust: Season the meat filling with salt and black pepper to your taste. Remember, the cauliflower topping will also be seasoned, so aim for a well-balanced flavor.
Part 3: Assemble and Bake Your Keto Shepherd’s Pie
- Preheat Oven: Preheat your oven to 375°F (190°C).
- Layer the Filling: Pour the prepared meat filling into a 9×13 inch baking dish or a similar-sized oven-safe casserole dish. Spread it out into an even layer.
- Top with Cauliflower Mash: Carefully spoon the prepared cauliflower mash over the meat filling. Spread it gently to cover the meat completely, sealing the edges if possible to prevent the filling from bubbling over too much. You can create a rustic, swirled pattern with the back of a spoon or use a fork to create ridges, which will crisp up nicely.
- Add Remaining Cheese: Sprinkle the remaining 1/2 cup of shredded cheddar cheese evenly over the cauliflower topping.
- Bake to Golden Perfection: Place the baking dish in the preheated oven. Bake for 25-30 minutes, or until the topping is golden brown and the filling is bubbly around the edges. If the topping starts to brown too quickly, you can loosely tent it with aluminum foil.
- Rest Before Serving: Once baked, remove the Keto Shepherd’s Pie from the oven and let it rest for 10-15 minutes before serving. This allows the filling to set slightly and makes it easier to serve. It will also be very hot!
Nutrition
- Serving Size: One Normal Portion
- Calories: 450-600


