The first time I encountered Mango Sago with Coconut Jelly, it was on a sweltering summer afternoon at a family gathering. My aunt, renowned for her culinary prowess, presented this vibrant, sunshine-yellow dessert in chilled glasses. Skeptical at first – I wasn’t a huge sago fan back then – I took a tentative spoonful. Oh, what a revelation! The explosion of sweet, tangy mango, the creamy coconut-infused liquid, the delightful chewiness of the sago pearls, and the surprisingly refreshing bite of coconut jelly – it was a symphony of textures and tropical flavors. It wasn’t just a dessert; it was an experience. The children adored it, their faces lighting up with each spoonful, and even the usually dessert-averse uncles went back for seconds. Since that day, Mango Sago with Coconut Jelly has become a staple in our home, especially during mango season. It’s my go-to recipe for potlucks, celebrations, or simply when we crave a taste of tropical paradise. It’s surprisingly easy to make, yet it looks and tastes incredibly impressive, always eliciting oohs and aahs from anyone who tries it. This recipe is my perfected version, balancing the sweetness, creaminess, and fruity punch to create what I believe is the ultimate Mango Sago experience.
What Makes This Mango Sago with Coconut Jelly Irresistible?
Mango Sago with Coconut Jelly isn’t just a dessert; it’s a celebration of tropical abundance, a delightful concoction that dances on your palate with a variety of textures and a wave of refreshing flavors. Its charm lies in the harmonious blend of its core components, each playing a vital role in creating an unforgettable culinary experience.
At its heart is the luscious mango, the undisputed king of tropical fruits. We use ripe, sweet mangoes, transformed into a velvety smooth puree that forms the rich, fruity base of the dessert. More diced mangoes are folded in, offering bursts of pure, unadulterated mango goodness with every spoonful. The natural sweetness and slight tanginess of the mango provide a vibrant, sun-kissed flavor profile that is both invigorating and deeply satisfying.
Then come the sago pearls, tiny orbs of tapioca starch that, when cooked correctly, transform into translucent, chewy jewels. They don’t have much flavor on their own, which makes them perfect for absorbing the creamy, mango-infused liquid. Their unique, slightly bouncy texture adds a playful and satisfying mouthfeel, contrasting beautifully with the smoothness of the mango puree and the creaminess of the base. Cooking them to perfection is key – they should be tender yet retain a pleasant chewiness, never mushy or hard.
The creamy coconut concoction is what binds everything together. A luxurious blend of full-fat coconut milk and sweetened condensed milk (often with a touch of evaporated milk for extra depth) creates a rich, decadent, yet surprisingly light base. The coconut milk lends its characteristic tropical fragrance and subtle sweetness, complementing the mango perfectly. The condensed milk provides the primary sweetness and an unparalleled creamy texture that coats the sago pearls and mango pieces, making each bite incredibly indulgent.
And finally, the coconut jelly (Nata de Coco). These translucent, chewy cubes are made from fermented coconut water and offer a delightful textural counterpoint. They have a subtle coconut flavor and a unique, slightly firm yet yielding bite that adds another layer of interest to the dessert. They absorb the surrounding flavors beautifully while retaining their distinct chewiness, making them little pockets of refreshment within the creamy dessert.
Together, these elements create a dessert that is:
- Refreshingly Cool: Perfect for hot days, served chilled, it’s like a tropical breeze in a bowl.
- Texturally Diverse: From the creamy puree and chewy sago to the soft mango chunks and jiggly coconut jelly, every spoonful is an adventure.
- Flavorfully Balanced: The sweetness of mango and condensed milk is perfectly balanced by the slight tang of the fruit and the richness of coconut milk.
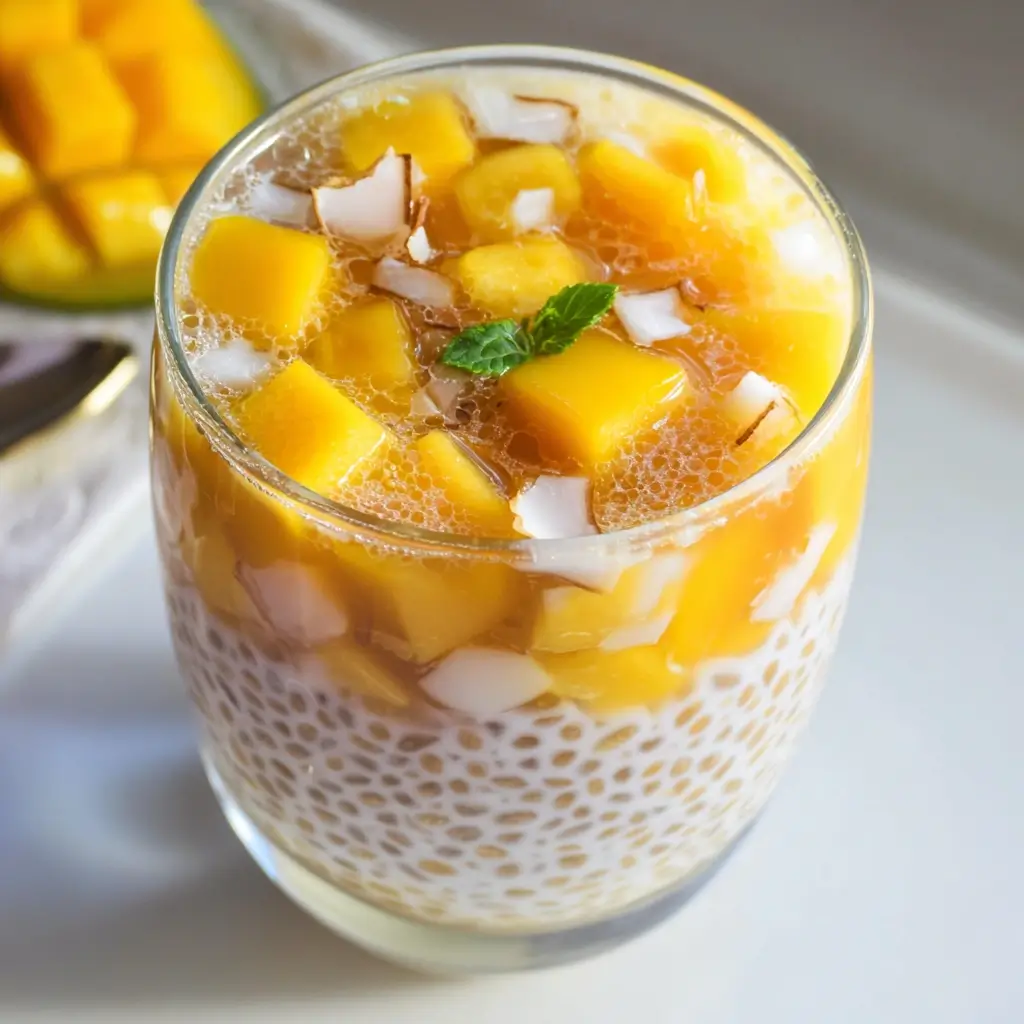
- Visually Appealing: The vibrant yellow of the mango, dotted with translucent sago pearls and white coconut jelly, makes it a feast for the eyes.
- Crowd-Pleasing: It’s a hit with both adults and children, making it ideal for gatherings and celebrations.
This Mango Sago with Coconut Jelly is more than just the sum of its parts; it’s a delightful escape to a tropical paradise, a testament to how simple ingredients can create something truly magical.
Ingredients for Mango Sago with Coconut Jelly
This recipe aims for a perfect balance of mango sweetness, creamy texture, and delightful chewiness. Using ripe, high-quality ingredients will elevate your dessert.
- For the Sago Pearls:
- 1 cup small sago pearls (tapioca pearls)
- 6-8 cups water (for boiling)
- Cold water (for rinsing)
- For the Mango Puree & Base:
- 4-5 large ripe mangoes (preferably sweet varieties like Ataulfo, Honey Mangoes, or Carabao. Approx. 2 lbs or 1 kg total weight before peeling/pitting)
- About 3 mangoes (or 2.5-3 cups diced) for puree
- About 1-2 mangoes (or 1-1.5 cups diced) for chunks to fold in and garnish
- 1 can (13.5 oz / 400ml) full-fat coconut milk
- 1/2 to 3/4 cup sweetened condensed milk (adjust to your sweetness preference and mango sweetness)
- 1/2 cup evaporated milk (optional, for extra creaminess)
- 2-4 tablespoons granulated sugar (optional, only if mangoes are not sweet enough)
- Pinch of salt (to enhance flavors)
- 4-5 large ripe mangoes (preferably sweet varieties like Ataulfo, Honey Mangoes, or Carabao. Approx. 2 lbs or 1 kg total weight before peeling/pitting)
- For the Coconut Jelly & Add-ins:
- 1 jar (12 oz / 340g, drained weight) Nata de Coco (coconut jelly), plain or lychee flavored, drained and rinsed. Cut into smaller pieces if they are large.
- 1/4 cup pomelo sacs (optional, for Mango Pomelo Sago variation)
- Garnish (Optional):
- Extra diced mango
- Fresh mint leaves
- Toasted coconut flakes
A Note on Mangoes: The star of this dish is undoubtedly the mango. Choose mangoes that are ripe, fragrant, and sweet. They should yield slightly to gentle pressure. If your mangoes are very fibrous, consider straining the puree for an extra smooth consistency. The quantity of condensed milk may need adjustment based on how sweet your mangoes are. Always taste and adjust!
Step-by-Step Instructions: Crafting Your Mango Sago Masterpiece
Follow these detailed instructions to create a delicious and refreshing Mango Sago with Coconut Jelly that will transport your taste buds to a tropical haven.
Phase 1: Preparing the Sago Pearls – The Chewy Jewels
Sago pearls need careful cooking to achieve that perfect translucent, chewy texture without becoming a sticky mess.
- Boil Water: In a medium to large saucepan, bring 6-8 cups of water to a rolling boil. Using ample water prevents the sago from sticking together and ensures even cooking.
- Add Sago: Once the water is vigorously boiling, gently pour in the 1 cup of small sago pearls. Stir immediately and continuously for the first 1-2 minutes to prevent them from clumping at the bottom of the pot.
- Cook the Sago: Reduce the heat to medium-low, maintaining a gentle simmer. Cook uncovered for about 10-15 minutes, stirring occasionally to prevent sticking. The sago pearls will start to become translucent.
- Rest (Optional but Recommended): After 10-15 minutes, many pearls will be translucent with a small, opaque white dot in the center. At this point, you can turn off the heat, cover the saucepan, and let the sago sit in the hot water for another 10-15 minutes. The residual heat will continue to cook the pearls through, making them fully translucent.
- Check for Doneness: The sago pearls are perfectly cooked when they are almost entirely translucent. A tiny white dot in the very center is acceptable and often preferred as it indicates a slightly chewier texture. Avoid overcooking, which can make them mushy.
- Rinse Thoroughly: Once cooked, immediately drain the sago pearls into a fine-mesh sieve. Rinse them thoroughly under cold running water for several minutes. This step is crucial: it removes excess starch, stops the cooking process, and prevents the pearls from sticking together. Keep rinsing and gently tossing until the water runs clear and the pearls are cool to the touch.
- Set Aside: Let the rinsed sago pearls drain well. You can leave them in the sieve or transfer them to a bowl. If not using immediately, you can cover them with a little cold water to prevent them from drying out, then drain again before use.
Phase 2: Preparing the Mangoes – The Golden Nectar
The quality and preparation of your mangoes are paramount to the success of this dessert.
- Wash and Peel: Thoroughly wash the mangoes. Using a sharp knife or a vegetable peeler, carefully peel the skin from all the mangoes.
- Dice the Mangoes:
- For Puree: Take approximately 3 of the large mangoes. Slice the mango flesh away from the large, flat pit. Dice the flesh into rough chunks. You should aim for about 2.5 to 3 cups of diced mango for the puree.
- For Chunks: Take the remaining 1-2 mangoes. Slice the flesh away from the pit and carefully dice it into small, neat 1/2-inch cubes. These will be folded into the dessert for texture and used for garnish. Aim for about 1 to 1.5 cups of diced mango. Set these aside.
- Blend the Puree: Place the mango chunks designated for the puree into a blender or food processor. Blend until completely smooth and velvety. If the mango is very fibrous or your blender is struggling, you can add 1-2 tablespoons of the coconut milk (from the can measured for the recipe) or a tiny bit of water to help it blend.
- Strain (Optional): If you used mangoes known for being fibrous, or if you prefer an ultra-smooth puree, strain the mango puree through a fine-mesh sieve to remove any stringy bits.
Phase 3: Preparing the Coconut Jelly
- Drain and Rinse: Open the jar of Nata de Coco. Pour the contents into a sieve and drain away the syrup it’s packed in. Rinse the coconut jelly cubes under cold water.
- Cut (If Necessary): If the Nata de Coco cubes are large, you might want to cut them into smaller, more bite-sized pieces (e.g., 1/2-inch cubes) so they distribute more evenly in the dessert.
Phase 4: Creating the Creamy Mango Base
This is where all the luscious flavors come together.
- Combine Wet Ingredients: In a large mixing bowl, combine the freshly made mango puree, 1 can (400ml) of full-fat coconut milk, and 1/2 cup of sweetened condensed milk. Add the 1/2 cup of evaporated milk (if using) for extra creaminess. Add a pinch of salt – this small amount will surprisingly enhance the sweetness and overall flavor profile.
- Mix Well: Whisk all the ingredients together until thoroughly combined and the mixture is smooth and homogenous.
- Taste and Adjust Sweetness: This is a critical step. Taste the mango base. Mangoes vary greatly in sweetness. If the mixture isn’t sweet enough for your liking, gradually add more sweetened condensed milk (1 tablespoon at a time) or a bit of granulated sugar (1 tablespoon at a time), whisking well and tasting after each addition until you reach your desired level of sweetness. Remember that the dessert will be served chilled, and coldness can slightly dull sweetness, so aim for it to be slightly sweeter than you might think necessary at room temperature.
Phase 5: Assembling the Mango Sago with Coconut Jelly
Now for the fun part – bringing all the prepared components together!
- Add Sago and Jelly: Gently fold the well-drained, cooked sago pearls and the prepared (drained, rinsed, and possibly chopped) Nata de Coco into the creamy mango base.
- Add Mango Chunks: Add about 3/4 of the reserved diced mango chunks into the mixture, reserving the rest for garnish. If you’re using pomelo sacs, add them now as well.
- Stir Gently: Stir everything together gently but thoroughly with a spatula or large spoon, ensuring the sago pearls, coconut jelly, and mango chunks are evenly distributed throughout the creamy base. Be careful not to mash the mango chunks or sago pearls.
- Final Taste Test: Give it one last taste. Does it need a tiny bit more sweetness? Now is your last chance to adjust before chilling.
Phase 6: Chilling to Perfection
This step is non-negotiable for the best flavor and texture.
- Cover and Chill: Cover the bowl tightly with plastic wrap or transfer the mixture to an airtight container.
- Refrigerate: Place the Mango Sago with Coconut Jelly in the refrigerator to chill for at least 2-4 hours. For the absolute best results, where flavors meld beautifully and the dessert is perfectly cold and refreshing, chill it overnight. The sago pearls will also absorb more of the delicious mango-coconut flavor as it chills.
Phase 7: Serving
- Stir Before Serving: Before serving, give the chilled Mango Sago a gentle stir, as some settling might have occurred.
- Portion and Garnish: Ladle the Mango Sago with Coconut Jelly into individual serving bowls, glasses, or small jars.
- Garnish: Top with the reserved diced mango. For an extra touch of elegance and flavor, you can also garnish with a sprig of fresh mint or a sprinkle of toasted coconut flakes.
Enjoy your incredibly delicious and refreshing homemade Mango Sago with Coconut Jelly!
Nutritional Snapshot (Approximate)
Understanding the nutritional content can be helpful, though these are estimates and can vary based on specific ingredients, mango sweetness, and amount of added sugar/condensed milk.
- Servings: This recipe yields approximately 6-8 generous servings.
- Calories per Serving (Approximate): 350-450 calories.
Breakdown Considerations:
- Mangoes: Provide natural sugars, vitamins (especially Vitamin C and A), and fiber.
- Sago Pearls: Primarily carbohydrates.
- Coconut Milk: Source of healthy fats (medium-chain triglycerides) but also high in saturated fat and calories.
- Sweetened Condensed Milk: Adds significant sugar and calories.
- Nata de Coco: Low in calories, primarily fiber and water.
Disclaimer: These values are estimates. For precise nutritional information, it’s best to use a recipe nutrition calculator with your exact ingredient brands and quantities. The calorie count will be most significantly impacted by the amount of sweetened condensed milk and any additional sugar used.
Time Commitment: From Prep to Perfection
Knowing the time involved helps in planning when to make this delightful dessert.
- Preparation Time: 30-40 minutes
- This includes washing, peeling, and dicing mangoes; preparing sago for cooking; and preparing Nata de Coco.
- Cooking Time (Sago): 15-20 minutes (plus 10-15 minutes resting time for sago, if using that method)
- Assembly Time: 10-15 minutes
- Chilling Time: Minimum 2-4 hours, ideally 4+ hours or overnight for best flavor and texture.
- Total Active Time (Prep + Cook + Assemble): Approximately 55 – 75 minutes
- Total Time (Including Chilling): Approximately 3 hours to overnight.
While the active preparation isn’t overly long, the chilling time is crucial, so plan accordingly, especially if you’re making it for an event. It’s an excellent make-ahead dessert!
How to Serve Your Mango Sago with Coconut Jelly Like a Pro
Serving this dessert thoughtfully can elevate the experience from simply delicious to truly memorable. Here are some ideas:
- Individual Portions:
- Classic Bowls: Serve in small, clear glass bowls to showcase the vibrant colors and layers of ingredients.
- Elegant Glasses: Use parfait glasses, wine glasses, or even small mason jars for a more sophisticated presentation. Layering slightly can look beautiful if your mixture is thick enough.
- Small Tumblers: Short, wide tumblers are also a great option for a modern look.
- Garnishing is Key: A little garnish goes a long way.
- Fresh Mango Cubes: Always a winner. A generous topping of perfectly ripe, sweet mango dice adds freshness and visual appeal.
- Mint Sprig: A small sprig of fresh mint adds a pop of green color and a hint of fresh aroma.
- Toasted Coconut Flakes: Sprinkle lightly with toasted coconut flakes for added texture and a more intense coconut flavor. You can toast unsweetened flakes in a dry pan over medium heat until lightly golden.
- Lime Zest: A tiny grating of fresh lime zest can add a surprising zing that cuts through the richness.
- Edible Flowers: For a truly special occasion, a few small, colorful edible flowers can make the dessert look stunning.
- Serving Temperature:
- Chilled is Best: This dessert is designed to be served cold. Ensure it’s thoroughly chilled for at least 2-4 hours, or ideally longer, before serving. The cold temperature enhances its refreshing quality.
- Avoid Freezing Solid: While you want it cold, avoid freezing it solid, as this will ruin the texture of the sago and mango.
- Occasion-Based Serving:
- Casual Gatherings & Potlucks: A large, attractive serving bowl from which guests can serve themselves works well. Keep it chilled in an ice bath if it will be out for an extended period.
- Dinner Parties: Pre-portion into individual elegant glasses for easy serving and a refined presentation.
- Kids’ Parties: Serve in colorful, non-breakable cups or bowls. They’ll love the chewy textures and sweet flavors.
- Thematic Presentation:
- Tropical Paradise: Serve in coconut shell bowls (if you can find them!) or garnish with a small paper umbrella.
- Summer Refreshment: Pair with other light, fruity desserts or iced tea.
- Spoon Choice: A spoon that can easily scoop up the sago pearls, mango chunks, and coconut jelly is ideal. A dessert spoon or a slightly deeper teaspoon works well.
No matter how you choose to serve it, the vibrant color and enticing aroma of Mango Sago with Coconut Jelly are sure to draw everyone in for a delightful tropical treat.
Additional Pro Tips for an Even More Amazing Mango Sago Experience
Elevate your Mango Sago game from great to absolutely divine with these five expert tips:
- The Mango Matters Most – Choose Wisely: The soul of this dessert is the mango. Opt for sweet, ripe, and less fibrous varieties. Ataulfo (Honey Mangoes) from Mexico or the Philippines, Carabao mangoes from the Philippines, or Kesar mangoes from India are excellent choices. Their flesh is smooth, intensely sweet, and beautifully colored. If you can only find less sweet mangoes, you’ll need to be more generous with the condensed milk or add a bit of sugar. Taste your mangoes before you start – this will guide your sweetening decisions. Don’t be afraid to use a mix of mango varieties if you have them!
- Sago Perfection – Rinse, Rinse, Rinse!: The texture of your sago pearls can make or break the dessert. After boiling until translucent (a tiny white dot in the center is fine), the most crucial step is rinsing them thoroughly under cold running water. This washes away excess starch, which is the culprit behind clumpy, sticky sago. Keep rinsing and gently agitating the sago in a fine-mesh sieve until the water runs completely clear and the pearls are cool. This not only prevents clumping but also stops the cooking process, ensuring a pleasant chewiness rather than a mushy texture.
- Chill for Flavor Fusion and Optimal Texture: Patience is a virtue, especially with Mango Sago. While it might be tempting to dig in right after assembly, allowing it to chill in the refrigerator for at least 2-4 hours (overnight is even better) is paramount. Chilling does several things: it allows the flavors of mango, coconut, and sweetener to meld and deepen; it lets the sago pearls absorb some of the creamy liquid, making them even more flavorful; and, of course, it makes the dessert incredibly refreshing. The texture also improves as it sets and cools.
- Balance is Bliss – Taste and Adjust Sweetness Strategically: Mangoes vary wildly in sweetness, and personal preferences for dessert sweetness differ too. Start with the lower recommended amount of sweetened condensed milk. Once the mango puree and milks are combined, taste it. Then taste it again after adding the sago and Nata de Coco. Remember that chilling dulls sweetness, so it should taste slightly sweeter at room temperature than you want the final chilled product to be. Adjust with more condensed milk or a touch of sugar if needed. A tiny pinch of salt in the creamy base also works wonders to enhance the overall sweetness and complexity of flavors.
- Texture Play – Don’t Be Afraid to Customize: While this recipe focuses on mango, sago, and coconut jelly, feel free to get creative with additional textures and complementary flavors.
- Pomelo Power: For a classic Mango Pomelo Sago, add sacs of fresh pomelo. Their slightly bitter, citrusy notes provide a wonderful contrast to the sweetness.
- Other Jellies: Consider adding small cubes of lychee jelly, grass jelly, or even coffee jelly for a different textural and flavor dimension.
- Small Fruits: Tiny pearls of bursting boba, or small, soft fruit pieces like lychee or longgan, can add delightful surprises.
- A Touch of Citrus: A squeeze of fresh lime or calamansi juice into the mango base can brighten the flavors, especially if your mangoes are very sweet.
By keeping these tips in mind, you’ll be well on your way to creating a Mango Sago with Coconut Jelly that is truly exceptional, bursting with flavor, and boasting a delightful array of textures.
Frequently Asked Questions (FAQ) about Mango Sago with Coconut Jelly
Here are answers to some common questions about making and enjoying this delicious tropical dessert:
- Q: Can I use frozen mangoes if fresh ones aren’t in season?
- A: Yes, you absolutely can use frozen mango chunks. They are a convenient option when fresh mangoes are unavailable or too expensive. For the puree, you can blend them directly from frozen (you might need a powerful blender or to add a little liquid like coconut milk to help). For the diced mango pieces to fold in, thaw them completely and pat them dry with a paper towel to remove excess moisture before adding them to the dessert. While the flavor of prime-season fresh mangoes is unparalleled, frozen mangoes will still yield a delicious result. Look for good quality frozen mangoes that are sweet.
- Q: How long can I store Mango Sago with Coconut Jelly in the refrigerator? Will it go bad?
- A: Properly stored in an airtight container in the refrigerator, Mango Sago with Coconut Jelly will keep well for about 2-3 days. Beyond that, the sago pearls may start to soften too much and lose their chewy texture, and the mango flavor might diminish slightly. The coconut milk base also means it’s best consumed within this timeframe for optimal freshness and safety. Always give it a quick sniff test if you’re unsure; if it smells sour or off, discard it.
- Q: My sago pearls turned into a clumpy, sticky mess! What did I do wrong?
- A: This is a common issue with sago, but easily avoidable! Several factors could be at play:
- Not enough boiling water: Sago needs plenty of room to move around while cooking. Use at least 6-8 cups of water for 1 cup of sago.
- Not stirring initially: When you add sago to boiling water, you must stir it immediately and for the first couple of minutes to prevent it from sinking and sticking to the bottom or to each other.
- Insufficient rinsing: This is the most common culprit. After cooking, sago pearls are coated in starch. You must rinse them thoroughly under cold running water until the water runs clear and the pearls are cool. This washes off the excess starch that causes stickiness.
- Overcooking: If cooked for too long, sago can become overly soft and mushy, making it more prone to breaking apart and clumping.
- A: This is a common issue with sago, but easily avoidable! Several factors could be at play:
- Q: Can I make this dessert dairy-free or vegan?
- A: Yes, it’s very easy to adapt this recipe to be dairy-free and vegan! The main dairy components are sweetened condensed milk and optional evaporated milk.
- Sweetened Condensed Milk: Substitute with vegan sweetened condensed coconut milk (widely available) or make your own by simmering full-fat coconut milk with sugar until thickened.
- Evaporated Milk: Simply omit it, or for extra richness, use a bit more full-fat coconut milk or a splash of unsweetened coconut cream.
Ensure your Nata de Coco is also vegan (most are, but always check labels if concerned). Mangoes, sago, and coconut milk are naturally vegan.
- A: Yes, it’s very easy to adapt this recipe to be dairy-free and vegan! The main dairy components are sweetened condensed milk and optional evaporated milk.
- Q: What’s the difference between sago pearls and tapioca pearls? Can I use them interchangeably?
- A: While often used interchangeably in recipes like this, there’s a slight difference. True sago pearls are made from the pith of sago palm stems. Tapioca pearls are made from cassava root starch. Most “sago” pearls found in Western supermarkets are actually small tapioca pearls, as true sago is less common globally. For this dessert, small tapioca pearls are perfectly suitable and are what is typically used. The cooking method is the same. Just ensure you buy the small pearls, not the large ones used for boba tea, unless you specifically want that larger texture. The key is to look for pearls that cook to a chewy, translucent state.
Enjoy making and savoring your Mango Sago with Coconut Jelly!
Print
Mango Sago with Coconut Jelly Recipe
Ingredients
- For the Sago Pearls:
- 1 cup small sago pearls (tapioca pearls)
- 6–8 cups water (for boiling)
- Cold water (for rinsing)
- For the Mango Puree & Base:
- 4-5 large ripe mangoes (preferably sweet varieties like Ataulfo, Honey Mangoes, or Carabao. Approx. 2 lbs or 1 kg total weight before peeling/pitting)
- About 3 mangoes (or 2.5–3 cups diced) for puree
- About 1–2 mangoes (or 1–1.5 cups diced) for chunks to fold in and garnish
- 1 can (13.5 oz / 400ml) full-fat coconut milk
- 1/2 to 3/4 cup sweetened condensed milk (adjust to your sweetness preference and mango sweetness)
- 1/2 cup evaporated milk (optional, for extra creaminess)
- 2–4 tablespoons granulated sugar (optional, only if mangoes are not sweet enough)
- Pinch of salt (to enhance flavors)
- 4-5 large ripe mangoes (preferably sweet varieties like Ataulfo, Honey Mangoes, or Carabao. Approx. 2 lbs or 1 kg total weight before peeling/pitting)
- For the Coconut Jelly & Add-ins:
- 1 jar (12 oz / 340g, drained weight) Nata de Coco (coconut jelly), plain or lychee flavored, drained and rinsed. Cut into smaller pieces if they are large.
- 1/4 cup pomelo sacs (optional, for Mango Pomelo Sago variation)
- Garnish (Optional):
- Extra diced mango
- Fresh mint leaves
- Toasted coconut flakes
Instructions
Phase 1: Preparing the Sago Pearls – The Chewy Jewels
Sago pearls need careful cooking to achieve that perfect translucent, chewy texture without becoming a sticky mess.
- Boil Water: In a medium to large saucepan, bring 6-8 cups of water to a rolling boil. Using ample water prevents the sago from sticking together and ensures even cooking.
- Add Sago: Once the water is vigorously boiling, gently pour in the 1 cup of small sago pearls. Stir immediately and continuously for the first 1-2 minutes to prevent them from clumping at the bottom of the pot.
- Cook the Sago: Reduce the heat to medium-low, maintaining a gentle simmer. Cook uncovered for about 10-15 minutes, stirring occasionally to prevent sticking. The sago pearls will start to become translucent.
- Rest (Optional but Recommended): After 10-15 minutes, many pearls will be translucent with a small, opaque white dot in the center. At this point, you can turn off the heat, cover the saucepan, and let the sago sit in the hot water for another 10-15 minutes. The residual heat will continue to cook the pearls through, making them fully translucent.
- Check for Doneness: The sago pearls are perfectly cooked when they are almost entirely translucent. A tiny white dot in the very center is acceptable and often preferred as it indicates a slightly chewier texture. Avoid overcooking, which can make them mushy.
- Rinse Thoroughly: Once cooked, immediately drain the sago pearls into a fine-mesh sieve. Rinse them thoroughly under cold running water for several minutes. This step is crucial: it removes excess starch, stops the cooking process, and prevents the pearls from sticking together. Keep rinsing and gently tossing until the water runs clear and the pearls are cool to the touch.
- Set Aside: Let the rinsed sago pearls drain well. You can leave them in the sieve or transfer them to a bowl. If not using immediately, you can cover them with a little cold water to prevent them from drying out, then drain again before use.
Phase 2: Preparing the Mangoes – The Golden Nectar
The quality and preparation of your mangoes are paramount to the success of this dessert.
- Wash and Peel: Thoroughly wash the mangoes. Using a sharp knife or a vegetable peeler, carefully peel the skin from all the mangoes.
- Dice the Mangoes:
- For Puree: Take approximately 3 of the large mangoes. Slice the mango flesh away from the large, flat pit. Dice the flesh into rough chunks. You should aim for about 2.5 to 3 cups of diced mango for the puree.
- For Chunks: Take the remaining 1-2 mangoes. Slice the flesh away from the pit and carefully dice it into small, neat 1/2-inch cubes. These will be folded into the dessert for texture and used for garnish. Aim for about 1 to 1.5 cups of diced mango. Set these aside.
- Blend the Puree: Place the mango chunks designated for the puree into a blender or food processor. Blend until completely smooth and velvety. If the mango is very fibrous or your blender is struggling, you can add 1-2 tablespoons of the coconut milk (from the can measured for the recipe) or a tiny bit of water to help it blend.
- Strain (Optional): If you used mangoes known for being fibrous, or if you prefer an ultra-smooth puree, strain the mango puree through a fine-mesh sieve to remove any stringy bits.
Phase 3: Preparing the Coconut Jelly
- Drain and Rinse: Open the jar of Nata de Coco. Pour the contents into a sieve and drain away the syrup it’s packed in. Rinse the coconut jelly cubes under cold water.
- Cut (If Necessary): If the Nata de Coco cubes are large, you might want to cut them into smaller, more bite-sized pieces (e.g., 1/2-inch cubes) so they distribute more evenly in the dessert.
Phase 4: Creating the Creamy Mango Base
This is where all the luscious flavors come together.
- Combine Wet Ingredients: In a large mixing bowl, combine the freshly made mango puree, 1 can (400ml) of full-fat coconut milk, and 1/2 cup of sweetened condensed milk. Add the 1/2 cup of evaporated milk (if using) for extra creaminess. Add a pinch of salt – this small amount will surprisingly enhance the sweetness and overall flavor profile.
- Mix Well: Whisk all the ingredients together until thoroughly combined and the mixture is smooth and homogenous.
- Taste and Adjust Sweetness: This is a critical step. Taste the mango base. Mangoes vary greatly in sweetness. If the mixture isn’t sweet enough for your liking, gradually add more sweetened condensed milk (1 tablespoon at a time) or a bit of granulated sugar (1 tablespoon at a time), whisking well and tasting after each addition until you reach your desired level of sweetness. Remember that the dessert will be served chilled, and coldness can slightly dull sweetness, so aim for it to be slightly sweeter than you might think necessary at room temperature.
Phase 5: Assembling the Mango Sago with Coconut Jelly
Now for the fun part – bringing all the prepared components together!
- Add Sago and Jelly: Gently fold the well-drained, cooked sago pearls and the prepared (drained, rinsed, and possibly chopped) Nata de Coco into the creamy mango base.
- Add Mango Chunks: Add about 3/4 of the reserved diced mango chunks into the mixture, reserving the rest for garnish. If you’re using pomelo sacs, add them now as well.
- Stir Gently: Stir everything together gently but thoroughly with a spatula or large spoon, ensuring the sago pearls, coconut jelly, and mango chunks are evenly distributed throughout the creamy base. Be careful not to mash the mango chunks or sago pearls.
- Final Taste Test: Give it one last taste. Does it need a tiny bit more sweetness? Now is your last chance to adjust before chilling.
Phase 6: Chilling to Perfection
This step is non-negotiable for the best flavor and texture.
- Cover and Chill: Cover the bowl tightly with plastic wrap or transfer the mixture to an airtight container.
- Refrigerate: Place the Mango Sago with Coconut Jelly in the refrigerator to chill for at least 2-4 hours. For the absolute best results, where flavors meld beautifully and the dessert is perfectly cold and refreshing, chill it overnight. The sago pearls will also absorb more of the delicious mango-coconut flavor as it chills.
Phase 7: Serving
- Stir Before Serving: Before serving, give the chilled Mango Sago a gentle stir, as some settling might have occurred.
- Portion and Garnish: Ladle the Mango Sago with Coconut Jelly into individual serving bowls, glasses, or small jars.
- Garnish: Top with the reserved diced mango. For an extra touch of elegance and flavor, you can also garnish with a sprig of fresh mint or a sprinkle of toasted coconut flakes.
Nutrition
- Serving Size: One Normal Portion
- Calories: 350-450