


In our home, finding snacks that are both wholesome and genuinely enjoyed by everyone can sometimes feel like a treasure hunt. That’s why discovering these Maple Banana Nut Granola Bars was such a delightful win. The aroma alone, as they bake, fills the kitchen with a comforting blend of sweet maple, ripe banana, and toasty nuts. And the taste? Simply irresistible! Even my pickiest eater, who usually shies away from anything remotely “healthy,” devours these bars. They strike the perfect balance – satisfyingly chewy and crunchy, sweet but not overly sugary, and packed with wholesome ingredients. Whether it’s for a quick breakfast on the go, a mid-afternoon energy boost, or a guilt-free dessert, these granola bars have become a staple in our kitchen. They’re not just a recipe; they’re a wholesome treat that brings smiles to everyone’s faces, and I’m thrilled to share this simple yet incredibly satisfying recipe with you.
The Star Ingredients: What Makes These Granola Bars Shine?
The magic of these Maple Banana Nut Granola Bars truly lies in the quality and combination of its ingredients. Each element plays a crucial role in creating the perfect texture, flavor profile, and nutritional value that makes these bars so irresistible and good for you. Let’s delve deeper into each ingredient and understand why they are essential to this recipe:
- Rolled Oats: The Heart of the Granola Bar Rolled oats are the foundational ingredient, providing the structure and chewy texture that we all love in a granola bar. But their benefits go far beyond just texture. Rolled oats are a powerhouse of nutrition. They are a fantastic source of soluble fiber, particularly beta-glucan, which is known for its cholesterol-lowering properties and its ability to promote healthy digestion. This fiber also contributes to a feeling of fullness, making these granola bars a satisfying snack that can keep you feeling energized for longer. Furthermore, oats are a good source of complex carbohydrates, providing sustained energy release rather than the quick spike and crash associated with simple sugars. They also contain essential vitamins and minerals like manganese, phosphorus, magnesium, and zinc, contributing to overall well-being. When choosing rolled oats, opt for old-fashioned rolled oats rather than instant oats for the best texture in these bars. Instant oats are more finely processed and can result in a mushier texture.
- Mashed Ripe Bananas: Natural Sweetness and Binding Agent Ripe bananas serve a dual purpose in this recipe. Firstly, they act as a natural sweetener, reducing the need for excessive added sugars. The natural sugars in ripe bananas provide a gentle sweetness that complements the maple syrup beautifully. Secondly, and equally importantly, mashed bananas act as a binding agent. Their natural pectin and moisture help to hold the dry ingredients together, creating a cohesive bar that doesn’t crumble easily. Using ripe bananas is key here. As bananas ripen, their starch converts to sugar, making them sweeter and softer, perfect for mashing and incorporating into baked goods. Overripe bananas, those with brown spots, are ideal as they are even sweeter and easier to mash. Don’t discard those overripe bananas; they are a treasure trove for baking! Beyond sweetness and binding, bananas are also packed with potassium, an essential electrolyte that plays a crucial role in maintaining healthy blood pressure and muscle function. They also contribute vitamin B6, vitamin C, and fiber to the nutritional profile of these bars.
- Maple Syrup: Liquid Gold of Flavor and Natural Sweetener Maple syrup is the signature sweetener in these granola bars, lending its distinctive rich, warm, and slightly caramelized flavor. It’s not just about sweetness; maple syrup brings a depth of flavor that refined sugars simply can’t replicate. Choose pure maple syrup for the best flavor and nutritional benefits. While it’s still a form of sugar, pure maple syrup contains antioxidants and minerals like manganese, zinc, and calcium in trace amounts. It also has a lower glycemic index compared to refined sugar, meaning it causes a slower rise in blood sugar levels. The type of maple syrup you choose can also influence the flavor. Darker grades of maple syrup (Grade A Dark Color, robust flavor or Grade B) will have a more intense maple flavor, while lighter grades (Grade A Golden Color, delicate taste or Grade A Amber Color, rich taste) will be milder. For these granola bars, a Grade A Amber or Dark grade syrup provides a lovely balance of sweetness and robust maple flavor.
- Chopped Nuts (Walnuts or Pecans): Crunch, Flavor, and Healthy Fats The addition of chopped nuts, whether walnuts or pecans (or a mix of both!), brings a delightful crunch, nutty flavor, and a boost of healthy fats to these granola bars. Nuts are an excellent source of monounsaturated and polyunsaturated fats, which are considered “good” fats that are beneficial for heart health. They also provide protein and fiber, further contributing to the satiety factor of these bars.
- Walnuts: Walnuts are known for their rich, slightly bitter flavor and their distinctive brain-like shape. They are particularly rich in omega-3 fatty acids, specifically alpha-linolenic acid (ALA), which is an essential fatty acid that our bodies cannot produce on their own. Omega-3s are important for brain health, reducing inflammation, and supporting cardiovascular health. Walnuts also contain antioxidants and other beneficial plant compounds.
- Pecans: Pecans offer a sweeter, buttery flavor and a slightly softer texture compared to walnuts. They are rich in monounsaturated fats, particularly oleic acid, which is also found in olive oil and is associated with heart health benefits. Pecans are also a good source of vitamin E and zinc.
- Almond Butter: Creamy Texture, Nutty Flavor, and Binding Power Almond butter contributes a creamy texture, nutty flavor, and additional binding power to these granola bars. It works synergistically with the mashed banana to hold the ingredients together and create a satisfyingly chewy consistency. Almond butter is a great source of healthy monounsaturated fats, protein, and fiber. It also provides vitamin E, magnesium, and calcium. Choose natural almond butter, which is made from just almonds and sometimes a touch of salt, without added sugars or oils. The natural oils in almond butter are essential for achieving the right texture in these bars. You can also substitute other nut butters like peanut butter, cashew butter, or sunflower seed butter if you have allergies or prefer different flavors, but almond butter offers a particularly lovely subtle sweetness and smooth texture that works wonderfully in this recipe.
- Vanilla Extract: Enhancing the Sweetness and Warmth Vanilla extract, though used in a small quantity, plays a significant role in enhancing the overall flavor profile of these granola bars. It adds a warm, aromatic note that complements the maple syrup, banana, and nuts, bringing all the flavors together in harmony. Pure vanilla extract is always preferred over imitation vanilla for its superior flavor.
- Salt: Balancing Sweetness and Enhancing Flavors A pinch of salt might seem counterintuitive in a sweet recipe, but it is crucial for balancing the sweetness and enhancing all the other flavors. Salt helps to bring out the sweetness of the maple syrup and banana, while also complementing the nutty and oat-y flavors. It prevents the bars from tasting overly sweet and flat, adding depth and complexity to the overall taste.
- Cinnamon: Warm Spice and Flavor Depth Cinnamon adds a warm, comforting spice that perfectly complements the maple, banana, and nut flavors. It brings a touch of autumnal warmth and depth to the granola bars. Beyond flavor, cinnamon also has potential health benefits, including antioxidant and anti-inflammatory properties. Freshly ground cinnamon will offer the most potent flavor, but pre-ground cinnamon works perfectly well too.
- Chocolate Chips (Optional): A Touch of Indulgence While optional, chocolate chips add a delightful touch of indulgence to these granola bars. The bittersweetness of dark chocolate chips (or the creamy sweetness of milk chocolate chips, depending on your preference) provides a lovely contrast to the sweetness of the maple and banana, and the nutty flavors. Chocolate chips also add a textural element, melting slightly during baking and creating pockets of gooey chocolate goodness. Choose your favorite type of chocolate chips – dark, semi-sweet, milk, or even white chocolate chips – to customize these bars to your liking. You can also use chopped chocolate instead of chips for a more rustic look and intense chocolate flavor.
By understanding the role of each ingredient, you can appreciate how they work together to create these delicious and nutritious Maple Banana Nut Granola Bars. Feel free to experiment with variations and substitutions within each ingredient category to tailor the recipe to your preferences and dietary needs.
Step-by-Step Guide: Crafting Your Perfect Maple Banana Nut Granola Bars
Making these Maple Banana Nut Granola Bars is surprisingly simple, even for novice bakers. Follow these detailed step-by-step instructions to create a batch of these wholesome and delicious snacks:
- Preheat and Prepare: Setting the Stage for Baking Success
- Preheat Your Oven: Begin by preheating your oven to 350°F (175°C). Accurate oven temperature is crucial for even baking and achieving the desired texture. Using an oven thermometer can ensure your oven is heating correctly.
- Line Your Baking Dish: Line an 8×8 inch or 9×9 inch square baking dish with parchment paper. Leaving an overhang of parchment paper on the sides will make it much easier to lift the baked granola bars out of the dish later for cutting. Press the parchment paper firmly into the corners and along the sides of the dish to ensure it’s securely in place. Alternatively, you can lightly grease the baking dish if you don’t have parchment paper, but parchment paper is highly recommended for easy removal and cleanup.
- Combine Dry Ingredients: Building the Flavor Base
- In a Large Mixing Bowl: Take a large mixing bowl – it needs to be spacious enough to accommodate all the ingredients comfortably.
- Add Dry Ingredients: Pour in the 2 cups of rolled oats, ½ cup of chopped nuts (walnuts or pecans), ¼ teaspoon of salt, and ½ teaspoon of cinnamon.
- Whisk to Combine: Use a whisk or a fork to thoroughly combine all the dry ingredients. This ensures that the salt and cinnamon are evenly distributed throughout the oats and nuts, preventing any pockets of concentrated flavor and ensuring a balanced taste in every bite. Mixing the dry ingredients separately first also helps to prevent clumps of cinnamon or salt in the final mixture.
- Combine Wet Ingredients: Creating the Sweet and Sticky Binder
- In Another Bowl: Take a separate mixing bowl for the wet ingredients.
- Add Wet Ingredients: Place the 1 cup of mashed ripe bananas, ½ cup of maple syrup, ¼ cup of almond butter, and ½ teaspoon of vanilla extract into the bowl.
- Mix Until Smooth: Use a fork or a whisk to mix the wet ingredients together until they are smooth and well combined. Ensure the mashed bananas are fully incorporated and no lumps remain. The mixture should be creamy and homogenous. This step ensures that the wet ingredients will evenly coat the dry ingredients and bind them together effectively.
- Combine Wet and Dry: Bringing It All Together
- Pour Wet into Dry: Pour the wet ingredient mixture into the bowl with the dry ingredients.
- Stir Until Well Combined: Use a spatula or a large spoon to stir the wet and dry ingredients together until they are thoroughly combined. Ensure that all the oats and nuts are evenly coated with the wet mixture. The mixture will be slightly sticky and clumpy, which is exactly what you want for granola bars.
- Fold in Chocolate Chips (Optional): Adding a Touch of Indulgence: If you are using chocolate chips, gently fold them into the mixture at this stage, ensuring they are evenly distributed throughout.
- Press into Baking Dish: Shaping Your Granola Bars
- Transfer to Prepared Dish: Transfer the granola bar mixture into the parchment-lined baking dish.
- Spread Evenly: Use a spatula or your hands to spread the mixture evenly across the bottom of the dish.
- Press Down Firmly: This is a crucial step for creating granola bars that hold together well. Use the back of a spoon, a spatula, or your fingers to press the mixture down firmly and evenly into the baking dish. The more firmly you press, the more compact and less crumbly your granola bars will be. You can even use the bottom of a measuring cup or a glass to get a really firm and even press. Ensure the corners and edges are well-pressed.
- Bake to Golden Perfection: Achieving the Right Texture and Color
- Bake in Preheat Oven: Place the baking dish in the preheated oven.
- Bake for 20 Minutes: Bake for approximately 20 minutes, or until the edges of the granola bars are golden brown. The center might still seem slightly soft, but it will firm up as it cools. Keep an eye on the bars towards the end of the baking time to prevent them from burning, especially if your oven tends to run hot.
- Check for Doneness: The granola bars are done when the edges are nicely golden brown and the top is lightly golden and set. A toothpick inserted into the center might come out slightly moist but not wet.
- Cool Completely: Essential for Firmness and Easy Cutting
- Cool in Dish: Remove the baking dish from the oven and place it on a wire rack. Allow the granola bars to cool completely in the dish. This is a very important step! Do not attempt to cut the bars while they are still warm, as they will be too soft and crumbly. Cooling allows the bars to firm up and set properly, making them easier to cut and handle. Cooling completely can take at least 1-2 hours at room temperature, or you can speed up the process by placing the dish in the refrigerator for about 30-60 minutes.
- Cut and Serve: Enjoy Your Homemade Granola Bars
- Lift from Dish: Once the granola bars are completely cool and firm, use the parchment paper overhang to lift them out of the baking dish.
- Cut into Bars or Squares: Place the slab of granola bars on a cutting board. Use a sharp knife to cut them into squares or bars of your desired size. For cleaner cuts, you can use a large, sharp knife and cut with a firm, downward motion. Wiping the knife clean between cuts can also help to prevent sticking.
- Serve and Enjoy: Your homemade Maple Banana Nut Granola Bars are now ready to be served and enjoyed! They can be eaten immediately, or stored for later.
By following these detailed instructions, you’ll be able to confidently create a batch of delicious and wholesome Maple Banana Nut Granola Bars that are perfect for snacks, breakfasts, or anytime you need a healthy and satisfying treat. Don’t be afraid to adjust the ingredients and add-ins to customize them to your own taste preferences!
Nutritional Powerhouse: Unpacking the Goodness in Every Bite
These Maple Banana Nut Granola Bars are not just delicious; they are also packed with nutritional benefits, making them a smart choice for a healthy snack or breakfast. While the exact nutritional content can vary slightly based on the specific brands and ingredients used, here’s a general overview of the nutritional profile per serving:
- Servings: This recipe typically yields approximately 12-16 granola bars, depending on how you cut them. For nutritional estimation purposes, let’s consider 12 servings.
- Calories per Serving (Estimated): Approximately 200-250 calories per bar. Macronutrient Breakdown (per serving, approximate):
- Carbohydrates: 30-35 grams
- Primarily complex carbohydrates from rolled oats and bananas, providing sustained energy.
- Includes natural sugars from maple syrup and bananas, and potentially added sugars from chocolate chips (if used).
- Protein: 4-6 grams
- From rolled oats, nuts, and almond butter, contributing to satiety and muscle building/repair.
- Fat: 8-12 grams
- Predominantly healthy monounsaturated and polyunsaturated fats from nuts and almond butter, beneficial for heart health and brain function.
- Includes saturated fat, particularly if chocolate chips are used.
- Fiber: 3-5 grams
- Excellent source of fiber from rolled oats, bananas, and nuts, promoting digestive health, satiety, and blood sugar regulation.
- Potassium: From bananas, important for blood pressure regulation and muscle function.
- Magnesium: From oats, nuts, and almond butter, crucial for muscle and nerve function, blood sugar control, and bone health.
- Manganese: From oats and maple syrup, an antioxidant and important for bone formation, blood clotting, and metabolism.
- Vitamin E: From nuts and almond butter, an antioxidant protecting cells from damage.
- Vitamin B6: From bananas, important for brain development and function, and metabolism.
- Antioxidants: From maple syrup, cinnamon, nuts, and potentially dark chocolate chips, protecting against cell damage and inflammation.
- Rolled Oats: As discussed earlier, excellent source of soluble fiber (beta-glucan) for cholesterol reduction and digestive health. Provides sustained energy release.
- Bananas: Good source of potassium, fiber, and vitamin B6. Natural sweetness and digestive benefits.
- Maple Syrup: Natural sweetener with antioxidants and trace minerals. Lower glycemic index than refined sugar.
- Nuts (Walnuts/Pecans): Rich in healthy fats, protein, fiber, and various vitamins and minerals. Beneficial for heart health, brain function, and satiety.
- Almond Butter: Healthy fats, protein, fiber, vitamin E, and magnesium. Contributes to satiety and overall nutrition.
- Cinnamon: Antioxidant and anti-inflammatory properties. May help with blood sugar control.
- Sugar Content: While these granola bars use natural sweeteners like maple syrup and bananas, they still contain sugar. Consume in moderation as part of a balanced diet. You can adjust the amount of maple syrup to control sweetness to some extent.
- Fat Content: Healthy fats are beneficial, but they are still calorie-dense. Be mindful of portion sizes, especially if you are watching your calorie intake.
- Allergies: This recipe contains nuts and potentially gluten (depending on the oats used). Make substitutions as needed for allergies (e.g., use gluten-free oats, sunflower seed butter instead of almond butter, and seeds instead of nuts).
- Carbohydrates: 30-35 grams
Overall, these Maple Banana Nut Granola Bars offer a significantly healthier alternative to commercially produced granola bars, which are often loaded with added sugars, unhealthy fats, and artificial ingredients. By making them at home, you control the ingredients and can create a snack that is both delicious and genuinely nutritious.
Time-Saving Snack: Preparation and Cooking Timeline
One of the great advantages of these Maple Banana Nut Granola Bars is their quick preparation time. They are perfect for busy individuals or families who need healthy snacks without spending hours in the kitchen. Here’s a breakdown of the time involved:
- Preparation Time: 10 Minutes
- This includes the time it takes to:
- Preheat the oven and line the baking dish (2 minutes).
- Measure and combine the dry ingredients (3 minutes).
- Mash the bananas and combine the wet ingredients (3 minutes).
- Combine wet and dry ingredients and mix (2 minutes).
- The preparation is very straightforward and involves simple mixing and measuring. No special equipment is needed beyond basic kitchen tools like bowls, measuring cups and spoons, a whisk or fork, and a spatula.
- This includes the time it takes to:
- Cooking Time: 20 Minutes
- The baking time is a relatively short 20 minutes in a preheated oven.
- During this time, the granola bars will bake to golden brown perfection, developing their characteristic chewy and slightly crunchy texture.
- While the bars are baking, you can attend to other tasks, making this a very efficient use of your time.
- Total Time: 30 Minutes
- From start to finish, including preparation and baking, these granola bars take only about 30 minutes to make.
- This makes them an incredibly convenient option for a quick snack or a batch-cooking project for the week ahead.
- Cooling Time: (Additional Time, but Passive)
- While not included in the active preparation or cooking time, the cooling time is essential for the granola bars to firm up properly.
- Allowing them to cool completely in the dish takes approximately 1-2 hours at room temperature, or about 30-60 minutes in the refrigerator.
- This cooling time is passive – you don’t need to actively work on the recipe during this period. You can simply let them sit and cool while you do other things.
Time-Saving Tips:
- Pre-chop Nuts: To save time, you can pre-chop the nuts in advance and store them in an airtight container.
- Use Overripe Bananas: Using overripe bananas that are ready to be used up eliminates the need to wait for bananas to ripen.
- Efficient Mixing: Organize your ingredients beforehand and follow the mixing steps efficiently to minimize preparation time.
- Batch Cooking: Make a double or triple batch of these granola bars at once to have a supply of healthy snacks for the entire week. They store well, making batch cooking a very time-saving strategy.
These Maple Banana Nut Granola Bars are a testament to the fact that healthy and delicious snacks don’t have to be time-consuming to make. Their quick preparation and cooking time make them a perfect choice for busy lifestyles.
Serving Suggestions: Elevating Your Granola Bar Experience
While these Maple Banana Nut Granola Bars are delicious on their own, there are numerous ways to serve and enjoy them to elevate your snacking experience. Here are some creative serving suggestions:
- On-the-Go Snack:
- Wrap Individually: For ultimate portability, wrap each granola bar individually in parchment paper or plastic wrap. This makes them perfect for tossing into lunchboxes, backpacks, gym bags, or purses for a quick and healthy snack anytime, anywhere.
- Travel-Friendly: Their sturdy texture makes them ideal for travel – road trips, hikes, flights, or picnics. They won’t melt easily like some other snacks and provide sustained energy on the go.
- Breakfast Companion:
- Pair with Yogurt: Crumble a granola bar over a bowl of plain yogurt (Greek or regular) for added texture, sweetness, and flavor. The granola bar provides crunch and sweetness, complementing the creamy tanginess of yogurt. Add fresh fruit like berries or sliced bananas for an even more nutritious and satisfying breakfast.
- Alongside Fruit: Enjoy a granola bar alongside a piece of fresh fruit like an apple, pear, or orange for a balanced and quick breakfast or light meal.
- With a Smoothie: Pair a granola bar with a healthy smoothie for a more substantial breakfast or post-workout recovery snack.
- Dessert Treat (Guilt-Free Indulgence):
- Warm with Ice Cream: Warm a granola bar slightly in the microwave (just for a few seconds) and serve it with a scoop of vanilla ice cream or frozen yogurt for a healthier dessert option. The warm granola bar and cold ice cream create a delightful contrast in temperature and texture.
- Drizzled with Chocolate: Melt a bit of dark chocolate and drizzle it over the granola bars for an extra touch of indulgence. The bittersweet chocolate complements the sweetness of the granola bar beautifully.
- With a Cup of Tea or Coffee: Enjoy a granola bar as a sweet treat alongside your afternoon cup of tea or coffee. It’s a healthier alternative to cookies or cakes.
- Creative Crumbles and Toppings:
- Granola Crumble Topping: Crumble granola bars and use them as a crunchy topping for desserts like fruit crisps, cobblers, or baked apples.
- Ice Cream Topping: Use crumbled granola bars as a topping for ice cream sundaes or parfaits for added texture and flavor.
- Yogurt Parfait Layer: Layer crumbled granola bars in yogurt parfaits along with fruit and yogurt for a delicious and textured breakfast or dessert.
- Special Occasions and Gatherings:
- Party Platters: Arrange granola bars on a platter with fresh fruit, cheese cubes, and other snacks for a healthy and appealing party spread.
- Homemade Gifts: Wrap granola bars individually and tie with a ribbon to create thoughtful and homemade gifts for friends, family, or teachers.
- Lunchbox Treat for Kids (and Adults!): Pack a granola bar in lunchboxes as a healthier and more satisfying treat compared to processed snacks.
No matter how you choose to serve them, these Maple Banana Nut Granola Bars are a versatile and delicious snack that can be enjoyed in countless ways. Experiment with different serving suggestions to find your favorites and make the most of these wholesome treats.
Pro Tips for Granola Bar Perfection: Unlock the Secrets to Success
While the recipe for Maple Banana Nut Granola Bars is straightforward, these pro tips will help you achieve granola bar perfection every time, ensuring optimal texture, flavor, and overall success:
- Ripe Bananas are Key: Using ripe or even overripe bananas is crucial for both sweetness and binding. Ripe bananas are sweeter and mash more easily, contributing to the overall flavor and texture of the bars. If your bananas are not quite ripe, you can ripen them quickly by placing them in a paper bag with an apple or banana for a day or two. Alternatively, you can roast them in the oven briefly to soften and sweeten them.
- Don’t Overmix: When combining the wet and dry ingredients, stir just until everything is moistened and combined. Overmixing can lead to tougher granola bars. A few streaks of flour or oats are okay – they will incorporate during baking. Gentle mixing ensures a tender texture.
- Press Firmly and Evenly: Pressing the granola bar mixture firmly and evenly into the baking dish is essential for creating bars that hold together well. Use the back of a spoon, a spatula, or even the bottom of a measuring cup to achieve a compact and uniform layer. Pay special attention to the corners and edges, ensuring they are well-pressed.
- Bake Until Golden Brown (But Don’t Overbake): Bake the granola bars until the edges are golden brown and the center is set. Overbaking can result in dry and crumbly bars. Start checking for doneness around the 20-minute mark. The bars will continue to firm up as they cool. If you are unsure, it’s better to slightly underbake than overbake.
- Cool Completely Before Cutting: This is perhaps the most important tip for achieving clean cuts and preventing crumbly bars. Allow the granola bars to cool completely in the baking dish before attempting to cut them. Cooling allows them to firm up and set properly. Patience is key! Resist the urge to cut them while they are still warm. If you are in a hurry, you can speed up the cooling process by placing the dish in the refrigerator.
Bonus Tips for Customization and Variations:
- Toast Your Oats and Nuts: For an even deeper flavor, lightly toast the rolled oats and nuts before adding them to the recipe. Spread them in a single layer on a baking sheet and toast in a 350°F (175°C) oven for 5-7 minutes, or until lightly golden and fragrant. Let them cool completely before using.
- Add Dried Fruit: Incorporate ¼ to ½ cup of dried fruit, such as raisins, cranberries, chopped apricots, or chopped dates, for added sweetness, chewiness, and flavor complexity. Add the dried fruit along with the chocolate chips (if using).
- Spice it Up: Experiment with other spices like nutmeg, ginger, or cardamom to customize the flavor profile. A pinch of ground cloves would also complement the maple and banana flavors nicely.
- Seed Power: Add seeds like chia seeds, flax seeds, pumpkin seeds, or sunflower seeds for extra nutrition and texture. Substitute a portion of the nuts with seeds, or add them in addition to the nuts.
- Nut Butter Variations: Try different nut butters like peanut butter, cashew butter, or sunflower seed butter for different flavor nuances. Each nut butter will impart its unique flavor to the granola bars.
- Gluten-Free Option: Ensure you use certified gluten-free rolled oats to make these granola bars gluten-free.
By following these pro tips and embracing customization, you can master the art of making perfect Maple Banana Nut Granola Bars that are not only delicious and healthy but also tailored to your personal preferences.
Your Granola Bar Questions Answered: The Ultimate FAQ
Do you have questions about making Maple Banana Nut Granola Bars? This FAQ section addresses common queries to help you troubleshoot and achieve granola bar success:
Q1: My granola bars are too crumbly. What did I do wrong?
A: Crumbly granola bars are a common issue, but easily preventable. Here are the most likely causes and solutions:
- Not enough binding agent: Ensure you used ripe mashed bananas and almond butter as specified in the recipe. These are crucial for binding the ingredients together. If your bananas were not ripe enough, they may not have provided sufficient moisture and binding.
- Not pressing firmly enough: Pressing the granola bar mixture firmly into the baking dish is essential. If you didn’t press firmly enough, the bars may not hold together. Next time, use the back of a spoon or a measuring cup to press down very firmly and evenly.
- Overbaking: Overbaking can dry out the granola bars and make them crumbly. Bake just until the edges are golden brown and the center is set, but still slightly soft. They will firm up as they cool.
- Too many dry ingredients: Ensure you measured the ingredients accurately. Too many dry ingredients relative to wet ingredients can lead to dryness and crumbly texture.
Q2: Can I use different nuts or nut butter?
A: Absolutely! This recipe is very versatile.
- Nuts: Feel free to substitute walnuts or pecans with other nuts you enjoy, such as almonds, cashews, hazelnuts, or macadamia nuts. You can also use a mix of different nuts.
- Nut Butter: You can substitute almond butter with peanut butter, cashew butter, sunflower seed butter (for nut-free option), or even tahini (sesame seed butter). Keep in mind that different nut butters will have slightly different flavors and textures, which will affect the final granola bars.
Q3: Can I make these granola bars vegan?
A: Yes, this recipe is naturally vegan as written! All the ingredients are plant-based. Just ensure you are using pure maple syrup (not pancake syrup, which may contain animal products).
Q4: How should I store these granola bars and how long do they last?
A: Proper storage will keep your granola bars fresh and delicious for longer.
- Storage: Store the cooled and cut granola bars in an airtight container at room temperature. You can also store them in the refrigerator for a slightly firmer texture and extended shelf life.
- Shelf Life: At room temperature, they will last for about 5-7 days. In the refrigerator, they can last for up to 1-2 weeks.
- Freezing: For longer storage, you can freeze granola bars. Wrap them individually in plastic wrap and then place them in a freezer-safe bag or container. They can be frozen for up to 2-3 months. Thaw at room temperature for about 30 minutes before serving.
Q5: Can I make these granola bars gluten-free?
A: Yes, you can easily make these granola bars gluten-free.
- Use Gluten-Free Oats: The key is to use certified gluten-free rolled oats. Regular rolled oats are often processed in facilities that also handle wheat, so they may contain trace amounts of gluten. Certified gluten-free oats are processed in dedicated gluten-free facilities.
- Check Other Ingredients: While the other ingredients in this recipe are naturally gluten-free, always double-check labels to ensure there is no hidden gluten, especially if you are very sensitive to gluten.
We hope this FAQ section has answered your questions and equipped you with the knowledge to confidently bake perfect Maple Banana Nut Granola Bars every time! Happy baking and enjoy your wholesome homemade treats!
Print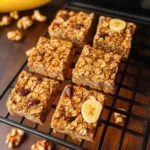
Maple Banana Nut Granola Bar Recipe
Ingredients
- Rolled Oats: The Heart of the Granola Bar Rolled oats are the foundational ingredient, providing the structure and chewy texture that we all love in a granola bar. But their benefits go far beyond just texture. Rolled oats are a powerhouse of nutrition. They are a fantastic source of soluble fiber, particularly beta-glucan, which is known for its cholesterol-lowering properties and its ability to promote healthy digestion. This fiber also contributes to a feeling of fullness, making these granola bars a satisfying snack that can keep you feeling energized for longer. Furthermore, oats are a good source of complex carbohydrates, providing sustained energy release rather than the quick spike and crash associated with simple sugars. They also contain essential vitamins and minerals like manganese, phosphorus, magnesium, and zinc, contributing to overall well-being. When choosing rolled oats, opt for old-fashioned rolled oats rather than instant oats for the best texture in these bars. Instant oats are more finely processed and can result in a mushier texture.
- Mashed Ripe Bananas: Natural Sweetness and Binding Agent Ripe bananas serve a dual purpose in this recipe. Firstly, they act as a natural sweetener, reducing the need for excessive added sugars. The natural sugars in ripe bananas provide a gentle sweetness that complements the maple syrup beautifully. Secondly, and equally importantly, mashed bananas act as a binding agent. Their natural pectin and moisture help to hold the dry ingredients together, creating a cohesive bar that doesn’t crumble easily. Using ripe bananas is key here. As bananas ripen, their starch converts to sugar, making them sweeter and softer, perfect for mashing and incorporating into baked goods. Overripe bananas, those with brown spots, are ideal as they are even sweeter and easier to mash. Don’t discard those overripe bananas; they are a treasure trove for baking! Beyond sweetness and binding, bananas are also packed with potassium, an essential electrolyte that plays a crucial role in maintaining healthy blood pressure and muscle function. They also contribute vitamin B6, vitamin C, and fiber to the nutritional profile of these bars.
- Maple Syrup: Liquid Gold of Flavor and Natural Sweetener Maple syrup is the signature sweetener in these granola bars, lending its distinctive rich, warm, and slightly caramelized flavor. It’s not just about sweetness; maple syrup brings a depth of flavor that refined sugars simply can’t replicate. Choose pure maple syrup for the best flavor and nutritional benefits. While it’s still a form of sugar, pure maple syrup contains antioxidants and minerals like manganese, zinc, and calcium in trace amounts. It also has a lower glycemic index compared to refined sugar, meaning it causes a slower rise in blood sugar levels. The type of maple syrup you choose can also influence the flavor. Darker grades of maple syrup (Grade A Dark Color, robust flavor or Grade B) will have a more intense maple flavor, while lighter grades (Grade A Golden Color, delicate taste or Grade A Amber Color, rich taste) will be milder. For these granola bars, a Grade A Amber or Dark grade syrup provides a lovely balance of sweetness and robust maple flavor.
- Chopped Nuts (Walnuts or Pecans): Crunch, Flavor, and Healthy Fats The addition of chopped nuts, whether walnuts or pecans (or a mix of both!), brings a delightful crunch, nutty flavor, and a boost of healthy fats to these granola bars. Nuts are an excellent source of monounsaturated and polyunsaturated fats, which are considered “good” fats that are beneficial for heart health. They also provide protein and fiber, further contributing to the satiety factor of these bars.
- Walnuts: Walnuts are known for their rich, slightly bitter flavor and their distinctive brain-like shape. They are particularly rich in omega-3 fatty acids, specifically alpha-linolenic acid (ALA), which is an essential fatty acid that our bodies cannot produce on their own. Omega-3s are important for brain health, reducing inflammation, and supporting cardiovascular health. Walnuts also contain antioxidants and other beneficial plant compounds.
- Pecans: Pecans offer a sweeter, buttery flavor and a slightly softer texture compared to walnuts. They are rich in monounsaturated fats, particularly oleic acid, which is also found in olive oil and is associated with heart health benefits. Pecans are also a good source of vitamin E and zinc.
You can choose to use either walnuts or pecans based on your personal preference, or even combine them for a more complex flavor profile. To enhance their flavor and crunch, you can lightly toast the nuts before chopping and adding them to the recipe.
- Almond Butter: Creamy Texture, Nutty Flavor, and Binding Power Almond butter contributes a creamy texture, nutty flavor, and additional binding power to these granola bars. It works synergistically with the mashed banana to hold the ingredients together and create a satisfyingly chewy consistency. Almond butter is a great source of healthy monounsaturated fats, protein, and fiber. It also provides vitamin E, magnesium, and calcium. Choose natural almond butter, which is made from just almonds and sometimes a touch of salt, without added sugars or oils. The natural oils in almond butter are essential for achieving the right texture in these bars. You can also substitute other nut butters like peanut butter, cashew butter, or sunflower seed butter if you have allergies or prefer different flavors, but almond butter offers a particularly lovely subtle sweetness and smooth texture that works wonderfully in this recipe.
- Vanilla Extract: Enhancing the Sweetness and Warmth Vanilla extract, though used in a small quantity, plays a significant role in enhancing the overall flavor profile of these granola bars. It adds a warm, aromatic note that complements the maple syrup, banana, and nuts, bringing all the flavors together in harmony. Pure vanilla extract is always preferred over imitation vanilla for its superior flavor.
- Salt: Balancing Sweetness and Enhancing Flavors A pinch of salt might seem counterintuitive in a sweet recipe, but it is crucial for balancing the sweetness and enhancing all the other flavors. Salt helps to bring out the sweetness of the maple syrup and banana, while also complementing the nutty and oat-y flavors. It prevents the bars from tasting overly sweet and flat, adding depth and complexity to the overall taste.
- Cinnamon: Warm Spice and Flavor Depth Cinnamon adds a warm, comforting spice that perfectly complements the maple, banana, and nut flavors. It brings a touch of autumnal warmth and depth to the granola bars. Beyond flavor, cinnamon also has potential health benefits, including antioxidant and anti-inflammatory properties. Freshly ground cinnamon will offer the most potent flavor, but pre-ground cinnamon works perfectly well too.
- Chocolate Chips (Optional): A Touch of Indulgence While optional, chocolate chips add a delightful touch of indulgence to these granola bars. The bittersweetness of dark chocolate chips (or the creamy sweetness of milk chocolate chips, depending on your preference) provides a lovely contrast to the sweetness of the maple and banana, and the nutty flavors. Chocolate chips also add a textural element, melting slightly during baking and creating pockets of gooey chocolate goodness. Choose your favorite type of chocolate chips – dark, semi-sweet, milk, or even white chocolate chips – to customize these bars to your liking. You can also use chopped chocolate instead of chips for a more rustic look and intense chocolate flavor.
Instructions
- Preheat and Prepare: Setting the Stage for Baking Success
- Preheat Your Oven: Begin by preheating your oven to 350°F (175°C). Accurate oven temperature is crucial for even baking and achieving the desired texture. Using an oven thermometer can ensure your oven is heating correctly.
- Line Your Baking Dish: Line an 8×8 inch or 9×9 inch square baking dish with parchment paper. Leaving an overhang of parchment paper on the sides will make it much easier to lift the baked granola bars out of the dish later for cutting. Press the parchment paper firmly into the corners and along the sides of the dish to ensure it’s securely in place. Alternatively, you can lightly grease the baking dish if you don’t have parchment paper, but parchment paper is highly recommended for easy removal and cleanup.
- Combine Dry Ingredients: Building the Flavor Base
- In a Large Mixing Bowl: Take a large mixing bowl – it needs to be spacious enough to accommodate all the ingredients comfortably.
- Add Dry Ingredients: Pour in the 2 cups of rolled oats, ½ cup of chopped nuts (walnuts or pecans), ¼ teaspoon of salt, and ½ teaspoon of cinnamon.
- Whisk to Combine: Use a whisk or a fork to thoroughly combine all the dry ingredients. This ensures that the salt and cinnamon are evenly distributed throughout the oats and nuts, preventing any pockets of concentrated flavor and ensuring a balanced taste in every bite. Mixing the dry ingredients separately first also helps to prevent clumps of cinnamon or salt in the final mixture.
- Combine Wet Ingredients: Creating the Sweet and Sticky Binder
- In Another Bowl: Take a separate mixing bowl for the wet ingredients.
- Add Wet Ingredients: Place the 1 cup of mashed ripe bananas, ½ cup of maple syrup, ¼ cup of almond butter, and ½ teaspoon of vanilla extract into the bowl.
- Mix Until Smooth: Use a fork or a whisk to mix the wet ingredients together until they are smooth and well combined. Ensure the mashed bananas are fully incorporated and no lumps remain. The mixture should be creamy and homogenous. This step ensures that the wet ingredients will evenly coat the dry ingredients and bind them together effectively.
- Combine Wet and Dry: Bringing It All Together
- Pour Wet into Dry: Pour the wet ingredient mixture into the bowl with the dry ingredients.
- Stir Until Well Combined: Use a spatula or a large spoon to stir the wet and dry ingredients together until they are thoroughly combined. Ensure that all the oats and nuts are evenly coated with the wet mixture. The mixture will be slightly sticky and clumpy, which is exactly what you want for granola bars.
- Fold in Chocolate Chips (Optional): Adding a Touch of Indulgence: If you are using chocolate chips, gently fold them into the mixture at this stage, ensuring they are evenly distributed throughout.
- Press into Baking Dish: Shaping Your Granola Bars
- Transfer to Prepared Dish: Transfer the granola bar mixture into the parchment-lined baking dish.
- Spread Evenly: Use a spatula or your hands to spread the mixture evenly across the bottom of the dish.
- Press Down Firmly: This is a crucial step for creating granola bars that hold together well. Use the back of a spoon, a spatula, or your fingers to press the mixture down firmly and evenly into the baking dish. The more firmly you press, the more compact and less crumbly your granola bars will be. You can even use the bottom of a measuring cup or a glass to get a really firm and even press. Ensure the corners and edges are well-pressed.
- Bake to Golden Perfection: Achieving the Right Texture and Color
- Bake in Preheat Oven: Place the baking dish in the preheated oven.
- Bake for 20 Minutes: Bake for approximately 20 minutes, or until the edges of the granola bars are golden brown. The center might still seem slightly soft, but it will firm up as it cools. Keep an eye on the bars towards the end of the baking time to prevent them from burning, especially if your oven tends to run hot.
- Check for Doneness: The granola bars are done when the edges are nicely golden brown and the top is lightly golden and set. A toothpick inserted into the center might come out slightly moist but not wet.
- Cool Completely: Essential for Firmness and Easy Cutting
- Cool in Dish: Remove the baking dish from the oven and place it on a wire rack. Allow the granola bars to cool completely in the dish. This is a very important step! Do not attempt to cut the bars while they are still warm, as they will be too soft and crumbly. Cooling allows the bars to firm up and set properly, making them easier to cut and handle. Cooling completely can take at least 1-2 hours at room temperature, or you can speed up the process by placing the dish in the refrigerator for about 30-60 minutes.
- Cut and Serve: Enjoy Your Homemade Granola Bars
- Lift from Dish: Once the granola bars are completely cool and firm, use the parchment paper overhang to lift them out of the baking dish.
- Cut into Bars or Squares: Place the slab of granola bars on a cutting board. Use a sharp knife to cut them into squares or bars of your desired size. For cleaner cuts, you can use a large, sharp knife and cut with a firm, downward motion. Wiping the knife clean between cuts can also help to prevent sticking.
- Serve and Enjoy: Your homemade Maple Banana Nut Granola Bars are now ready to be served and enjoyed! They can be eaten immediately, or stored for later.
Nutrition
- Serving Size: One Normal Portion
- Calories: 200-250
- Fat: 8-12 grams
- Carbohydrates: 30-35 grams
- Fiber: 3-5 grams
- Protein: 4-6 grams


