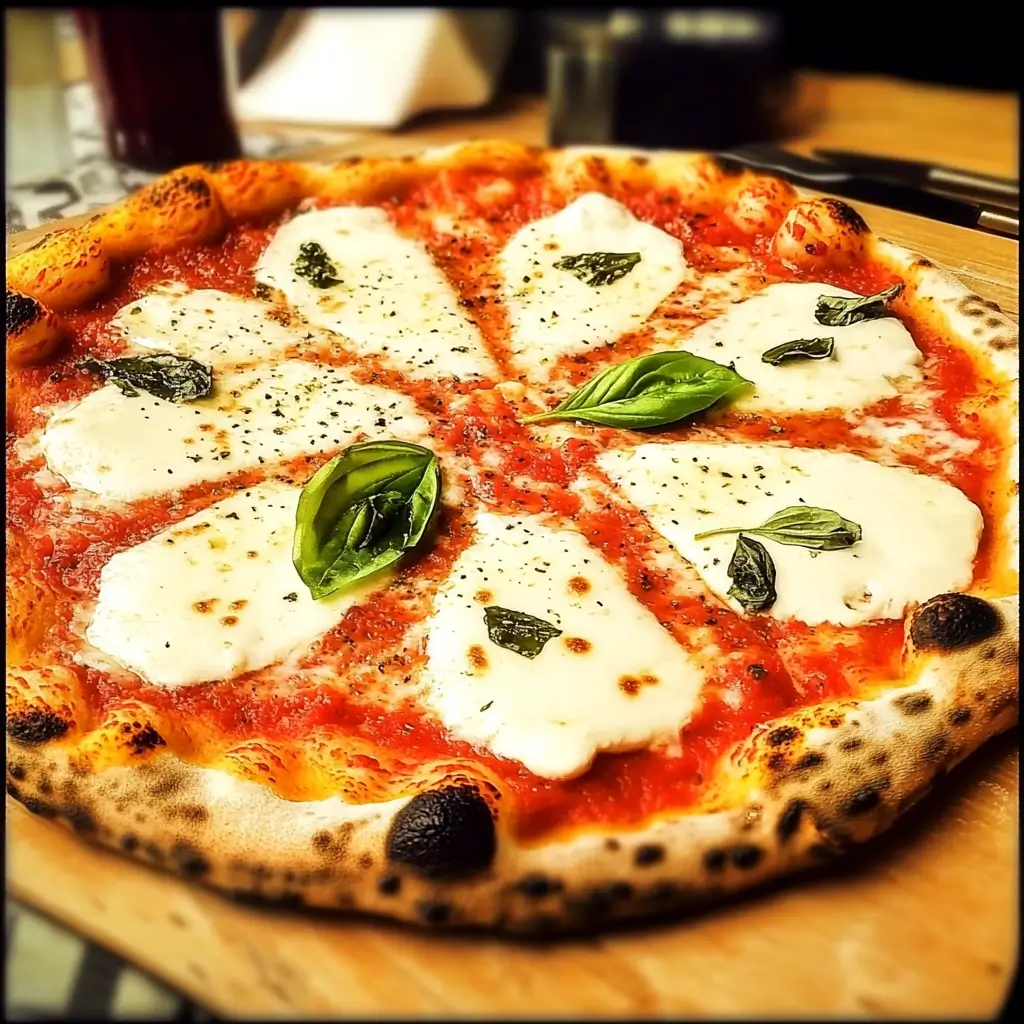
There’s a certain magic to a homemade Margherita pizza, a culinary alchemy that transforms simple ingredients into something truly special. I remember the first time I pulled a perfectly blistered, fragrant Margherita from my own oven – the aroma of baked dough, sweet San Marzano tomatoes, creamy mozzarella, and fresh basil filled the kitchen. My family gathered around, eyes wide, and that first bite was pure bliss. It wasn’t just pizza; it was a taste of Naples, a testament to tradition, and a moment of shared joy. Since then, this Authentic Margherita Pizza recipe has become a cherished staple in our home, a go-to for weekend gatherings, cozy nights in, and any occasion that calls for a touch of Italian sunshine. It’s more than just food; it’s an experience, a connection to a rich culinary heritage, and a delicious reminder that the best things in life are often the simplest. This recipe, honed over many attempts, captures that authentic spirit, delivering a crust with the perfect chew and char, a sauce that sings of summer, and cheese that melts into luscious, creamy pools. Prepare to fall in love with pizza all over again.
The Enduring Allure of the Authentic Margherita Pizza
The Margherita pizza is not just a pizza; it is the quintessential Neapolitan pizza, a culinary icon recognized and adored worldwide. Its beauty lies in its simplicity, a harmonious trinity of ingredients – vibrant red tomatoes, creamy white mozzarella, and fresh green basil – echoing the colors of the Italian flag. Legend has it that this patriotic pie was created in 1889 by pizzaiolo Raffaele Esposito of Pizzeria Brandi in Naples to honor Queen Margherita of Savoy during her visit. Whether an apocryphal tale or historical fact, the Margherita pizza has undoubtedly captured hearts and palates for over a century.
Crafting an authentic Margherita at home might seem daunting, but with the right ingredients, techniques, and a little patience, you can recreate a slice of Naples in your own kitchen. This comprehensive guide will walk you through every step, from creating the perfect Neapolitan-style dough to achieving that coveted leopard-spotted crust. We’ll delve into the nuances of ingredient selection, the science behind dough fermentation, and the art of baking a pizza that would make any Neapolitan pizzaiolo proud. Forget takeaway; true pizza perfection is within your reach.
Ingredients for Authentic Margherita Pizza (Makes 2 x 12-inch Pizzas)
Achieving an authentic Margherita pizza hinges on the quality of your ingredients. While simplicity is key, each component must shine.
For the Neapolitan-Style Pizza Dough:
- Flour: 500g “00” flour (Italian-style finely milled flour), plus extra for dusting (Alternatively, high-protein bread flour can be used, though “00” is preferred for its extensibility and fine crumb)
- Water: 325ml lukewarm water (around 95-105°F or 35-40°C – crucial for yeast activation)
- Salt: 10g fine sea salt (enhances flavor and controls yeast activity)
- Yeast: 3g active dry yeast (or 1g instant dry yeast, or 9g fresh yeast)
- Olive Oil: 1 tablespoon extra virgin olive oil (optional, for a slightly softer crumb and easier handling, though traditional Neapolitan dough often omits it)
- Sugar: 1 teaspoon granulated sugar (optional, helps activate yeast and adds a touch of browning, but purists may omit)
For the San Marzano Tomato Sauce:
- Tomatoes: 400g (1 can) whole San Marzano tomatoes, DOP certified if possible (these tomatoes are less acidic, sweeter, and meatier)
- Salt: ½ teaspoon fine sea salt, or to taste
- Fresh Basil: 2-3 fresh basil leaves, torn (optional, for infusing the sauce)
- Extra Virgin Olive Oil: 1 tablespoon (optional, for richness)
For the Toppings (per pizza):
- Fresh Mozzarella: 125-150g fresh mozzarella cheese (preferably Fior di Latte, made from cow’s milk, or Buffalo Mozzarella for a richer, tangier flavor), torn or sliced
- Fresh Basil Leaves: A generous handful (5-10 leaves per pizza), to be added after baking or in the last minute of baking
- Extra Virgin Olive Oil: A light drizzle to finish
- Parmigiano-Reggiano or Pecorino Romano: A light grating (optional, for an extra savory kick)
Why these ingredients?
- “00” Flour: This Italian flour is finely ground and has a specific protein content (typically 11-12.5%) that allows the dough to be stretched thin without tearing, yielding a crust that’s both soft and chewy with a slight crispness.
- San Marzano Tomatoes: Grown in the volcanic soil of the Sarno River valley near Mount Vesuvius, these tomatoes have a unique sweet flavor, low acidity, and fewer seeds, making them ideal for a simple, uncooked pizza sauce. The DOP (Denominazione d’Origine Protetta) label ensures their origin and quality.
- Fresh Mozzarella: Unlike low-moisture mozzarella, fresh mozzarella (Fior di Latte or Buffalo) melts into creamy pools rather than becoming oily or rubbery. It provides a delicate, milky flavor that complements the tomatoes and basil.
- Fresh Basil: Its aromatic, slightly peppery notes are essential to the Margherita’s flavor profile. It’s best added fresh after baking to preserve its vibrant color and aroma.
Step-by-Step Instructions for Crafting Your Margherita Masterpiece
Patience and attention to detail are your best friends when making authentic pizza. Let’s break down the process:
Phase 1: Making the Neapolitan-Style Pizza Dough
This dough benefits from a slow fermentation, which develops flavor and texture.
- Activate the Yeast (if using Active Dry Yeast):
- In a small bowl, combine the lukewarm water with the sugar (if using). Sprinkle the active dry yeast over the top.
- Let it sit for 5-10 minutes until it becomes foamy and fragrant. This indicates the yeast is alive and active.
- If using instant yeast, you can mix it directly with the flour. If using fresh yeast, crumble it into the water.
- Combine Dry Ingredients:
- In a large mixing bowl, or the bowl of a stand mixer, whisk together the “00” flour and fine sea salt.
- Mix Wet and Dry Ingredients:
- Create a well in the center of the flour mixture.
- Pour the activated yeast mixture (and olive oil, if using) into the well.
- Gradually incorporate the flour into the liquid using a fork or your hands, until a shaggy dough begins to form.
- Knead the Dough:
- By Hand: Turn the shaggy dough out onto a lightly floured surface. Knead for 10-15 minutes. The dough will start sticky but will become smooth, elastic, and slightly tacky. Use the heel of your hand to push the dough away from you, then fold it over and repeat. Rotate the dough occasionally.
- With a Stand Mixer: Using the dough hook attachment, mix on low speed for 8-10 minutes. The dough should clear the sides of the bowl and become smooth and elastic.
- Windowpane Test: To check if the dough is sufficiently kneaded, take a small piece and gently stretch it. If you can stretch it thin enough to see light through it without it tearing easily, it’s ready.
- First Proof (Bulk Fermentation):
- Lightly oil a large bowl. Place the kneaded dough into the bowl, turning it once to coat lightly with oil.
- Cover the bowl with plastic wrap or a damp kitchen towel.
- Let the dough rise in a warm, draft-free place for 1.5 – 2 hours, or until it has doubled in size. For enhanced flavor, you can opt for a longer, cold fermentation in the refrigerator for 24-72 hours after an initial 30-60 minute rise at room temperature. If cold fermenting, bring the dough to room temperature for at least 2-3 hours before shaping.
- Divide and Second Proof (Shaping into Balls):
- Gently punch down the risen dough to release the air.
- Turn it out onto a lightly floured surface.
- Divide the dough into two equal portions (each will be around 260-280g).
- Shape each portion into a smooth, tight ball. To do this, flatten a portion slightly, then pull the edges into the center, pinching them together. Flip the ball over so the seam is down, and rotate it on the work surface under a cupped hand to create surface tension.
- Place the dough balls on a lightly floured tray or individual containers, ensuring they have space to expand.
- Cover them again with plastic wrap or a damp towel.
- Let them proof for another 45-60 minutes at room temperature (or longer if they were cold-fermented and still cool) until puffy. They should indent slightly when gently poked and spring back slowly.
Phase 2: Preparing the San Marzano Tomato Sauce
Simplicity is the soul of authentic Neapolitan pizza sauce.
- Drain Tomatoes (Optional but Recommended):
- If your San Marzano tomatoes are very watery, you can drain some of the excess liquid to prevent a soggy pizza.
- Crush the Tomatoes:
- Pour the whole San Marzano tomatoes into a bowl.
- Using your hands (the traditional way!), crush the tomatoes into a rustic, slightly chunky sauce. Alternatively, you can use an immersion blender for a few quick pulses, but avoid over-processing into a smooth puree. You want some texture.
- Season the Sauce:
- Stir in the fine sea salt.
- If using, tear the fresh basil leaves and add them to the sauce. Drizzle in the optional extra virgin olive oil.
- Taste and adjust seasoning if necessary. The sauce should be bright and fresh. Do not cook the sauce – it will cook on the pizza.
Phase 3: Assembling and Baking Your Margherita Pizza
This is where the magic happens! High heat is critical.
- Preheat Your Oven and Baking Surface:
- At least 45-60 minutes before baking, place a pizza stone, baking steel, or an inverted heavy-duty baking sheet on a rack in the upper-middle or top third of your oven.
- Preheat your oven to its highest possible temperature, typically 500-550°F (260-290°C). A baking steel is particularly good at retaining and transferring heat.
- Prepare Your Workspace:
- Have all your toppings ready: the prepared tomato sauce, torn fresh mozzarella, fresh basil leaves, and olive oil.
- Lightly flour a pizza peel or the back of a baking sheet. If you don’t have a peel, you can assemble the pizza on parchment paper cut to size, which can then be slid onto the hot stone/steel.
- Stretch the Dough:
- Take one dough ball and place it on a generously floured surface (semolina flour mixed with “00” flour works well for easy sliding).
- Using your fingertips, gently press down in the center of the dough, working outwards to create a rim (the cornicione). Leave about a ½ to 1-inch border untouched.
- Carefully lift the dough. Let gravity help you stretch it by rotating it, supporting it with the backs of your hands. You can also gently stretch it over your knuckles.
- Aim for a 10 to 12-inch round. Avoid using a rolling pin, as this deflates the air pockets that create a light, airy crust. Be careful not to tear the center. If it resists stretching, let it rest for 5-10 minutes, covered, then try again.
- Top the Pizza:
- Transfer the stretched dough to your prepared pizza peel (or parchment paper).
- Working quickly, spread a thin, even layer of the San Marzano tomato sauce over the dough, leaving the border clean. Don’t use too much sauce, as this can make the pizza soggy (about 1/3 to 1/2 cup per pizza is usually sufficient).
- Distribute the torn pieces of fresh mozzarella evenly over the sauce.
- If you’re adding Parmigiano-Reggiano, give it a light grating now.
- Bake the Pizza:
- With a quick, decisive jerking motion, slide the pizza from the peel onto the hot baking stone/steel. If using parchment, slide the parchment and pizza together. After 3-4 minutes, you might be able to carefully pull the parchment out from under the pizza using tongs.
- Bake for 7-12 minutes, depending on your oven’s temperature and the desired crispness. The crust should be golden brown, puffed up, and have some charring (leopard spots), and the mozzarella should be melted and bubbly.
- If your oven has hot spots, you may need to rotate the pizza halfway through baking for even cooking.
- Finish and Serve:
- Carefully remove the pizza from the oven using the peel or large tongs.
- Immediately scatter the fresh basil leaves over the hot pizza. The residual heat will wilt them slightly and release their aroma.
- Drizzle lightly with high-quality extra virgin olive oil.
- Let the pizza rest for a minute or two before slicing and serving. This allows the cheese to set slightly.
- Repeat the process with the second dough ball and remaining toppings.
Nutrition Facts (Approximate)
- Servings: This recipe makes 2 x 12-inch pizzas. Each pizza can be considered 2-4 servings, depending on appetite.
- Calories per serving (assuming 1/4 of one 12-inch pizza, or 2 slices): Approximately 350-450 calories.
Disclaimer: Nutritional information is an estimate and can vary significantly based on specific ingredient brands, precise quantities used, and portion sizes.
- Dough contribution: Primarily carbohydrates from flour.
- Sauce contribution: Vitamins (especially C and A from tomatoes), minimal calories.
- Cheese contribution: Protein, fat, calcium.
- Olive oil contribution: Healthy monounsaturated fats.
Preparation and Cooking Time
Understanding the time commitment helps in planning your pizza-making adventure.
- Dough Preparation (Active Time): 20-30 minutes (mixing, kneading)
- Dough First Proof (Inactive Time): 1.5 – 2 hours (room temperature) OR 24-72 hours (cold fermentation in refrigerator, plus 2-3 hours to come to room temp)
- Dough Second Proof (Inactive Time): 45-60 minutes
- Sauce Preparation (Active Time): 5-10 minutes
- Oven & Stone Preheating (Inactive Time): 45-60 minutes
- Assembly & Baking (per pizza, Active Time): 5 minutes assembly, 7-12 minutes baking
Total Estimated Time (with room temp proofing):
- Active Time: Approximately 30-45 minutes
- Inactive Time: Approximately 3 – 4 hours
Total Estimated Time (with 24-hour cold fermentation):
- Active Time: Approximately 30-45 minutes
- Inactive Time: Approximately 27-28 hours (including final room temp rise)
While it seems like a long process, much of it is hands-off waiting time, perfect for anticipating the deliciousness to come!
How to Serve Your Authentic Margherita Pizza
Serving a Margherita pizza is an event in itself. Here are some ways to enhance the experience:
- Classic Presentation:
- Slice the pizza into 6 or 8 wedges using a sharp pizza cutter or kitchen shears.
- Serve immediately while hot and the cheese is perfectly melted.
- Accompaniments:
- Simple Green Salad: A lightly dressed arugula or mixed greens salad with a lemon vinaigrette provides a fresh, peppery contrast.
- Chili Oil or Red Pepper Flakes: For those who enjoy a bit of heat, offer these on the side.
- Garlic Infused Olive Oil: A small bowl of quality olive oil infused with garlic for dipping the crusts.
- Beverage Pairings:
- Wine:
- Red: A light-bodied Italian red like Chianti, Sangiovese, or Barbera complements the tomato sauce beautifully.
- White: A crisp, dry Italian white such as Pinot Grigio, Vermentino, or Fiano can be refreshing.
- Rosé: A dry rosé also works wonderfully, especially in warmer weather.
- Beer: A classic Italian lager (like Peroni or Moretti), a crisp Pilsner, or even a Pale Ale pairs well.
- Non-alcoholic: Sparkling water with a squeeze of lemon, or a classic Italian soda like San Pellegrino Aranciata or Limonata.
- Wine:
- Occasions:
- Casual Weeknight Dinner: Makes any evening feel special.
- Weekend Pizza Night: A fun activity for family or friends. Get everyone involved in shaping their own!
- Parties and Gatherings: Pizzas are always a crowd-pleaser. You can make smaller, individual-sized pizzas.
- Eating Etiquette (Neapolitan Style):
- In Naples, pizzas are often served unsliced, and eaten with a knife and fork.
- Alternatively, some Neapolitans fold a slice in half (like a wallet – a portafoglio) to eat it on the go. Feel free to adopt whichever style suits you!
Additional Tips for Margherita Pizza Perfection
Unlock the secrets to an even better homemade Margherita with these expert tips:
- Invest in a Pizza Stone or Steel:
This is arguably the single most impactful upgrade for homemade pizza. A pizza stone or, even better, a baking steel absorbs and radiates intense heat, mimicking the floor of a professional pizza oven. This results in a crispier, well-cooked crust with those desirable charred spots. Preheat it thoroughly for at least 45-60 minutes at your oven’s highest temperature. - Don’t Overload with Toppings:
The beauty of a Margherita is its balance. Too much sauce can make the dough soggy, and too much cheese can weigh it down, preventing the crust from cooking properly and overwhelming the delicate flavors. A thin layer of sauce and strategically placed mozzarella pieces are key. Less is truly more. - Master Dough Hydration and Handling:
The hydration level (ratio of water to flour) significantly affects dough texture. Neapolitan dough is typically around 60-65% hydration. Higher hydration can yield a lighter, airier crust but is trickier to handle. Use “00” flour and be gentle when stretching to preserve the air bubbles created during fermentation. Avoid a rolling pin at all costs. - Embrace High Heat and Quick Baking:
Authentic Neapolitan pizza is cooked in wood-fired ovens at temperatures exceeding 800°F (430°C) for just 60-90 seconds. While home ovens don’t reach these temperatures, get yours as hot as possible (500-550°F / 260-290°C). This intense heat quickly cooks the crust, creating a delightful contrast between a crispy exterior and a chewy interior, while also perfectly melting the cheese and warming the sauce. - Use High-Quality Fresh Mozzarella and Manage its Moisture:
Fresh mozzarella has a high moisture content. To prevent a watery pizza, tear the mozzarella into pieces and let it drain on a paper towel-lined plate for at least 30 minutes before using. Some even gently pat it dry. Buffalo mozzarella offers superior flavor but can be even more watery, so draining is crucial. Fior di Latte (cow’s milk fresh mozzarella) is a fantastic, more readily available option.
Frequently Asked Questions (FAQ) about Margherita Pizza
Q1: Can I make the pizza dough ahead of time?
A: Absolutely! In fact, it’s highly recommended for better flavor development. After the initial kneading, you can let the dough undergo its first proof (bulk fermentation) in the refrigerator for 24 to 72 hours. This slow, cold fermentation enhances the crust’s complexity and texture. Simply place the oiled dough in a covered bowl in the fridge. When ready to use, remove it, divide and shape it into balls, and let them come to room temperature and complete their second proof (about 2-4 hours, depending on ambient temperature) before stretching.
Q2: My pizza crust isn’t getting crispy. What am I doing wrong?
A: Several factors could be at play:
* Oven Temperature: Your oven might not be hot enough. Ensure it’s preheated to its maximum temperature.
* Baking Surface: A preheated pizza stone or steel is crucial for direct, intense heat transfer to the crust. If you’re using a regular baking sheet, it won’t get as crispy.
* Dough Hydration: Dough that’s too wet might result in a softer, less crispy crust.
* Baking Time: You might need to bake it a little longer.
* Sauce/Topping Overload: Too much moisture from sauce or cheese can lead to a soggy bottom.
Q3: What’s the difference between San Marzano tomatoes and other canned tomatoes? Why are they preferred?
A: San Marzano tomatoes are a specific variety of plum tomatoes grown in the nutrient-rich volcanic soil of the Agro Sarnese-Nocerino region near Naples, Italy. They are prized for their distinctively sweet flavor, lower acidity, fewer seeds, and firm, meaty flesh compared to other canned tomatoes. This makes them ideal for simple, uncooked pizza sauces where the tomato flavor is paramount. Look for “DOP” (Denominazione d’Origine Protetta) certification on the can, which guarantees their authenticity and origin.
Q4: Can I use dried basil instead of fresh for a Margherita pizza?
A: While you can, it’s strongly discouraged for an authentic Margherita experience. Fresh basil is a defining characteristic, providing a bright, aromatic, and slightly peppery flavor that dried basil simply cannot replicate. Dried basil has a more muted, concentrated, and different flavor profile. If fresh basil isn’t available, it’s better to make a “pizza marinara” (tomatoes, garlic, oregano, olive oil) or use the fresh basil very sparingly if it’s not at its peak. Always add fresh basil after baking or in the very last minute to preserve its delicate aroma and color.
Q5: Can I add other toppings to a Margherita pizza?
A: You can certainly add other toppings to your pizza, but then it technically ceases to be a “Margherita pizza.” The beauty of the Margherita lies in its simplicity and the perfect harmony of its three key ingredients representing the Italian flag. If you add pepperoni, mushrooms, or onions, you’re creating a different (and potentially delicious!) type of pizza. The Margherita is a celebration of pure, high-quality ingredients. However, your kitchen, your rules – feel free to experiment once you’ve mastered the classic!

Margherita Pizza Recipe
Ingredients
For the Neapolitan-Style Pizza Dough:
- Flour: 500g “00” flour (Italian-style finely milled flour), plus extra for dusting (Alternatively, high-protein bread flour can be used, though “00” is preferred for its extensibility and fine crumb)
- Water: 325ml lukewarm water (around 95-105°F or 35-40°C – crucial for yeast activation)
- Salt: 10g fine sea salt (enhances flavor and controls yeast activity)
- Yeast: 3g active dry yeast (or 1g instant dry yeast, or 9g fresh yeast)
- Olive Oil: 1 tablespoon extra virgin olive oil (optional, for a slightly softer crumb and easier handling, though traditional Neapolitan dough often omits it)
- Sugar: 1 teaspoon granulated sugar (optional, helps activate yeast and adds a touch of browning, but purists may omit)
For the San Marzano Tomato Sauce:
- Tomatoes: 400g (1 can) whole San Marzano tomatoes, DOP certified if possible (these tomatoes are less acidic, sweeter, and meatier)
- Salt: ½ teaspoon fine sea salt, or to taste
- Fresh Basil: 2-3 fresh basil leaves, torn (optional, for infusing the sauce)
- Extra Virgin Olive Oil: 1 tablespoon (optional, for richness)
For the Toppings (per pizza):
- Fresh Mozzarella: 125-150g fresh mozzarella cheese (preferably Fior di Latte, made from cow’s milk, or Buffalo Mozzarella for a richer, tangier flavor), torn or sliced
- Fresh Basil Leaves: A generous handful (5-10 leaves per pizza), to be added after baking or in the last minute of baking
- Extra Virgin Olive Oil: A light drizzle to finish
- Parmigiano-Reggiano or Pecorino Romano: A light grating (optional, for an extra savory kick)
Instructions
Phase 1: Making the Neapolitan-Style Pizza Dough
This dough benefits from a slow fermentation, which develops flavor and texture.
- Activate the Yeast (if using Active Dry Yeast):
- In a small bowl, combine the lukewarm water with the sugar (if using). Sprinkle the active dry yeast over the top.
- Let it sit for 5-10 minutes until it becomes foamy and fragrant. This indicates the yeast is alive and active.
- If using instant yeast, you can mix it directly with the flour. If using fresh yeast, crumble it into the water.
- Combine Dry Ingredients:
- In a large mixing bowl, or the bowl of a stand mixer, whisk together the “00” flour and fine sea salt.
- Mix Wet and Dry Ingredients:
- Create a well in the center of the flour mixture.
- Pour the activated yeast mixture (and olive oil, if using) into the well.
- Gradually incorporate the flour into the liquid using a fork or your hands, until a shaggy dough begins to form.
- Knead the Dough:
- By Hand: Turn the shaggy dough out onto a lightly floured surface. Knead for 10-15 minutes. The dough will start sticky but will become smooth, elastic, and slightly tacky. Use the heel of your hand to push the dough away from you, then fold it over and repeat. Rotate the dough occasionally.
- With a Stand Mixer: Using the dough hook attachment, mix on low speed for 8-10 minutes. The dough should clear the sides of the bowl and become smooth and elastic.
- Windowpane Test: To check if the dough is sufficiently kneaded, take a small piece and gently stretch it. If you can stretch it thin enough to see light through it without it tearing easily, it’s ready.
- First Proof (Bulk Fermentation):
- Lightly oil a large bowl. Place the kneaded dough into the bowl, turning it once to coat lightly with oil.
- Cover the bowl with plastic wrap or a damp kitchen towel.
- Let the dough rise in a warm, draft-free place for 1.5 – 2 hours, or until it has doubled in size. For enhanced flavor, you can opt for a longer, cold fermentation in the refrigerator for 24-72 hours after an initial 30-60 minute rise at room temperature. If cold fermenting, bring the dough to room temperature for at least 2-3 hours before shaping.
- Divide and Second Proof (Shaping into Balls):
- Gently punch down the risen dough to release the air.
- Turn it out onto a lightly floured surface.
- Divide the dough into two equal portions (each will be around 260-280g).
- Shape each portion into a smooth, tight ball. To do this, flatten a portion slightly, then pull the edges into the center, pinching them together. Flip the ball over so the seam is down, and rotate it on the work surface under a cupped hand to create surface tension.
- Place the dough balls on a lightly floured tray or individual containers, ensuring they have space to expand.
- Cover them again with plastic wrap or a damp towel.
- Let them proof for another 45-60 minutes at room temperature (or longer if they were cold-fermented and still cool) until puffy. They should indent slightly when gently poked and spring back slowly.
Phase 2: Preparing the San Marzano Tomato Sauce
Simplicity is the soul of authentic Neapolitan pizza sauce.
- Drain Tomatoes (Optional but Recommended):
- If your San Marzano tomatoes are very watery, you can drain some of the excess liquid to prevent a soggy pizza.
- Crush the Tomatoes:
- Pour the whole San Marzano tomatoes into a bowl.
- Using your hands (the traditional way!), crush the tomatoes into a rustic, slightly chunky sauce. Alternatively, you can use an immersion blender for a few quick pulses, but avoid over-processing into a smooth puree. You want some texture.
- Season the Sauce:
- Stir in the fine sea salt.
- If using, tear the fresh basil leaves and add them to the sauce. Drizzle in the optional extra virgin olive oil.
- Taste and adjust seasoning if necessary. The sauce should be bright and fresh. Do not cook the sauce – it will cook on the pizza.
Phase 3: Assembling and Baking Your Margherita Pizza
This is where the magic happens! High heat is critical.
- Preheat Your Oven and Baking Surface:
- At least 45-60 minutes before baking, place a pizza stone, baking steel, or an inverted heavy-duty baking sheet on a rack in the upper-middle or top third of your oven.
- Preheat your oven to its highest possible temperature, typically 500-550°F (260-290°C). A baking steel is particularly good at retaining and transferring heat.
- Prepare Your Workspace:
- Have all your toppings ready: the prepared tomato sauce, torn fresh mozzarella, fresh basil leaves, and olive oil.
- Lightly flour a pizza peel or the back of a baking sheet. If you don’t have a peel, you can assemble the pizza on parchment paper cut to size, which can then be slid onto the hot stone/steel.
- Stretch the Dough:
- Take one dough ball and place it on a generously floured surface (semolina flour mixed with “00” flour works well for easy sliding).
- Using your fingertips, gently press down in the center of the dough, working outwards to create a rim (the cornicione). Leave about a ½ to 1-inch border untouched.
- Carefully lift the dough. Let gravity help you stretch it by rotating it, supporting it with the backs of your hands. You can also gently stretch it over your knuckles.
- Aim for a 10 to 12-inch round. Avoid using a rolling pin, as this deflates the air pockets that create a light, airy crust. Be careful not to tear the center. If it resists stretching, let it rest for 5-10 minutes, covered, then try again.
- Top the Pizza:
- Transfer the stretched dough to your prepared pizza peel (or parchment paper).
- Working quickly, spread a thin, even layer of the San Marzano tomato sauce over the dough, leaving the border clean. Don’t use too much sauce, as this can make the pizza soggy (about 1/3 to 1/2 cup per pizza is usually sufficient).
- Distribute the torn pieces of fresh mozzarella evenly over the sauce.
- If you’re adding Parmigiano-Reggiano, give it a light grating now.
- Bake the Pizza:
- With a quick, decisive jerking motion, slide the pizza from the peel onto the hot baking stone/steel. If using parchment, slide the parchment and pizza together. After 3-4 minutes, you might be able to carefully pull the parchment out from under the pizza using tongs.
- Bake for 7-12 minutes, depending on your oven’s temperature and the desired crispness. The crust should be golden brown, puffed up, and have some charring (leopard spots), and the mozzarella should be melted and bubbly.
- If your oven has hot spots, you may need to rotate the pizza halfway through baking for even cooking.
- Finish and Serve:
- Carefully remove the pizza from the oven using the peel or large tongs.
- Immediately scatter the fresh basil leaves over the hot pizza. The residual heat will wilt them slightly and release their aroma.
- Drizzle lightly with high-quality extra virgin olive oil.
- Let the pizza rest for a minute or two before slicing and serving. This allows the cheese to set slightly.
- Repeat the process with the second dough ball and remaining toppings.
Nutrition
- Serving Size: One Normal Portion
- Calories: 350-450