


Introduction
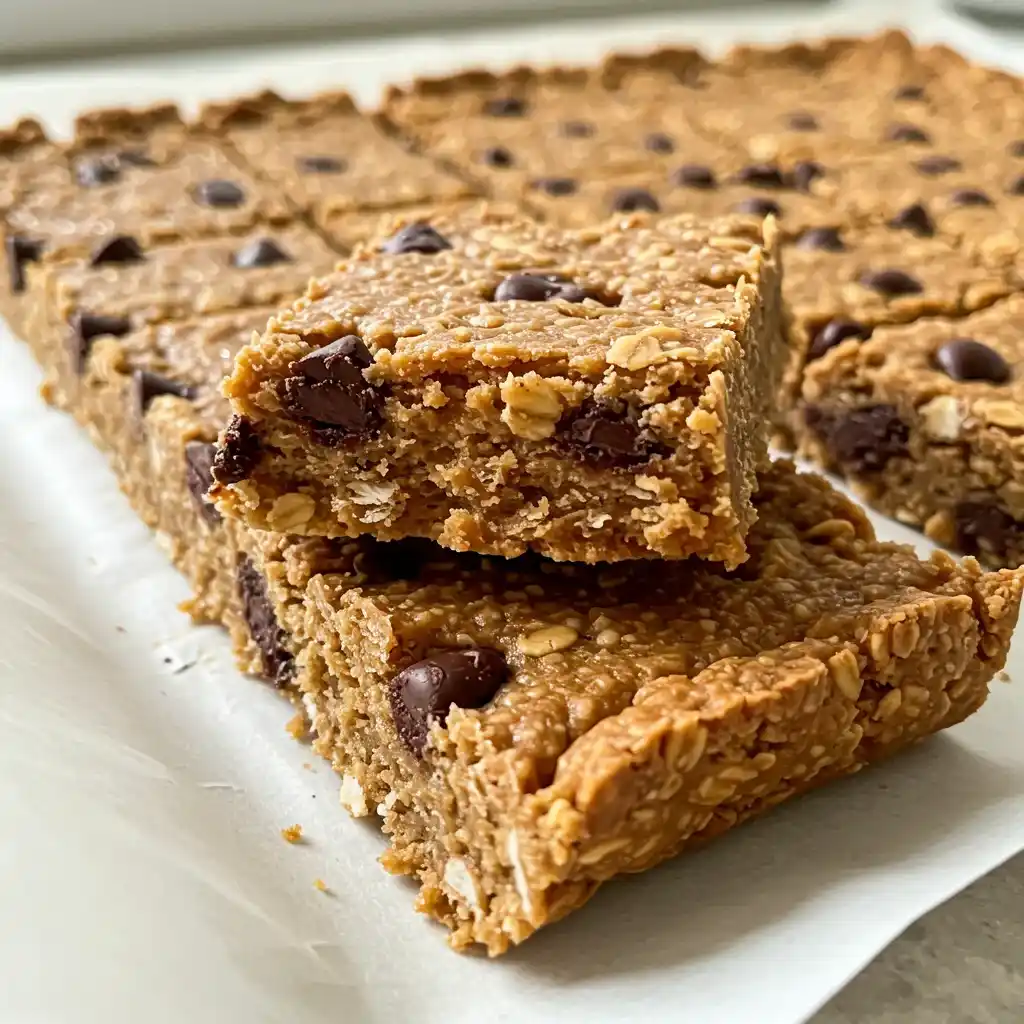
When it comes to quick and delightful desserts, no-bake chocolate peanut butter bars have earned a special place in the hearts (and stomachs) of dessert lovers everywhere. These bars are not only a scrumptious treat but also a breeze to prepare, making them an ideal solution for those moments when you need something sweet without the hassle of turning on the oven. With just 15 minutes of preparation time and a chilling period of about an hour, these bars are perfect for satisfying a sweet craving, serving at a gathering, or simply indulging after a long day. Their rich, velvety chocolate combined with the creamy, nutty flavor of peanut butter creates an irresistible combination that is both comforting and satisfying. Let’s explore the world of no-bake chocolate peanut butter bars and learn how to make them at home with minimal effort!
Ingredients
To create these delectable bars, gather the following ingredients:
- 1 cup peanut butter
Choose between creamy or chunky peanut butter based on your texture preference. Creamy peanut butter will yield a smooth consistency, while chunky peanut butter will add delightful crunch. - 1/2 cup honey or maple syrup
Honey provides a rich, sweet flavor that pairs beautifully with chocolate and peanut butter. For a vegan-friendly option, opt for pure maple syrup, which also adds a unique depth of flavor. - 2 cups rolled oats
Rolled oats are perfect for this recipe, contributing a chewy texture and wholesome goodness. Avoid instant oats, as they may result in a mushy consistency. - 1/2 cup chocolate chips
Choose your favorite variety—semi-sweet, dark, or dairy-free chocolate chips work wonderfully. For a unique twist, consider using flavored chocolate chips, such as mint or caramel. - 1/4 cup coconut oil
Coconut oil not only adds a subtle tropical flavor but also helps bind the mixture together. If you prefer a different taste, you can substitute this with unsalted butter or a vegan butter alternative.
Instructions
Creating your own no-bake chocolate peanut butter bars is a straightforward process. Follow these simple steps:
- Mix the Base
In a large mixing bowl, combine the peanut butter and honey or maple syrup. Use a spatula or wooden spoon to stir until the mixture is smooth and well-blended, ensuring there are no lumps. - Combine the Oats
Gradually add the rolled oats to the peanut butter mixture. Stir continuously to ensure the oats are fully integrated and evenly distributed throughout the mixture. - Prepare the Chocolate Mixture
In a separate microwave-safe bowl, combine the chocolate chips and coconut oil. Microwave in 30-second intervals, stirring in between, until the chocolate and oil are fully melted and smooth. Be careful not to overheat, as chocolate can burn easily. - Blend the Mixtures
Pour the melted chocolate mixture into the oat mixture, stirring thoroughly to ensure the chocolate is well incorporated. The mixture should be uniformly chocolatey and sticky. - Press into a Pan
Line an 8×8 inch baking pan with parchment paper, allowing some overhang for easy removal. Pour the mixture into the pan and press it down evenly using a spatula or your hands, smoothing the top to create a flat surface. - Refrigerate
Place the pan in the refrigerator and allow it to chill for at least 1 hour. This step is crucial as it helps the bars to firm up and makes cutting easier. - Serve
Once the bars are set, gently lift them out of the pan using the parchment paper overhang. Cut into approximately 12 equal-sized bars. Enjoy immediately, or store them for later!
Nutrition Facts
These no-bake chocolate peanut butter bars are not only a delicious treat but also boast a reasonable nutritional profile. Here’s a breakdown of the nutrition facts per bar:
- Calories: 150
- Protein: 4g
- Carbohydrates: 20g
- Fat: 8g
- Sugar: 5g
Packed with protein and healthy fats, these bars serve as a great source of energy, making them an excellent snack option for any time of the day.
How to Serve
The versatility of no-bake chocolate peanut butter bars makes them a fantastic addition to any meal or occasion. Their rich flavor and satisfying texture not only make them delicious but also allow for a variety of creative serving suggestions that enhance their appeal. Here are some comprehensive ideas for serving these delightful bars:
As a Snack
No-bake chocolate peanut butter bars are ideal for a quick pick-me-up during the day. Their combination of protein from the peanut butter and energy from the chocolate makes them a perfect snack to curb hunger and satisfy cravings. Whether you’re at the office, studying for exams, or simply enjoying a leisurely day at home, these bars can be cut into bite-sized pieces for easy snacking. For added convenience, consider storing them in an airtight container in your fridge. This way, they remain fresh and ready to grab when you need a boost. You might also pair them with a piece of fruit, like an apple or banana, for a balanced snack that provides both fiber and protein.
Dessert
Impress your guests by serving these bars as a dessert at dinner parties or casual gatherings. Their rich and decadent flavor profile complements a variety of meal themes, from casual barbecues to elegant dinner parties. To elevate the presentation, consider drizzling the bars with additional melted chocolate or a warm peanut butter sauce for extra indulgence. You could also sprinkle them with crushed nuts, sea salt, or even colorful sprinkles to create a visually appealing dessert. For an added touch, serve them alongside fresh berries or a fruit compote to contrast the richness of the bars with some acidity and freshness.
For those looking to make a more substantial dessert, consider layering the bars with whipped cream or yogurt to create a parfait. Simply crumble the bars into a glass, layer with whipped cream, and repeat until you reach the top. This not only enhances the flavor but also provides a beautiful presentation that will impress your guests.
On-the-Go
For busy individuals or families, these bars can be conveniently wrapped in parchment paper or foil, making them a healthy on-the-go snack that fits easily into your bag or lunchbox. This portable option is perfect for anyone who needs a nutritious and satisfying treat while commuting, traveling, or running errands. To make it even easier, you can pre-portion the bars into individual servings, reducing the temptation to overindulge. You might also consider creating a snack pack by pairing the bars with nuts, dried fruit, or yogurt-covered raisins for a varied and nutritious snack option that can help keep energy levels up throughout the day.
With Ice Cream
Elevate your dessert experience by pairing these bars with a scoop of vanilla or chocolate ice cream. The combination of warm and cold, creamy and crunchy, creates a delightful treat that is sure to please any palate. For an even more indulgent experience, consider lightly toasting the bars in the oven for a few minutes before serving them with ice cream. This will enhance their flavor and provide a warm contrast to the cold ice cream.
You can also create an ice cream sandwich by placing a scoop of ice cream between two pieces of the bar, allowing for a delightful fusion of textures and flavors. For added flair, garnish the plate with chocolate syrup, caramel drizzle, or a dusting of cocoa powder. A sprig of mint on top can also add a refreshing touch to this decadent dessert.
With Coffee or Tea
Consider pairing these no-bake chocolate peanut butter bars with a warm cup of coffee or tea. The deep, rich flavors of the chocolate and peanut butter complement the robust taste of coffee or the soothing qualities of herbal tea. This combination makes for a perfect afternoon treat or a cozy evening snack, allowing you to unwind while enjoying a delightful pairing. You could even create a mini coffee bar at your next gathering, where guests can enjoy the bars alongside a variety of coffee options, such as espresso, cappuccino, or cold brew.
In summary, no-bake chocolate peanut butter bars are more than just a simple treat. Their flexibility allows them to shine in various contexts, whether as a quick snack, an impressive dessert, a convenient on-the-go option, or paired with ice cream for an elevated experience. With these creative serving suggestions, you can ensure that these bars are a delightful addition to any meal or occasion, catering to different tastes and preferences.
Additional Tips
To guarantee that your no-bake chocolate peanut butter bars turn out perfectly every time, consider the following comprehensive tips:
1. Texture Enhancements
For those who enjoy a bit of crunch in their treats, consider mixing in a variety of chopped nuts or seeds before pressing the mixture into the pan. Nuts such as almonds, walnuts, or pecans not only add a delightful crunch but also contribute healthy fats and protein, enhancing the nutritional profile of your bars. If you prefer a plant-based option, seeds like chia or flaxseeds can also be stirred into the mixture. Chia seeds, in particular, can absorb moisture and add a unique texture while providing omega-3 fatty acids. Toasting the nuts or seeds lightly beforehand can elevate their flavor and add an extra layer of complexity to the bars.
2. Sweetness Control
Sweetness is subjective, and personal preferences vary widely. To achieve a balance that suits your palate, adjust the amount of honey or maple syrup in the recipe. Start with the recommended amount, then taste the mixture before pouring it into the pan. If it feels a bit too bitter from the cocoa or too rich from the peanut butter, consider adding more sweetener gradually. Additionally, remember that the sweetness of the bars can also be influenced by the toppings you choose. For example, if you plan to drizzle melted chocolate on top, you might want to reduce the sweetener in the base to prevent the overall flavor from becoming overly sweet.
3. Proper Storage Techniques
Storage is crucial for maintaining the freshness and flavor of your no-bake chocolate peanut butter bars. To keep them at their best, store the bars in an airtight container in the refrigerator, where they can last for up to a week. If you want to enjoy them over a longer period, freezing is an excellent option. When freezing, it’s important to separate the layers of bars with parchment paper to prevent them from sticking together. This way, you can easily grab a single bar whenever you crave a sweet treat. When you’re ready to eat, simply remove the desired number of bars from the freezer and let them thaw in the refrigerator for about 30 minutes before enjoying.
4. Customization Options
One of the joys of making no-bake chocolate peanut butter bars is the opportunity to customize them to your liking. Feel free to experiment with different flavors and textures to make the recipe uniquely yours. Adding shredded coconut can introduce a tropical twist, while dried fruits like cranberries, raisins, or even chopped apricots can add a chewy texture and a hint of natural sweetness. For a gourmet touch, consider sprinkling a pinch of sea salt on top before the bars set; this contrast can elevate the flavor profile significantly.
Moreover, spices such as cinnamon or nutmeg can infuse your bars with warmth and depth. Just a dash of cinnamon can enhance the chocolate flavor and add a comforting aroma. If you’re feeling adventurous, try incorporating other flavorings like vanilla extract or almond extract to complement the peanut butter.
By implementing these additional tips, you can ensure that your no-bake chocolate peanut butter bars are not only delicious but also tailored to your taste preferences and lifestyle. Enjoy the process of creating and customizing your treats, and indulge in the satisfaction of a homemade dessert that’s both easy to make and delectably satisfying!
FAQs
- Can I use quick oats instead of rolled oats?
Yes, quick oats can be used, but they will result in a softer texture compared to rolled oats. Rolled oats provide a better chewiness that many prefer. - Are these bars gluten-free?
Absolutely! If you use certified gluten-free oats, these bars can easily be made gluten-free. - Can I substitute peanut butter with another nut butter?
Yes! Almond butter, cashew butter, or sunflower seed butter are excellent alternatives that provide their own unique flavors and textures. - How long do these bars last?
Stored in the refrigerator, they can last up to a week. If frozen, they can be kept for up to 3 months. Just thaw them in the refrigerator before enjoying. - What can I use instead of coconut oil?
Coconut oil can be replaced with unsalted butter or a vegan butter substitute if you prefer a different flavor profile.
Conclusion
No-bake chocolate peanut butter bars are a delightful combination of flavors and textures that are sure to please anyone with a sweet tooth. Their ease of preparation, coupled with the flexibility to customize flavors, makes them a go-to treat for any occasion—be it a family gathering, a casual snack, or a thoughtful homemade gift. Whether you’re an experienced cook or a novice in the kitchen, you can confidently whip up these bars and indulge in the rich, satisfying blend of chocolate and peanut butter. Try making these bars today, and treat yourself to a delicious no-bake delight that’s not only perfect for sharing but also ideal for savoring all by yourself!
Print
No-Bake Chocolate Peanut Butter Bars recipe
Ingredients
- 1 cup peanut butter
Choose between creamy or chunky peanut butter based on your texture preference. Creamy peanut butter will yield a smooth consistency, while chunky peanut butter will add delightful crunch. - 1/2 cup honey or maple syrup
Honey provides a rich, sweet flavor that pairs beautifully with chocolate and peanut butter. For a vegan-friendly option, opt for pure maple syrup, which also adds a unique depth of flavor. - 2 cups rolled oats
Rolled oats are perfect for this recipe, contributing a chewy texture and wholesome goodness. Avoid instant oats, as they may result in a mushy consistency. - 1/2 cup chocolate chips
Choose your favorite variety—semi-sweet, dark, or dairy-free chocolate chips work wonderfully. For a unique twist, consider using flavored chocolate chips, such as mint or caramel. - 1/4 cup coconut oil
Coconut oil not only adds a subtle tropical flavor but also helps bind the mixture together. If you prefer a different taste, you can substitute this with unsalted butter or a vegan butter alternative.
Instructions
- Mix the Base
In a large mixing bowl, combine the peanut butter and honey or maple syrup. Use a spatula or wooden spoon to stir until the mixture is smooth and well-blended, ensuring there are no lumps. - Combine the Oats
Gradually add the rolled oats to the peanut butter mixture. Stir continuously to ensure the oats are fully integrated and evenly distributed throughout the mixture. - Prepare the Chocolate Mixture
In a separate microwave-safe bowl, combine the chocolate chips and coconut oil. Microwave in 30-second intervals, stirring in between, until the chocolate and oil are fully melted and smooth. Be careful not to overheat, as chocolate can burn easily. - Blend the Mixtures
Pour the melted chocolate mixture into the oat mixture, stirring thoroughly to ensure the chocolate is well incorporated. The mixture should be uniformly chocolatey and sticky. - Press into a Pan
Line an 8×8 inch baking pan with parchment paper, allowing some overhang for easy removal. Pour the mixture into the pan and press it down evenly using a spatula or your hands, smoothing the top to create a flat surface. - Refrigerate
Place the pan in the refrigerator and allow it to chill for at least 1 hour. This step is crucial as it helps the bars to firm up and makes cutting easier. - Serve
Once the bars are set, gently lift them out of the pan using the parchment paper overhang. Cut into approximately 12 equal-sized bars. Enjoy immediately, or store them for later!
Nutrition
- Serving Size: 1 normal portion
- Calories: 150 kcal
- Sugar: 5g
- Fat: 8g
- Carbohydrates: 20g
- Protein: 4g


