Get ready to unwrap a wave of nostalgia and pure, unadulterated joy with a dessert that’s as fun to make as it is to eat! The No-Bake Twinkie Pudding Cake became an absolute legend in my household from the very first time I whipped it up. I was initially looking for something quick, easy, and guaranteed to please a crowd for a last-minute family get-together. Little did I know, this simple concoction of iconic golden sponge cakes, creamy pudding, and fluffy whipped topping would become a most-requested treat. The kids’ eyes lit up at the mere mention of “Twinkie Cake,” and even the adults, initially skeptical, were won over by its surprisingly delightful texture and comforting flavors. It’s the kind of dessert that brings smiles, sparks conversations about childhood memories, and disappears from the dish in record time. The beauty of this recipe lies in its simplicity – no hot ovens, no complicated steps, just straightforward layering of deliciousness that results in a surprisingly elegant and incredibly satisfying dessert. It’s a testament to the fact that sometimes, the most beloved treats are born from the simplest of inspirations.
The Ultimate No-Bake Twinkie Pudding Cake: A Nostalgic Delight
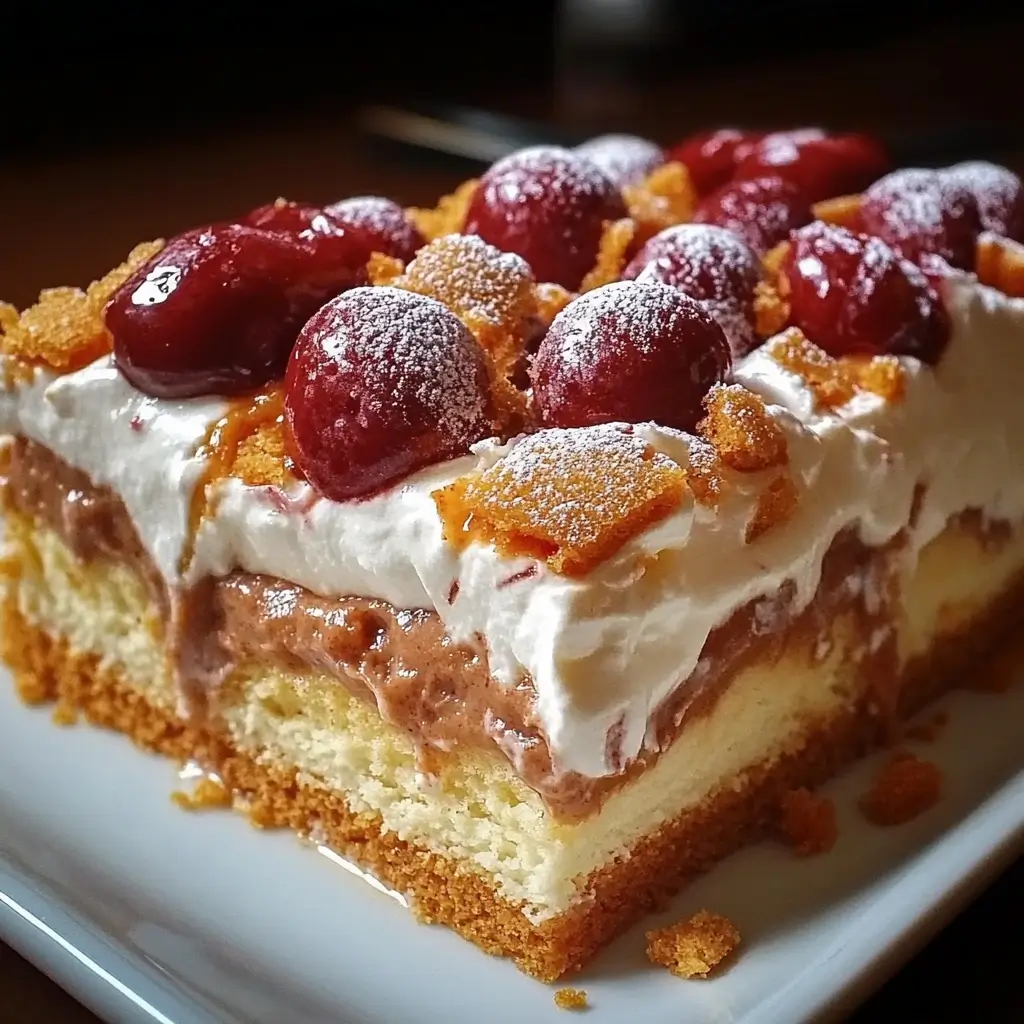
This recipe takes the iconic Hostess Twinkie and elevates it into a dreamy, creamy, layered dessert that’s perfect for potlucks, parties, or any occasion that calls for a sweet, crowd-pleasing treat. The combination of soft sponge cake, rich vanilla pudding, tangy cream cheese, and light whipped topping creates a symphony of textures and flavors that will have everyone asking for seconds.
Ingredients
To create this masterpiece of no-bake goodness, you’ll need a handful of readily available components. Each ingredient plays a crucial role in building the layers of flavor and texture that make this cake so irresistible.
- Hostess Twinkies: 1 box (10-12 Twinkies, depending on size and your pan). These golden sponge cakes filled with creamy goodness form the delightful base of our cake.
- Instant Vanilla Pudding Mix: 2 packages (3.4 oz or approximately 96g each). Ensure it’s instant pudding for the correct setting properties. French vanilla or white chocolate pudding can also be delicious alternatives.
- Cold Milk: 3 ½ cups (whole milk is recommended for the richest flavor and creamiest texture, but 2% will also work). This is slightly less than the standard amount called for on pudding boxes to ensure a firmer set.
- Cream Cheese: 1 block (8 oz or approximately 226g), softened to room temperature. This adds a wonderful tangy richness that balances the sweetness of the Twinkies and pudding. Full-fat cream cheese will yield the best results.
- Frozen Whipped Topping (e.g., Cool Whip): 1 container (8 oz or approximately 226g), thawed in the refrigerator. You can use an additional container if you prefer a more generous whipped topping layer or want extra for garnish.
- Optional Garnishes:
- Additional Twinkies, sliced or crumbled
- Chocolate shavings or mini chocolate chips
- Rainbow or chocolate sprinkles
- Maraschino cherries, halved or whole
- Toasted coconut flakes
- Crushed Nilla Wafers or graham crackers
Instructions
Assembling this No-Bake Twinkie Pudding Cake is a breeze. Follow these simple steps for a dessert that’s sure to impress with minimal effort.
- Prepare the Pan: Select a 9×13 inch baking dish or a similar-sized trifle bowl. No need to grease the pan.
- Arrange the Twinkies: Unwrap the Twinkies. You have a couple of options here:
- Whole: You can lay them side-by-side to cover the bottom of the dish.
- Split: Carefully slice each Twinkie in half lengthwise. Place them cut-side up (to absorb more pudding) or cut-side down (for a slightly neater base) in a single layer, snugly fitting them to cover the entire bottom of the pan. You may need to cut some pieces to fit into any gaps. This method often allows for better coverage.
- Beat the Cream Cheese: In a large mixing bowl, using an electric hand mixer or a stand mixer fitted with the paddle attachment, beat the softened cream cheese on medium speed until it is completely smooth and creamy, with no lumps remaining. This should take about 1-2 minutes. Scrape down the sides of the bowl as needed.
- Prepare the Pudding Layer: To the bowl with the beaten cream cheese, add the two packages of instant vanilla pudding mix and the 3 ½ cups of cold milk. Beat on low speed for about 30 seconds to combine, then increase the speed to medium and beat for another 2-3 minutes, or until the mixture is smooth, well-combined with the cream cheese, and has started to thicken. It will be a luscious, creamy consistency.
- Fold in Whipped Topping (Optional Richness Boost): Gently fold in about half (4 oz) of the thawed whipped topping into the pudding and cream cheese mixture. This step is optional but makes the pudding layer even lighter and more luxurious. Use a spatula and gentle folding motions to maintain the airiness of the whipped topping.
- Layer the Pudding: Carefully pour or spoon the pudding mixture evenly over the layer of Twinkies in the baking dish. Use an offset spatula or the back of a spoon to spread it smoothly, ensuring it reaches all corners.
- Add the Top Layer: Spread the remaining thawed whipped topping (the other 4 oz, or more if you’re using extra) evenly over the pudding layer. Create attractive swirls or a smooth surface, depending on your preference.
- Chill Thoroughly: Cover the baking dish with plastic wrap or a lid. Refrigerate the No-Bake Twinkie Pudding Cake for at least 4-6 hours, or preferably overnight. This chilling time is crucial; it allows the pudding to fully set and the flavors to meld together beautifully. The Twinkies will also soften slightly, creating a wonderful cake-like texture.
- Garnish and Serve: Just before serving, add your desired garnishes. Sliced Twinkies, a dusting of cocoa powder, chocolate shavings, sprinkles, or maraschino cherries all make lovely additions. Cut into squares and serve chilled.
Nutrition Facts
- Servings: This recipe typically yields 12-15 servings, depending on the size of the slices.
- Calories per serving (approximate): Around 350-450 calories per serving. This is an estimate and can vary based on the specific brands of ingredients used, the exact number of Twinkies, and the size of the serving portions. For a more precise calculation, it’s recommended to use an online nutrition calculator with your specific ingredients.
Preparation Time
The beauty of this no-bake dessert is its quick assembly and minimal hands-on effort.
- Active Preparation Time: 20-25 minutes (this includes unwrapping Twinkies, mixing pudding, and assembling the layers).
- Chilling Time: Minimum 4-6 hours, but overnight is highly recommended for the best texture and flavor. The longer it chills, the more the flavors meld and the pudding sets firmly.
How to Serve Your No-Bake Twinkie Pudding Cake
Serving this delightful cake is just as easy as making it. Here are some tips to present it perfectly:
- Chill is Key: Always serve this cake well-chilled, directly from the refrigerator. The cool temperature enhances its refreshing quality and helps maintain its structure.
- Clean Slices: For neat slices, dip a sharp knife in hot water and wipe it clean between each cut. This helps prevent the creamy layers from sticking and smearing.
- Individual Portions:
- Cut into squares or rectangles and serve on dessert plates.
- For a more elegant presentation, especially if made in a trifle bowl, scoop generous portions into individual dessert bowls or glasses.
- Garnish Just Before Serving: Add any delicate garnishes like fresh fruit, extra whipped cream swirls, or chocolate shavings right before you’re ready to serve to keep them looking their best.
- Accompaniments:
- A dollop of extra whipped cream or a scoop of vanilla ice cream can take it over the top.
- A light drizzle of chocolate or caramel sauce complements the flavors wonderfully.
- Serve with a cup of coffee, tea, or a cold glass of milk for a classic pairing.
- Party Perfect: This cake is ideal for potlucks or buffets as it can be made a day ahead and travels well (kept chilled in a cooler). Label it clearly – it’s bound to be a popular choice!
Additional Tips for Twinkie Pudding Perfection
Want to take your No-Bake Twinkie Pudding Cake from great to absolutely sensational? Here are five extra tips:
- Twinkie Tactics: For maximum flavor absorption and a softer cake-like base, consider lightly poking a few holes in the Twinkies with a fork before pouring the pudding mixture over them. If you like a bit more texture, you can also crumble some Twinkies and sprinkle them between the pudding and whipped topping layers.
- Pudding Power-Up: Don’t skimp on the beating time for the pudding. Ensure it’s thick and well-combined with the cream cheese before layering. Using very cold milk is essential for instant pudding to set correctly. For a different flavor profile, try banana cream, white chocolate, or even pistachio instant pudding mix.
- Cream Cheese Consistency: Make absolutely sure your cream cheese is fully softened to room temperature. Cold cream cheese will result in a lumpy pudding layer, which can be unpleasant. If you’re short on time, you can unwrap the cream cheese and microwave it on a plate in 10-second intervals until softened, but be careful not to melt it.
- Layering Like a Pro: When spreading the pudding and whipped topping layers, use an offset spatula for the smoothest, most even results. Start by dropping dollops of the mixture across the surface, then gently connect and spread them. This prevents disturbing the layer underneath.
- Flavor Infusions & Variations:
- Fruit Medley: Layer sliced bananas, strawberries, or even drained pineapple tidbits between the Twinkie and pudding layers, or on top of the pudding layer, for a fruity twist. Banana is a classic pairing with Twinkies and vanilla pudding.
- Extract Excellence: Add ½ teaspoon of almond extract or a teaspoon of high-quality vanilla extract to the pudding mixture for an enhanced flavor dimension.
- Cookie Crumble: Instead of or in addition to Twinkies on top, sprinkle crushed Nilla Wafers, Oreo cookies (filling removed if desired), or graham crackers for added crunch and flavor.
Frequently Asked Questions (FAQ)
Here are answers to some common questions about making this No-Bake Twinkie Pudding Cake:
- Q: Can I use homemade whipped cream instead of frozen whipped topping?
A: Yes, you absolutely can! If using homemade whipped cream, make sure to stabilize it so it holds its shape. You can do this by adding a teaspoon of unflavored gelatin (bloomed in a little cold water, then gently warmed to dissolve) or a tablespoon or two of powdered sugar or instant pudding mix to the cream as you whip it. Use about 2 cups of heavy cream, whipped to stiff peaks, to replace an 8 oz container of frozen whipped topping. - Q: How long will this No-Bake Twinkie Pudding Cake last in the refrigerator?
A: Properly covered with plastic wrap or in an airtight container, the cake will last for 3-4 days in the refrigerator. The Twinkies will continue to soften over time, which many people enjoy. However, it’s at its textural best within the first 1-2 days. - Q: Can I freeze this dessert?
A: Freezing is generally not recommended for this type of dessert. The pudding and cream cheese layer can become watery or develop an icy texture upon thawing, and the Twinkies may become overly soggy. It’s best enjoyed fresh from the refrigerator. - Q: What if I don’t have cream cheese or want to make it without?
A: You can omit the cream cheese. The pudding layer will be a bit softer and less tangy, more like a traditional pudding. Simply prepare the instant pudding according to package directions (perhaps using slightly less milk for a firmer set, as in the main recipe), and then fold in some of the whipped topping if desired before layering. The dessert will still be delicious! - Q: Can I use other Hostess snack cakes or different flavored pudding?
A: Definitely! This recipe is very adaptable.- Snack Cakes: Hostess Ho Hos, Ding Dongs (sliced), or even Sno Balls (with the coconut layer) could be fun variations, though they will change the flavor profile significantly.
- Pudding Flavors: Chocolate pudding would create a “Hostess Cupcake” type of vibe, especially if paired with chocolate snack cakes. Banana cream pudding is a natural fit, as is butterscotch. Get creative and experiment with your favorite Ingredients.
No-Bake Twinkie Pudding Cake Recipe
Ingredients
- Hostess Twinkies: 1 box (10-12 Twinkies, depending on size and your pan). These golden sponge cakes filled with creamy goodness form the delightful base of our cake.
- Instant Vanilla Pudding Mix: 2 packages (3.4 oz or approximately 96g each). Ensure it’s instant pudding for the correct setting properties. French vanilla or white chocolate pudding can also be delicious alternatives.
- Cold Milk: 3 ½ cups (whole milk is recommended for the richest flavor and creamiest texture, but 2% will also work). This is slightly less than the standard amount called for on pudding boxes to ensure a firmer set.
- Cream Cheese: 1 block (8 oz or approximately 226g), softened to room temperature. This adds a wonderful tangy richness that balances the sweetness of the Twinkies and pudding. Full-fat cream cheese will yield the best results.
- Frozen Whipped Topping (e.g., Cool Whip): 1 container (8 oz or approximately 226g), thawed in the refrigerator. You can use an additional container if you prefer a more generous whipped topping layer or want extra for garnish.
- Optional Garnishes:
- Additional Twinkies, sliced or crumbled
- Chocolate shavings or mini chocolate chips
- Rainbow or chocolate sprinkles
- Maraschino cherries, halved or whole
- Toasted coconut flakes
- Crushed Nilla Wafers or graham crackers
Instructions
- Prepare the Pan: Select a 9×13 inch baking dish or a similar-sized trifle bowl. No need to grease the pan.
- Arrange the Twinkies: Unwrap the Twinkies. You have a couple of options here:
- Whole: You can lay them side-by-side to cover the bottom of the dish.
- Split: Carefully slice each Twinkie in half lengthwise. Place them cut-side up (to absorb more pudding) or cut-side down (for a slightly neater base) in a single layer, snugly fitting them to cover the entire bottom of the pan. You may need to cut some pieces to fit into any gaps. This method often allows for better coverage.
- Beat the Cream Cheese: In a large mixing bowl, using an electric hand mixer or a stand mixer fitted with the paddle attachment, beat the softened cream cheese on medium speed until it is completely smooth and creamy, with no lumps remaining. This should take about 1-2 minutes. Scrape down the sides of the bowl as needed.
- Prepare the Pudding Layer: To the bowl with the beaten cream cheese, add the two packages of instant vanilla pudding mix and the 3 ½ cups of cold milk. Beat on low speed for about 30 seconds to combine, then increase the speed to medium and beat for another 2-3 minutes, or until the mixture is smooth, well-combined with the cream cheese, and has started to thicken. It will be a luscious, creamy consistency.
- Fold in Whipped Topping (Optional Richness Boost): Gently fold in about half (4 oz) of the thawed whipped topping into the pudding and cream cheese mixture. This step is optional but makes the pudding layer even lighter and more luxurious. Use a spatula and gentle folding motions to maintain the airiness of the whipped topping.
- Layer the Pudding: Carefully pour or spoon the pudding mixture evenly over the layer of Twinkies in the baking dish. Use an offset spatula or the back of a spoon to spread it smoothly, ensuring it reaches all corners.
- Add the Top Layer: Spread the remaining thawed whipped topping (the other 4 oz, or more if you’re using extra) evenly over the pudding layer. Create attractive swirls or a smooth surface, depending on your preference.
- Chill Thoroughly: Cover the baking dish with plastic wrap or a lid. Refrigerate the No-Bake Twinkie Pudding Cake for at least 4-6 hours, or preferably overnight. This chilling time is crucial; it allows the pudding to fully set and the flavors to meld together beautifully. The Twinkies will also soften slightly, creating a wonderful cake-like texture.
- Garnish and Serve: Just before serving, add your desired garnishes. Sliced Twinkies, a dusting of cocoa powder, chocolate shavings, sprinkles, or maraschino cherries all make lovely additions. Cut into squares and serve chilled.
Nutrition
- Serving Size: One Normal Portion
- Calories: 350-450