Of all the desserts in my arsenal, the ones that consistently receive the most audible gasps of delight are the no-bake creations. There’s something magical about a dessert that comes together without ever turning on the oven, especially during those warm summer months or hectic holiday seasons. This No-Bake White Chocolate Peanut Butter Dessert, however, is in a league of its own. I first made it for a family potluck, slightly nervous about how the combination of white chocolate and peanut butter would be received by a crowd of discerning palates. The moment I set it down, it was clear I had a winner. The rich, dark Oreo crust, the cloud-like peanut butter filling, and the sweet, velvety white chocolate topping created a symphony of textures and flavors that was simply irresistible. My cousin, a self-proclaimed dessert snob, declared it “the best thing I’ve ever eaten,” and the entire pan vanished in under ten minutes. Since that day, it has become my most requested recipe, the go-to treat for birthdays, celebrations, or just a Tuesday night that calls for something special. It’s a showstopper that looks incredibly impressive but is secretly, wonderfully simple to create. This dessert isn’t just a recipe; it’s a guaranteed crowd-pleaser, a sweet memory in the making, and a testament to the glorious, decadent power of white chocolate and peanut butter.
The Ultimate No-Bake White Chocolate Peanut Butter Dessert Recipe
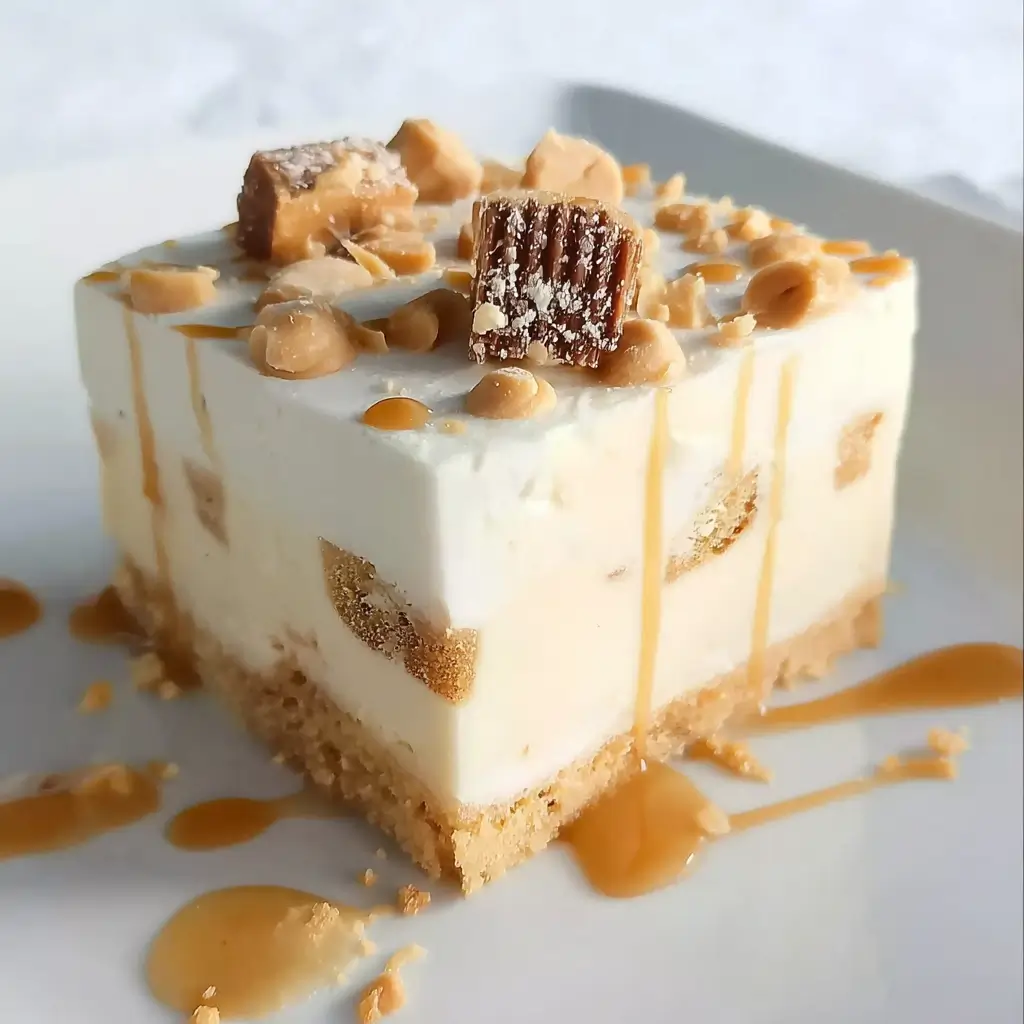
This recipe breaks down the dessert into three distinct, heavenly layers: a crunchy chocolate cookie crust, a fluffy and rich peanut butter cream cheese filling, and a smooth, sweet white chocolate topping. Each component is simple on its own, but together they create a dessert that is truly greater than the sum of its parts.
Ingredients You’ll Need
Before you begin, gathering and preparing your ingredients is the first step to dessert success. Using high-quality ingredients and ensuring some are at the proper temperature will make a significant difference in the final texture and flavor.
For the Oreo Cookie Crust:
- 32 Oreo Cookies (or equivalent chocolate sandwich cookies): This is approximately one standard-size package. You will be using the entire cookie, cream filling and all. The cream filling helps bind the crust together and adds a touch of sweetness.
- 6 Tablespoons (85g) Unsalted Butter, melted: Melting the butter is crucial as it acts as the glue that holds the cookie crumbs together, creating a firm and sliceable crust once chilled. Unsalted butter allows you to control the salt level of the dessert.
For the Creamy Peanut Butter Filling:
- 1 cup (240g) Creamy Peanut Butter: For the smoothest, most luxurious filling, a standard commercial creamy peanut butter (like Jif or Skippy) is recommended. Natural peanut butters that require stirring can sometimes separate and create an oily texture.
- 8 ounces (226g) Full-Fat Block Cream Cheese, softened to room temperature: This is non-negotiable for a lump-free filling. Set the cream cheese out on the counter for at least an hour before you begin. Full-fat provides the richest flavor and best structure.
- 1 cup (120g) Powdered Sugar (also known as confectioners’ sugar): Powdered sugar dissolves instantly into the filling, ensuring a smooth, non-gritty texture.
- 1 teaspoon Vanilla Extract: A small amount of pure vanilla extract enhances the other flavors in the filling, adding depth and warmth.
- 8 ounces (227g) Frozen Whipped Topping (like Cool Whip), thawed: Thaw the whipped topping in the refrigerator overnight or on the counter for a couple of hours. It needs to be soft and foldable to incorporate into the filling without deflating. This ingredient provides the light, airy, mousse-like consistency.
For the White Chocolate Topping:
- 1 cup (170g) High-Quality White Chocolate Chips or a chopped white chocolate bar: The quality of your white chocolate matters immensely here. A good quality brand will melt smoother and have a more authentic, less waxy cocoa butter flavor.
- 1/2 cup (120ml) Heavy Whipping Cream: The fat in the heavy cream is essential for creating a smooth, stable, and rich ganache-like topping that will set beautifully without becoming hard.
Step-by-Step Instructions for Dessert Perfection
Follow these detailed instructions carefully. The process is straightforward, but paying attention to the details, especially regarding ingredient temperatures and chilling times, will guarantee a perfect result every time.
Part 1: Creating the Perfect Oreo Crust
- Prepare Your Pan: Lightly grease a 9×13-inch baking dish or pan. This will make removing the slices much cleaner later on. You can also line it with parchment paper, leaving an overhang on the two long sides to act as “handles” for lifting the entire dessert out for easy cutting.
- Crush the Cookies: Place the entire Oreo cookies (wafers and filling) into the bowl of a food processor. Pulse them until they are broken down into fine, consistent crumbs, resembling dark, wet sand. If you don’t have a food processor, you can place the cookies in a large, sealed zip-top bag and crush them with a rolling pin or a heavy can. Ensure there are no large cookie chunks remaining.
- Combine with Butter: Transfer the fine cookie crumbs to a medium-sized bowl. Pour the 6 tablespoons of melted unsalted butter over the crumbs. Using a fork or a spatula, mix thoroughly until all the crumbs are evenly moistened by the butter.
- Press into Pan: Pour the buttered crumb mixture into your prepared 9×13-inch pan. Use the back of a spoon or the bottom of a flat measuring cup to press the crumbs firmly and evenly across the bottom of the pan. Pay special attention to the corners and edges to create a solid, uniform base.
- Initial Chill: Place the pan with the crust in the freezer for at least 15-20 minutes while you prepare the peanut butter filling. This quick chill helps the butter solidify, creating a firm foundation that won’t crumble when you spread the next layer.
Part 2: Crafting the Dreamy Peanut Butter Filling
- Beat the Base: In a large mixing bowl, combine the 8 ounces of softened cream cheese and the 1 cup of creamy peanut butter. Using an electric hand mixer or a stand mixer fitted with the paddle attachment, beat on medium speed for 1-2 minutes until the mixture is completely smooth, creamy, and well-combined. Scrape down the sides and bottom of the bowl to ensure there are no hidden lumps of cream cheese.
- Add Sweetness and Flavor: Add the 1 cup of powdered sugar and the 1 teaspoon of vanilla extract to the bowl. Start mixing on low speed to prevent a cloud of powdered sugar from dusting your kitchen. Once the sugar is mostly incorporated, increase the speed to medium and beat for another minute until the filling is light, fluffy, and perfectly smooth.
- Fold in the Lightness: Now, add the 8 ounces of thawed whipped topping. Switch from the mixer to a rubber spatula. Gently fold the whipped topping into the peanut butter mixture. Use a scooping motion from the bottom up and over the top, rotating the bowl as you go. Continue folding just until no white streaks remain. Be careful not to overmix, as this can deflate the whipped topping and make your filling dense rather than airy.
- Layer and Spread: Retrieve your chilled crust from the freezer. Carefully spoon the peanut butter filling over the crust. Using an offset spatula or the back of a spoon, gently spread the filling into an even layer, reaching all the way to the edges of the pan.
- Second Chill: Place the dessert back into the refrigerator (not the freezer this time) for at least 1 hour. This allows the peanut butter layer to firm up significantly, which is essential for creating clean, distinct layers when you add the final topping.
Part 3: The Velvety White Chocolate Topping
- Melt to Perfection: There are two reliable methods for melting the white chocolate.
- Microwave Method: Place the 1 cup of white chocolate chips and the 1/2 cup of heavy whipping cream in a microwave-safe bowl. Microwave in 30-second intervals, stirring well after each interval. It’s crucial not to overheat white chocolate, as it can seize and become grainy. Stop heating when there are still a few small lumps, and just continue stirring until the residual heat melts them completely.
- Stovetop Method (Double Boiler): Place the white chocolate and heavy cream in a heatproof bowl set over a saucepan of simmering (not boiling) water. Ensure the bottom of the bowl does not touch the water. Stir constantly until the chocolate is completely melted and the mixture is silky smooth.
- Cool Slightly: Once your white chocolate and cream mixture is smooth, let it cool on the counter for about 5-10 minutes. It should still be pourable but not hot to the touch. Pouring a hot topping onto the chilled filling can cause the layers to melt into each other.
- The Final Layer: Remove the dessert from the refrigerator. Pour the slightly cooled white chocolate mixture over the firmed-up peanut butter layer. Gently tilt the pan or use an offset spatula to spread it evenly, covering the entire surface.
- The Final, Crucial Chill: Cover the pan with plastic wrap or a lid. Place the completed dessert in the refrigerator for a minimum of 6 hours, but preferably overnight. This extended chilling time is not optional; it is essential for all the layers to set and meld together, allowing for clean slices and the perfect texture.
Nutrition Facts
- Servings: 15-18 servings
- Calories per serving: Approximately 450-550 kcal (This is an estimate and can vary based on specific brands of ingredients used, such as Oreos, peanut butter, and white chocolate.)
Disclaimer: This is a rich and decadent dessert best enjoyed as a special treat. The nutritional information is an approximation and should be used as a guideline only.
Preparation Time
- Active Preparation Time: 25-30 minutes
- Chilling Time: 7 hours 20 minutes (minimum)
- Crust Chilling: 20 minutes
- Filling Chilling: 1 hour
- Final Chilling: 6+ hours (overnight is best)
- Total Time: Approximately 8 hours
How to Serve This Masterpiece
Presentation can elevate this dessert from delicious to unforgettable. Here are some ideas for serving your No-Bake White Chocolate Peanut Butter Dessert:
- The Classic Cut:
- For the cleanest slices, dip a large, sharp knife in hot water and wipe it dry between each cut. The warm blade will glide through the layers without smearing.
- Serve a simple, elegant square on a dessert plate to let the beautiful layers speak for themselves.
- Garnish for a “Wow” Factor:
- Peanut Butter Drizzle: Melt a few tablespoons of creamy peanut butter in the microwave for 15-20 seconds until it’s pourable. Drizzle it over the top of the dessert or individual slices.
- Chocolate Accents: Use a vegetable peeler to shave a bar of semi-sweet or milk chocolate over the top for a beautiful contrast. Mini chocolate chips also work well.
- Peanut Perfection: Sprinkle crushed peanuts, chopped peanut butter cups, or whole mini peanut butter cups on top before the final chill or just before serving.
- A Dollop of Cream: Add a small dollop of fresh whipped cream or the remaining thawed whipped topping to each slice for an extra touch of lightness.
- Perfect Pairings:
- A hot cup of coffee or a cold glass of milk are classic companions that cut through the richness perfectly.
- For an adult pairing, a stout beer or a coffee liqueur complements the deep chocolate and peanut butter flavors beautifully.
5 Additional Tips for Flawless Results
- Room Temperature is Your Best Friend: The importance of softened, room temperature cream cheese cannot be overstated. Cold cream cheese will result in a lumpy, unpleasant texture in your filling. Set it on the counter for at least an hour before you begin. The same applies to the peanut butter; if it’s cold, it will be harder to mix smoothly.
- Don’t Rush the Chill: Patience is a key ingredient in any no-bake recipe. Each chilling step is designed to set a specific layer, creating the structure needed for the next. Rushing the chill, especially the final one, will result in a soft, soupy dessert that is impossible to slice cleanly. Give it the full 6 hours, or even better, make it the day before you plan to serve it.
- Master the Art of Folding: When incorporating the thawed whipped topping, be gentle. The goal is to keep as much air in the mixture as possible. Use a wide rubber spatula and a gentle “fold and turn” motion. Stop as soon as it’s combined. Over-mixing will deflate the topping, leading to a much denser and heavier filling.
- Make-Ahead and Freezer Friendly: This dessert is a fantastic make-ahead option. You can prepare it completely up to 2 days in advance and store it, covered, in the refrigerator. It also freezes exceptionally well. For freezing, cover the pan tightly with plastic wrap and then a layer of aluminum foil. It can be frozen for up to 2 months. To serve, thaw it in the refrigerator overnight.
- Customize Your Crust: While the Oreo crust is a classic, you can easily customize it. Try using Nutter Butter cookies for an even more intense peanut butter flavor, or use graham cracker crumbs for a more traditional cheesecake-style base. If using graham crackers, you may want to add 2-3 tablespoons of sugar to the crumb mixture.
Frequently Asked Questions (FAQ)
1. Can I use natural peanut butter in this recipe?
It’s not recommended. Natural peanut butters tend to separate, with the oil rising to the top. This can make your filling greasy and prevent it from setting properly. For the best creamy, stable, and fluffy texture, a standard processed creamy peanut butter (like Jif, Skippy, or a store-brand equivalent) is the ideal choice.
2. My white chocolate seized up when I melted it! What went wrong?
White chocolate is more delicate than dark or milk chocolate and is prone to seizing (becoming thick and grainy). This usually happens for two reasons: overheating or contact with water. When microwaving, always use short intervals and stir frequently. When using a double boiler, ensure no steam or water gets into the chocolate. If it does seize, you can sometimes save it by vigorously stirring in a teaspoon of hot water or vegetable oil, but the texture may not be as perfect.
3. Can I make this dessert gluten-free?
Absolutely! The filling and topping are naturally gluten-free. The only substitution you need to make is for the crust. Use your favorite brand of gluten-free chocolate sandwich cookies in place of the Oreos. The rest of the recipe and instructions remain the same.
4. How do I store leftovers?
Leftovers should be stored in the refrigerator, tightly covered with plastic wrap or in an airtight container. It will stay fresh and delicious for up to 4-5 days. The crust may soften slightly over time, but the flavor will remain fantastic.
5. Can I use real whipped cream instead of frozen whipped topping (Cool Whip)?
You can, but it will affect the stability of the filling. Cool Whip and other frozen whipped toppings contain stabilizers that help the filling set firmly and last for days. If you use real whipped cream (whipping about 1.5 cups of heavy cream with a few tablespoons of powdered sugar until stiff peaks form), the filling will be softer and may not hold its shape as well after the first day. If you choose this route, be extra certain to give it a very long and cold chill before serving.

No-Bake White Chocolate Peanut Butter Dessert Recipe
Ingredients
For the Oreo Cookie Crust:
- 32 Oreo Cookies (or equivalent chocolate sandwich cookies): This is approximately one standard-size package. You will be using the entire cookie, cream filling and all. The cream filling helps bind the crust together and adds a touch of sweetness.
- 6 Tablespoons (85g) Unsalted Butter, melted: Melting the butter is crucial as it acts as the glue that holds the cookie crumbs together, creating a firm and sliceable crust once chilled. Unsalted butter allows you to control the salt level of the dessert.
For the Creamy Peanut Butter Filling:
- 1 cup (240g) Creamy Peanut Butter: For the smoothest, most luxurious filling, a standard commercial creamy peanut butter (like Jif or Skippy) is recommended. Natural peanut butters that require stirring can sometimes separate and create an oily texture.
- 8 ounces (226g) Full-Fat Block Cream Cheese, softened to room temperature: This is non-negotiable for a lump-free filling. Set the cream cheese out on the counter for at least an hour before you begin. Full-fat provides the richest flavor and best structure.
- 1 cup (120g) Powdered Sugar (also known as confectioners’ sugar): Powdered sugar dissolves instantly into the filling, ensuring a smooth, non-gritty texture.
- 1 teaspoon Vanilla Extract: A small amount of pure vanilla extract enhances the other flavors in the filling, adding depth and warmth.
- 8 ounces (227g) Frozen Whipped Topping (like Cool Whip), thawed: Thaw the whipped topping in the refrigerator overnight or on the counter for a couple of hours. It needs to be soft and foldable to incorporate into the filling without deflating. This ingredient provides the light, airy, mousse-like consistency.
For the White Chocolate Topping:
- 1 cup (170g) High-Quality White Chocolate Chips or a chopped white chocolate bar: The quality of your white chocolate matters immensely here. A good quality brand will melt smoother and have a more authentic, less waxy cocoa butter flavor.
- 1/2 cup (120ml) Heavy Whipping Cream: The fat in the heavy cream is essential for creating a smooth, stable, and rich ganache-like topping that will set beautifully without becoming hard.
Instructions
Part 1: Creating the Perfect Oreo Crust
- Prepare Your Pan: Lightly grease a 9×13-inch baking dish or pan. This will make removing the slices much cleaner later on. You can also line it with parchment paper, leaving an overhang on the two long sides to act as “handles” for lifting the entire dessert out for easy cutting.
- Crush the Cookies: Place the entire Oreo cookies (wafers and filling) into the bowl of a food processor. Pulse them until they are broken down into fine, consistent crumbs, resembling dark, wet sand. If you don’t have a food processor, you can place the cookies in a large, sealed zip-top bag and crush them with a rolling pin or a heavy can. Ensure there are no large cookie chunks remaining.
- Combine with Butter: Transfer the fine cookie crumbs to a medium-sized bowl. Pour the 6 tablespoons of melted unsalted butter over the crumbs. Using a fork or a spatula, mix thoroughly until all the crumbs are evenly moistened by the butter.
- Press into Pan: Pour the buttered crumb mixture into your prepared 9×13-inch pan. Use the back of a spoon or the bottom of a flat measuring cup to press the crumbs firmly and evenly across the bottom of the pan. Pay special attention to the corners and edges to create a solid, uniform base.
- Initial Chill: Place the pan with the crust in the freezer for at least 15-20 minutes while you prepare the peanut butter filling. This quick chill helps the butter solidify, creating a firm foundation that won’t crumble when you spread the next layer.
Part 2: Crafting the Dreamy Peanut Butter Filling
- Beat the Base: In a large mixing bowl, combine the 8 ounces of softened cream cheese and the 1 cup of creamy peanut butter. Using an electric hand mixer or a stand mixer fitted with the paddle attachment, beat on medium speed for 1-2 minutes until the mixture is completely smooth, creamy, and well-combined. Scrape down the sides and bottom of the bowl to ensure there are no hidden lumps of cream cheese.
- Add Sweetness and Flavor: Add the 1 cup of powdered sugar and the 1 teaspoon of vanilla extract to the bowl. Start mixing on low speed to prevent a cloud of powdered sugar from dusting your kitchen. Once the sugar is mostly incorporated, increase the speed to medium and beat for another minute until the filling is light, fluffy, and perfectly smooth.
- Fold in the Lightness: Now, add the 8 ounces of thawed whipped topping. Switch from the mixer to a rubber spatula. Gently fold the whipped topping into the peanut butter mixture. Use a scooping motion from the bottom up and over the top, rotating the bowl as you go. Continue folding just until no white streaks remain. Be careful not to overmix, as this can deflate the whipped topping and make your filling dense rather than airy.
- Layer and Spread: Retrieve your chilled crust from the freezer. Carefully spoon the peanut butter filling over the crust. Using an offset spatula or the back of a spoon, gently spread the filling into an even layer, reaching all the way to the edges of the pan.
- Second Chill: Place the dessert back into the refrigerator (not the freezer this time) for at least 1 hour. This allows the peanut butter layer to firm up significantly, which is essential for creating clean, distinct layers when you add the final topping.
Part 3: The Velvety White Chocolate Topping
- Melt to Perfection: There are two reliable methods for melting the white chocolate.
- Microwave Method: Place the 1 cup of white chocolate chips and the 1/2 cup of heavy whipping cream in a microwave-safe bowl. Microwave in 30-second intervals, stirring well after each interval. It’s crucial not to overheat white chocolate, as it can seize and become grainy. Stop heating when there are still a few small lumps, and just continue stirring until the residual heat melts them completely.
- Stovetop Method (Double Boiler): Place the white chocolate and heavy cream in a heatproof bowl set over a saucepan of simmering (not boiling) water. Ensure the bottom of the bowl does not touch the water. Stir constantly until the chocolate is completely melted and the mixture is silky smooth.
- Cool Slightly: Once your white chocolate and cream mixture is smooth, let it cool on the counter for about 5-10 minutes. It should still be pourable but not hot to the touch. Pouring a hot topping onto the chilled filling can cause the layers to melt into each other.
- The Final Layer: Remove the dessert from the refrigerator. Pour the slightly cooled white chocolate mixture over the firmed-up peanut butter layer. Gently tilt the pan or use an offset spatula to spread it evenly, covering the entire surface.
- The Final, Crucial Chill: Cover the pan with plastic wrap or a lid. Place the completed dessert in the refrigerator for a minimum of 6 hours, but preferably overnight. This extended chilling time is not optional; it is essential for all the layers to set and meld together, allowing for clean slices and the perfect texture.
Nutrition
- Serving Size: One Normal Portion
- Calories: 450-550 kcal