
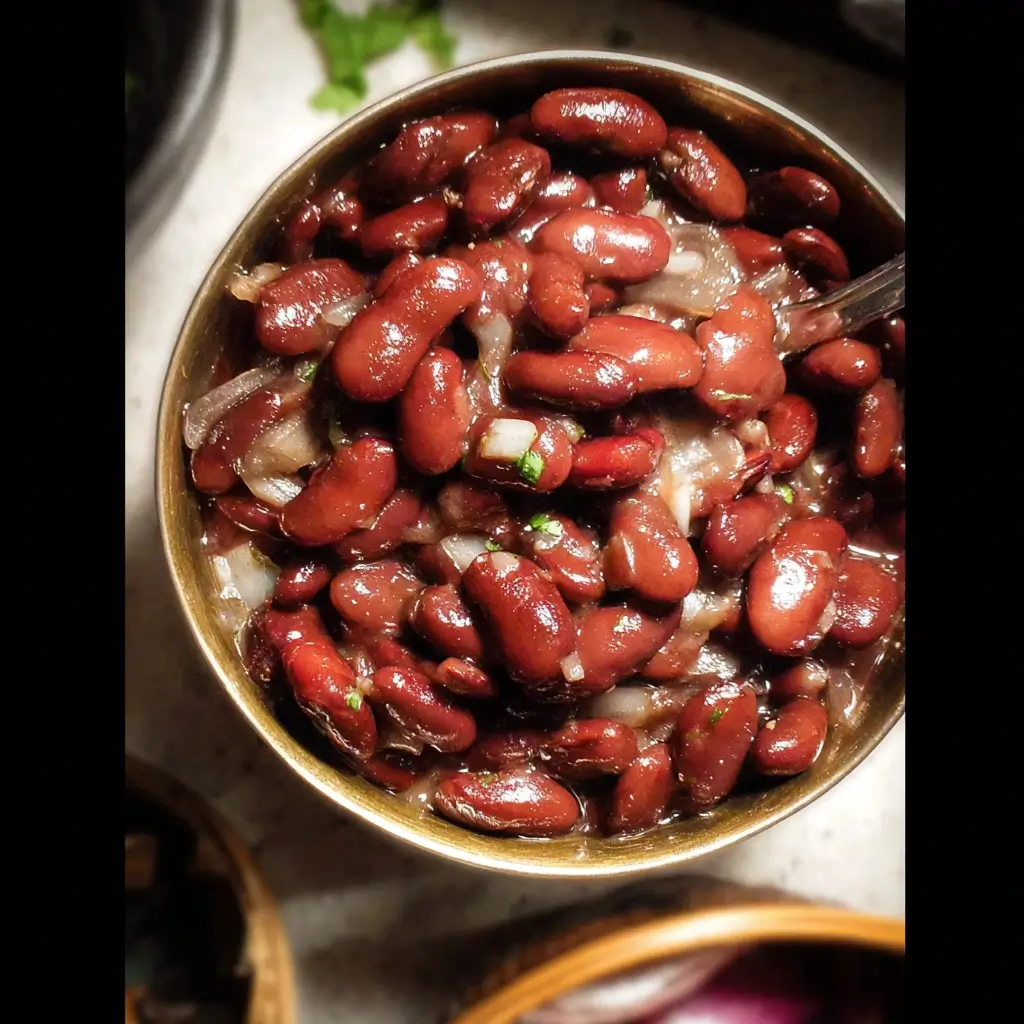

There are certain dishes that feel less like a meal and more like a warm, comforting hug in a bowl. For my family, this One-Pot Red Kidney Beans recipe is exactly that. I still remember the first time I perfected it on a chilly, rain-swept Sunday. The kids were getting restless, and I needed something wholesome and satisfying that wouldn’t require a mountain of dishes. As the aromatic steam from the pot began to fill the kitchen—a fragrant cloud of ginger, garlic, and toasted spices—the entire mood of the house shifted. When we finally sat down to eat, spooning the rich, creamy bean curry over fluffy basmati rice, there was a moment of contented silence. My youngest, usually a picky eater, looked up with a smear of sauce on his cheek and declared it “the best soupy beans ever.” That’s the magic of this dish. It’s incredibly simple to make, relying on pantry staples and a single pot, yet it delivers a depth of flavor that tastes like it has been simmering for hours. It has since become our go-to for busy weeknights, lazy weekends, and whenever we need a little dose of culinary comfort.
Why This One-Pot Red Kidney Beans Recipe is a Game-Changer
Before we dive into the pot, let’s talk about why this specific recipe will become a staple in your kitchen.
- Effortless & Minimal Cleanup: The “one-pot” method is the star here. Everything, from sautéing the aromatics to simmering the beans, happens in a single Dutch oven or heavy-bottomed pot. This means less time washing up and more time enjoying your meal.
- Budget-Friendly Nutrition: Kidney beans are a nutritional powerhouse packed with protein, fiber, and essential minerals. This dish is an incredibly affordable way to create a hearty, filling, and healthy meal for the whole family.
- Deeply Flavorful: Don’t let the simplicity fool you. By layering flavors—starting with the sweet foundation of sautéed onions, adding the pungent kick of ginger-garlic paste, and “blooming” the spices to release their essential oils—we build a complex and robust taste profile that is deeply satisfying.
- Incredibly Versatile: This recipe is a fantastic starting point. You can easily adjust the spice level, add vegetables, or make it creamier to suit your personal taste. It’s also naturally vegetarian and can be made vegan and gluten-free with ease.
Ingredients for the Perfect One-Pot Red Kidney Beans
Accuracy is key to replicating that perfect, comforting flavor. Here are the exact measurements you’ll need. This recipe is inspired by the classic North Indian dish, Rajma Masala, but simplified for a one-pot approach.
For the Beans and Base:
- Oil: 2 tablespoons of a neutral oil (like avocado, canola, or a light olive oil) or ghee for a richer flavor.
- Onion: 1 large yellow onion, finely chopped.
- Ginger-Garlic Paste: 1.5 tablespoons. You can use store-bought or make your own by blending equal parts fresh ginger and garlic cloves with a splash of water.
- Tomatoes: 1 (15-ounce / 400g) can of crushed or puréed tomatoes. This creates a smooth, consistent gravy.
- Red Kidney Beans: 2 (15-ounce / 400g) cans of red kidney beans, rinsed and drained. (See notes on using dried beans in the FAQ).
- Water or Vegetable Broth: 1.5 to 2 cups, depending on your desired consistency. Using vegetable broth will add another layer of savory flavor.
- Salt: 1.5 teaspoons, or to taste.
For the Aromatic Spice Blend:
- Cumin Seeds: 1 teaspoon.
- Turmeric Powder: 1/2 teaspoon.
- Red Chili Powder: 1/2 teaspoon (use Kashmiri for color and mild heat, or cayenne for more kick). Adjust to your spice preference.
- Coriander Powder: 2 teaspoons.
- Garam Masala: 1 teaspoon. This is a finishing spice blend, added at the end to preserve its aroma.
- Dried Fenugreek Leaves (Kasuri Methi): 1 teaspoon (optional, but highly recommended for an authentic, earthy aroma).
For Garnish (Optional but Recommended):
- Fresh Cilantro: 1/4 cup, freshly chopped.
- Lemon or Lime Juice: A squeeze from half a lemon or lime.
- Full-Fat Cream or Coconut Cream: 2 tablespoons for a richer, creamier finish (optional).
Step-by-Step Instructions
Follow these steps carefully to build layers of flavor for a truly delicious result. The process is straightforward and focuses on developing taste at each stage.
- Build the Aromatic Foundation: Place a large, heavy-bottomed pot or Dutch oven over medium heat. Add the 2 tablespoons of oil or ghee. Once the oil is shimmering, add the 1 teaspoon of cumin seeds. Let them sizzle and toast for about 30 seconds until they become fragrant and a shade darker. This “blooming” process is crucial for releasing their flavor.
- Sauté the Onions: Add the finely chopped onion to the pot. Sauté, stirring frequently, for about 8-10 minutes. You’re looking for the onions to become soft, translucent, and just starting to turn golden brown at the edges. Be patient with this step; well-cooked onions create a sweet, non-astringent base for the curry.
- Cook the Aromatics: Add the 1.5 tablespoons of ginger-garlic paste to the pot. Stir continuously for about 1-2 minutes until the raw smell is gone and it becomes deeply fragrant. This paste can stick to the bottom, so keep it moving.
- Incorporate the Spices: Turn the heat down to low to prevent the spices from burning. Add the 1/2 teaspoon of turmeric powder, 1/2 teaspoon of red chili powder, and 2 teaspoons of coriander powder. Stir constantly for 30-45 seconds. This step, known as bhunao in Indian cooking, toasts the ground spices, which deepens their flavor and removes any raw taste.
- Create the Tomato Gravy: Pour in the can of crushed or puréed tomatoes and the 1.5 teaspoons of salt. Turn the heat back up to medium and stir everything together, scraping up any browned bits from the bottom of the pot. Cook the mixture for 5-7 minutes, stirring occasionally, until the paste darkens in color and you see oil starting to separate at the edges of the pan. This indicates the tomatoes are well-cooked and the base (masala) is ready.
- Add the Beans and Simmer: Add the 2 cans of rinsed and drained red kidney beans to the pot. Stir gently to coat them in the tomato-spice mixture. Pour in 1.5 cups of water or vegetable broth. Bring the mixture to a gentle boil, then reduce the heat to low, cover the pot, and let it simmer for at least 20-25 minutes. This allows the beans to absorb all the wonderful flavors of the gravy. If you prefer a thinner curry, you can add the remaining 1/2 cup of broth. For a creamier texture, you can lightly mash about 1/4 of the beans against the side of the pot with your spoon before simmering.
- The Finishing Touches: After simmering, turn off the heat. Stir in the 1 teaspoon of garam masala. If using, crush the 1 teaspoon of dried fenugreek leaves (kasuri methi) between your palms and sprinkle it in—this releases its essential oils. If you desire a richer curry, now is the time to stir in the 2 tablespoons of heavy cream or coconut cream.
- Rest and Garnish: Let the dish rest for 5-10 minutes off the heat. This allows the flavors to meld and settle. Just before serving, stir in the freshly chopped cilantro and a generous squeeze of lemon or lime juice. The acid from the citrus brightens up all the deep, savory flavors. Check for seasoning and add more salt if needed.
Nutrition Facts
Please note that these values are an estimate and can vary based on the specific ingredients used (e.g., oil vs. ghee, water vs. broth, added cream).
- Servings: This recipe makes approximately 4-6 servings.
- Calories per serving (approximate): 350-400 kcal (based on 4 servings, without cream or serving accompaniments like rice).
This dish is an excellent source of plant-based protein, dietary fiber (promoting digestive health and satiety), iron, and folate.
Preparation and Cooking Time
One of the best aspects of this recipe is how quickly it comes together, especially when using canned beans.
- Preparation Time: 15 minutes (chopping onion, measuring spices, opening cans).
- Cooking Time: 45 minutes (sautéing, simmering).
- Total Time: 1 hour.
The Great Debate: Canned vs. Dried Kidney Beans
While this recipe is optimized for the convenience of canned beans, you can absolutely use dried beans. Here’s a breakdown to help you choose:
- Canned Beans (The Convenient Choice):
- Pros: Incredibly fast, no pre-planning required. Perfect for a weeknight meal. The texture is consistently soft.
- Cons: Higher in sodium (though rinsing well helps significantly). Can be slightly more expensive per serving. Some people find the texture to be too soft or “mushy.”
- Dried Beans (The Flavor & Texture Champion):
- Pros: Superior texture with a more “al dente” bite. More cost-effective. You control the sodium content completely. The cooking liquid from the beans is starchy and flavorful, making for an even better gravy.
- Cons: Requires significant pre-planning. You must soak them overnight (or for at least 8 hours) and then boil them until tender before starting the recipe. This can add several hours (or a day) to the process. Crucially, dried red kidney beans contain a toxin called phytohaemagglutinin, which must be destroyed by boiling them vigorously for at least 10 minutes. Never cook them from raw in a slow cooker.
To use dried beans in this recipe: Soak 1 cup of dried kidney beans overnight. Drain the soaking water, add fresh water, and boil them vigorously for 10-15 minutes. Then, reduce the heat and simmer for 1-1.5 hours, or until completely tender. Drain them (reserving some of the cooking liquid) and proceed with the recipe from Step 6, using the bean cooking liquid instead of plain water for an extra flavor boost.
How to Serve Your Delicious Red Kidney Beans
This dish is a fantastic centerpiece that pairs beautifully with a variety of accompaniments. Here are some classic and creative ways to serve it:
- Classic Grain Pairings:
- Basmati Rice: The most traditional and beloved pairing. The fluffy, separate grains are perfect for soaking up the rich gravy.
- Jeera Rice: Basmati rice tempered with cumin seeds and whole spices. It adds an extra layer of aroma.
- Brown Rice or Quinoa: A healthier, fiber-rich alternative that provides a lovely nutty contrast.
- Breads for Dipping:
- Naan Bread: Soft, pillowy naan (garlic or plain) is perfect for scooping up every last bit of curry.
- Roti/Chapati: Simple, whole-wheat flatbreads that are a staple in Indian households.
- Crusty Sourdough Bread: A non-traditional but delicious option. The tangy bread cuts through the richness of the beans beautifully.
- Essential Toppings and Sides:
- A dollop of yogurt: Plain full-fat yogurt or Greek yogurt adds a cool, creamy, and tangy contrast that balances the spices.
- Pickled Onions: Quick-pickled red onions provide a sharp, acidic crunch.
- Fresh Green Chilies: Thinly sliced, for those who want an extra kick of heat.
- Simple Kachumber Salad: A refreshing side salad made with chopped cucumber, tomato, onion, and a lemon-cilantro dressing.
- Transforming Leftovers:
- Bean & Rice Bowls: Layer leftover beans over rice and top with avocado, salsa, and a dollop of sour cream for a fusion-style bowl.
- Hearty Wraps: Spoon the beans into a warm tortilla with some shredded lettuce and cheese for a quick and filling lunch.
- “Beans on Toast”: Serve the warm beans over a thick slice of toasted, buttered sourdough for a fantastic brunch.
Additional Tips for Recipe Success
These five tips will elevate your dish from great to absolutely unforgettable.
- Don’t Rush the Sauté (The Bhuna): The most common mistake in making curries is rushing the initial sautéing of the onions, ginger-garlic, and tomatoes. This stage, called bhunao, is where the deep, complex flavor is built. Be patient. Cook the onions until truly soft and golden, cook the ginger-garlic until the raw smell is gone, and cook the tomatoes until the oil begins to separate. This effort pays huge dividends in the final taste.
- The Magic of Mashing: For a naturally creamier and thicker gravy without adding any cream, use the back of your spoon to gently mash about a quarter to a third of the beans against the side of the pot after you’ve added them. The starches released from the mashed beans will beautifully thicken the sauce as it simmers.
- Bloom Your Spices Correctly: Always add your ground spices to the pot after the ginger-garlic paste but before the wet ingredients (like tomatoes). Cooking them in the hot oil for 30-60 seconds on low heat “blooms” them, unlocking their fat-soluble flavor compounds and intensifying their aroma. This is a game-changer for flavor depth.
- Finish with Acid and Freshness: The final additions are just as important as the first. The garam masala adds a final layer of warm, aromatic spice that would be lost if cooked too long. The squeeze of fresh lemon or lime juice at the end is non-negotiable; its acidity cuts through the richness and makes all the other flavors pop. Finally, fresh cilantro adds a bright, herbaceous note that lifts the entire dish.
- Let It Rest: Like a good stew or chili, this kidney bean curry tastes even better the next day. If you have the time, make it a day ahead. If not, at least let it rest in the pot, off the heat, for 10-15 minutes before serving. This allows the flavors to meld and the gravy to thicken to its final, perfect consistency.
Frequently Asked Questions (FAQ)
Here are answers to some common questions you might have.
1. Why are my beans still hard or tough?
If you used canned beans and they are tough, it could be a sign of an older or lower-quality can. However, this is more common with dried beans. If your dried beans are still hard after cooking, it could be due to a few reasons: they might be very old (old beans take much longer to soften), or you might be cooking them in “hard” water. The most common culprit, though, is adding acidic ingredients (like tomatoes or lemon juice) or salt too early in the cooking process. Acid and salt can strengthen the pectin in the beans’ cell walls, preventing them from becoming tender. Always cook dried beans in plain water until they are fully soft before adding them to the acidic tomato base.
2. Can I make this recipe in an Instant Pot or a slow cooker?
Yes!
- Instant Pot: Use the “Sauté” function to complete Steps 1-5. Then, add the beans and broth, cancel “Sauté,” and cook on High Pressure for 8 minutes. Let the pressure release naturally for 10 minutes before performing a quick release. Stir in the finishing touches (garam masala, cilantro, lime).
- Slow Cooker: This method is best with pre-cooked (canned or boiled) beans. It is not safe to cook dried kidney beans from raw in a slow cooker as it doesn’t get hot enough to destroy the toxins. Complete Steps 1-5 in a pan on the stovetop to develop the flavor base. Then, transfer this base, the cooked beans, and the broth to your slow cooker. Cook on low for 4-6 hours or on high for 2-3 hours. Stir in the finishing touches before serving.
3. Is this recipe gluten-free?
Yes, this recipe is naturally gluten-free. All the core ingredients—beans, vegetables, spices, oil—are free from gluten. Just ensure that your spice blends (like garam masala) and vegetable broth are certified gluten-free if you have a severe intolerance or Celiac disease, as some brands can have anti-caking agents or additives that contain gluten.
4. Can I freeze this dish?
Absolutely! This dish freezes beautifully, making it perfect for meal prep. Let the curry cool completely to room temperature. Transfer it to freezer-safe containers or heavy-duty freezer bags, leaving a little bit of headspace for expansion. It will keep well in the freezer for up to 3 months. To reheat, thaw it overnight in the refrigerator and then gently warm it on the stovetop or in the microwave. You may need to add a splash of water to loosen it up. The flavor is often even better after freezing and reheating!
5. What is the difference between this dish (Rajma Masala) and a classic American chili?
While both are hearty, bean-based stews, they have distinct flavor profiles and origins. The primary difference lies in the spices. This One-Pot Red Kidney Bean curry is based on Indian flavors, using spices like cumin, coriander, turmeric, and garam masala, with a base of onion, ginger, and garlic. American chili, on the other hand, is rooted in Southwestern and Mexican cuisines, relying heavily on chili powder (a blend of dried chilies, cumin, and oregano), paprika, and often includes ingredients like bell peppers, corn, and sometimes meat. While both are delicious, their aromatic and taste profiles are worlds apart.

One-Pot Red Kidney Beans Recipe
Ingredients
For the Beans and Base:
- Oil: 2 tablespoons of a neutral oil (like avocado, canola, or a light olive oil) or ghee for a richer flavor.
- Onion: 1 large yellow onion, finely chopped.
- Ginger-Garlic Paste: 1.5 tablespoons. You can use store-bought or make your own by blending equal parts fresh ginger and garlic cloves with a splash of water.
- Tomatoes: 1 (15-ounce / 400g) can of crushed or puréed tomatoes. This creates a smooth, consistent gravy.
- Red Kidney Beans: 2 (15-ounce / 400g) cans of red kidney beans, rinsed and drained. (See notes on using dried beans in the FAQ).
- Water or Vegetable Broth: 1.5 to 2 cups, depending on your desired consistency. Using vegetable broth will add another layer of savory flavor.
- Salt: 1.5 teaspoons, or to taste.
For the Aromatic Spice Blend:
- Cumin Seeds: 1 teaspoon.
- Turmeric Powder: 1/2 teaspoon.
- Red Chili Powder: 1/2 teaspoon (use Kashmiri for color and mild heat, or cayenne for more kick). Adjust to your spice preference.
- Coriander Powder: 2 teaspoons.
- Garam Masala: 1 teaspoon. This is a finishing spice blend, added at the end to preserve its aroma.
- Dried Fenugreek Leaves (Kasuri Methi): 1 teaspoon (optional, but highly recommended for an authentic, earthy aroma).
For Garnish (Optional but Recommended):
- Fresh Cilantro: 1/4 cup, freshly chopped.
- Lemon or Lime Juice: A squeeze from half a lemon or lime.
- Full-Fat Cream or Coconut Cream: 2 tablespoons for a richer, creamier finish (optional).
Instructions
- Build the Aromatic Foundation: Place a large, heavy-bottomed pot or Dutch oven over medium heat. Add the 2 tablespoons of oil or ghee. Once the oil is shimmering, add the 1 teaspoon of cumin seeds. Let them sizzle and toast for about 30 seconds until they become fragrant and a shade darker. This “blooming” process is crucial for releasing their flavor.
- Sauté the Onions: Add the finely chopped onion to the pot. Sauté, stirring frequently, for about 8-10 minutes. You’re looking for the onions to become soft, translucent, and just starting to turn golden brown at the edges. Be patient with this step; well-cooked onions create a sweet, non-astringent base for the curry.
- Cook the Aromatics: Add the 1.5 tablespoons of ginger-garlic paste to the pot. Stir continuously for about 1-2 minutes until the raw smell is gone and it becomes deeply fragrant. This paste can stick to the bottom, so keep it moving.
- Incorporate the Spices: Turn the heat down to low to prevent the spices from burning. Add the 1/2 teaspoon of turmeric powder, 1/2 teaspoon of red chili powder, and 2 teaspoons of coriander powder. Stir constantly for 30-45 seconds. This step, known as bhunao in Indian cooking, toasts the ground spices, which deepens their flavor and removes any raw taste.
- Create the Tomato Gravy: Pour in the can of crushed or puréed tomatoes and the 1.5 teaspoons of salt. Turn the heat back up to medium and stir everything together, scraping up any browned bits from the bottom of the pot. Cook the mixture for 5-7 minutes, stirring occasionally, until the paste darkens in color and you see oil starting to separate at the edges of the pan. This indicates the tomatoes are well-cooked and the base (masala) is ready.
- Add the Beans and Simmer: Add the 2 cans of rinsed and drained red kidney beans to the pot. Stir gently to coat them in the tomato-spice mixture. Pour in 1.5 cups of water or vegetable broth. Bring the mixture to a gentle boil, then reduce the heat to low, cover the pot, and let it simmer for at least 20-25 minutes. This allows the beans to absorb all the wonderful flavors of the gravy. If you prefer a thinner curry, you can add the remaining 1/2 cup of broth. For a creamier texture, you can lightly mash about 1/4 of the beans against the side of the pot with your spoon before simmering.
- The Finishing Touches: After simmering, turn off the heat. Stir in the 1 teaspoon of garam masala. If using, crush the 1 teaspoon of dried fenugreek leaves (kasuri methi) between your palms and sprinkle it in—this releases its essential oils. If you desire a richer curry, now is the time to stir in the 2 tablespoons of heavy cream or coconut cream.
- Rest and Garnish: Let the dish rest for 5-10 minutes off the heat. This allows the flavors to meld and settle. Just before serving, stir in the freshly chopped cilantro and a generous squeeze of lemon or lime juice. The acid from the citrus brightens up all the deep, savory flavors. Check for seasoning and add more salt if needed.
Nutrition
- Serving Size: One Normal Portion
- Calories: 350-400 kcal