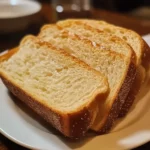
It’s a truth universally acknowledged that the warm, dark, slightly sweet, and utterly irresistible bread served at Outback Steakhouse is a culinary siren song. My family, like many others, has always considered it a highlight of any Outback dining experience. So, when we found ourselves craving that distinctive loaf at home, the quest for the perfect copycat recipe began. After countless trials and tweaks, I’m thrilled to share a version that not only captures the essence of Outback’s iconic bread but, dare I say, might even surpass it in freshness and homemade charm. The aroma that fills your kitchen as this bread bakes is pure magic, and the delighted faces around the dinner table when you serve it warm are the ultimate reward. This recipe is surprisingly straightforward, and even if you’re a novice baker, you’ll be able to recreate this restaurant favorite in your own kitchen. Get ready to experience the joy of warm, soft, slightly sweet Outback-style bread right from your oven!
Ingredients
Creating the perfect Outback Steakhouse bread copycat starts with understanding the role of each ingredient. This recipe relies on a harmonious blend of simple components that, when combined correctly, yield that signature dark color, slightly sweet flavor, and wonderfully soft texture. Let’s break down each ingredient and explore its importance:
- All-Purpose Flour (5 cups): The backbone of our bread, all-purpose flour provides the structure and chewiness we desire. It’s versatile and readily available, making it a great choice for this recipe. The gluten in all-purpose flour develops as we knead the dough, creating the elastic network that traps air and gives the bread its rise and characteristic crumb. For best results, measure your flour correctly. Spoon it lightly into your measuring cup and level off the top with a knife, avoiding scooping directly from the bag, which can compact the flour and lead to a denser loaf.
- Unsweetened Cocoa Powder (1/4 cup): This might seem like an unusual ingredient in bread, but cocoa powder is the secret to the Outback bread’s distinctive dark brown color. It doesn’t contribute a strong chocolate flavor; instead, it adds a subtle depth and richness that enhances the overall taste profile. Use unsweetened cocoa powder, not Dutch-processed, for the best color and flavor.
- Granulated Sugar (1/4 cup): Sugar serves multiple purposes in this recipe. It not only adds a touch of sweetness, mirroring the slight sweetness of the original Outback bread, but also provides food for the yeast, helping it to activate and rise. The sugar also contributes to browning during baking, enhancing the bread’s beautiful dark crust. While granulated sugar is recommended, you could experiment with light brown sugar for a slightly deeper molasses-like note, though this will slightly alter the flavor profile.
- Molasses (1/4 cup): Molasses is another key ingredient that contributes to both the color and the flavor of Outback bread. It imparts a rich, dark, and slightly smoky sweetness that is characteristic of this style of bread. Molasses also adds moisture to the dough, contributing to the bread’s soft and tender crumb. Unsulphured molasses is the best choice for baking; avoid blackstrap molasses, which is much stronger and can be bitter.
- Active Dry Yeast (2 1/4 teaspoons – 1 packet): Yeast is the leavening agent that makes our bread rise. Active dry yeast needs to be activated in warm water before being added to the other ingredients. Ensure your yeast is fresh; expired yeast may not activate properly, resulting in a dense loaf. If you’re unsure about your yeast’s freshness, you can test it by dissolving a teaspoon of sugar and the yeast in 1/4 cup of warm water. If it foams up within 5-10 minutes, it’s active and ready to use.
- Warm Water (1 1/2 cups, about 105-115°F): Warm water is crucial for activating the active dry yeast. The ideal temperature range is 105-115°F. Water that is too cold will not activate the yeast, while water that is too hot can kill it. Use a thermometer to ensure the water is at the correct temperature. The warm water also helps to hydrate the flour and bring the dough together.
- Vegetable Oil (1/4 cup): Vegetable oil adds moisture and tenderness to the bread, contributing to its soft crumb and preventing it from drying out too quickly. It also helps to create a slightly richer flavor. You can substitute other neutral oils like canola oil or grapeseed oil if you prefer. Olive oil can also be used, but it will impart a slight olive oil flavor, which may not be desirable for a copycat recipe aiming for the Outback flavor profile.
- Salt (1 1/2 teaspoons): Salt is an essential ingredient in bread making. It not only enhances the flavor of the bread, balancing the sweetness and richness, but also controls the yeast activity, preventing the dough from rising too quickly and becoming too airy. Salt also strengthens the gluten structure, contributing to the bread’s texture. Use regular table salt or fine sea salt.
- Butter, melted (for brushing, optional): Brushing the baked loaves with melted butter adds a beautiful sheen to the crust and enhances the flavor. It also helps to keep the crust soft and prevents it from becoming too hard. This step is optional but highly recommended for that extra touch of deliciousness.
Instructions
Now that we’ve explored the ingredients, let’s dive into the step-by-step instructions for creating your own batch of delectable Outback Steakhouse copycat bread. Follow these instructions carefully for the best results.
- Activate the Yeast: In a large bowl, combine the warm water (105-115°F), sugar, and active dry yeast. Gently stir to combine and let it stand for 5-10 minutes. This process, known as proofing, ensures that the yeast is active and ready to leaven the dough. You’ll know the yeast is active when you see a foamy layer forming on top of the water. If no foam appears after 10 minutes, your yeast may be old or inactive, and you should start with fresh yeast.
- Combine Wet Ingredients: Once the yeast is activated, add the molasses and vegetable oil to the yeast mixture. Stir to combine these wet ingredients. The molasses will dissolve into the warm water, creating a rich, dark liquid base for our dough.
- Incorporate Dry Ingredients: In a separate large bowl, whisk together the all-purpose flour, cocoa powder, and salt. Whisking the dry ingredients ensures that they are evenly distributed, especially the cocoa powder, preventing any clumps and ensuring a consistent color throughout the bread.
- Gradually Add Wet to Dry: Gradually add the wet ingredients to the dry ingredients, mixing with a wooden spoon or spatula until a shaggy dough forms. Start by adding about half of the wet ingredients and mix until just combined. Then, add the remaining wet ingredients gradually, mixing until the dough comes together. Avoid adding all the wet ingredients at once, as this can make it harder to incorporate the flour evenly.
- Knead the Dough: Turn the dough out onto a lightly floured surface. Knead for 8-10 minutes, or until the dough is smooth, elastic, and no longer sticky. Kneading is crucial for developing the gluten in the flour, which gives the bread its structure and chewiness. Use the heel of your hand to push the dough away from you, then fold it back over and turn it. Repeat this process rhythmically. If the dough is too sticky, add a tablespoon of flour at a time, but be careful not to add too much, as this can make the bread dry. The dough should be slightly tacky but not stick to your hands.
- First Rise (Bulk Fermentation): Place the kneaded dough in a lightly oiled bowl, turning to coat all sides. Cover the bowl with plastic wrap or a clean kitchen towel. Let the dough rise in a warm place for 1-1.5 hours, or until doubled in size. The warm place helps the yeast to ferment and produce carbon dioxide, which makes the dough rise. The ideal temperature for proofing is around 75-80°F. You can place the bowl in a slightly warm oven (turned off!) or in a sunny spot in your kitchen.
- Divide and Shape the Dough: Once the dough has doubled, gently punch it down to release the air. Turn the dough out onto a lightly floured surface and divide it into two equal portions. Shape each portion into a loaf. You can shape them into round loaves or oblong loaves, depending on your preference. To shape a loaf, gently stretch the dough into a rectangle, then fold it in thirds like a letter, and roll it up tightly.
- Second Rise (Proofing): Place the shaped loaves in greased 9×5 inch loaf pans. Cover the pans loosely with plastic wrap or a clean kitchen towel. Let the loaves rise in a warm place for another 45-60 minutes, or until they have almost doubled in size. This second rise, also known as proofing, allows the dough to relax and rise further, resulting in a lighter and airier bread.
- Preheat Oven and Bake: Preheat your oven to 350°F (175°C). Once the oven is preheated and the loaves have risen sufficiently, bake for 30-35 minutes, or until the loaves are golden brown and sound hollow when tapped on the bottom. Use an oven thermometer to ensure your oven is at the correct temperature. Baking time may vary slightly depending on your oven.
- Cool and Brush with Butter (Optional): Remove the loaves from the oven and let them cool in the pans for 5-10 minutes before transferring them to a wire rack to cool completely. While the loaves are still warm, brush the tops with melted butter, if desired. Cooling the bread completely before slicing is important, as slicing warm bread can result in a gummy texture. Brushing with butter adds a lovely flavor and sheen.
- Serve and Enjoy: Once cooled, slice and serve your homemade Outback Steakhouse bread. It’s best enjoyed warm with butter, or as a side to your favorite soups, salads, or steak dishes.
Nutrition Facts
(Approximate, per serving – based on recipe divided into 16 servings)
- Servings: 16
- Calories per serving: Approximately 180-220 calories (depending on slice size and ingredients used)
Approximate Nutritional Breakdown per Serving:
- Total Fat: 5-7g
- Saturated Fat: 1-2g
- Unsaturated Fat: 4-5g
- Cholesterol: 0mg
- Sodium: 150-200mg
- Total Carbohydrate: 30-35g
- Dietary Fiber: 1-2g
- Sugars: 5-7g
- Protein: 4-5g
Please note: These are estimated values and can vary based on specific ingredient brands and portion sizes. For precise nutritional information, use a nutrition calculator with the specific brands you use. This bread, while delicious, should be enjoyed in moderation as part of a balanced diet. It is a carbohydrate-rich food with moderate fat and protein content.
Preparation Time
- Prep Time: 30 minutes (includes yeast activation, mixing, and kneading)
- Rise Time (First Rise): 1-1.5 hours
- Rise Time (Second Rise): 45-60 minutes
- Bake Time: 30-35 minutes
- Cooling Time: 1-2 hours (recommended for best slicing)
- Total Time (Approximate): 3.5 – 4.5 hours (including cooling)
While the total time seems lengthy, much of it is hands-off rise time. The active preparation time is relatively short, making this recipe manageable even for busy schedules. You can also break up the process by preparing the dough in advance and letting it rise in the refrigerator overnight for baking the next day.
How to Serve
Outback Steakhouse bread is incredibly versatile and can be enjoyed in countless ways. Here are some serving suggestions to elevate your bread experience:
- Classic Butter: Serve warm slices with softened butter. This is the quintessential way to enjoy Outback bread, highlighting its soft texture and subtle sweetness.
- Honey Butter: Elevate the butter experience by making honey butter. Simply whip together softened butter with honey to taste. The sweetness of the honey complements the slight sweetness of the bread beautifully.
- Garlic Butter: For a savory twist, create garlic butter. Mix softened butter with minced garlic, parsley, and a pinch of salt. This savory butter pairs wonderfully with the bread and makes it an excellent accompaniment to pasta dishes or grilled meats.
- Soup and Salad Companion: Outback bread is a fantastic side for soups and salads. Its slightly sweet flavor provides a delightful contrast to savory soups like French onion or creamy tomato soup. It’s also perfect for dipping into salad dressings.
- Steakhouse Side: Recreate the full Outback experience by serving this bread alongside steak, ribs, or grilled chicken. It’s the perfect carbohydrate accompaniment to a hearty steakhouse meal.
- Sandwiches and Sliders: While traditionally served as a side, this bread can also be used to make delicious sandwiches and sliders. Its soft texture and slightly sweet flavor make it a unique and flavorful bread for fillings.
- Appetizer with Dips: Cut the bread into cubes and serve it as an appetizer with various dips like spinach artichoke dip, French onion dip, or hummus. The dark color and slightly sweet flavor make it a visually appealing and tasty option for dipping.
- Breakfast Toast (Sweet or Savory): While not traditionally a breakfast bread, toasted slices of Outback bread are surprisingly delicious for breakfast. Top with sweet toppings like jam, Nutella, or peanut butter, or savory toppings like avocado, eggs, or cream cheese.
Additional Tips for Perfect Outback Bread
Achieving bakery-quality Outback bread at home is within reach with these helpful tips:
- Use Fresh Yeast: Ensure your active dry yeast is fresh and within its expiration date. Inactive yeast is the most common reason for bread not rising. If you’re unsure about your yeast’s freshness, proof it as described in the instructions.
- Don’t Over-Measure Flour: Over-measuring flour is a common mistake in baking. Always spoon flour lightly into your measuring cup and level it off with a knife. Avoid scooping directly from the bag, which can compact the flour and lead to a denser loaf.
- Knead Adequately: Kneading is essential for gluten development, which gives the bread its structure and texture. Knead for the recommended time (8-10 minutes) until the dough is smooth and elastic. If using a stand mixer with a dough hook, knead for about 6-8 minutes on medium-low speed.
- Proper Rise Temperature: Yeast thrives in warm environments. Ensure your dough rises in a warm place (around 75-80°F) for optimal rising. Avoid drafts and cold spots. A slightly warm oven (turned off) or a sunny spot can provide the ideal conditions.
- Don’t Over-Bake: Over-baking can result in dry bread. Bake until the loaves are golden brown and sound hollow when tapped on the bottom. Use a toothpick inserted into the center to check for doneness; it should come out clean. Start checking for doneness a few minutes before the recommended baking time and adjust as needed based on your oven.
FAQ Section
Q: Can I use instant yeast instead of active dry yeast?
A: Yes, you can substitute instant yeast for active dry yeast. Use the same amount (2 1/4 teaspoons). Instant yeast does not need to be proofed in water first. You can add it directly to the dry ingredients. You may need to slightly adjust the rising times, as instant yeast can sometimes rise a bit faster.
Q: Can I make this recipe ahead of time?
A: Yes, you can prepare the dough ahead of time. After the first rise, punch down the dough, divide it, shape it, and place it in the loaf pans. Cover and refrigerate overnight or for up to 24 hours. When ready to bake, remove the dough from the refrigerator and let it come to room temperature and rise again (this may take longer than usual, about 1-2 hours) before baking as directed. Baked loaves can also be frozen for longer storage. Cool completely, wrap tightly in plastic wrap and then foil, and freeze for up to 2 months. Thaw at room temperature before serving.
Q: Can I make this recipe gluten-free?
A: This recipe is specifically formulated with wheat flour and is not inherently gluten-free. To make a gluten-free version, you would need to substitute the all-purpose flour with a gluten-free flour blend specifically designed for bread making. Be aware that gluten-free bread often has a different texture and may require adjustments to the liquid content and baking time. Look for a reputable gluten-free bread recipe specifically designed to mimic Outback-style bread for best results.
Q: What if I don’t have molasses? Can I substitute it?
A: Molasses is a key ingredient for the authentic flavor and color of Outback bread. However, if you absolutely don’t have molasses, you can try substituting dark brown sugar. It won’t provide exactly the same depth of flavor, but it will offer a similar sweetness and color. You can also try a combination of honey or maple syrup with a small amount of dark brown sugar. Keep in mind that substitutions will slightly alter the final flavor profile.
Q: Why is cocoa powder in bread? Will it taste like chocolate?
A: The cocoa powder in this recipe is primarily for color, not for a strong chocolate flavor. It contributes to the signature dark brown hue of Outback Steakhouse bread. The amount of cocoa powder is small enough that it doesn’t impart a noticeable chocolate taste to the bread. Instead, it adds a subtle depth and richness that complements the other flavors. You might detect a very faint hint of cocoa, but it’s more about enhancing the overall flavor profile rather than making it taste like chocolate bread.
Outback Steakhouse Bread Copycat Recipe
Ingredients
- All-Purpose Flour (5 cups): The backbone of our bread, all-purpose flour provides the structure and chewiness we desire. It’s versatile and readily available, making it a great choice for this recipe. The gluten in all-purpose flour develops as we knead the dough, creating the elastic network that traps air and gives the bread its rise and characteristic crumb. For best results, measure your flour correctly. Spoon it lightly into your measuring cup and level off the top with a knife, avoiding scooping directly from the bag, which can compact the flour and lead to a denser loaf.
- Unsweetened Cocoa Powder (1/4 cup): This might seem like an unusual ingredient in bread, but cocoa powder is the secret to the Outback bread’s distinctive dark brown color. It doesn’t contribute a strong chocolate flavor; instead, it adds a subtle depth and richness that enhances the overall taste profile. Use unsweetened cocoa powder, not Dutch-processed, for the best color and flavor.
- Granulated Sugar (1/4 cup): Sugar serves multiple purposes in this recipe. It not only adds a touch of sweetness, mirroring the slight sweetness of the original Outback bread, but also provides food for the yeast, helping it to activate and rise. The sugar also contributes to browning during baking, enhancing the bread’s beautiful dark crust. While granulated sugar is recommended, you could experiment with light brown sugar for a slightly deeper molasses-like note, though this will slightly alter the flavor profile.
- Molasses (1/4 cup): Molasses is another key ingredient that contributes to both the color and the flavor of Outback bread. It imparts a rich, dark, and slightly smoky sweetness that is characteristic of this style of bread. Molasses also adds moisture to the dough, contributing to the bread’s soft and tender crumb. Unsulphured molasses is the best choice for baking; avoid blackstrap molasses, which is much stronger and can be bitter.
- Active Dry Yeast (2 1/4 teaspoons – 1 packet): Yeast is the leavening agent that makes our bread rise. Active dry yeast needs to be activated in warm water before being added to the other ingredients. Ensure your yeast is fresh; expired yeast may not activate properly, resulting in a dense loaf. If you’re unsure about your yeast’s freshness, you can test it by dissolving a teaspoon of sugar and the yeast in 1/4 cup of warm water. If it foams up within 5-10 minutes, it’s active and ready to use.
- Warm Water (1 1/2 cups, about 105-115°F): Warm water is crucial for activating the active dry yeast. The ideal temperature range is 105-115°F. Water that is too cold will not activate the yeast, while water that is too hot can kill it. Use a thermometer to ensure the water is at the correct temperature. The warm water also helps to hydrate the flour and bring the dough together.
- Vegetable Oil (1/4 cup): Vegetable oil adds moisture and tenderness to the bread, contributing to its soft crumb and preventing it from drying out too quickly. It also helps to create a slightly richer flavor. You can substitute other neutral oils like canola oil or grapeseed oil if you prefer. Olive oil can also be used, but it will impart a slight olive oil flavor, which may not be desirable for a copycat recipe aiming for the Outback flavor profile.
- Salt (1 1/2 teaspoons): Salt is an essential ingredient in bread making. It not only enhances the flavor of the bread, balancing the sweetness and richness, but also controls the yeast activity, preventing the dough from rising too quickly and becoming too airy. Salt also strengthens the gluten structure, contributing to the bread’s texture. Use regular table salt or fine sea salt.
- Butter, melted (for brushing, optional): Brushing the baked loaves with melted butter adds a beautiful sheen to the crust and enhances the flavor. It also helps to keep the crust soft and prevents it from becoming too hard. This step is optional but highly recommended for that extra touch of deliciousness.
Instructions
- Activate the Yeast: In a large bowl, combine the warm water (105-115°F), sugar, and active dry yeast. Gently stir to combine and let it stand for 5-10 minutes. This process, known as proofing, ensures that the yeast is active and ready to leaven the dough. You’ll know the yeast is active when you see a foamy layer forming on top of the water. If no foam appears after 10 minutes, your yeast may be old or inactive, and you should start with fresh yeast.
- Combine Wet Ingredients: Once the yeast is activated, add the molasses and vegetable oil to the yeast mixture. Stir to combine these wet ingredients. The molasses will dissolve into the warm water, creating a rich, dark liquid base for our dough.
- Incorporate Dry Ingredients: In a separate large bowl, whisk together the all-purpose flour, cocoa powder, and salt. Whisking the dry ingredients ensures that they are evenly distributed, especially the cocoa powder, preventing any clumps and ensuring a consistent color throughout the bread.
- Gradually Add Wet to Dry: Gradually add the wet ingredients to the dry ingredients, mixing with a wooden spoon or spatula until a shaggy dough forms. Start by adding about half of the wet ingredients and mix until just combined. Then, add the remaining wet ingredients gradually, mixing until the dough comes together. Avoid adding all the wet ingredients at once, as this can make it harder to incorporate the flour evenly.
- Knead the Dough: Turn the dough out onto a lightly floured surface. Knead for 8-10 minutes, or until the dough is smooth, elastic, and no longer sticky. Kneading is crucial for developing the gluten in the flour, which gives the bread its structure and chewiness. Use the heel of your hand to push the dough away from you, then fold it back over and turn it. Repeat this process rhythmically. If the dough is too sticky, add a tablespoon of flour at a time, but be careful not to add too much, as this can make the bread dry. The dough should be slightly tacky but not stick to your hands.
- First Rise (Bulk Fermentation): Place the kneaded dough in a lightly oiled bowl, turning to coat all sides. Cover the bowl with plastic wrap or a clean kitchen towel. Let the dough rise in a warm place for 1-1.5 hours, or until doubled in size. The warm place helps the yeast to ferment and produce carbon dioxide, which makes the dough rise. The ideal temperature for proofing is around 75-80°F. You can place the bowl in a slightly warm oven (turned off!) or in a sunny spot in your kitchen.
- Divide and Shape the Dough: Once the dough has doubled, gently punch it down to release the air. Turn the dough out onto a lightly floured surface and divide it into two equal portions. Shape each portion into a loaf. You can shape them into round loaves or oblong loaves, depending on your preference. To shape a loaf, gently stretch the dough into a rectangle, then fold it in thirds like a letter, and roll it up tightly.
- Second Rise (Proofing): Place the shaped loaves in greased 9×5 inch loaf pans. Cover the pans loosely with plastic wrap or a clean kitchen towel. Let the loaves rise in a warm place for another 45-60 minutes, or until they have almost doubled in size. This second rise, also known as proofing, allows the dough to relax and rise further, resulting in a lighter and airier bread.
- Preheat Oven and Bake: Preheat your oven to 350°F (175°C). Once the oven is preheated and the loaves have risen sufficiently, bake for 30-35 minutes, or until the loaves are golden brown and sound hollow when tapped on the bottom. Use an oven thermometer to ensure your oven is at the correct temperature. Baking time may vary slightly depending on your oven.
- Cool and Brush with Butter (Optional): Remove the loaves from the oven and let them cool in the pans for 5-10 minutes before transferring them to a wire rack to cool completely. While the loaves are still warm, brush the tops with melted butter, if desired. Cooling the bread completely before slicing is important, as slicing warm bread can result in a gummy texture. Brushing with butter adds a lovely flavor and sheen.
- Serve and Enjoy: Once cooled, slice and serve your homemade Outback Steakhouse bread. It’s best enjoyed warm with butter, or as a side to your favorite soups, salads, or steak dishes.
Nutrition
- Serving Size: one normal portion
- Calories: 180-220
- Sugar: 5-7g
- Sodium: 150-200mg
- Fat: 5-7g
- Saturated Fat: 1-2g
- Unsaturated Fat: 4-5g
- Carbohydrates: 30-35g
- Fiber: 1-2g
- Protein: 4-5g
- Cholesterol: 0mg