There’s a certain magic to a weekend morning, one that isn’t complete in our house without the sizzle of batter hitting a hot griddle or the satisfying click of a waffle iron closing. For years, my kitchen counter was a battlefield of different recipes—one for pancakes that promised cloud-like fluffiness, and another for waffles that swore to deliver that perfect crispy-on-the-outside, tender-on-the-inside texture. It was a delicious but cluttered endeavor. I dreamed of a single, unified theory of breakfast batter, a master recipe that could do it all. After countless batches, a little bit of food science, and plenty of “taste-testing” from my very willing family, this is it. This is the recipe that ended the breakfast wars in my home. It has become our go-to, our tried-and-true, the one that earns rave reviews whether it’s served as a golden-brown stack or a perfectly pocketed waffle. It’s versatile, foolproof, and I’m genuinely thrilled to share it with you.
The Ultimate “One Batter” Pancake and Waffle Recipe
This recipe is designed to be the only one you’ll ever need for your breakfast staples. The base creates exceptionally fluffy pancakes, and with one minor adjustment—a little extra fat—it transforms into the perfect batter for crisp, golden waffles.
Ingredients for the Master Batter
Here is everything you will need to create the foundational batter. Explanations for key ingredients are included to help you understand their role.
- 2 cups (250g) All-Purpose Flour: The structural backbone of our recipe. Standard all-purpose flour provides the perfect balance of protein for a tender crumb.
- 2 tablespoons (25g) Granulated Sugar: This adds a subtle sweetness and, more importantly, helps with browning (caramelization) for that perfect golden color.
- 2 teaspoons Baking Powder: This is our primary leavening agent. It reacts with the liquid and heat to create carbon dioxide bubbles, which make the pancakes and waffles rise and become fluffy. Make sure your baking powder is fresh for the best lift!
- 1 teaspoon Baking Soda: Works in tandem with the acidic buttermilk to provide an extra boost of leavening, ensuring a light and airy texture.
- ½ teaspoon Salt: Salt is a flavor enhancer. It doesn’t make the batter salty; it makes everything else taste more like itself, balancing the sweetness and richness.
- 2 large Eggs: These act as a binder, holding everything together. They also contribute to the richness, color, and flavor of the final product.
- 2 cups (480ml) Buttermilk: This is the secret weapon. The acidity in buttermilk reacts with the baking soda for superior leavening and breaks down gluten strands for an incredibly tender texture. (See tips section for an easy DIY substitute if you don’t have any on hand).
- 4 tablespoons (57g) Unsalted Butter, melted and slightly cooled: Butter adds incredible flavor and richness. Melting it ensures it incorporates smoothly into the batter.
- 1 teaspoon Vanilla Extract: A simple addition that elevates the flavor profile, giving it that classic, bakery-fresh aroma.
Additional Ingredient for Crispy Waffles
- 2 tablespoons (30ml) Neutral Oil (like canola or vegetable) OR an additional 2 tablespoons (28g) Melted Butter: This is the crucial modification for waffles. The extra fat coats the flour, inhibiting gluten development and helping to “fry” the waffle from the inside out, creating that signature crispy exterior.
Step-by-Step Instructions
Follow these instructions carefully to create the master batter, then proceed to the specific cooking method for your desired breakfast treat.
Part 1: Preparing the Master Batter
- Combine Dry Ingredients: In a large mixing bowl, add the all-purpose flour, granulated sugar, baking powder, baking soda, and salt. Use a whisk to thoroughly combine them. This step is crucial as it ensures the leavening agents are evenly distributed, preventing pockets of saltiness or bitterness and guaranteeing an even rise.
- Combine Wet Ingredients: In a separate medium-sized bowl, crack the two large eggs. Lightly whisk them until the yolks and whites are just combined. Pour in the buttermilk, the 4 tablespoons of cooled melted butter, and the vanilla extract. Whisk these wet ingredients together until they are uniform.
- Combine Wet and Dry: Pour the entire mixture of wet ingredients into the large bowl containing the dry ingredients.
- Mix Gently – The Golden Rule: Using the whisk or a rubber spatula, gently fold the ingredients together until they are just combined. It is perfectly fine—and actually desirable—for the batter to have some small to medium-sized lumps. Over-mixing is the number one enemy of tender pancakes and waffles. Over-mixing develops gluten, which will result in a tough, rubbery texture instead of a light and fluffy one.
- Rest the Batter: Let the batter rest on the counter for 5 to 10 minutes. This allows the gluten to relax and the baking powder to start its work, creating a thicker, more aerated batter that will cook up even fluffier.
Part 2: Cooking Your Masterpiece
Choose your path: fluffy pancakes or crispy waffles.
For Perfect, Fluffy Pancakes:
- Preheat Your Griddle: Place a non-stick skillet or a griddle over medium heat. To test if it’s ready, flick a few drops of water onto the surface. If they sizzle and dance before evaporating, the griddle is at the perfect temperature. If they evaporate instantly, it’s too hot.
- Grease the Surface: Lightly grease the griddle with a small amount of butter or a light coating of cooking spray. Wipe away any excess with a paper towel. You want a very thin, almost invisible layer.
- Pour the Batter: Use a ¼-cup measure to pour batter onto the hot griddle for evenly sized pancakes. Don’t crowd the pan; leave a few inches between each pancake to allow for spreading and easy flipping.
- Watch for Bubbles: Cook for about 2-3 minutes on the first side. You’ll know it’s time to flip when you see bubbles forming and popping on the surface and the edges begin to look dry and set.
- Flip and Finish: Using a thin, wide spatula, confidently flip the pancake. Cook on the second side for another 1-2 minutes, or until golden brown.
- Serve Immediately: Transfer the cooked pancakes to a plate and serve hot with your favorite toppings. To keep a large batch warm, place them on a baking sheet in a single layer in an oven set to 200°F (93°C).
For Golden, Crispy Waffles:
- Make the Waffle Adjustment: Before cooking, take your master batter and gently stir in the additional 2 tablespoons of neutral oil or melted butter. Mix just until it’s incorporated. This is the key step for crispiness.
- Preheat Your Waffle Iron: Plug in your waffle iron and preheat it according to the manufacturer’s instructions. Most models have an indicator light that tells you when it’s ready.
- Grease the Iron (If Needed): Even if your waffle iron is non-stick, it’s a good practice to lightly grease it with cooking spray or a brush of melted butter for the first waffle to guarantee it won’t stick.
- Add the Batter: Pour the recommended amount of batter onto the center of the bottom grid. The amount will vary depending on your waffle iron’s size and style (Belgian vs. American). Use a spatula to spread it slightly towards the edges.
- Close and Cook: Close the lid firmly and let the waffle cook. Do not be tempted to open the lid to peek! Most modern waffle irons will signal when the waffle is done, often with a beep or a light change. This typically takes 3-5 minutes. Steam will stop billowing from the sides when it’s nearly ready.
- Remove and Serve: Carefully open the waffle iron. The waffle should be golden brown and crispy. Use a fork or tongs (avoid metal if your iron has a non-stick coating) to lift the waffle out.
- Serve Hot: Serve immediately to enjoy its maximum crispiness, or place it on a wire rack in a warm oven (200°F / 93°C) to keep it crisp while you cook the rest of the batch. Do not stack waffles on a plate, as the trapped steam will make them soggy.
Nutrition Facts
Please note that these values are an estimate and can vary based on the specific ingredients used and the final serving size.
- Servings: This recipe yields approximately 12-14 medium-sized pancakes or 6-8 standard Belgian waffles.
- Calories Per Serving (Approximate):
- Per Pancake (1/12 of recipe): ~140-160 kcal
- Per Waffle (1/7 of recipe, with extra fat): ~280-310 kcal
Preparation Time
Breaking down the time commitment to help you plan your morning.
- Preparation Time: 10 minutes (mixing the batter)
- Resting Time: 5-10 minutes
- Cook Time: 15-20 minutes (depending on the size of your griddle/waffle iron and how many batches you make)
- Total Time: Approximately 30-40 minutes
How to Serve: A World of Toppings and Pairings
The pancake or waffle is a blank canvas. Here’s how to turn it into a work of art.
Classic & Sweet Toppings
- The Quintessential: A pat of high-quality butter melting over the warm surface, followed by a generous drizzle of pure maple syrup.
- Fruit Forward: A pile of fresh berries (strawberries, blueberries, raspberries), sliced bananas, or warm-cooked apples with cinnamon.
- Decadent Delight: A dollop of fresh whipped cream, a scoop of vanilla ice cream, or a drizzle of chocolate or caramel sauce.
- Crunchy & Nutty: A sprinkle of toasted pecans, walnuts, or sliced almonds.
Savory Sensations
Don’t be afraid to take your breakfast in a savory direction!
- Chicken & Waffles: The legendary pairing. Serve a crispy waffle with a piece of fried chicken and a drizzle of hot honey or maple syrup.
- The Breakfast Stack: Top a pancake with a fried egg, a few strips of crispy bacon or a sausage patty, and maybe a slice of melted cheddar cheese.
- Avocado Dream: Mash an avocado with salt, pepper, and a squeeze of lime juice. Spread it over a waffle and top with everything bagel seasoning.
- Herb and Cheese: Before cooking, fold some shredded sharp cheddar and chopped chives or scallions directly into the batter for an incredible savory pancake.
Additional Tips for Breakfast Perfection
These five tips will elevate your pancake and waffle game from good to unforgettable.
- Master Your Heat Source: The most common mistake is having a pan that is too hot or not hot enough. Too hot, and the outside will burn before the inside is cooked. Too cool, and you’ll get pale, greasy pancakes. The water-drop test is your best friend. For waffles, always let your iron preheat completely for a uniformly cooked, crispy result.
- The DIY Buttermilk Hack: No buttermilk? No problem. You can make a fantastic substitute in 5 minutes. For every 1 cup of regular milk (whole or 2% works best), stir in 1 tablespoon of an acid—either lemon juice or white vinegar. Let it sit for 5-10 minutes. The milk will curdle slightly and become acidic, perfectly mimicking the properties of buttermilk in this recipe.
- Don’t Press Your Waffle Iron: Once you close the lid on your waffle maker, resist the urge to press down on it. The batter needs space to expand as the leavening agents create steam. Pressing it can result in a dense, doughy waffle and may even cause hot batter to ooze out the sides.
- Know When to Flip: For pancakes, look for the visual cues. The edges will start to look dry, and bubbles will appear across the surface. Once those bubbles begin to pop and leave little holes that don’t immediately fill back in with batter, it’s the perfect time to flip. Flipping too early or too late can ruin the texture.
- Batch Cook and Freeze for Easy Mornings: This recipe is perfect for making ahead. Cook the entire batch of pancakes or waffles. Let them cool completely on a wire rack. To freeze, place them on a baking sheet in a single layer and pop them in the freezer for an hour until solid. Then, transfer them to a freezer-safe zip-top bag. They can be reheated directly from frozen in a toaster or toaster oven for a crispy, delicious breakfast in minutes.
Frequently Asked Questions (FAQ)
Here are answers to some of the most common questions about this recipe.
1. Can I make the batter ahead of time?
You can, but with a slight caveat. You can mix the batter and store it in an airtight container in the refrigerator for up to 24 hours. However, the baking powder and soda will begin to lose their potency over time. For the absolute fluffiest results, the batter is best used within an hour of mixing (after its initial rest). If you do use older batter, it will still be delicious, just slightly less airy.
2. Can I substitute whole wheat flour or other flours?
Yes, you can. For a healthier twist, you can substitute up to half of the all-purpose flour with whole wheat flour. This will result in a denser, nuttier-tasting product. You may need to add an extra tablespoon or two of buttermilk, as whole wheat flour is more absorbent. Other flours like oat flour or a gluten-free all-purpose blend can also work, but results will vary, and you may need to adjust the liquid ratio.
3. Why is my first pancake always a disaster?
This is a universal kitchen phenomenon! The “first pancake” often fails because the griddle is still coming to the correct, stable temperature, or it has an improper amount of grease on it (too much or too little). Think of the first one as a sacrifice to the breakfast gods—it’s testing the heat and seasoning the pan for the perfect ones to follow.
4. How do I properly clean my waffle iron?
Never submerge your electric waffle iron in water. After it has cooled down completely, use a dry paper towel or a soft-bristled brush to wipe away any crumbs. For stubborn, cooked-on bits, dampen a paper towel with a little cooking oil and gently rub the spot to loosen it. For a deep clean, you can make a paste of baking soda and a little water, apply it to the tough spots, let it sit, and then wipe it away with a damp cloth. Always ensure the iron is completely dry before storing.
5. What is the difference between pancake batter and waffle batter, and why does this one work for both?
Traditionally, waffle batter contains more sugar for better caramelization and more fat (oil or butter) for that signature crispiness. Pancake batter is typically lower in fat and sugar to remain soft and fluffy like a cake. This master recipe creates a perfect pancake batter as its base. The simple act of adding a bit more fat (the “waffle tweak”) is what transforms it, providing the richness needed to create a crispy exterior while maintaining a tender, fluffy interior when cooked in the high, even heat of a waffle iron.
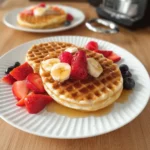
Pancake and Waffle Recipe
Ingredients
Ingredients for the Master Batter
Here is everything you will need to create the foundational batter. Explanations for key ingredients are included to help you understand their role.
- 2 cups (250g) All-Purpose Flour: The structural backbone of our recipe. Standard all-purpose flour provides the perfect balance of protein for a tender crumb.
- 2 tablespoons (25g) Granulated Sugar: This adds a subtle sweetness and, more importantly, helps with browning (caramelization) for that perfect golden color.
- 2 teaspoons Baking Powder: This is our primary leavening agent. It reacts with the liquid and heat to create carbon dioxide bubbles, which make the pancakes and waffles rise and become fluffy. Make sure your baking powder is fresh for the best lift!
- 1 teaspoon Baking Soda: Works in tandem with the acidic buttermilk to provide an extra boost of leavening, ensuring a light and airy texture.
- ½ teaspoon Salt: Salt is a flavor enhancer. It doesn’t make the batter salty; it makes everything else taste more like itself, balancing the sweetness and richness.
- 2 large Eggs: These act as a binder, holding everything together. They also contribute to the richness, color, and flavor of the final product.
- 2 cups (480ml) Buttermilk: This is the secret weapon. The acidity in buttermilk reacts with the baking soda for superior leavening and breaks down gluten strands for an incredibly tender texture. (See tips section for an easy DIY substitute if you don’t have any on hand).
- 4 tablespoons (57g) Unsalted Butter, melted and slightly cooled: Butter adds incredible flavor and richness. Melting it ensures it incorporates smoothly into the batter.
- 1 teaspoon Vanilla Extract: A simple addition that elevates the flavor profile, giving it that classic, bakery-fresh aroma.
Additional Ingredient for Crispy Waffles
- 2 tablespoons (30ml) Neutral Oil (like canola or vegetable) OR an additional 2 tablespoons (28g) Melted Butter: This is the crucial modification for waffles. The extra fat coats the flour, inhibiting gluten development and helping to “fry” the waffle from the inside out, creating that signature crispy exterior.
Instructions
Part 1: Preparing the Master Batter
- Combine Dry Ingredients: In a large mixing bowl, add the all-purpose flour, granulated sugar, baking powder, baking soda, and salt. Use a whisk to thoroughly combine them. This step is crucial as it ensures the leavening agents are evenly distributed, preventing pockets of saltiness or bitterness and guaranteeing an even rise.
- Combine Wet Ingredients: In a separate medium-sized bowl, crack the two large eggs. Lightly whisk them until the yolks and whites are just combined. Pour in the buttermilk, the 4 tablespoons of cooled melted butter, and the vanilla extract. Whisk these wet ingredients together until they are uniform.
- Combine Wet and Dry: Pour the entire mixture of wet ingredients into the large bowl containing the dry ingredients.
- Mix Gently – The Golden Rule: Using the whisk or a rubber spatula, gently fold the ingredients together until they are just combined. It is perfectly fine—and actually desirable—for the batter to have some small to medium-sized lumps. Over-mixing is the number one enemy of tender pancakes and waffles. Over-mixing develops gluten, which will result in a tough, rubbery texture instead of a light and fluffy one.
- Rest the Batter: Let the batter rest on the counter for 5 to 10 minutes. This allows the gluten to relax and the baking powder to start its work, creating a thicker, more aerated batter that will cook up even fluffier.
Part 2: Cooking Your Masterpiece
Choose your path: fluffy pancakes or crispy waffles.
For Perfect, Fluffy Pancakes:
- Preheat Your Griddle: Place a non-stick skillet or a griddle over medium heat. To test if it’s ready, flick a few drops of water onto the surface. If they sizzle and dance before evaporating, the griddle is at the perfect temperature. If they evaporate instantly, it’s too hot.
- Grease the Surface: Lightly grease the griddle with a small amount of butter or a light coating of cooking spray. Wipe away any excess with a paper towel. You want a very thin, almost invisible layer.
- Pour the Batter: Use a ¼-cup measure to pour batter onto the hot griddle for evenly sized pancakes. Don’t crowd the pan; leave a few inches between each pancake to allow for spreading and easy flipping.
- Watch for Bubbles: Cook for about 2-3 minutes on the first side. You’ll know it’s time to flip when you see bubbles forming and popping on the surface and the edges begin to look dry and set.
- Flip and Finish: Using a thin, wide spatula, confidently flip the pancake. Cook on the second side for another 1-2 minutes, or until golden brown.
- Serve Immediately: Transfer the cooked pancakes to a plate and serve hot with your favorite toppings. To keep a large batch warm, place them on a baking sheet in a single layer in an oven set to 200°F (93°C).
For Golden, Crispy Waffles:
- Make the Waffle Adjustment: Before cooking, take your master batter and gently stir in the additional 2 tablespoons of neutral oil or melted butter. Mix just until it’s incorporated. This is the key step for crispiness.
- Preheat Your Waffle Iron: Plug in your waffle iron and preheat it according to the manufacturer’s instructions. Most models have an indicator light that tells you when it’s ready.
- Grease the Iron (If Needed): Even if your waffle iron is non-stick, it’s a good practice to lightly grease it with cooking spray or a brush of melted butter for the first waffle to guarantee it won’t stick.
- Add the Batter: Pour the recommended amount of batter onto the center of the bottom grid. The amount will vary depending on your waffle iron’s size and style (Belgian vs. American). Use a spatula to spread it slightly towards the edges.
- Close and Cook: Close the lid firmly and let the waffle cook. Do not be tempted to open the lid to peek! Most modern waffle irons will signal when the waffle is done, often with a beep or a light change. This typically takes 3-5 minutes. Steam will stop billowing from the sides when it’s nearly ready.
- Remove and Serve: Carefully open the waffle iron. The waffle should be golden brown and crispy. Use a fork or tongs (avoid metal if your iron has a non-stick coating) to lift the waffle out.
- Serve Hot: Serve immediately to enjoy its maximum crispiness, or place it on a wire rack in a warm oven (200°F / 93°C) to keep it crisp while you cook the rest of the batch. Do not stack waffles on a plate, as the trapped steam will make them soggy.
Nutrition
- Serving Size: One Normal Portion
- Calories: 280-310 kcal
