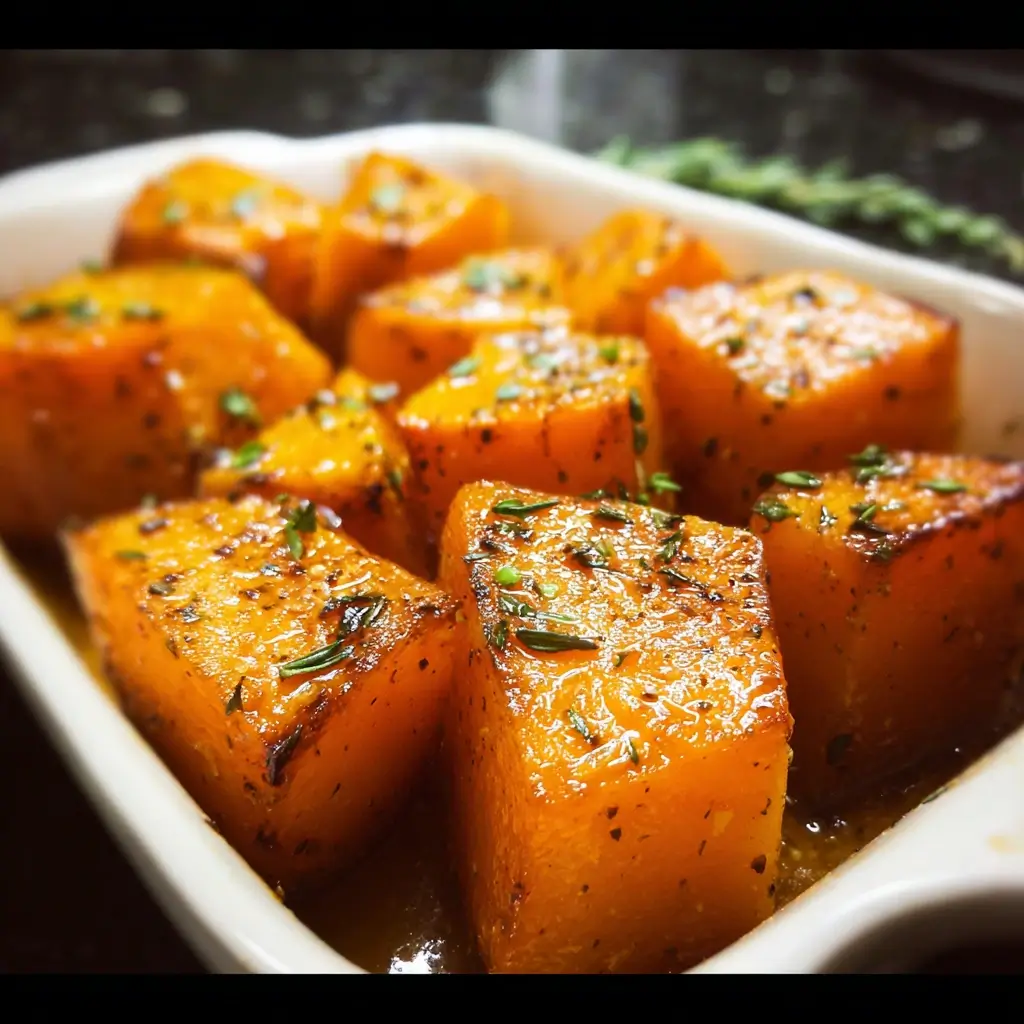
Of all the culinary signals that autumn has arrived, none is more vibrant or comforting than a butternut squash sitting on the kitchen counter. For years, I saw it as a decorative gourd, an intimidating vegetable I wasn’t quite sure how to tackle. That all changed one chilly Sunday afternoon when, determined to create the ultimate fall feast, I decided to finally face the squash. The result was nothing short of a revelation. The aroma of cinnamon and roasting squash that filled my home was intoxicating, a scent of pure comfort. When I pulled the baking sheet from the oven, the squash was transformed into glistening, golden-brown jewels with beautifully caramelized edges and a tender, creamy interior. My family, including my notoriously picky youngest, devoured it. They didn’t just eat it; they asked for seconds. It wasn’t just a side dish; it became the star of the meal. This recipe for Roasted Butternut Squash is the culmination of that discovery—perfected through trial and error to achieve the ideal balance of sweet and savory, a method so simple yet so profoundly delicious that it has become an non-negotiable staple in our home from the first crisp day of fall until the last whisper of winter. It’s more than a recipe; it’s a feeling, a tradition, and the coziest, most delicious hug on a plate.
Why This is The Ultimate Roasted Butternut Squash Recipe
In a world filled with countless ways to cook a vegetable, what makes one recipe stand out? This Roasted Butternut Squash recipe isn’t about complex techniques or obscure ingredients. Its brilliance lies in its simplicity and its focus on a singular goal: to enhance, not mask, the naturally sweet, nutty, and earthy flavor of the butternut squash.
The secret is in the balance and the method. We use just enough pure maple syrup to coax out the squash’s inherent sugars, helping them to caramelize under the oven’s high heat. This isn’t about making it cloyingly sweet; it’s about creating those irresistible, slightly crispy, deep-brown edges that contrast so beautifully with the soft, melt-in-your-mouth flesh. A whisper of cinnamon and nutmeg adds a layer of warmth and spice that is quintessentially autumnal, evoking feelings of cozy sweaters and crackling fires.
Furthermore, the technique is designed for success. We emphasize roasting at a high temperature, a critical step that prevents the squash from steaming and becoming mushy. By giving the cubes ample space on the baking sheet, we ensure that hot air circulates around each piece, guaranteeing even cooking and maximum caramelization. This method transforms the humble butternut squash from a simple vegetable into a gourmet side dish worthy of a holiday centerpiece or a simple weeknight dinner. It’s reliable, foolproof, and delivers consistently delicious results every single time.
The Complete Guide to Perfect Roasted Butternut Squash
This section contains everything you need to create the perfect dish, from the specific ingredients to the step-by-step instructions.
Ingredients
- 1 medium Butternut Squash (approximately 2.5 to 3 lbs), peeled, seeded, and cut into 1-inch cubes
- 2 tablespoons extra virgin olive oil
- 1.5 tablespoons pure maple syrup
- 1/2 teaspoon ground cinnamon
- 1/4 teaspoon ground nutmeg
- 1 teaspoon kosher salt (or 3/4 teaspoon table salt)
- 1/2 teaspoon freshly ground black pepper
- (Optional) A pinch of cayenne pepper for a subtle kick
Instructions
- Preheat and Prepare: Position an oven rack in the center of the oven and preheat to 400°F (200°C). Line a large, rimmed baking sheet with parchment paper for easy cleanup and to prevent sticking. This is a crucial step for achieving a good roast without the squash adhering to the pan.
- Prepare the Squash: If you haven’t already, prepare your butternut squash. Start by washing and drying the exterior. Carefully slice off the top stem and the bottom end to create two flat, stable surfaces. Use a sharp vegetable peeler to remove the tough outer skin. Cut the squash in half lengthwise. Use a sturdy spoon to scoop out all the seeds and stringy pulp from the cavity. Place the squash halves cut-side down on your cutting board and slice them into 1-inch thick pieces, then cut those pieces into uniform 1-inch cubes. Uniformity is key for even cooking.
- Combine the Ingredients: In a large mixing bowl, place all of your butternut squash cubes. Drizzle the olive oil and maple syrup over the squash. Sprinkle the cinnamon, nutmeg, kosher salt, black pepper, and optional cayenne pepper over the top.
- Toss to Coat: Using your hands or a large spatula, toss everything together thoroughly. Ensure every single cube of squash is evenly coated with the oil, syrup, and spices. This will guarantee that each bite is packed with flavor and that the entire batch roasts evenly.
- Arrange on the Baking Sheet: Pour the coated butternut squash cubes onto the prepared baking sheet. Spread them out into a single, even layer. Do not crowd the pan. This is the most important rule of roasting. If the pieces are too close together or piled on top of each other, they will steam instead of roast, resulting in a soft, mushy texture rather than the desired caramelized, golden-brown finish. If necessary, use two baking sheets.
- Roast to Perfection: Place the baking sheet in the preheated oven. Roast for 25 to 35 minutes, flipping the squash cubes halfway through the cooking time (around the 15-minute mark). This flip helps to ensure all sides get beautifully browned. The squash is done when it is tender all the way through when pierced with a fork and has developed deep golden-brown, caramelized spots on the edges.
- Serve Immediately: Remove the baking sheet from the oven. For the best flavor and texture, serve the roasted butternut squash warm.
Nutrition Facts
- Servings: 6
- Calories per serving: Approximately 145 kcal
Disclaimer: The nutritional information provided is an estimate and can vary based on the specific size of the squash and the precise measurements of ingredients used.
Butternut squash is a nutritional powerhouse. It is exceptionally rich in Vitamin A (in the form of beta-carotene), which is vital for vision, immune function, and skin health. It’s also a great source of Vitamin C, an important antioxidant, as well as potassium, magnesium, and dietary fiber, which aids in digestion and helps you feel full and satisfied.
Preparation Time
- Prep Time: 15 minutes (This involves peeling, seeding, and cubing the squash).
- Cook Time: 30 minutes
- Total Time: 45 minutes
This recipe is perfectly suited for a weeknight meal, as the hands-on time is minimal, with the oven doing most of the work.
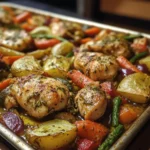
How to Serve Roasted Butternut Squash
The versatility of this dish is one of its greatest strengths. It can be adapted to fit almost any meal or occasion. Here are some of our favorite ways to serve it:
- As a Classic Side Dish:
- Serve it alongside roasted chicken, turkey, or pork loin for a quintessential fall or holiday meal.
- Pair it with a perfectly cooked steak for a delicious steakhouse-at-home experience.
- It’s a fantastic accompaniment to baked salmon or other flaky white fish.
- As the Star of a Salad:
- Allow the roasted squash to cool slightly, then toss it with a bed of arugula or mixed greens.
- Add crumbled goat cheese or feta, toasted pecans or walnuts, and dried cranberries for a spectacular warm fall salad.
- Drizzle with a simple balsamic vinaigrette to tie all the flavors together.
- In Grain Bowls and Power Bowls:
- Build a hearty and healthy lunch by layering the roasted squash over a base of cooked quinoa, farro, or brown rice.
- Add a protein like chickpeas or grilled chicken, some fresh greens, and a dollop of tahini dressing.
- Incorporated into Main Dishes:
- Toss it with pasta, sage brown butter, and a sprinkle of Parmesan cheese for a comforting vegetarian main course.
- Use it as a key ingredient in a vegetarian curry or stew.
- Mash it and use it as a filling for homemade ravioli or as a layer in a vegetarian lasagna.
- For Breakfast or Brunch:
- Serve it as a side with scrambled eggs and sausage for a savory-sweet start to your day.
- Fold it into a frittata or omelet along with spinach and cheese.
Additional Tips for Roasting Perfection
Achieving roasted vegetable nirvana is easy with a few key tricks up your sleeve. Follow these five tips to guarantee your butternut squash is perfectly caramelized and delicious every time.
- Don’t Crowd the Pan: This is the golden rule of roasting and bears repeating. When vegetables are packed too tightly on a baking sheet, they trap moisture and steam, leading to a soft, pale, and often mushy result. For crispy, browned, and caramelized edges, the squash cubes need space for the hot air to circulate freely around them. If your squash looks crowded, it’s always better to divide it between two baking sheets.
- Ensure Uniform Cube Size: Take a few extra moments to cut your squash into pieces that are roughly the same size (ideally 1-inch cubes). This ensures that every piece cooks at the same rate. If you have a mix of large and small pieces, the smaller ones will burn before the larger ones are tender, leaving you with an unevenly cooked batch.
- High Heat is Your Friend: Roasting is not baking. It requires a relatively high oven temperature to achieve that signature caramelized exterior and tender interior. 400°F (200°C) is the sweet spot. A lower temperature will slowly bake the squash, making it soft but preventing the browning (the Maillard reaction) that creates so much depth of flavor. Don’t be afraid of the heat!
- Use Parchment Paper for a Flawless Finish: While you can roast directly on a greased pan, using parchment paper offers two significant advantages. First, it makes cleanup incredibly easy. Second, and more importantly, it provides a non-stick surface that prevents the natural sugars and the maple syrup from sticking and burning onto the pan, ensuring your beautifully caramelized squash cubes lift off effortlessly.
- Don’t Be Afraid to Adjust Seasoning After Roasting: Once the squash comes out of the oven, give it a taste. The roasting process concentrates the flavors, and you might find it needs a little something extra. A final sprinkle of flaky sea salt, a fresh crack of black pepper, or even a drizzle of high-quality balsamic glaze right before serving can elevate the dish from great to unforgettable.
Frequently Asked Questions (FAQ)
Here are answers to some of the most common questions about roasting butternut squash.
1. Do I have to peel the butternut squash before roasting?
While you technically can eat the skin of a butternut squash, it is highly recommended that you peel it for this recipe. The skin is tough and fibrous, and even after roasting, it can be chewy and slightly bitter. Peeling the squash allows the heat to directly penetrate the flesh, resulting in that wonderfully creamy, melt-in-your-mouth texture that is the hallmark of perfectly roasted squash. The skin simply gets in the way of achieving the best possible result.
2. Can I use frozen butternut squash cubes for this recipe?
Yes, you can use pre-cut frozen butternut squash to save on prep time. However, there are a few adjustments to keep in mind. Do not thaw the squash first; roast it directly from frozen. Frozen squash releases more water, so it’s even more critical not to crowd the pan. You may also need to increase the roasting time by 10-15 minutes. While convenient, be aware that the final texture might be slightly softer and less caramelized than when using fresh squash, but it will still be delicious.
3. How do I store leftover roasted butternut squash?
Leftovers are fantastic! Allow the roasted butternut squash to cool completely to room temperature. Then, transfer it to an airtight container. It can be stored in the refrigerator for up to 4 days. To reheat, you can microwave it for a quick option, or for best results, spread it on a baking sheet and warm it in a 350°F (175°C) oven for about 10 minutes, or until heated through. This helps to bring back some of its original texture.
4. My butternut squash came out mushy, not caramelized. What did I do wrong?
This is a very common issue, and it almost always comes down to one of three things:
- A Crowded Pan: As mentioned in the tips, this is the number one culprit. The squash steamed itself instead of roasting.
- Oven Temperature Was Too Low: Roasting requires high heat. If your oven was set below 400°F (200°C), it wouldn’t be hot enough to create the browning and caramelization you’re looking for.
- Too Much Liquid: Be precise with your oil and maple syrup measurements. Adding too much liquid can also lead to steaming rather than roasting.
5. Is roasted butternut squash a healthy dish?
Absolutely! Butternut squash itself is incredibly healthy, packed with vitamins, minerals, and fiber. This recipe uses heart-healthy olive oil and only a small amount of pure maple syrup to enhance the flavor. Compared to many other starchy side dishes (like mashed potatoes loaded with butter and cream), this roasted butternut squash is a low-calorie, nutrient-dense, and exceptionally flavorful choice that you can feel great about serving to your family. It’s a delicious way to get a powerful dose of beta-carotene and other essential nutrients.

Roasted Butternut Squash Recipe
Ingredients
- 1 medium Butternut Squash (approximately 2.5 to 3 lbs), peeled, seeded, and cut into 1-inch cubes
- 2 tablespoons extra virgin olive oil
- 1.5 tablespoons pure maple syrup
- 1/2 teaspoon ground cinnamon
- 1/4 teaspoon ground nutmeg
- 1 teaspoon kosher salt (or 3/4 teaspoon table salt)
- 1/2 teaspoon freshly ground black pepper
- (Optional) A pinch of cayenne pepper for a subtle kick
Instructions
- Preheat and Prepare: Position an oven rack in the center of the oven and preheat to 400°F (200°C). Line a large, rimmed baking sheet with parchment paper for easy cleanup and to prevent sticking. This is a crucial step for achieving a good roast without the squash adhering to the pan.
- Prepare the Squash: If you haven’t already, prepare your butternut squash. Start by washing and drying the exterior. Carefully slice off the top stem and the bottom end to create two flat, stable surfaces. Use a sharp vegetable peeler to remove the tough outer skin. Cut the squash in half lengthwise. Use a sturdy spoon to scoop out all the seeds and stringy pulp from the cavity. Place the squash halves cut-side down on your cutting board and slice them into 1-inch thick pieces, then cut those pieces into uniform 1-inch cubes. Uniformity is key for even cooking.
- Combine the Ingredients: In a large mixing bowl, place all of your butternut squash cubes. Drizzle the olive oil and maple syrup over the squash. Sprinkle the cinnamon, nutmeg, kosher salt, black pepper, and optional cayenne pepper over the top.
- Toss to Coat: Using your hands or a large spatula, toss everything together thoroughly. Ensure every single cube of squash is evenly coated with the oil, syrup, and spices. This will guarantee that each bite is packed with flavor and that the entire batch roasts evenly.
- Arrange on the Baking Sheet: Pour the coated butternut squash cubes onto the prepared baking sheet. Spread them out into a single, even layer. Do not crowd the pan. This is the most important rule of roasting. If the pieces are too close together or piled on top of each other, they will steam instead of roast, resulting in a soft, mushy texture rather than the desired caramelized, golden-brown finish. If necessary, use two baking sheets.
- Roast to Perfection: Place the baking sheet in the preheated oven. Roast for 25 to 35 minutes, flipping the squash cubes halfway through the cooking time (around the 15-minute mark). This flip helps to ensure all sides get beautifully browned. The squash is done when it is tender all the way through when pierced with a fork and has developed deep golden-brown, caramelized spots on the edges.
- Serve Immediately: Remove the baking sheet from the oven. For the best flavor and texture, serve the roasted butternut squash warm.
Nutrition
- Serving Size: One Normal Portion
- Calories: 145