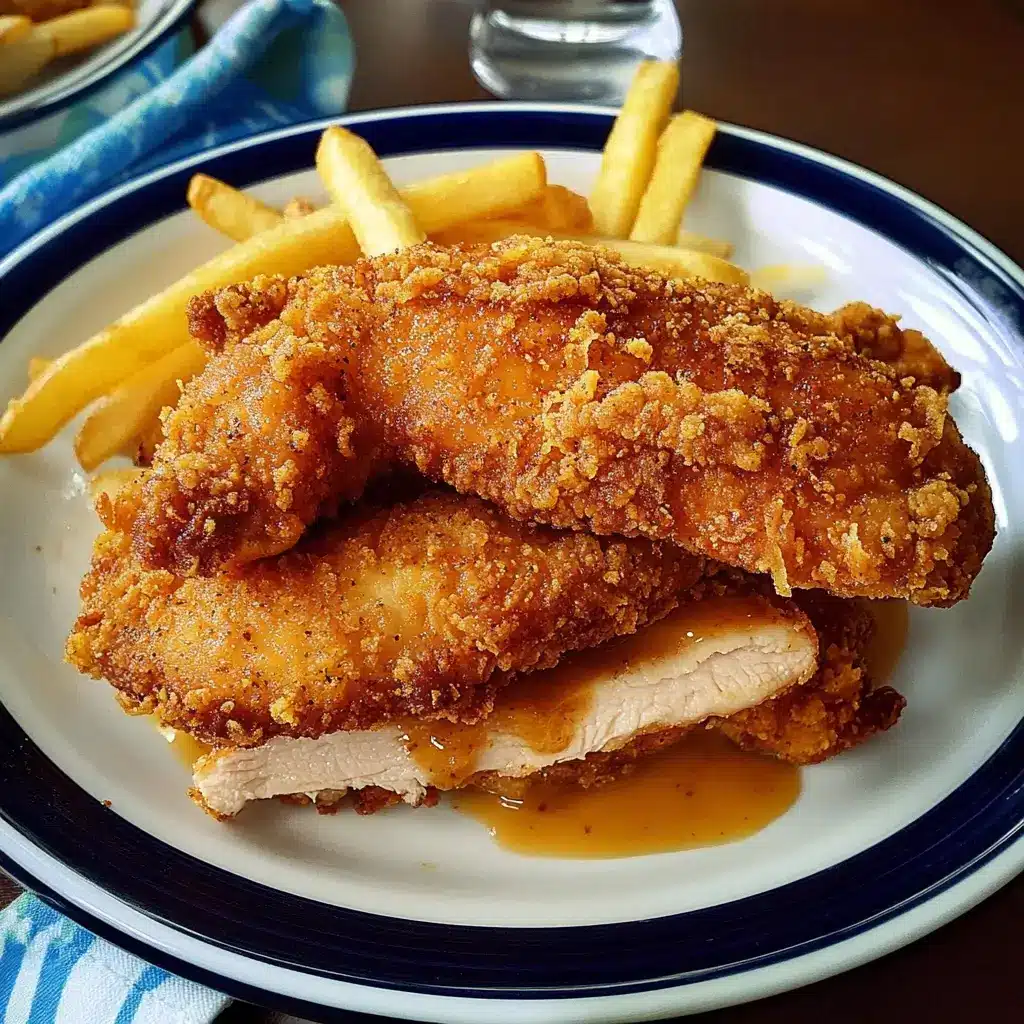
There are some recipes that just scream comfort, nostalgia, and pure, unadulterated family satisfaction. For me, homemade Shake and Bake Chicken is firmly at the top of that list. I remember the crinkle of the bag, the rhythmic shaking, and the intoxicating aroma filling the kitchen as a kid. Now, as a parent myself, I’ve rediscovered the magic, but with a homemade twist that I swear is even better than the boxed version we grew up with. The first time I made this particular recipe for my family, the silence around the dinner table was punctuated only by contented crunches and murmurs of “Mmm, this is SO good!” The kids, usually picky, devoured their portions and even asked for seconds. My partner, a self-proclaimed fried chicken aficionado, declared it a “game-changer” for weeknight meals – all the crispy, savory goodness without the fuss and fat of deep frying. It’s become our go-to for a quick, satisfying, and crowd-pleasing dinner that never fails to impress. The secret, I’ve found, lies in the blend of seasonings and the choice of breadcrumbs, creating a coating that’s perfectly crisp, golden brown, and packed with flavor, encasing tender, juicy chicken.
Ingredients for The Ultimate Homemade Shake and Bake Chicken
This recipe aims for a generous coating on about 3 pounds of chicken, which typically serves a family of 4-6. The beauty of homemade is you can tweak the seasonings to your heart’s content!
- For the Chicken:
- 3 lbs bone-in, skin-on chicken pieces (a mix of thighs, drumsticks, and breasts works well)
- 1/4 cup olive oil (or other neutral cooking oil like canola or vegetable)
- For the “Shake” Coating:
- 1 ½ cups Panko breadcrumbs (for extra crispiness)
- ½ cup all-purpose flour (helps the coating stick)
- 2 teaspoons paprika (sweet or smoked, for color and flavor)
- 2 teaspoons garlic powder
- 2 teaspoons onion powder
- 1 ½ teaspoons dried thyme
- 1 ½ teaspoons dried oregano
- 1 teaspoon salt (adjust to taste, especially if your chicken is pre-brined)
- 1 teaspoon black pepper, freshly ground
- ½ teaspoon cayenne pepper (optional, for a little kick)
- ¼ cup grated Parmesan cheese (optional, for extra savory depth and browning)
Step-by-Step Instructions for Perfect Shake and Bake Chicken
Follow these simple steps to achieve chicken that’s crispy on the outside and perfectly juicy on the inside. The process is straightforward and quite fun, especially if you get little helpers involved in the shaking!
- Preheat and Prepare: Preheat your oven to 400°F (200°C). Line a large baking sheet with parchment paper for easy cleanup, or lightly grease it. If you have a wire rack that fits inside your baking sheet, using it will promote even crispier chicken by allowing air to circulate underneath.
- Prepare the Chicken: Pat the chicken pieces thoroughly dry with paper towels. This is a crucial step! Removing excess moisture helps the oil and coating adhere better, leading to a much crispier result.
- Oil the Chicken: Place the chicken pieces in a large bowl. Drizzle with the 1/4 cup of olive oil and toss gently to ensure each piece is lightly and evenly coated. The oil acts as a binder for the seasoning mix and helps the chicken brown beautifully.
- Mix the Coating: In a large, sealable plastic bag (a gallon-sized zip-top bag works perfectly) or a shallow dish, combine the Panko breadcrumbs, all-purpose flour, paprika, garlic powder, onion powder, thyme, oregano, salt, black pepper, cayenne pepper (if using), and Parmesan cheese (if using). Seal the bag and shake vigorously, or whisk thoroughly in the dish, until all the ingredients are well combined and evenly distributed. This is your magic “shake” mixture!
- Shake the Chicken: Working with one or two pieces of chicken at a time (to avoid overcrowding), place them into the bag with the coating mixture. Seal the bag, ensuring there’s some air trapped inside, and shake well until each piece is thoroughly and evenly coated. Gently press the coating onto the chicken if needed to help it adhere. If using a dish, dredge each oiled chicken piece in the mixture, pressing gently to coat all sides.
- Arrange on Baking Sheet: Carefully remove the coated chicken pieces from the bag, shaking off any excess loose crumbs. Arrange them in a single layer on the prepared baking sheet (or on the wire rack set inside the baking sheet). Ensure there’s a little space between each piece; overcrowding can lead to steaming instead of crisping.
- Bake to Golden Perfection: Place the baking sheet in the preheated oven. Bake for 40-50 minutes, or until the chicken is golden brown, crispy, and cooked through. The exact cooking time will vary depending on the size and thickness of your chicken pieces. Bone-in, skin-on pieces generally take longer than boneless. Chicken breasts will cook faster than thighs or drumsticks.
- Check for Doneness: The most reliable way to check for doneness is with a meat thermometer. Insert it into the thickest part of the chicken piece, avoiding the bone. The internal temperature should register 165°F (74°C). If you don’t have a thermometer, the juices should run clear when pierced with a fork.
- Rest Before Serving: Once cooked, remove the chicken from the oven and let it rest on the baking sheet for 5-10 minutes before serving. This allows the juices to redistribute, resulting in more tender and flavorful chicken.
Nutrition Facts (Estimated)
- Servings: This recipe makes approximately 6 servings, assuming about 1/2 pound of chicken per person.
- Calories per serving: Approximately 380-450 calories.
Disclaimer: The nutritional information provided is an estimate and can vary significantly based on the specific cuts of chicken used (dark meat vs. white meat, amount of skin), the exact brand and quantity of ingredients, and portion sizes. For precise nutritional information, it’s recommended to use an online calculator with your specific ingredients.
Preparation and Cooking Time
Understanding the time commitment helps in planning your meal, especially on busy weeknights.
- Preparation Time: 15-20 minutes (This includes patting the chicken dry, oiling it, mixing the coating, and coating the chicken pieces.)
- Cooking Time: 40-50 minutes (Baking time can vary based on chicken piece size and oven accuracy.)
- Resting Time: 5-10 minutes
- Total Time: Approximately 1 hour to 1 hour 20 minutes
This makes it a fantastic option for a weeknight dinner that feels a little special without requiring hours in the kitchen.
How to Serve Your Delicious Shake and Bake Chicken
This versatile homemade Shake and Bake Chicken pairs wonderfully with a wide array of side dishes. Here are some ideas to complete your meal, ranging from classic comforts to lighter, healthier options:
- Classic Comfort Pairings:
- Creamy Mashed Potatoes: The ultimate comfort food duo. The fluffy potatoes are perfect for soaking up any chicken juices.
- Macaroni and Cheese: A kid-favorite and a rich, cheesy complement to the crispy chicken.
- Coleslaw: A creamy, tangy slaw provides a refreshing contrast to the savory chicken.
- Corn on the Cob: Sweet, juicy corn is always a welcome addition, especially in the summer months.
- Biscuits or Cornbread: Perfect for sopping up any deliciousness left on the plate.
- Lighter & Healthier Sides:
- Steamed Green Beans with Almonds: A simple, elegant, and nutritious side.
- Roasted Vegetables: Think broccoli, carrots, bell peppers, or asparagus tossed with a little olive oil and roasted alongside the chicken (adjust timing as needed).
- A Crisp Garden Salad: A light vinaigrette dressing will cut through the richness of the chicken beautifully. Include mixed greens, cherry tomatoes, cucumbers, and red onion.
- Quinoa or Brown Rice Pilaf: A whole-grain option that adds fiber and nutrients.
- Baked Sweet Potato Fries: A healthier alternative to traditional fries, offering a touch of sweetness.
- Dipping Sauces (Optional but Fun!):
- Honey Mustard: A classic sweet and tangy dip.
- BBQ Sauce: For a smoky, tangy kick.
- Ranch Dressing: Always a crowd-pleaser, especially with kids.
- Spicy Aioli: Mix mayonnaise with sriracha or your favorite hot sauce and a squeeze of lime for a creamy, spicy dip.
- Gravy: A simple chicken or brown gravy can elevate the meal, especially when served with mashed potatoes.
- Presentation Tips:
- Arrange the chicken on a platter surrounded by fresh parsley or lemon wedges for a pop of color.
- Serve family-style, allowing everyone to pick their favorite pieces.
- For individual plates, nestle the chicken alongside your chosen sides for an appealing presentation.
Additional Tips for Shake and Bake Success
Take your homemade Shake and Bake Chicken from great to absolutely phenomenal with these extra pointers:
- Don’t Overcrowd the Pan: This is a golden rule for anything you want to get crispy. If the chicken pieces are too close together on the baking sheet, they will steam rather than bake and crisp up. Use two baking sheets if necessary to give each piece enough space for air to circulate. Proper spacing ensures that heat can reach all surfaces of the chicken, promoting even browning and crispiness.
- Elevate for Extra Crispiness: As mentioned in the instructions, using an oven-safe wire rack placed inside your baking sheet is a game-changer. This allows hot air to circulate all around the chicken, including underneath, preventing the bottom from becoming soggy and ensuring maximum crispiness on all sides. If you don’t have a rack, flipping the chicken halfway through the baking time can help, though a rack is superior.
- Customize Your Spice Level: The beauty of a homemade coating is complete control over the flavor profile.
- For more heat: Increase the cayenne pepper, or add a pinch of red pepper flakes or a dash of your favorite hot sauce to the oil before tossing the chicken. Chipotle powder can add a smoky heat.
- For a milder version: Omit the cayenne pepper entirely. You can also increase the sweet paprika for color without adding heat.
- For different flavor profiles: Experiment with other dried herbs like rosemary, sage, or marjoram. A pinch of celery salt or mustard powder can also add interesting notes.
- Making Ahead & Storage:
- Coating Mix: The dry seasoning mix can be made well in advance. Prepare a large batch and store it in an airtight container in a cool, dry place (like your pantry) for up to 2-3 months. This makes future Shake and Bake nights even quicker!
- Cooked Chicken: Leftover cooked chicken can be stored in an airtight container in the refrigerator for 3-4 days.
- Reheating: To maintain crispiness, reheat the chicken in an oven or toaster oven at 350°F (175°C) for 10-15 minutes, or until warmed through. An air fryer also works wonderfully for reheating and re-crisping. Avoid the microwave if you want to keep it crispy, as it tends to make the coating soft.
- Consider a Double Coat (for Super-Crunch Lovers): If you’re aiming for an exceptionally thick and crunchy crust, you can try a double-coating method. After the first shake, you could dip the coated chicken into a lightly beaten egg wash (1 egg whisked with 1 tablespoon of water) and then shake it in the breadcrumb mixture a second time. This will create a more substantial crust, but be mindful it will also use more coating and add a few more calories.
Frequently Asked Questions (FAQ) About Homemade Shake and Bake Chicken
Here are answers to some common questions you might have about making this delicious dish:
- Q: Why isn’t my Shake and Bake Chicken crispy?
- A: Several factors can contribute to less-than-crispy chicken. The most common culprits are:
- Chicken wasn’t dry enough: Excess moisture on the chicken skin will steam the coating. Always pat the chicken thoroughly dry with paper towels before oiling.
- Overcrowding the pan: As mentioned in the tips, if pieces are too close, they steam. Give them space!
- Oven temperature too low: Ensure your oven is accurately preheated to 400°F (200°C). An oven thermometer can verify this.
- Not using a wire rack: Placing chicken directly on the baking sheet can trap moisture underneath, making the bottom soggy. A wire rack allows air circulation.
- Coating too thick in spots: Ensure an even, not overly clumpy, coating.
- A: Several factors can contribute to less-than-crispy chicken. The most common culprits are:
- Q: Can I use boneless, skinless chicken breasts or thighs?
- A: Absolutely! Boneless, skinless chicken works very well with this recipe. Keep in mind that boneless, skinless breasts will cook faster than bone-in pieces, typically in about 20-25 minutes, depending on their thickness. They are also more prone to drying out, so be sure to check their internal temperature (165°F/74°C) and avoid overcooking. Boneless, skinless thighs will be more forgiving and stay juicier, cooking in about 25-35 minutes.
- Q: Can I make the coating mix gluten-free?
- A: Yes, easily! Substitute the all-purpose flour with a good quality gluten-free all-purpose flour blend. For the breadcrumbs, use gluten-free Panko breadcrumbs or crush gluten-free crackers or cornflakes into coarse crumbs. The taste and texture will be very similar. Ensure all your other seasonings are certified gluten-free if Celiac disease is a concern.
- Q: Can I prepare the chicken ahead of time and bake it later?
- A: It’s best to coat the chicken just before baking. If you coat it too far in advance and let it sit in the refrigerator, the breading can absorb moisture from the chicken and become soggy, leading to a less crispy result. However, you can prepare the dry coating mix well in advance (see Tip #4). You can also oil the chicken and keep it refrigerated for a few hours before you’re ready to coat and bake.
- Q: Can I use an air fryer for this recipe?
- A: Yes, Shake and Bake Chicken is fantastic in an air fryer! It often gets even crispier.
- Preheat your air fryer to around 380-400°F (190-200°C).
- Prepare the chicken as directed.
- Lightly spray the air fryer basket with oil to prevent sticking.
- Arrange the coated chicken pieces in a single layer in the basket, ensuring not to overcrowd it (work in batches if necessary).
- Air fry for approximately 15-25 minutes (boneless pieces will be quicker, bone-in longer), flipping halfway through, until golden brown, crispy, and the internal temperature reaches 165°F (74°C). Cooking times will vary depending on your air fryer model and the size of the chicken pieces.
- A: Yes, Shake and Bake Chicken is fantastic in an air fryer! It often gets even crispier.
This homemade Shake and Bake Chicken recipe is more than just a meal; it’s an experience. It’s the satisfaction of creating something delicious from scratch, the joy of sharing it with loved ones, and the comfort of a classic dish made even better. Enjoy the process, savor every crispy bite, and don’t be surprised if this becomes a new family favorite in your home too!
Print
Shake and Bake Chicken Recipe
Ingredients
- For the Chicken:
- 3 lbs bone-in, skin-on chicken pieces (a mix of thighs, drumsticks, and breasts works well)
- 1/4 cup olive oil (or other neutral cooking oil like canola or vegetable)
- For the “Shake” Coating:
- 1 ½ cups Panko breadcrumbs (for extra crispiness)
- ½ cup all-purpose flour (helps the coating stick)
- 2 teaspoons paprika (sweet or smoked, for color and flavor)
- 2 teaspoons garlic powder
- 2 teaspoons onion powder
- 1 ½ teaspoons dried thyme
- 1 ½ teaspoons dried oregano
- 1 teaspoon salt (adjust to taste, especially if your chicken is pre-brined)
- 1 teaspoon black pepper, freshly ground
- ½ teaspoon cayenne pepper (optional, for a little kick)
- ¼ cup grated Parmesan cheese (optional, for extra savory depth and browning)
Instructions
- Preheat and Prepare: Preheat your oven to 400°F (200°C). Line a large baking sheet with parchment paper for easy cleanup, or lightly grease it. If you have a wire rack that fits inside your baking sheet, using it will promote even crispier chicken by allowing air to circulate underneath.
- Prepare the Chicken: Pat the chicken pieces thoroughly dry with paper towels. This is a crucial step! Removing excess moisture helps the oil and coating adhere better, leading to a much crispier result.
- Oil the Chicken: Place the chicken pieces in a large bowl. Drizzle with the 1/4 cup of olive oil and toss gently to ensure each piece is lightly and evenly coated. The oil acts as a binder for the seasoning mix and helps the chicken brown beautifully.
- Mix the Coating: In a large, sealable plastic bag (a gallon-sized zip-top bag works perfectly) or a shallow dish, combine the Panko breadcrumbs, all-purpose flour, paprika, garlic powder, onion powder, thyme, oregano, salt, black pepper, cayenne pepper (if using), and Parmesan cheese (if using). Seal the bag and shake vigorously, or whisk thoroughly in the dish, until all the ingredients are well combined and evenly distributed. This is your magic “shake” mixture!
- Shake the Chicken: Working with one or two pieces of chicken at a time (to avoid overcrowding), place them into the bag with the coating mixture. Seal the bag, ensuring there’s some air trapped inside, and shake well until each piece is thoroughly and evenly coated. Gently press the coating onto the chicken if needed to help it adhere. If using a dish, dredge each oiled chicken piece in the mixture, pressing gently to coat all sides.
- Arrange on Baking Sheet: Carefully remove the coated chicken pieces from the bag, shaking off any excess loose crumbs. Arrange them in a single layer on the prepared baking sheet (or on the wire rack set inside the baking sheet). Ensure there’s a little space between each piece; overcrowding can lead to steaming instead of crisping.
- Bake to Golden Perfection: Place the baking sheet in the preheated oven. Bake for 40-50 minutes, or until the chicken is golden brown, crispy, and cooked through. The exact cooking time will vary depending on the size and thickness of your chicken pieces. Bone-in, skin-on pieces generally take longer than boneless. Chicken breasts will cook faster than thighs or drumsticks.
- Check for Doneness: The most reliable way to check for doneness is with a meat thermometer. Insert it into the thickest part of the chicken piece, avoiding the bone. The internal temperature should register 165°F (74°C). If you don’t have a thermometer, the juices should run clear when pierced with a fork.
- Rest Before Serving: Once cooked, remove the chicken from the oven and let it rest on the baking sheet for 5-10 minutes before serving. This allows the juices to redistribute, resulting in more tender and flavorful chicken.
Nutrition
- Serving Size: One Normal Portion
- Calories: 380-450