Oh, these Sourdough Sandwich Rolls! Let me tell you, they have become an absolute staple in our household. For years, I searched for that perfect roll – soft enough for a delicate sandwich filling, yet with that signature sourdough tang and a satisfying chew. Store-bought rolls were often too bland, too fluffy in an artificial way, or too crusty for a proper sandwich. Then, I stumbled upon the magic of long-fermented sourdough, not just for loaves, but for rolls. After a few tweaks and trials, this recipe emerged, and it was a game-changer. The first time I pulled a batch from the oven, the aroma alone was intoxicating. My kids, usually picky about bread textures, devoured them plain, still warm. My partner, a sandwich aficionado, declared them “the ultimate sandwich vessel.” They are soft and pillowy on the inside, with a beautifully thin, slightly chewy crust that holds up wonderfully to any filling you throw at it. From simple ham and cheese to elaborate gourmet creations, these rolls elevate every single bite. They’ve transformed our lunch game and even made appearances as dinner rolls, much to everyone’s delight. The subtle tang from the sourdough starter adds a depth of flavor that plain yeast rolls simply can’t match. If you’re looking to up your sandwich game or simply want a versatile, delicious sourdough roll, this recipe is your golden ticket.
Ingredients for Perfect Sourdough Sandwich Rolls
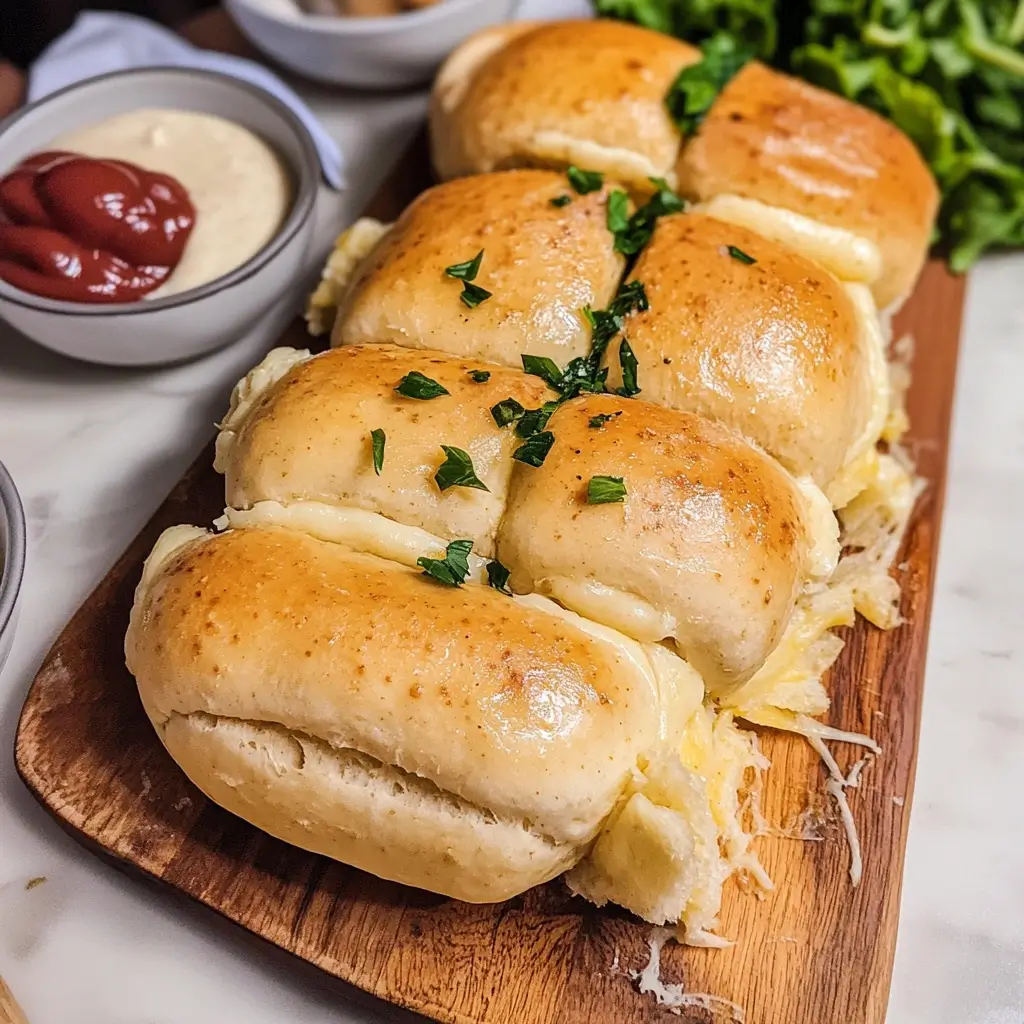
This recipe is designed to yield wonderfully soft, tangy, and versatile sourdough rolls, perfect for sandwiches, sliders, or enjoying on their own.
For the Levain (Sourdough Pre-ferment):
- 50g Active Sourdough Starter (100% hydration, recently fed and bubbly): This is the heart of your rolls, providing lift and flavor.
- 50g Unbleached All-Purpose Flour (or Bread Flour): Provides food for the yeast and bacteria in your starter.
- 50g Filtered Water (room temperature or slightly warm, around 80-85°F/27-29°C): Hydrates the flour and helps activate the starter.
For the Main Dough:
- All of the Levain (approximately 150g): The active pre-ferment you prepared.
- 480g Bread Flour: Higher protein content in bread flour gives better structure and chew, ideal for rolls. You can use all-purpose flour, but the texture might be slightly softer.
- 270g Filtered Water (room temperature or slightly warm, around 80-85°F/27-29°C): Adjust slightly based on your flour’s absorption.
- 30g Honey (or Granulated Sugar): Adds a touch of sweetness, helps with browning, and contributes to a softer crumb.
- 30g Olive Oil (or Melted Unsalted Butter): Enriches the dough, making the rolls softer and adding flavor.
- 10g Fine Sea Salt: Crucial for flavor development and controlling fermentation.
Optional for Topping:
- Egg wash (1 egg beaten with 1 tbsp water or milk) for a shiny, golden crust.
- Sesame seeds, poppy seeds, or everything bagel seasoning.
Step-by-Step Instructions: Crafting Your Sourdough Masterpieces
Sourdough baking is a journey of patience and observation. These steps will guide you to creating beautiful, delicious sandwich rolls.
Phase 1: Building the Levain (Night Before or Morning of Mixing – 4-8 hours)
- Feed Your Starter: In a clean jar or bowl, combine the 50g active sourdough starter, 50g flour, and 50g water. Mix well until no dry flour remains.
- Ferment: Cover loosely and let it sit at warm room temperature (ideally 75-80°F/24-27°C) for 4-8 hours, or until it has at least doubled in volume, is bubbly, and has a pleasant, slightly acidic aroma. It should pass the “float test” (a small spoonful dropped into water should float).
Phase 2: Mixing the Main Dough (Approx. 30 mins active, 1-hour autolyse)
- Autolyse (Optional but Recommended): In a large mixing bowl, combine the 480g bread flour and 270g water. Mix with your hands or a spatula until just combined and no dry flour patches remain. Cover the bowl and let it rest for 30 minutes to 1 hour. This step helps hydrate the flour fully, making the dough easier to work with and improving its extensibility.
- Add Levain and Sweetener: To the autolyzed dough, add all of the ripe levain (around 150g) and the 30g honey (or sugar). Use wet hands to pinch and squeeze these ingredients into the dough until they are fairly well incorporated.
- Incorporate Salt and Fat: Sprinkle the 10g fine sea salt and drizzle the 30g olive oil (or melted butter) over the dough. Continue to mix using your hands (the “slap and fold” or “Rubaud” method can be effective here if mixing by hand) or a stand mixer fitted with a dough hook on low speed.
- By Hand: Mix vigorously for 5-8 minutes, performing folds and kneading in the bowl, or using a gentle slap and fold technique on a lightly floured surface, until the dough starts to come together and becomes smoother.
- By Stand Mixer: Mix on low speed for 2-3 minutes until ingredients are combined, then increase to medium-low speed and mix for another 5-7 minutes, or until the dough is smooth, elastic, and starts to pull away from the sides of the bowl. It should pass the windowpane test (a small piece can be stretched thinly without tearing easily).
- Initial Rest: Cover the bowl and let the dough rest for 30 minutes.
Phase 3: Bulk Fermentation (Approx. 3-5 hours at room temperature, with folds)
This is where the dough develops its strength and flavor. The timing will depend heavily on your room temperature.
- Stretch and Folds: Perform a series of 3-4 sets of stretch and folds, spaced 30-45 minutes apart.
- To do a stretch and fold: Wet your hands slightly. Reach under one side of the dough, pull it up gently, and fold it over the top of the dough. Rotate the bowl a quarter turn and repeat three more times, so you’ve folded all four “sides.”
- Continue Fermentation: After the last set of folds, cover the dough and let it continue to ferment at warm room temperature until it has increased in volume by about 50-75% and looks airy, jiggly, and full of life. You should see some bubbles on the surface or through the side of a clear container. This can take anywhere from 2 to 4 hours after the last fold, depending on the temperature and starter activity.
Phase 4: Shaping the Rolls (Approx. 20-30 mins)
- Divide: Gently tip the dough out onto a lightly floured work surface. Be careful not to deflate it too much. Using a bench scraper or sharp knife, divide the dough into 8-12 equal pieces (for standard sandwich rolls, aim for around 80-100g per piece).
- Pre-shape (Optional): Gently round each piece into a loose ball. Cover with a clean kitchen towel or plastic wrap and let rest for 15-20 minutes. This relaxes the gluten, making final shaping easier.
- Final Shape: Take each piece of dough and shape it into your desired roll form.
- Round Rolls: Gently flatten a piece of dough into a rough circle. Fold the edges into the center, pinching them together to create surface tension. Flip the dough over (seam-side down) and use cupped hands to drag it in small circles on the work surface to create a tight, smooth ball.
- Oblong/Hoagie Rolls: Gently flatten a piece of dough into a rectangle. Fold the top third down towards the center and press gently. Fold the bottom third up over the first fold, like a letter. Then, fold the dough in half lengthwise and pinch the seam tightly to seal. Gently roll it back and forth to elongate it to your desired length, creating a torpedo shape.
- Arrange for Proofing: Place the shaped rolls onto a baking sheet lined with parchment paper, leaving a couple of inches between them to allow for expansion. If you want pull-apart rolls, you can place them closer together in a baking dish.
Phase 5: Final Proof (1-3 hours at room temp OR 12-24 hours cold proof)
- Room Temperature Proof: Cover the rolls loosely with oiled plastic wrap or a damp kitchen towel. Let them proof at warm room temperature for 1-3 hours, or until they have increased in size by about 50-75% and appear puffy. They should pass the “poke test” – when you gently poke a roll, the indentation should spring back slowly and incompletely.
- Cold Proof (Recommended for Flavor & Flexibility): Alternatively, after shaping and arranging on the baking sheet, cover the rolls tightly with plastic wrap (or place the entire tray inside a large food-safe bag) and refrigerate for 12-24 hours. This slow, cold fermentation develops a more complex sourdough flavor and gives you flexibility in baking time.
Phase 6: Baking the Rolls (Approx. 20-25 mins)
- Preheat Oven: About 30-45 minutes before baking, preheat your oven to 400°F (200°C). If using a baking stone or steel, place it in the oven during preheating.
- Prepare for Baking: If you cold-proofed the rolls, you can bake them directly from the fridge. If desired, brush the tops of the rolls with an egg wash for a shiny, golden-brown crust and sprinkle with seeds. You can also score them with a lame or sharp knife if you want a specific burst pattern, though it’s not strictly necessary for soft rolls.
- Create Steam (Optional but enhances crust): To create a steamy environment for the initial part of baking (which helps with oven spring and crust development):
- Place a shallow metal pan (e.g., a broiler pan or cast iron skillet) on the bottom rack of your oven while it preheats.
- Just before putting the rolls in, carefully pour about 1 cup of hot water into the hot pan. It will create a burst of steam. Be cautious of the steam.
- Alternatively, spray the oven walls with water from a spray bottle a few times in the first 5-10 minutes of baking.
- Bake: Place the baking sheet with the rolls into the preheated oven.
- Bake for 20-25 minutes, or until the rolls are beautifully golden brown and sound hollow when tapped on the bottom. The internal temperature should be around 200-210°F (93-99°C).
- If they are browning too quickly, you can loosely tent them with aluminum foil for the last 5-10 minutes of baking.
Phase 7: Cooling (Essential! Approx. 1 hour)
- Cool: Carefully transfer the baked rolls to a wire rack to cool completely before slicing or serving. This is an important step as the rolls continue to cook internally from residual heat, and the crumb structure sets as they cool. Slicing them too early can result in a gummy texture.
Nutrition Facts (Approximate)
- Servings: This recipe yields approximately 10 medium-sized rolls.
- Calories per serving (1 roll): Approximately 220-250 calories.
Disclaimer: Nutritional information is an estimate and can vary significantly based on specific ingredient brands, exact measurements, and portion sizes. The addition of egg wash or seeds will slightly alter these values.
Preparation Time: A Sourdough Journey
Sourdough baking is a process that spans over time, much of which is hands-off.
- Levain Build: 4-8 hours (mostly inactive)
- Autolyse: 30 minutes – 1 hour (inactive)
- Mixing & Kneading: 20-30 minutes (active)
- Bulk Fermentation: 3-5 hours (mostly inactive, with short active periods for folds)
- Dividing & Shaping: 20-30 minutes (active)
- Final Proof:
- Room Temperature: 1-3 hours (inactive)
- Cold Proof (Refrigerator): 12-24 hours (inactive)
- Baking: 20-25 minutes (active monitoring)
- Cooling: At least 1 hour (inactive)
Total Time: From building the levain to cooled rolls, it can range from approximately 10-12 hours (if doing everything at room temperature relatively quickly) to over 36 hours (if incorporating a long cold proof).
Active Hands-On Time: Approximately 1.5 – 2 hours spread out over the entire process.
How to Serve Your Delicious Sourdough Sandwich Rolls
These versatile sourdough rolls are perfect for a multitude of culinary applications. Here are some ideas:
- Classic Sandwiches:
- Fill with your favorite deli meats (turkey, ham, roast beef) and cheeses (cheddar, Swiss, provolone).
- Load them up for a hearty BLT or a classic club sandwich.
- Perfect for egg salad, tuna salad, or chicken salad sandwiches.
- Gourmet Creations:
- Use for pulled pork or BBQ brisket sliders.
- Create mini gourmet burgers or meatball subs.
- Excellent for vegetarian sandwiches with roasted vegetables, hummus, and feta.
- Alongside Meals:
- Serve warm with butter alongside soups, stews, or chilis.
- Use them to mop up sauces from pasta dishes or braises.
- Split, toast, and rub with garlic, then drizzle with olive oil for a quick garlic bread.
- Breakfast Options:
- Ideal for breakfast sandwiches with egg, cheese, and bacon or sausage.
- Toast and serve with jam, honey, or your favorite spread.
- As a Snack:
- Enjoy them plain, still slightly warm from the oven, to fully appreciate the sourdough flavor.
- Pair with a cheese board and some fruit.
Additional Tips for Sourdough Success
- Starter is Key: Ensure your sourdough starter is vigorous and active before you begin. Feed it regularly in the days leading up to baking, and make sure the levain is bubbly and has at least doubled before using it. A weak starter will result in dense, under-proofed rolls.
- Flour Power: Bread flour is recommended for its higher protein content, which gives the rolls better structure and a chewier texture. However, good quality all-purpose flour can also be used, though you might need to slightly adjust water content, and the rolls may be a bit softer. Don’t be afraid to experiment with adding a small percentage (10-20%) of whole wheat or rye flour for added flavor complexity.
- Hydration Awareness: Sourdough hydration can be tricky. Different flours absorb water differently, and even ambient humidity can play a role. Start with the recommended water amount, but be prepared to add a little more (a tablespoon at a time) if the dough feels too stiff, or a little more flour if it’s overly sticky and unmanageable. The dough should be soft and pliable but not overly wet.
- Watch the Dough, Not the Clock: Fermentation times are always guidelines. The most crucial skill in sourdough baking is learning to read your dough. Pay attention to visual cues (volume increase, bubbles, jiggle) and tactile ones (the poke test) to determine when bulk fermentation and final proofing are complete. Temperature is the biggest variable, so adjust times accordingly.
- Steam for a Superior Crust: Creating steam in your oven for the first 10-15 minutes of baking is highly beneficial. It keeps the surface of the dough moist, allowing for maximum oven spring before the crust sets. This results in lighter rolls with a thinner, more tender crust. If you don’t have a dedicated steam setup, the pan of hot water or spraying the oven walls are good alternatives.
Frequently Asked Questions (FAQ)
Q1: My sourdough starter isn’t very active. Can I still make these rolls?
A: It’s highly recommended to use a very active, bubbly starter (and subsequently, a lively levain) for the best results, especially for lift and flavor. If your starter is sluggish, your rolls may be dense and lack the characteristic sourdough tang. Focus on strengthening your starter with regular feedings (e.g., twice a day at room temperature, or once a day if kept cooler) for a few days before attempting the recipe. Ensure it reliably doubles or triples in volume within 4-8 hours after feeding.
Q2: Can I make these sourdough sandwich rolls without a stand mixer?
A: Absolutely! While a stand mixer makes the initial mixing and kneading process easier, these rolls can definitely be made by hand. You’ll use techniques like “stretch and folds” in the bowl, or traditional kneading on a lightly floured surface for about 10-15 minutes until the dough is smooth and elastic. The “Rubaud method” or “slap and fold” technique can also be very effective for developing gluten by hand.
Q3: How should I store leftover sourdough sandwich rolls?
A: Once completely cooled, store the rolls in an airtight container or a zip-top bag at room temperature for up to 2-3 days. For longer storage, they freeze beautifully. Wrap them individually in plastic wrap and then place them in a freezer-safe bag or container for up to 2-3 months. To serve from frozen, thaw at room temperature or gently reheat in a 300°F (150°C) oven for 5-10 minutes until warmed through.
Q4: Why are my sourdough rolls dense or flat?
A: Dense or flat rolls can be due to several factors:
* Under-active starter/levain: The primary leavening agent wasn’t strong enough.
* Under-proofing: The dough didn’t ferment long enough during bulk fermentation or final proof, so not enough gas was produced.
* Over-proofing: The dough fermented for too long, and the gluten structure weakened and collapsed.
* Not enough gluten development: Insufficient kneading or stretch and folds.
* Room temperature: If your kitchen is too cold, fermentation will be very slow, potentially leading to under-proofing if you stick too rigidly to clock times.
Careful observation of your dough’s activity and volume increase is key.
Q5: Can I add other ingredients like seeds, herbs, or cheese to these rolls?
A: Yes, definitely! This recipe is a great base for variations.
* Seeds (sesame, poppy, flax, sunflower): You can knead about 1/4 to 1/2 cup of seeds into the dough during the last stages of mixing or after the first set of stretch and folds. They can also be sprinkled on top before baking (use an egg wash to help them adhere).
* Herbs (rosemary, thyme, oregano): Add 1-2 tablespoons of fresh chopped herbs or 1-2 teaspoons of dried herbs during the mixing phase.
* Cheese (cheddar, parmesan, asiago): Incorporate about 1/2 to 3/4 cup of shredded or cubed cheese during the final stretch and folds or when shaping the rolls. Be mindful that cheese can sometimes affect fermentation slightly.
Experiment and have fun creating your own signature sourdough sandwich rolls!

Sourdough Sandwich Rolls Recipe
Ingredients
For the Levain (Sourdough Pre-ferment):
- 50g Active Sourdough Starter (100% hydration, recently fed and bubbly): This is the heart of your rolls, providing lift and flavor.
- 50g Unbleached All-Purpose Flour (or Bread Flour): Provides food for the yeast and bacteria in your starter.
- 50g Filtered Water (room temperature or slightly warm, around 80-85°F/27-29°C): Hydrates the flour and helps activate the starter.
For the Main Dough:
- All of the Levain (approximately 150g): The active pre-ferment you prepared.
- 480g Bread Flour: Higher protein content in bread flour gives better structure and chew, ideal for rolls. You can use all-purpose flour, but the texture might be slightly softer.
- 270g Filtered Water (room temperature or slightly warm, around 80-85°F/27-29°C): Adjust slightly based on your flour’s absorption.
- 30g Honey (or Granulated Sugar): Adds a touch of sweetness, helps with browning, and contributes to a softer crumb.
- 30g Olive Oil (or Melted Unsalted Butter): Enriches the dough, making the rolls softer and adding flavor.
- 10g Fine Sea Salt: Crucial for flavor development and controlling fermentation.
Optional for Topping:
- Egg wash (1 egg beaten with 1 tbsp water or milk) for a shiny, golden crust.
- Sesame seeds, poppy seeds, or everything bagel seasoning.
Instructions
Phase 1: Building the Levain (Night Before or Morning of Mixing – 4-8 hours)
- Feed Your Starter: In a clean jar or bowl, combine the 50g active sourdough starter, 50g flour, and 50g water. Mix well until no dry flour remains.
- Ferment: Cover loosely and let it sit at warm room temperature (ideally 75-80°F/24-27°C) for 4-8 hours, or until it has at least doubled in volume, is bubbly, and has a pleasant, slightly acidic aroma. It should pass the “float test” (a small spoonful dropped into water should float).
Phase 2: Mixing the Main Dough (Approx. 30 mins active, 1-hour autolyse)
- Autolyse (Optional but Recommended): In a large mixing bowl, combine the 480g bread flour and 270g water. Mix with your hands or a spatula until just combined and no dry flour patches remain. Cover the bowl and let it rest for 30 minutes to 1 hour. This step helps hydrate the flour fully, making the dough easier to work with and improving its extensibility.
- Add Levain and Sweetener: To the autolyzed dough, add all of the ripe levain (around 150g) and the 30g honey (or sugar). Use wet hands to pinch and squeeze these ingredients into the dough until they are fairly well incorporated.
- Incorporate Salt and Fat: Sprinkle the 10g fine sea salt and drizzle the 30g olive oil (or melted butter) over the dough. Continue to mix using your hands (the “slap and fold” or “Rubaud” method can be effective here if mixing by hand) or a stand mixer fitted with a dough hook on low speed.
- By Hand: Mix vigorously for 5-8 minutes, performing folds and kneading in the bowl, or using a gentle slap and fold technique on a lightly floured surface, until the dough starts to come together and becomes smoother.
- By Stand Mixer: Mix on low speed for 2-3 minutes until ingredients are combined, then increase to medium-low speed and mix for another 5-7 minutes, or until the dough is smooth, elastic, and starts to pull away from the sides of the bowl. It should pass the windowpane test (a small piece can be stretched thinly without tearing easily).
- Initial Rest: Cover the bowl and let the dough rest for 30 minutes.
Phase 3: Bulk Fermentation (Approx. 3-5 hours at room temperature, with folds)
This is where the dough develops its strength and flavor. The timing will depend heavily on your room temperature.
- Stretch and Folds: Perform a series of 3-4 sets of stretch and folds, spaced 30-45 minutes apart.
- To do a stretch and fold: Wet your hands slightly. Reach under one side of the dough, pull it up gently, and fold it over the top of the dough. Rotate the bowl a quarter turn and repeat three more times, so you’ve folded all four “sides.”
- Continue Fermentation: After the last set of folds, cover the dough and let it continue to ferment at warm room temperature until it has increased in volume by about 50-75% and looks airy, jiggly, and full of life. You should see some bubbles on the surface or through the side of a clear container. This can take anywhere from 2 to 4 hours after the last fold, depending on the temperature and starter activity.
Phase 4: Shaping the Rolls (Approx. 20-30 mins)
- Divide: Gently tip the dough out onto a lightly floured work surface. Be careful not to deflate it too much. Using a bench scraper or sharp knife, divide the dough into 8-12 equal pieces (for standard sandwich rolls, aim for around 80-100g per piece).
- Pre-shape (Optional): Gently round each piece into a loose ball. Cover with a clean kitchen towel or plastic wrap and let rest for 15-20 minutes. This relaxes the gluten, making final shaping easier.
- Final Shape: Take each piece of dough and shape it into your desired roll form.
- Round Rolls: Gently flatten a piece of dough into a rough circle. Fold the edges into the center, pinching them together to create surface tension. Flip the dough over (seam-side down) and use cupped hands to drag it in small circles on the work surface to create a tight, smooth ball.
- Oblong/Hoagie Rolls: Gently flatten a piece of dough into a rectangle. Fold the top third down towards the center and press gently. Fold the bottom third up over the first fold, like a letter. Then, fold the dough in half lengthwise and pinch the seam tightly to seal. Gently roll it back and forth to elongate it to your desired length, creating a torpedo shape.
- Arrange for Proofing: Place the shaped rolls onto a baking sheet lined with parchment paper, leaving a couple of inches between them to allow for expansion. If you want pull-apart rolls, you can place them closer together in a baking dish.
Phase 5: Final Proof (1-3 hours at room temp OR 12-24 hours cold proof)
- Room Temperature Proof: Cover the rolls loosely with oiled plastic wrap or a damp kitchen towel. Let them proof at warm room temperature for 1-3 hours, or until they have increased in size by about 50-75% and appear puffy. They should pass the “poke test” – when you gently poke a roll, the indentation should spring back slowly and incompletely.
- Cold Proof (Recommended for Flavor & Flexibility): Alternatively, after shaping and arranging on the baking sheet, cover the rolls tightly with plastic wrap (or place the entire tray inside a large food-safe bag) and refrigerate for 12-24 hours. This slow, cold fermentation develops a more complex sourdough flavor and gives you flexibility in baking time.
Phase 6: Baking the Rolls (Approx. 20-25 mins)
- Preheat Oven: About 30-45 minutes before baking, preheat your oven to 400°F (200°C). If using a baking stone or steel, place it in the oven during preheating.
- Prepare for Baking: If you cold-proofed the rolls, you can bake them directly from the fridge. If desired, brush the tops of the rolls with an egg wash for a shiny, golden-brown crust and sprinkle with seeds. You can also score them with a lame or sharp knife if you want a specific burst pattern, though it’s not strictly necessary for soft rolls.
- Create Steam (Optional but enhances crust): To create a steamy environment for the initial part of baking (which helps with oven spring and crust development):
- Place a shallow metal pan (e.g., a broiler pan or cast iron skillet) on the bottom rack of your oven while it preheats.
- Just before putting the rolls in, carefully pour about 1 cup of hot water into the hot pan. It will create a burst of steam. Be cautious of the steam.
- Alternatively, spray the oven walls with water from a spray bottle a few times in the first 5-10 minutes of baking.
- Bake: Place the baking sheet with the rolls into the preheated oven.
- Bake for 20-25 minutes, or until the rolls are beautifully golden brown and sound hollow when tapped on the bottom. The internal temperature should be around 200-210°F (93-99°C).
- If they are browning too quickly, you can loosely tent them with aluminum foil for the last 5-10 minutes of baking.
Phase 7: Cooling (Essential! Approx. 1 hour)
- Cool: Carefully transfer the baked rolls to a wire rack to cool completely before slicing or serving. This is an important step as the rolls continue to cook internally from residual heat, and the crumb structure sets as they cool. Slicing them too early can result in a gummy texture.
Nutrition
- Serving Size: One Normal Portion
- Calories: 220-250