

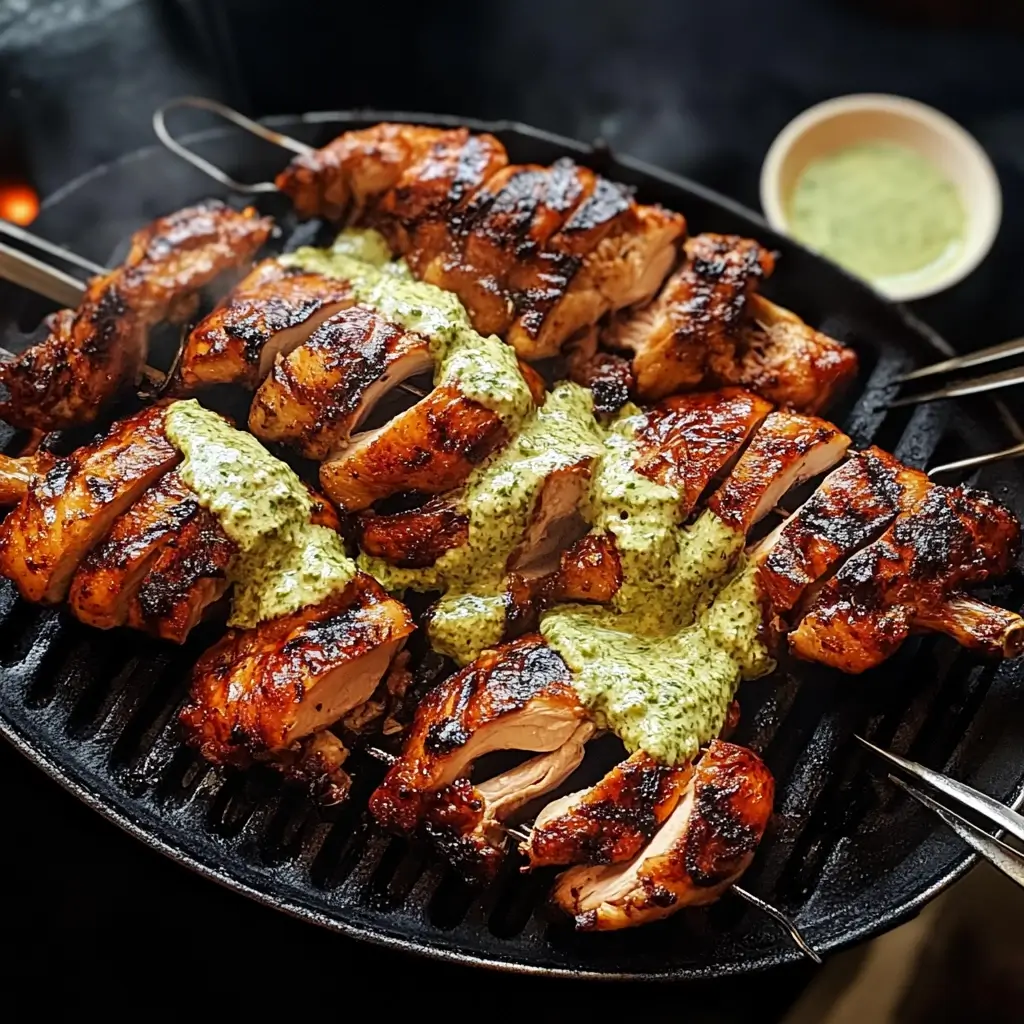

It was one of those perfect summer evenings, the kind where the air is warm but not stifling, and the scent of charcoal is already wafting from a neighbor’s yard. I’d been hearing about spatchcocking chicken for ages – this almost mythical technique that promised faster cooking, juicier meat, and impossibly crispy skin. Honestly, I was a bit skeptical. It sounded fiddly, and I wondered if it was truly worth the effort compared to just throwing a whole bird on the grill. But, with a family gathering planned and a desire to impress (and frankly, to eat some seriously good chicken), I decided to give it a whirl. The process of removing the backbone was surprisingly straightforward, and once that chicken lay flat, I knew I was onto something. The marinade, a vibrant mix of lemon, garlic, and herbs, perfumed the kitchen as I slathered it on. The real magic, though, happened on the grill. The way the chicken cooked so evenly, the skin crackling and turning a deep golden brown without the usual flare-ups charring one side while the other remained pale – it was a revelation. When I finally pulled it off, let it rest (the hardest part!), and carved into it, the juices flowed, the meat was tender, and that skin… oh, that skin was everything I’d hoped for. The family devoured it, with my usually picky nephew even asking for seconds of “the flat chicken.” It wasn’t just a meal; it was an event, a new family favorite, and the technique that officially converted me to the church of spatchcocking. Trust me, once you try this, you’ll wonder how you ever grilled chicken any other way.
Ingredients for Perfect Spatchcocked Grilled Chicken
This recipe aims for a classic, herby, and zesty flavor profile that is universally loved. The quantities are designed for a standard-sized chicken, yielding succulent results.
- For the Chicken:
- 1 whole chicken (approximately 3.5 to 4.5 pounds / 1.6 to 2 kg)
- 1 tablespoon olive oil (for initial coating, separate from marinade)
- For the Marinade/Rub:
- 1/4 cup (60 ml) extra virgin olive oil
- Juice of 2 large lemons (about 1/4 cup or 60 ml)
- Zest of 1 large lemon
- 6-8 cloves garlic, minced (or 2 tablespoons minced garlic)
- 2 tablespoons fresh rosemary, finely chopped
- 2 tablespoons fresh thyme leaves, finely chopped
- 1 tablespoon smoked paprika (provides color and smoky depth)
- 1 teaspoon onion powder
- 1.5 teaspoons kosher salt (or 1 teaspoon table salt, adjust to taste)
- 1 teaspoon freshly cracked black pepper
- Optional: 1/2 teaspoon red pepper flakes (for a touch of heat)
Step-by-Step Instructions for Grilling Nirvana
Follow these detailed steps to ensure your spatchcocked grilled chicken is a resounding success, from preparation to the final, glorious bite.
Step 1: The Art of Spatchcocking
This is the foundational step that sets this recipe apart. Spatchcocking, or butterflying, involves removing the chicken’s backbone so it can lie flat. This promotes even cooking, faster cooking times, and maximum skin exposure for ultimate crispiness.
- Prepare Your Workspace: Lay down a large cutting board to catch any juices. Have a pair of sturdy kitchen shears or poultry shears ready. These are crucial for easily cutting through the bones.
- Position the Chicken: Place the chicken breast-side down on the cutting board, with the backbone facing up and the neck cavity towards you.
- Remove the Backbone: Starting at the tail (or parson’s nose), use your shears to cut along one side of the backbone, staying as close to the bone as possible. You’ll need to apply firm pressure to cut through the rib bones. Continue cutting all the way up to the neck.
- Repeat on the Other Side: Rotate the chicken if needed and cut along the other side of the backbone, again from tail to neck. Once fully cut, remove the backbone. (Don’t discard it! It’s fantastic for making chicken stock.)
- Flatten the Chicken: Flip the chicken over so it’s skin-side up. Using the heel of your hand, press down firmly on the center of the breastbone. You should hear and feel a crack – this is the breastbone breaking, allowing the chicken to lie completely flat. If it doesn’t flatten easily, you might need to make a small incision on the inside of the breastbone cartilage with a knife and then press again.
- Trim Excess Fat and Skin: Neatly trim any large pieces of excess fat or skin, particularly around the neck and cavity areas. Pat the entire chicken, especially the skin, very dry with paper towels. This is key for crispy skin.
Step 2: Crafting the Flavor-Packed Marinade
This vibrant marinade will infuse the chicken with incredible flavor.
- Combine Ingredients: In a small bowl, whisk together all the marinade ingredients: olive oil, lemon juice, lemon zest, minced garlic, chopped rosemary, chopped thyme, smoked paprika, onion powder, kosher salt, black pepper, and red pepper flakes (if using).
- Taste and Adjust: Give the marinade a little taste (before it touches raw chicken, of course!). Adjust seasoning if necessary – perhaps a bit more salt or a squeeze more lemon.
Step 3: Marination Magic
Now it’s time to get those flavors working their magic on the chicken.
- Loosen the Skin: Gently slide your fingers between the skin and the meat of the breasts and thighs. Be careful not to tear the skin. This creates pockets for the marinade to penetrate directly into the meat.
- Apply the Marinade: Pour about two-thirds of the marinade over the chicken. Use your hands to rub it all over, ensuring you get it under the loosened skin on the breasts and thighs, as well as into all the nooks and crannies of the meat side.
- Coat the Skin: Use the remaining one-third of the marinade to coat the skin side of the chicken.
- Marinate: Place the chicken in a large zip-top bag, a shallow dish covered with plastic wrap, or a container with a lid. Refrigerate for at least 4 hours, or ideally, overnight (up to 24 hours). The longer it marinates, the more flavorful it will be. If short on time, even 1-2 hours will make a difference.
Step 4: Preparing the Grill
Proper grill setup is essential for evenly cooked, non-charred chicken. You’re aiming for a two-zone fire (direct and indirect heat).
- Clean and Oil Grates: Before preheating, ensure your grill grates are clean. Use a grill brush to scrub off any old debris. Once clean, lightly oil the grates by wiping them with a paper towel dipped in a high smoke point oil (like canola or vegetable oil).
- For a Charcoal Grill:
- Arrange hot coals on one side of the grill, leaving the other side empty. This creates a hot direct heat zone and a cooler indirect heat zone.
- Allow the grill to preheat with the lid on for about 10-15 minutes until it reaches a medium-high temperature, around 375-450°F (190-230°C).
- For a Gas Grill:
- Turn half the burners (e.g., left or right side) to medium-high heat and leave the other half off or on very low.
- Close the lid and allow the grill to preheat for 10-15 minutes until it reaches 375-450°F (190-230°C).
- Temperature Check: You can gauge the heat by holding your hand about 5 inches above the grates. Over direct heat, you should only be able to hold it there for 3-4 seconds. Over indirect heat, it should be 6-8 seconds.
Step 5: Grilling to Perfection
This is where the magic happens. Patience and a good meat thermometer are your best friends here.
- Remove Chicken from Marinade: Take the chicken out of the refrigerator about 30 minutes before grilling to allow it to come closer to room temperature. This helps with even cooking. Let any excess marinade drip off, but don’t wipe it completely clean.
- Initial Sear (Skin-Side Down): Place the spatchcocked chicken skin-side down directly over the hot (direct heat) zone of the grill. Let it sear for about 5-7 minutes, or until the skin is nicely browned and has good grill marks. Keep a close eye on it to prevent burning. If flare-ups occur, move the chicken slightly.
- Move to Indirect Heat (Skin-Side Up): Using sturdy tongs and a spatula for support, carefully flip the chicken and move it to the cooler (indirect heat) side of the grill, skin-side up. If you have a very large chicken, you might need to arrange it so the thicker parts (thighs and breasts) are closer to the heat source, while the thinner parts are further away.
- Cook Through: Close the grill lid and let the chicken cook for approximately 35-50 minutes. The exact time will depend on the size of your chicken and the consistent temperature of your grill. Avoid opening the lid too frequently, as this lets heat escape.
- Check for Doneness: The most reliable way to check for doneness is with an instant-read meat thermometer. Insert the thermometer into the thickest part of the thigh, avoiding the bone. The internal temperature should register 165-170°F (74-77°C). The juices should run clear when pierced with a fork or skewer. If the skin isn’t as crispy as you’d like towards the end, you can carefully move it back over direct heat skin-side down for a minute or two, watching VERY closely to prevent burning.
- Optional Basting: If you reserved some marinade (that hasn’t touched raw chicken) or made a separate batch, you can baste the chicken during the last 10-15 minutes of cooking on the indirect side. Avoid basting with used marinade due to raw chicken contamination.
Step 6: The Crucial Rest
Do not skip this step! Resting allows the muscle fibers to relax and the juices to redistribute throughout the meat, resulting in a much juicier and more tender chicken.
- Transfer and Tent: Once the chicken reaches the correct internal temperature, carefully transfer it from the grill to a clean cutting board.
- Rest: Tent the chicken loosely with aluminum foil. Do not wrap it tightly, as this can steam the skin and make it less crispy. Let it rest for at least 10-15 minutes before carving. Larger birds may benefit from a 20-minute rest.
Carving: Carve the chicken as you would a roasted chicken – remove the legs (thigh and drumstick together), then separate them. Slice the breast meat. Arrange on a platter and serve immediately.
Nutritional Snapshot (Approximate)
- Servings: This recipe typically serves 4-6 people, depending on appetite and side dishes.
- Calories per serving (approximate): Around 450-600 calories. This is an estimate and can vary based on the exact size of the chicken, the amount of skin consumed, and the precise quantity of marinade absorbed. Chicken is a great source of lean protein. The majority of the fat is in the skin.
Disclaimer: Nutritional information is an estimate and can vary.
Time Investment: From Bird to Bliss
- Active Preparation Time (Spatchcocking & Marinade Prep): 20-30 minutes
- Marination Time: Minimum 4 hours, ideally 8-24 hours (overnight)
- Grill Preheating: 10-15 minutes
- Grilling Time: 45-60 minutes (depending on chicken size and grill temp)
- Resting Time: 10-15 minutes
- Total Time (excluding marination): Approximately 1.5 – 2 hours
- Total Time (including 8-hour marination): Approximately 9.5 – 10 hours
How to Serve Your Masterpiece
Your perfectly grilled spatchcocked chicken deserves some equally delicious accompaniments. Here are some ideas:
- Classic BBQ Sides:
- Creamy Potato Salad
- Crisp Coleslaw (vinegar-based or creamy)
- Grilled Corn on the Cob, slathered with butter and a sprinkle of chili powder
- Baked Beans
- Macaroni and Cheese
- Lighter, Fresher Options:
- A large Green Salad with a zesty vinaigrette
- Grilled Vegetables: Asparagus, bell peppers, zucchini, and onions tossed in olive oil and herbs
- Quinoa Salad with fresh vegetables and a lemon dressing
- Caprese Salad (tomatoes, mozzarella, basil)
- Breads & Starches:
- Crusty Bread or Baguette for soaking up juices
- Garlic Bread
- Roasted Potatoes (rosemary and garlic potatoes are a great match)
- Cornbread
- Sauces (on the side):
- Your favorite BBQ sauce
- A vibrant Chimichurri
- Garlic Aioli or a Lemon-Herb Yogurt Sauce
- Salsa Verde
- Presentation:
- Carve the chicken on a large wooden board or platter.
- Garnish with fresh herbs like sprigs of rosemary or thyme, and lemon wedges.
- Serve family-style, allowing everyone to pick their favorite pieces.
Additional Tips for Grilling Glory
- Invest in Good Shears: A sharp, sturdy pair of poultry shears makes the spatchcocking process significantly easier and safer than using a knife for cutting through bones.
- Dry Brine for Extra Crispy Skin: For next-level crispy skin, after spatchcocking and patting the chicken dry, season it generously with kosher salt (about 1 teaspoon per pound) and let it sit uncovered on a wire rack in the refrigerator for at least 4 hours, or ideally overnight, before applying the wet marinade. The salt draws out moisture, drying the skin. Rinse off any excess surface salt and pat thoroughly dry before marinating.
- Don’t Fear the Thermometer: A reliable instant-read meat thermometer is your best tool for perfectly cooked chicken. Always check the temperature in the thickest part of the thigh (avoiding bone) and breast. Pull the chicken when the thigh hits 165-170°F (74-77°C).
- Embrace the Two-Zone Fire: This is crucial for grilling larger items like a whole chicken. The direct heat zone is for searing and crisping, while the indirect heat zone allows the chicken to cook through gently without burning the exterior.
- Patience During Resting: Resist the urge to cut into the chicken immediately. That 10-15 minute rest is vital for juicy, tender meat. The internal temperature will also continue to rise slightly during this time (carryover cooking).
Frequently Asked Questions (FAQ)
Q1: Why is spatchcocking chicken better for grilling?
A: Spatchcocking offers several advantages:
* Even Cooking: By flattening the chicken, all parts (breast, thighs, legs) are more uniformly exposed to the heat, so they cook more evenly. No more dry breasts waiting for thighs to cook!
* Faster Cooking: Increased surface area and even heat exposure significantly reduce overall cooking time compared to a traditional whole bird.
* Crispier Skin: More skin is exposed directly to the heat, resulting in wonderfully crispy skin all over.
* Better Marinade Penetration: The flatter profile allows marinades and rubs to make better contact with more of the meat.
Q2: Can I make this recipe in the oven if I don’t have a grill?
A: Absolutely! Spatchcocked chicken is fantastic roasted in the oven. Preheat your oven to 400-425°F (200-220°C). Place the marinated chicken on a wire rack set inside a rimmed baking sheet (this allows air to circulate for crispier skin). Roast for 40-50 minutes, or until the internal temperature reaches 165°F (74°C) in the thigh. You can broil it for the last few minutes for extra crispy skin, watching carefully.
Q3: What if I don’t have fresh herbs? Can I use dried?
A: Yes, you can substitute dried herbs, but you’ll need to adjust the quantity. The general rule is to use one-third the amount of dried herbs as fresh. So, for 2 tablespoons of fresh rosemary, you’d use about 2 teaspoons of dried rosemary. Crush dried herbs between your fingers before adding them to release their aroma. While fresh herbs offer a brighter flavor, dried ones will still provide a delicious result.
Q4: How do I prevent the chicken skin from sticking to the grill grates?
A: There are a few key things:
* Clean Grates: Always start with clean grill grates.
* Hot Grates: Ensure your grill is properly preheated. Hot grates help sear the chicken quickly, making it less likely to stick.
* Oiled Grates: Lightly oil the grates before placing the chicken on them.
* Oil on Chicken: The olive oil in the marinade also helps.
* Don’t Move Too Soon: When you first place the chicken skin-side down, let it sear and develop a crust before trying to move or flip it. It will often release naturally once properly seared.
Q5: My chicken is cooked through, but the skin isn’t as crispy as I’d like. What can I do?
A: If the chicken is cooked but the skin needs more crisping, you have a couple of options:
* Grill: Carefully move the chicken back over the direct heat zone, skin-side down, for a very short period (1-3 minutes). Watch it like a hawk, as the skin can go from crispy to burnt very quickly due to the rendered fat and marinade.
* Oven/Broiler (if bringing inside): If you’re transitioning indoors or cooked in the oven, you can place the chicken under the broiler for 2-4 minutes, keeping the oven door ajar and watching constantly. Position the chicken so the skin is about 6-8 inches from the broiler element.
* Ensure Dry Skin: Next time, make sure the chicken skin is patted very, very dry before marinating, or try the dry brining tip mentioned above.
Spatchcocked Grilled Chicken Recipe
Ingredients
- For the Chicken:
- 1 whole chicken (approximately 3.5 to 4.5 pounds / 1.6 to 2 kg)
- 1 tablespoon olive oil (for initial coating, separate from marinade)
- For the Marinade/Rub:
- 1/4 cup (60 ml) extra virgin olive oil
- Juice of 2 large lemons (about 1/4 cup or 60 ml)
- Zest of 1 large lemon
- 6–8 cloves garlic, minced (or 2 tablespoons minced garlic)
- 2 tablespoons fresh rosemary, finely chopped
- 2 tablespoons fresh thyme leaves, finely chopped
- 1 tablespoon smoked paprika (provides color and smoky depth)
- 1 teaspoon onion powder
- 1.5 teaspoons kosher salt (or 1 teaspoon table salt, adjust to taste)
- 1 teaspoon freshly cracked black pepper
- Optional: 1/2 teaspoon red pepper flakes (for a touch of heat)
Instructions
Step 1: The Art of Spatchcocking
This is the foundational step that sets this recipe apart. Spatchcocking, or butterflying, involves removing the chicken’s backbone so it can lie flat. This promotes even cooking, faster cooking times, and maximum skin exposure for ultimate crispiness.
- Prepare Your Workspace: Lay down a large cutting board to catch any juices. Have a pair of sturdy kitchen shears or poultry shears ready. These are crucial for easily cutting through the bones.
- Position the Chicken: Place the chicken breast-side down on the cutting board, with the backbone facing up and the neck cavity towards you.
- Remove the Backbone: Starting at the tail (or parson’s nose), use your shears to cut along one side of the backbone, staying as close to the bone as possible. You’ll need to apply firm pressure to cut through the rib bones. Continue cutting all the way up to the neck.
- Repeat on the Other Side: Rotate the chicken if needed and cut along the other side of the backbone, again from tail to neck. Once fully cut, remove the backbone. (Don’t discard it! It’s fantastic for making chicken stock.)
- Flatten the Chicken: Flip the chicken over so it’s skin-side up. Using the heel of your hand, press down firmly on the center of the breastbone. You should hear and feel a crack – this is the breastbone breaking, allowing the chicken to lie completely flat. If it doesn’t flatten easily, you might need to make a small incision on the inside of the breastbone cartilage with a knife and then press again.
- Trim Excess Fat and Skin: Neatly trim any large pieces of excess fat or skin, particularly around the neck and cavity areas. Pat the entire chicken, especially the skin, very dry with paper towels. This is key for crispy skin.
Step 2: Crafting the Flavor-Packed Marinade
This vibrant marinade will infuse the chicken with incredible flavor.
- Combine Ingredients: In a small bowl, whisk together all the marinade ingredients: olive oil, lemon juice, lemon zest, minced garlic, chopped rosemary, chopped thyme, smoked paprika, onion powder, kosher salt, black pepper, and red pepper flakes (if using).
- Taste and Adjust: Give the marinade a little taste (before it touches raw chicken, of course!). Adjust seasoning if necessary – perhaps a bit more salt or a squeeze more lemon.
Step 3: Marination Magic
Now it’s time to get those flavors working their magic on the chicken.
- Loosen the Skin: Gently slide your fingers between the skin and the meat of the breasts and thighs. Be careful not to tear the skin. This creates pockets for the marinade to penetrate directly into the meat.
- Apply the Marinade: Pour about two-thirds of the marinade over the chicken. Use your hands to rub it all over, ensuring you get it under the loosened skin on the breasts and thighs, as well as into all the nooks and crannies of the meat side.
- Coat the Skin: Use the remaining one-third of the marinade to coat the skin side of the chicken.
- Marinate: Place the chicken in a large zip-top bag, a shallow dish covered with plastic wrap, or a container with a lid. Refrigerate for at least 4 hours, or ideally, overnight (up to 24 hours). The longer it marinates, the more flavorful it will be. If short on time, even 1-2 hours will make a difference.
Step 4: Preparing the Grill
Proper grill setup is essential for evenly cooked, non-charred chicken. You’re aiming for a two-zone fire (direct and indirect heat).
- Clean and Oil Grates: Before preheating, ensure your grill grates are clean. Use a grill brush to scrub off any old debris. Once clean, lightly oil the grates by wiping them with a paper towel dipped in a high smoke point oil (like canola or vegetable oil).
- For a Charcoal Grill:
- Arrange hot coals on one side of the grill, leaving the other side empty. This creates a hot direct heat zone and a cooler indirect heat zone.
- Allow the grill to preheat with the lid on for about 10-15 minutes until it reaches a medium-high temperature, around 375-450°F (190-230°C).
- For a Gas Grill:
- Turn half the burners (e.g., left or right side) to medium-high heat and leave the other half off or on very low.
- Close the lid and allow the grill to preheat for 10-15 minutes until it reaches 375-450°F (190-230°C).
- Temperature Check: You can gauge the heat by holding your hand about 5 inches above the grates. Over direct heat, you should only be able to hold it there for 3-4 seconds. Over indirect heat, it should be 6-8 seconds.
Step 5: Grilling to Perfection
This is where the magic happens. Patience and a good meat thermometer are your best friends here.
- Remove Chicken from Marinade: Take the chicken out of the refrigerator about 30 minutes before grilling to allow it to come closer to room temperature. This helps with even cooking. Let any excess marinade drip off, but don’t wipe it completely clean.
- Initial Sear (Skin-Side Down): Place the spatchcocked chicken skin-side down directly over the hot (direct heat) zone of the grill. Let it sear for about 5-7 minutes, or until the skin is nicely browned and has good grill marks. Keep a close eye on it to prevent burning. If flare-ups occur, move the chicken slightly.
- Move to Indirect Heat (Skin-Side Up): Using sturdy tongs and a spatula for support, carefully flip the chicken and move it to the cooler (indirect heat) side of the grill, skin-side up. If you have a very large chicken, you might need to arrange it so the thicker parts (thighs and breasts) are closer to the heat source, while the thinner parts are further away.
- Cook Through: Close the grill lid and let the chicken cook for approximately 35-50 minutes. The exact time will depend on the size of your chicken and the consistent temperature of your grill. Avoid opening the lid too frequently, as this lets heat escape.
- Check for Doneness: The most reliable way to check for doneness is with an instant-read meat thermometer. Insert the thermometer into the thickest part of the thigh, avoiding the bone. The internal temperature should register 165-170°F (74-77°C). The juices should run clear when pierced with a fork or skewer. If the skin isn’t as crispy as you’d like towards the end, you can carefully move it back over direct heat skin-side down for a minute or two, watching VERY closely to prevent burning.
- Optional Basting: If you reserved some marinade (that hasn’t touched raw chicken) or made a separate batch, you can baste the chicken during the last 10-15 minutes of cooking on the indirect side. Avoid basting with used marinade due to raw chicken contamination.
Step 6: The Crucial Rest
Do not skip this step! Resting allows the muscle fibers to relax and the juices to redistribute throughout the meat, resulting in a much juicier and more tender chicken.
- Transfer and Tent: Once the chicken reaches the correct internal temperature, carefully transfer it from the grill to a clean cutting board.
- Rest: Tent the chicken loosely with aluminum foil. Do not wrap it tightly, as this can steam the skin and make it less crispy. Let it rest for at least 10-15 minutes before carving. Larger birds may benefit from a 20-minute rest.
Nutrition
- Serving Size: One Normal Portion
- Calories: 450-600


