

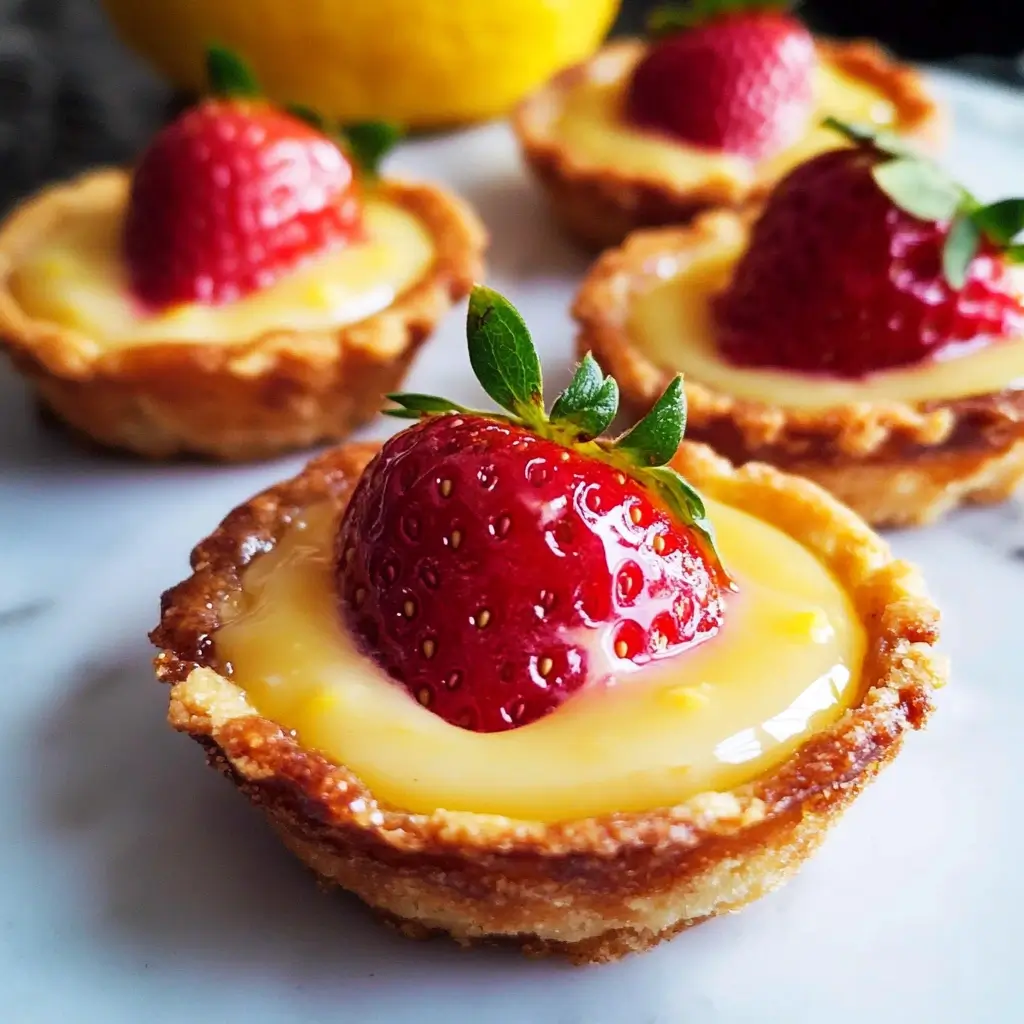

There are some desserts that just sing of sunshine, special occasions, and pure, unadulterated joy. These Strawberry Honey Custard Tarts with Lemon Curd are firmly in that category for my family. The first time I made them, I was aiming for something elegant for a spring gathering, but I wasn’t prepared for the reaction. The buttery, crisp pastry shell giving way to a silky, subtly sweet honey custard, punctuated by that bright, zesty hit of lemon curd, and finally crowned with juicy, fresh strawberries – it was pure magic. My kids, usually drawn to simpler chocolate treats, were instantly smitten. My husband declared them “dangerously good,” and they disappeared from the platter in record time. Since then, they’ve become a requested favorite for birthdays, garden parties, or simply when we need a reminder of warmer days. The combination sounds complex, but breaking it down makes it achievable, and the result is a truly show-stopping dessert that tastes even better than it looks. It’s that perfect balance of creamy, tangy, sweet, and fruity that makes every bite an experience.
The Symphony of Flavors: Why Strawberry, Honey, Custard & Lemon Work
Before diving into the ‘how-to’, let’s appreciate the ‘why’. What makes this combination so utterly captivating?
- Sweet Meets Tangy: The natural sweetness of ripe strawberries and the floral notes of honey are beautifully balanced by the sharp, bright acidity of the lemon curd. This prevents the dessert from becoming cloying or one-note.
- Creamy Meets Crisp: The smooth, luscious texture of the honey custard provides a luxurious contrast to the crisp, crumbly shortcrust pastry. It’s a textural delight that keeps each mouthful interesting.
- Aromatic Harmony: Honey adds a unique floral depth that complements both the berries and the lemon zest. It elevates the simple custard beyond a standard vanilla flavour.
- Seasonal Perfection: While possible year-round with imported berries, this tart truly shines when strawberries are at their peak season, bursting with flavour and vibrant colour. It captures the essence of spring and summer.
Creating each element separately allows you to control the flavour profile and texture, ensuring they come together harmoniously in the final tart.
Ingredients for Strawberry Honey Custard Tarts with Lemon Curd
Accuracy is key in baking. Here’s what you’ll need to create approximately 12 individual 4-inch (10cm) tarts or one large 9-10 inch (23-25cm) tart.
For the Sweet Shortcrust Pastry (Pâte Sucrée):
- All-Purpose Flour: 2 ½ cups (300g) – Provides structure.
- Powdered Sugar (Icing Sugar): ½ cup (60g) – Adds sweetness and tenderness. Sifted is best to avoid lumps.
- Salt: ½ teaspoon – Enhances flavour and balances sweetness.
- Unsalted Butter: 1 cup (2 sticks or 226g) – Very cold and cut into ½-inch cubes. This is crucial for a flaky texture.
- Large Egg Yolks: 2 – Adds richness, colour, and helps bind the dough.
- Ice Water: 2-4 tablespoons – Use only as needed to bring the dough together. Add one tablespoon at a time.
For the Honey Custard Filling:
- Whole Milk: 1 ½ cups (360ml) – Provides the liquid base and richness.
- Heavy Cream: ½ cup (120ml) – Adds extra creaminess and stability.
- Honey: ½ cup (170g) – Choose a good quality, flavourful honey (like wildflower or clover). Adjust slightly based on sweetness preference.
- Vanilla Bean: ½ bean, split lengthwise, seeds scraped (or 1 tsp pure vanilla extract) – Adds aromatic depth.
- Large Egg Yolks: 5 – The primary thickening agent, providing richness and colour.
- Cornstarch: 3 tablespoons (25g) – Helps thicken the custard and prevents curdling.
- Salt: ¼ teaspoon – Balances the sweetness.
- Unsalted Butter: 2 tablespoons (28g) – Stirred in at the end for extra smoothness and gloss.
For the Quick Lemon Curd:
- Large Eggs: 2
- Large Egg Yolks: 2 – Using extra yolks makes the curd richer.
- Granulated Sugar: ¾ cup (150g)
- Fresh Lemon Juice: ½ cup (120ml) – From approximately 2-3 large lemons. Fresh juice is essential!
- Lemon Zest: 1 tablespoon – Finely grated from the lemons used for juice (avoid the white pith).
- Unsalted Butter: 6 tablespoons (85g) – Cut into small pieces.
For the Strawberry Topping & Garnish:
- Fresh Strawberries: 1 pint (about 450-500g) – Ripe, firm, and vibrant red. Washed, hulled, and sliced or halved depending on size.
- Optional Glaze: 2 tablespoons apricot jam or redcurrant jelly, warmed with 1 teaspoon water – For a professional shine.
- Optional Garnish: Fresh mint sprigs, powdered sugar dusting.
Step-by-Step Instructions: Crafting Your Tarts
Follow these steps carefully for pastry perfection and luscious fillings. It’s best to read through everything once before starting.
Phase 1: Make the Sweet Shortcrust Pastry
- Combine Dry Ingredients: In a large bowl or the bowl of a food processor, whisk together the flour, powdered sugar, and salt.
- Cut in the Butter: Add the cold, cubed butter. If using a food processor, pulse 10-15 times until the mixture resembles coarse meal with some pea-sized butter pieces remaining. If using hands or a pastry blender, cut the butter into the flour mixture until you achieve the same consistency. Don’t overwork it; those butter pieces create flakiness.
- Add Wet Ingredients: In a small bowl, lightly whisk the egg yolks with 2 tablespoons of ice water. Add this to the flour-butter mixture. Pulse (or mix gently with a fork) just until the dough starts to come together. If it seems too dry, add more ice water, 1 teaspoon at a time, until it just holds together when squeezed. Be careful not to add too much water.
- Form and Chill: Turn the dough out onto a lightly floured surface and gently bring it together into a cohesive disc (or two discs if making individual tarts). Avoid kneading. Wrap tightly in plastic wrap and flatten slightly. Refrigerate for at least 1 hour (or up to 2 days). Chilling is crucial for relaxing the gluten and preventing shrinkage.
Phase 2: Prepare the Honey Custard Filling
- Infuse Milk/Cream: In a medium saucepan, combine the whole milk, heavy cream, honey, and vanilla bean (both pod and scraped seeds, if using). Heat over medium-low heat, stirring occasionally, until it’s steaming and small bubbles form around the edges. Do not let it boil.
- Remove from Heat: Once steaming, remove the saucepan from the heat. If using a vanilla bean, cover the pan and let it steep for 15-20 minutes to infuse the flavour deeply. If using extract, you can skip the steeping. Remove the vanilla pod before proceeding.
- Prepare Egg Mixture: In a separate medium bowl, whisk together the egg yolks, cornstarch, and salt until smooth and pale yellow.
- Temper the Eggs: Slowly pour about half of the warm milk/honey mixture into the egg yolk mixture while whisking constantly. This process, called tempering, gently heats the eggs without scrambling them.
- Combine and Cook: Pour the tempered egg mixture back into the saucepan with the remaining milk/honey mixture. Place the saucepan over medium-low heat.
- Thicken the Custard: Cook, whisking constantly and ensuring you scrape the bottom and corners of the pan, until the custard thickens significantly and coats the back of a spoon (about 5-8 minutes). It should be thick enough that if you draw a line through it on the spoon, the line holds. Don’t let it boil vigorously, or it might curdle. If small bubbles start breaking the surface, that’s okay, just keep whisking.
- Strain and Finish: Immediately remove the custard from the heat. Strain it through a fine-mesh sieve into a clean bowl to remove any potential lumps or cooked egg bits. Whisk in the 2 tablespoons of butter until melted and fully incorporated. If using vanilla extract, stir it in now.
- Chill the Custard: Press a piece of plastic wrap directly onto the surface of the custard (this prevents a skin from forming). Let it cool slightly at room temperature, then refrigerate for at least 2-3 hours, or until completely cold and set.
Phase 3: Whip Up the Quick Lemon Curd
- Combine Ingredients (Except Butter): In a medium, heatproof bowl (preferably stainless steel), whisk together the whole eggs, egg yolks, granulated sugar, fresh lemon juice, and lemon zest until well combined.
- Set Up Double Boiler: Place the bowl over a saucepan filled with about an inch of simmering (not boiling) water. Ensure the bottom of the bowl does not touch the water.
- Cook the Curd: Cook, whisking constantly, until the mixture thickens enough to coat the back of a spoon (similar to the custard test). This usually takes 8-12 minutes. The temperature should reach about 170°F (77°C) on an instant-read thermometer. Constant whisking prevents scrambling.
- Add Butter: Remove the bowl from the heat. Add the cubed butter, one piece at a time, whisking until each piece is melted and incorporated before adding the next. The curd should become smooth and glossy.
- Strain and Chill: Strain the lemon curd through a fine-mesh sieve into a clean bowl or jar to remove the zest and any potential lumps. Press plastic wrap directly onto the surface and refrigerate until completely cold and thickened, at least 2 hours.
Phase 4: Prepare and Blind Bake the Tart Shells
Preheat your oven to 375°F (190°C) with a rack in the lower third.
- Roll Out Dough: On a lightly floured surface, roll out the chilled pastry disc(s) to about ⅛-inch (3mm) thickness. Work quickly to keep the dough cool. If making individual tarts, cut circles slightly larger than your tart tins. If making one large tart, roll it large enough to fit your tart pan with overhang.
- Line the Tart Pans: Carefully transfer the pastry to your tart pan(s). Gently press the dough into the bottom and up the sides, ensuring it fits snugly into the corners. Trim the excess pastry flush with the rim of the pan(s) using a sharp knife or by rolling your rolling pin over the top edge.
- Dock and Chill: Prick the bottom of the pastry shell(s) all over with a fork (this prevents puffing). Place the lined tart pan(s) in the freezer for 15-20 minutes (or refrigerator for 30 minutes) to firm up again. This helps prevent shrinking during baking.
- Blind Bake: Line the chilled pastry shell(s) with parchment paper or aluminium foil, ensuring it covers the base and sides. Fill with pie weights, dried beans, or uncooked rice, distributing them evenly, especially around the edges. Place on a baking sheet.
- First Bake: Bake in the preheated oven for 15-20 minutes (individual tarts might take less time than a large one) until the edges are set and lightly golden.
- Remove Weights: Carefully lift out the parchment paper/foil and weights.
- Second Bake (Optional Egg Wash): For an extra layer of protection against a soggy bottom, you can lightly beat an egg white and brush it thinly over the bottom and sides of the partially baked shell(s). Return the shell(s) to the oven and bake for another 5-8 minutes, until the bottom looks dry and pale golden.
- Cool: Let the tart shell(s) cool in the pan(s) on a wire rack for about 10-15 minutes before proceeding to fill them. Reduce oven temperature to 325°F (160°C) for baking the custard.
Phase 5: Fill and Bake the Custard Tarts
- Fill the Shells: Retrieve the chilled honey custard. Give it a good whisk to ensure it’s smooth. Carefully spoon or pipe the custard into the pre-baked tart shell(s), filling them about three-quarters full. Be careful not to overfill.
- Bake the Custard: Carefully place the baking sheet with the filled tart(s) back into the 325°F (160°C) oven. Bake for 20-30 minutes (individual tarts) or 30-45 minutes (large tart), or until the custard is just set. It should still have a slight wobble in the very center when gently shaken. The edges will be set. Do not overbake, as the custard can become rubbery or crack.
- Cool Completely: Remove the tarts from the oven and let them cool completely in their pans on a wire rack. This can take 1-2 hours. Once at room temperature, carefully remove them from the tart pans (many have removable bottoms, which helps). Chill the cooled custard tarts in the refrigerator for at least 1-2 hours before assembling to ensure the custard is fully set and cold.
Phase 6: Assemble and Garnish the Tarts
- Prepare Strawberries: Wash, hull, and slice or halve your fresh strawberries just before assembly. Pat them dry gently.
- Add Lemon Curd: Retrieve the chilled lemon curd. Dollop or pipe a generous layer of lemon curd evenly over the surface of the set honey custard in each tart. Spread it gently.
- Arrange Strawberries: Artfully arrange the prepared strawberry slices or halves over the lemon curd layer. You can create concentric circles, pile them casually, or make intricate patterns.
- Optional Glaze: If desired, gently warm the apricot jam or redcurrant jelly with a teaspoon of water until smooth and brushable. Lightly brush this glaze over the strawberries for a beautiful shine and to help preserve them slightly.
- Final Touches: Garnish with fresh mint sprigs just before serving. A light dusting of powdered sugar around the plate or very lightly over the tart edges can also add elegance.
- Serve: Serve the tarts chilled or at cool room temperature for the best texture and flavour experience.
Nutritional Information (Approximate)
- Servings: Makes approximately 12 individual (4-inch) tarts or 1 large (9-10 inch) tart (serving 8-10 slices).
- Calories per Serving (Individual Tart): Approximately 450-550 kcal per 4-inch tart.
- Calories per Serving (Slice of Large Tart): Approximately 500-600 kcal per slice (assuming 8 slices).
Disclaimer: Nutritional values are estimates calculated using standard ingredient databases. Actual values may vary based on specific ingredients used (e.g., fat content of dairy, type of honey, exact size of tarts/slices) and precise measurements. This information is provided for guidance only.
Time Commitment: Planning Your Bake
This recipe involves several components and chilling times, so planning is beneficial.
- Active Preparation Time:
- Pastry: 20-25 minutes
- Honey Custard: 20-25 minutes
- Lemon Curd: 15-20 minutes
- Assembly & Garnishing: 20-30 minutes
- Total Active Time: Approx. 1 hour 20 minutes – 1 hour 40 minutes
- Inactive Time (Chilling & Baking):
- Pastry Chilling: Minimum 1 hour (initial) + 20-30 minutes (lined shells)
- Custard Chilling: Minimum 2-3 hours
- Lemon Curd Chilling: Minimum 2 hours
- Blind Baking: 20-30 minutes
- Custard Baking: 20-45 minutes
- Cooling Time (Baked Tarts): Minimum 2-3 hours (including final chill)
- Total Inactive Time: Minimum 6-8 hours (much of this can be done concurrently or overnight)
- Total Estimated Time: While active time is manageable, allow at least half a day, or preferably spread the process over two days (e.g., make pastry, custard, curd Day 1; bake shells, fill, bake custard, assemble Day 2) for a less stressful experience.
How to Serve Your Masterpiece Tarts
These tarts are stunning on their own but can be elevated further with thoughtful presentation.
- Temperature: Serve chilled or at cool room temperature. The custard is best when cold, and the pastry stays crisp. Avoid serving warm, as the custard won’t be fully set.
- Occasions:
- Elegant dessert for dinner parties.
- Star attraction at afternoon tea or high tea.
- Perfect for spring/summer celebrations like Easter, Mother’s Day, or garden parties.
- A delightful treat for brunch.
- A special birthday dessert.
- Presentation:
- Individual Tarts: Serve each tart on a small dessert plate. A dusting of powdered sugar on the plate edge adds a nice touch.
- Large Tart: Present the whole tart on a cake stand or platter before slicing. Use a sharp, thin knife, dipped in hot water and wiped dry between cuts, for clean slices.
- Garnishes: Fresh mint leaves provide a lovely colour contrast and aroma. A few whole small strawberries or raspberries scattered around the plate can also enhance the look.
- Accompaniments:
- While delicious alone, a small dollop of lightly sweetened whipped cream or crème fraîche can be served alongside.
- A drizzle of extra honey or a very thin lemon glaze could be added, but be mindful not to overpower the existing flavours.
- Pair with a light dessert wine, a cup of tea (Earl Grey or a fruity herbal blend works well), or coffee.
Pro Tips for Tart Perfection
Achieve bakery-level results with these essential tips:
- Keep Everything Cold (Pastry): The key to flaky, tender shortcrust is cold butter and minimal handling. If the dough warms up too much while rolling or lining, pop it back in the fridge or freezer for 10-15 minutes before proceeding. Cold dough prevents gluten development (toughness) and helps prevent shrinking.
- Master Blind Baking: Don’t skip or rush blind baking! It’s essential for ensuring a crisp pastry base that won’t become soggy under the wet custard filling. Using pie weights correctly (filling right to the top edge) supports the sides during the initial bake. The optional egg wash seal adds extra insurance.
- Strain for Smoothness: Always strain both the custard and the lemon curd through a fine-mesh sieve. This guarantees a silky-smooth texture by removing any tiny cooked egg bits, zest (from the curd), or undissolved cornstarch. It’s a small step with a big impact on the final mouthfeel.
- Don’t Overbake the Custard: Watch the custard filling carefully during the final bake. Remove the tarts from the oven when the center still has a slight wobble. The residual heat will continue to cook and set the custard as it cools. Overbaking leads to a rubbery texture or cracks on the surface.
- Make-Ahead Strategy: You can (and probably should!) break this recipe down over two days.
- Day 1: Make the pastry dough, wrap tightly, and refrigerate. Make the honey custard and lemon curd, cover with plastic wrap directly on the surface, and chill overnight.
- Day 2: Roll out and blind bake the pastry shells. Let them cool. Fill with the chilled custard, bake, and cool completely. Assemble with lemon curd and strawberries shortly before serving for maximum freshness and crispness. The un-filled, fully baked tart shells can also be stored in an airtight container at room temperature for a day or two.
Frequently Asked Questions (FAQ)
Addressing common queries about these delightful tarts:
- Q: Can I use store-bought shortcrust pastry?
- A: Absolutely! To save time, you can use a good quality, all-butter store-bought sweet shortcrust pastry (pâte sucrée) or even regular pie dough (though the flavour will be less rich). Ensure you still follow the blind baking steps carefully.
- Q: Can I make one large tart instead of individual ones?
- A: Yes, the recipe quantities are suitable for one 9-10 inch (23-25cm) tart pan with a removable bottom. Blind baking and custard baking times will likely need to be increased slightly (check the instructions for estimated times). Slicing requires care to keep it neat.
- Q: How long will these tarts keep? Can I make them fully ahead of time?
- A: These tarts are best enjoyed on the day they are assembled, especially once the strawberries are added, as the pastry can start to soften over time. You can store fully assembled tarts (without glaze/garnish ideally) lightly covered in the refrigerator for up to 24-36 hours, but the pastry texture will be best within the first 12 hours. Components (pastry dough, baked shells, custard, curd) can be made ahead as described in the tips.
- Q: Can I substitute the honey in the custard?
- A: Yes, you can substitute the honey with an equal amount of granulated sugar or maple syrup for a different flavour profile. If using sugar, dissolve it fully in the milk mixture. Maple syrup will lend its own distinct taste which could also be lovely with strawberry and lemon. The texture might be slightly different, but it should still set correctly.
- Q: My custard was lumpy/curdled. What went wrong?
- A: This usually happens for two reasons: overheating or insufficient whisking. Ensure you temper the eggs correctly by slowly adding the hot milk while whisking constantly. When cooking the custard on the stovetop, use medium-low heat and whisk continuously, especially scraping the bottom and corners. If it starts to look slightly grainy, remove it from the heat immediately and whisk vigorously. Straining the custard after cooking is your final safety net to catch any small lumps.
Enjoy the process of creating these beautiful and delicious Strawberry Honey Custard Tarts with Lemon Curd. They are a true labour of love that pays off with every delightful bite!
Print
Strawberry Honey Custard Tarts with Lemon Curd Recipe
Ingredients
For the Sweet Shortcrust Pastry (Pâte Sucrée):
- All-Purpose Flour: 2 ½ cups (300g) – Provides structure.
- Powdered Sugar (Icing Sugar): ½ cup (60g) – Adds sweetness and tenderness. Sifted is best to avoid lumps.
- Salt: ½ teaspoon – Enhances flavour and balances sweetness.
- Unsalted Butter: 1 cup (2 sticks or 226g) – Very cold and cut into ½-inch cubes. This is crucial for a flaky texture.
- Large Egg Yolks: 2 – Adds richness, colour, and helps bind the dough.
- Ice Water: 2-4 tablespoons – Use only as needed to bring the dough together. Add one tablespoon at a time.
For the Honey Custard Filling:
- Whole Milk: 1 ½ cups (360ml) – Provides the liquid base and richness.
- Heavy Cream: ½ cup (120ml) – Adds extra creaminess and stability.
- Honey: ½ cup (170g) – Choose a good quality, flavourful honey (like wildflower or clover). Adjust slightly based on sweetness preference.
- Vanilla Bean: ½ bean, split lengthwise, seeds scraped (or 1 tsp pure vanilla extract) – Adds aromatic depth.
- Large Egg Yolks: 5 – The primary thickening agent, providing richness and colour.
- Cornstarch: 3 tablespoons (25g) – Helps thicken the custard and prevents curdling.
- Salt: ¼ teaspoon – Balances the sweetness.
- Unsalted Butter: 2 tablespoons (28g) – Stirred in at the end for extra smoothness and gloss.
For the Quick Lemon Curd:
- Large Eggs: 2
- Large Egg Yolks: 2 – Using extra yolks makes the curd richer.
- Granulated Sugar: ¾ cup (150g)
- Fresh Lemon Juice: ½ cup (120ml) – From approximately 2-3 large lemons. Fresh juice is essential!
- Lemon Zest: 1 tablespoon – Finely grated from the lemons used for juice (avoid the white pith).
- Unsalted Butter: 6 tablespoons (85g) – Cut into small pieces.
For the Strawberry Topping & Garnish:
- Fresh Strawberries: 1 pint (about 450-500g) – Ripe, firm, and vibrant red. Washed, hulled, and sliced or halved depending on size.
- Optional Glaze: 2 tablespoons apricot jam or redcurrant jelly, warmed with 1 teaspoon water – For a professional shine.
- Optional Garnish: Fresh mint sprigs, powdered sugar dusting.
Instructions
Phase 1: Make the Sweet Shortcrust Pastry
- Combine Dry Ingredients: In a large bowl or the bowl of a food processor, whisk together the flour, powdered sugar, and salt.
- Cut in the Butter: Add the cold, cubed butter. If using a food processor, pulse 10-15 times until the mixture resembles coarse meal with some pea-sized butter pieces remaining. If using hands or a pastry blender, cut the butter into the flour mixture until you achieve the same consistency. Don’t overwork it; those butter pieces create flakiness.
- Add Wet Ingredients: In a small bowl, lightly whisk the egg yolks with 2 tablespoons of ice water. Add this to the flour-butter mixture. Pulse (or mix gently with a fork) just until the dough starts to come together. If it seems too dry, add more ice water, 1 teaspoon at a time, until it just holds together when squeezed. Be careful not to add too much water.
- Form and Chill: Turn the dough out onto a lightly floured surface and gently bring it together into a cohesive disc (or two discs if making individual tarts). Avoid kneading. Wrap tightly in plastic wrap and flatten slightly. Refrigerate for at least 1 hour (or up to 2 days). Chilling is crucial for relaxing the gluten and preventing shrinkage.
Phase 2: Prepare the Honey Custard Filling
- Infuse Milk/Cream: In a medium saucepan, combine the whole milk, heavy cream, honey, and vanilla bean (both pod and scraped seeds, if using). Heat over medium-low heat, stirring occasionally, until it’s steaming and small bubbles form around the edges. Do not let it boil.
- Remove from Heat: Once steaming, remove the saucepan from the heat. If using a vanilla bean, cover the pan and let it steep for 15-20 minutes to infuse the flavour deeply. If using extract, you can skip the steeping. Remove the vanilla pod before proceeding.
- Prepare Egg Mixture: In a separate medium bowl, whisk together the egg yolks, cornstarch, and salt until smooth and pale yellow.
- Temper the Eggs: Slowly pour about half of the warm milk/honey mixture into the egg yolk mixture while whisking constantly. This process, called tempering, gently heats the eggs without scrambling them.
- Combine and Cook: Pour the tempered egg mixture back into the saucepan with the remaining milk/honey mixture. Place the saucepan over medium-low heat.
- Thicken the Custard: Cook, whisking constantly and ensuring you scrape the bottom and corners of the pan, until the custard thickens significantly and coats the back of a spoon (about 5-8 minutes). It should be thick enough that if you draw a line through it on the spoon, the line holds. Don’t let it boil vigorously, or it might curdle. If small bubbles start breaking the surface, that’s okay, just keep whisking.
- Strain and Finish: Immediately remove the custard from the heat. Strain it through a fine-mesh sieve into a clean bowl to remove any potential lumps or cooked egg bits. Whisk in the 2 tablespoons of butter until melted and fully incorporated. If using vanilla extract, stir it in now.
- Chill the Custard: Press a piece of plastic wrap directly onto the surface of the custard (this prevents a skin from forming). Let it cool slightly at room temperature, then refrigerate for at least 2-3 hours, or until completely cold and set.
Phase 3: Whip Up the Quick Lemon Curd
- Combine Ingredients (Except Butter): In a medium, heatproof bowl (preferably stainless steel), whisk together the whole eggs, egg yolks, granulated sugar, fresh lemon juice, and lemon zest until well combined.
- Set Up Double Boiler: Place the bowl over a saucepan filled with about an inch of simmering (not boiling) water. Ensure the bottom of the bowl does not touch the water.
- Cook the Curd: Cook, whisking constantly, until the mixture thickens enough to coat the back of a spoon (similar to the custard test). This usually takes 8-12 minutes. The temperature should reach about 170°F (77°C) on an instant-read thermometer. Constant whisking prevents scrambling.
- Add Butter: Remove the bowl from the heat. Add the cubed butter, one piece at a time, whisking until each piece is melted and incorporated before adding the next. The curd should become smooth and glossy.
- Strain and Chill: Strain the lemon curd through a fine-mesh sieve into a clean bowl or jar to remove the zest and any potential lumps. Press plastic wrap directly onto the surface and refrigerate until completely cold and thickened, at least 2 hours.
Phase 4: Prepare and Blind Bake the Tart Shells
Preheat your oven to 375°F (190°C) with a rack in the lower third.
- Roll Out Dough: On a lightly floured surface, roll out the chilled pastry disc(s) to about ⅛-inch (3mm) thickness. Work quickly to keep the dough cool. If making individual tarts, cut circles slightly larger than your tart tins. If making one large tart, roll it large enough to fit your tart pan with overhang.
- Line the Tart Pans: Carefully transfer the pastry to your tart pan(s). Gently press the dough into the bottom and up the sides, ensuring it fits snugly into the corners. Trim the excess pastry flush with the rim of the pan(s) using a sharp knife or by rolling your rolling pin over the top edge.
- Dock and Chill: Prick the bottom of the pastry shell(s) all over with a fork (this prevents puffing). Place the lined tart pan(s) in the freezer for 15-20 minutes (or refrigerator for 30 minutes) to firm up again. This helps prevent shrinking during baking.
- Blind Bake: Line the chilled pastry shell(s) with parchment paper or aluminium foil, ensuring it covers the base and sides. Fill with pie weights, dried beans, or uncooked rice, distributing them evenly, especially around the edges. Place on a baking sheet.
- First Bake: Bake in the preheated oven for 15-20 minutes (individual tarts might take less time than a large one) until the edges are set and lightly golden.
- Remove Weights: Carefully lift out the parchment paper/foil and weights.
- Second Bake (Optional Egg Wash): For an extra layer of protection against a soggy bottom, you can lightly beat an egg white and brush it thinly over the bottom and sides of the partially baked shell(s). Return the shell(s) to the oven and bake for another 5-8 minutes, until the bottom looks dry and pale golden.
- Cool: Let the tart shell(s) cool in the pan(s) on a wire rack for about 10-15 minutes before proceeding to fill them. Reduce oven temperature to 325°F (160°C) for baking the custard.
Phase 5: Fill and Bake the Custard Tarts
- Fill the Shells: Retrieve the chilled honey custard. Give it a good whisk to ensure it’s smooth. Carefully spoon or pipe the custard into the pre-baked tart shell(s), filling them about three-quarters full. Be careful not to overfill.
- Bake the Custard: Carefully place the baking sheet with the filled tart(s) back into the 325°F (160°C) oven. Bake for 20-30 minutes (individual tarts) or 30-45 minutes (large tart), or until the custard is just set. It should still have a slight wobble in the very center when gently shaken. The edges will be set. Do not overbake, as the custard can become rubbery or crack.
- Cool Completely: Remove the tarts from the oven and let them cool completely in their pans on a wire rack. This can take 1-2 hours. Once at room temperature, carefully remove them from the tart pans (many have removable bottoms, which helps). Chill the cooled custard tarts in the refrigerator for at least 1-2 hours before assembling to ensure the custard is fully set and cold.
Phase 6: Assemble and Garnish the Tarts
- Prepare Strawberries: Wash, hull, and slice or halve your fresh strawberries just before assembly. Pat them dry gently.
- Add Lemon Curd: Retrieve the chilled lemon curd. Dollop or pipe a generous layer of lemon curd evenly over the surface of the set honey custard in each tart. Spread it gently.
- Arrange Strawberries: Artfully arrange the prepared strawberry slices or halves over the lemon curd layer. You can create concentric circles, pile them casually, or make intricate patterns.
- Optional Glaze: If desired, gently warm the apricot jam or redcurrant jelly with a teaspoon of water until smooth and brushable. Lightly brush this glaze over the strawberries for a beautiful shine and to help preserve them slightly.
- Final Touches: Garnish with fresh mint sprigs just before serving. A light dusting of powdered sugar around the plate or very lightly over the tart edges can also add elegance.
- Serve: Serve the tarts chilled or at cool room temperature for the best texture and flavour experience.
Nutrition
- Serving Size: One Normal Portion
- Calories: 500-600


