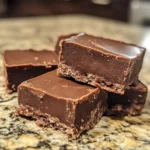
There’s something truly satisfying about sinking your teeth into a crisp, chocolatey treat—and what if you could enjoy that without any sugar guilt? After scouring countless recipes and tweaking ingredients, I finally perfected a homemade Sugar Free Kit Kat that’s just as crunchy and rich as the classic. Whether you’re cutting back on sugar, managing dietary needs, or simply craving a healthier indulgence, this recipe hits the sweet spot without compromising on flavor or texture. Ready in under an hour and surprisingly simple, it’s a crowd-pleaser that transforms your kitchen into a mini chocolate factory. Let me show you how to whip up this delightful treat that proves sugar-free can still mean seriously delicious!
Why Choose a Sugar Free Kit Kat?
Crispy Satisfaction: This recipe delivers the classic crunch you crave without any sugar. Guilt-free indulgence: Enjoy your favorite treat while keeping your health goals on track. Quick and Easy: Ready in under an hour with simple steps that anyone can follow. Versatile delight: Perfect for special diets or anyone wanting a healthier snack option. Crowd favorite: Impress family and friends with homemade goodness that tastes better than store-bought!
Sugar Free Kit Kat Ingredients
For the Crisp Wafer Layers
- Almond flour – Provides a light, nutty crunch as a low-carb alternative to wheat flour.
- Egg whites – Help bind the wafers while keeping them crisp and airy.
- Erythritol – A natural, zero-calorie sweetener that replaces sugar without bitterness.
- Butter – Adds richness and helps create the perfect wafer texture.
For the Chocolate Coating
- Sugar-free dark chocolate – Melts smoothly for a rich coating that’s perfect for this Sugar Free Kit Kat.
- Heavy cream – Creates a creamy ganache-like texture when mixed with chocolate for that silky finish.
- Vanilla extract – Enhances the depth of chocolate flavor naturally without sweetness.
Optional Flavor Enhancers
- Sea salt flakes – Balances sweetness and intensifies the chocolate notes.
- Crushed nuts – Adds an extra crunch and subtle flavor contrast if desired.
How to Make Sugar Free Kit Kat
-
Preheat oven: Preheat oven to 350°F and line a baking sheet with parchment paper. This ensures even heat distribution for ultra-crispy homemade wafers.
-
Combine ingredients: In a bowl, whisk almond flour, erythritol, egg whites, and melted butter until smooth and slightly thick for a silky texture.
-
Spread batter: Spread batter thinly (about 1/8-inch thick) onto the prepared sheet. Bake 12–15 minutes until edges turn light golden brown and center feels firm.
-
Cool & cut: Allow wafers to cool completely on the countertop (about 10 minutes). Once cool, cut into 3×1-inch bars using a sharp knife for uniform pieces.
For the Chocolate Coating:
-
Melt chocolate: Melt sugar-free dark chocolate with heavy cream and vanilla in a heatproof bowl over simmering water. Stir until glossy and velvety smooth.
-
Dip wafers: Dip each wafer bar into melted chocolate using forks, coating all sides evenly. Tap off excess gently and place bars on fresh parchment.
-
Chill bars: Refrigerate coated bars for 20 minutes or until chocolate sets firm. Remove, let sit 2 minutes at room temperature, then enjoy or store airtight.
Optional: Sprinkle sea salt flakes or crushed nuts before chilling for a gourmet twist.
Exact quantities are listed in the recipe card below.
Sugar Free Kit Kat Variations
Feel free to get creative and tailor this delightful recipe to your taste and dietary preferences!
-
Nut-Free: Replace almond flour with sunflower seed flour for a nut-free alternative, still keeping that lovely crunch.
-
Vegan: Swap egg whites with aquafaba (chickpea brine) to bind the wafers while keeping it completely plant-based. Each bite will be just as indulgent!
-
Coconut Twist: Add shredded unsweetened coconut to the batter for a tropical flair; it brings a delightful chewiness that enhances the crunch.
-
Minty Fresh: Mix in a few drops of peppermint extract into the chocolate coating for a refreshing minty flavor that pairs perfectly with chocolate.
-
Chili Heat: Stir in a pinch of cayenne pepper into the chocolate coating for a surprising spicy kick; it will tantalize your taste buds!
-
Peanut Butter Love: Spread a thin layer of sugar-free peanut butter between the wafer layers for a rich and creamy contrast.
-
Chocolate Variance: Use various types of sugar-free chocolate such as milk chocolate or white chocolate for different flavor profiles; a unique twist each time!
-
Crunchy Surprise: Fold in toasted coconut or crushed sugar-free cookies into the wafer batter for added texture and surprise in every bite.
Embrace these variations as a way to make this recipe fit your lifestyle and preferences while still delighting your taste buds!
Expert Tips for Sugar Free Kit Kat
- Use Fresh Ingredients: Always use fresh almond flour and egg whites to ensure the wafers stay crisp and don’t become soggy or rubbery.
- Thin Batter Spread: Spread the batter evenly and thin (about 1/8-inch) for the perfect wafer crunch; too thick will result in a chewy texture.
- Chocolate Melting: Melt sugar-free chocolate gently over low heat to avoid seizing or burning, stirring constantly for a smooth coating.
- Cooling Time: Let wafers cool fully before dipping to prevent chocolate melting and smudging, which preserves the neat bar shape.
- Chill Properly: Refrigerate the coated bars until the chocolate sets firm; skipping this step can cause sticky, messy bars.
- Avoid Overbaking: Watch baking time carefully—overbaked wafers become too hard or brittle, losing that ideal Sugar Free Kit Kat snap.
What to Serve with Sugar Free Kit Kat?
Indulging in a homemade treat is about more than just the dessert itself; it’s about creating an inviting experience for you and your loved ones.
- Fresh Berries: Their bright, tart flavor perfectly balances the rich chocolate, adding a burst of freshness to each bite.
- Vanilla Ice Cream: A scoop of creamy vanilla ice cream brings a delightful creaminess that beautifully complements the crunchy texture of the Kit Kat.
Imagine enjoying a Kit Kat alongside ice cream on a warm afternoon; the contrast is as delightful as the combination.
- Herbal Tea: The aromatic notes of chamomile or mint tea soothe the palate, wonderfully pairing with the sweetness of your treat.
- Dark Chocolate Dipped Fruit: Keep the chocolate theme going with fruits dipped in sugar-free dark chocolate—a luscious pairing offering extra flavor and texture.
- Coffee: A warm cup of coffee enhances the rich chocolate flavors, making it a perfect afternoon pick-me-up, especially for chocolate lovers.
Finish off your joyful moment with a refreshing touch or a cup of coffee, bringing an inviting end to your indulgent experience.
How to Store and Freeze Sugar Free Kit Kat
Room Temperature: Keep your Sugar Free Kit Kat bars in an airtight container at room temperature for up to 5 days to maintain freshness and crunch.
Fridge: If you prefer a firmer texture, store the bars in the refrigerator. They’ll last for 1–2 weeks but may absorb moisture, so seal them well.
Freezer: To extend their shelf life, freeze the bars for up to 3 months. Wrap each in plastic wrap and place them in a freezer-safe container to prevent freezer burn.
Reheating: For the best experience, enjoy straight from the fridge or allow to come to room temperature after freezing for an ideal biting texture!
Make Ahead Options
Making these Sugar Free Kit Kat treats ahead of time is a game-changer for busy home cooks! You can prepare the wafer layers up to 24 hours in advance by baking them, cooling, and storing them in an airtight container at room temperature. For even greater convenience, dip the cooled wafers in chocolate and refrigerate the bars for up to 3 days before serving. This not only saves time but helps the flavors meld beautifully, ensuring they taste just as delicious. When you’re ready to enjoy, simply take them out of the fridge and let them sit for a couple of minutes to soften slightly—they’ll be perfect for satisfying those chocolate cravings any day of the week!
Best Sugar Free Kit Kat Recipe: Indulgent Treat Without Guilt Recipe FAQs
How do I know if the almond flour and egg whites are fresh enough for the wafers?
Fresh almond flour should be free of any musty or rancid smell, and it should look light and powdery without clumps. For egg whites, use them as soon as possible after separating—fresh egg whites are clear and slightly viscous, not watery or cloudy. Freshness is key to crisp, airy wafers!
What’s the best way to store homemade Sugar Free Kit Kat bars to keep them crunchy?
I recommend an airtight container at room temperature, away from humidity and direct sunlight. Stored this way, the bars stay crisp for up to 5 days. If you prefer a firmer bite, refrigerate them for 1 to 2 weeks but ensure they’re sealed tightly to prevent moisture absorption that can soften the wafers.
Can I freeze the Sugar Free Kit Kat bars, and how should I thaw them?
Absolutely! Wrap each bar individually in plastic wrap, then place them in a freezer-safe container or zip-top bag. Freeze for up to 3 months. When ready to enjoy, thaw them in the fridge for a few hours or at room temperature for about 15–20 minutes. This method keeps the chocolate glossy and the wafers perfectly crisp.
What if my wafers come out soggy or chewy—how can I fix or prevent that?
This usually means the batter was spread too thick or the wafers were underbaked. Make sure you spread the batter thinly (about 1/8 inch) and bake until the edges are light golden brown and wafers feel firm. Also, let wafers cool completely before dipping in chocolate to avoid melting and sogginess.
Are these Sugar Free Kit Kat bars safe for pets or suitable for common allergies?
While sugar-free chocolate is great for humans, chocolate is toxic to dogs and some other pets—so keep these treats well out of their reach! The recipe contains nuts (almond flour) and dairy (butter, cream); anyone with nut or dairy allergies should avoid or substitute these ingredients cautiously.
Best Sugar Free Kit Kat Recipe: Indulgent Treat Without Guilt
Ingredients
Equipment
Method
- Preheat oven to 350°F and line a baking sheet with parchment paper.
- In a bowl, whisk almond flour, erythritol, egg whites, and melted butter until smooth and slightly thick.
- Spread batter thinly (about 1/8-inch thick) onto the prepared sheet. Bake 12–15 minutes until edges turn light golden brown.
- Allow wafers to cool completely on the countertop (about 10 minutes). Cut into 3×1-inch bars.
- Melt sugar-free dark chocolate with heavy cream and vanilla in a heatproof bowl over simmering water. Stir until glossy.
- Dip each wafer bar into melted chocolate using forks, coating all sides evenly.
- Refrigerate coated bars for 20 minutes or until chocolate sets firm.