
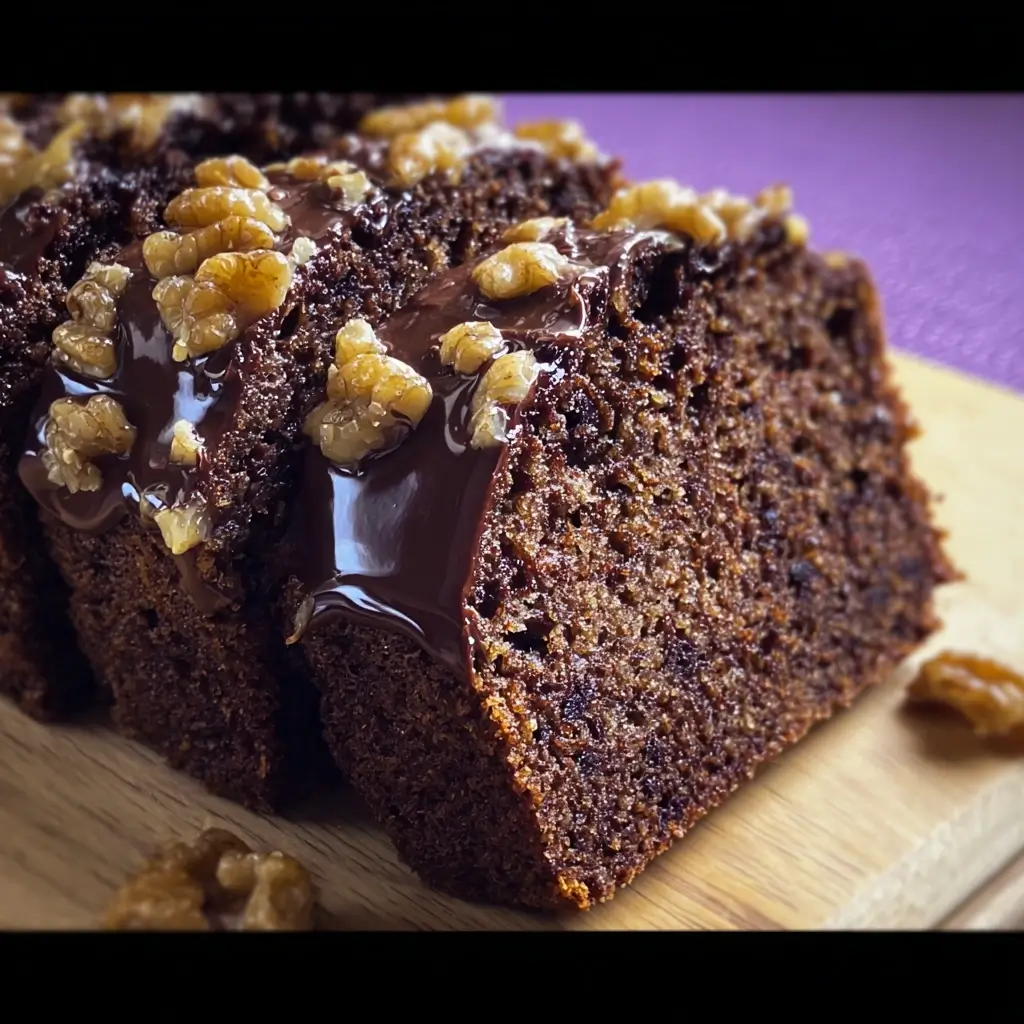

It’s one of those universal truths: the aroma of banana bread baking is pure comfort. For years, I’ve been on a quest to perfect a vegan version that doesn’t just mimic the classic but stands proudly on its own. This Vegan Chocolate Banana Nut Bread is the triumphant result of countless experiments, a few happy accidents, and many, many ripe bananas. The first time I baked this exact iteration, my kitchen filled with that intoxicating scent – sweet bananas, rich chocolate, and toasted nuts. My family, initially skeptical of “another vegan experiment,” were drawn in by the smell alone. The moment of truth came when they took their first bites. Silence, then a chorus of “Mmmms!” It was moist, decadent, perfectly sweet, and packed with delightful textures. The chocolate chips melt into gooey pockets, the nuts provide a satisfying crunch, and the banana flavor shines through beautifully. It’s become a household staple, disappearing almost as quickly as it cools. This isn’t just a recipe; it’s a guaranteed crowd-pleaser, a testament to how incredible plant-based baking can be.
The Ultimate Vegan Chocolate Banana Nut Bread Recipe
This recipe has been carefully crafted to deliver a moist, flavorful, and utterly decadent loaf every single time. The combination of ripe bananas, rich cocoa, gooey chocolate chips, and crunchy nuts makes it an irresistible treat for any occasion.
Yields: 1 standard loaf (approximately 10-12 slices)
Prep time: 20 minutes
Bake time: 55-65 minutes
Ingredients:
- For the “Flax Egg”:
- 1 tablespoon ground flaxseed
- 3 tablespoons warm water
- Dry Ingredients:
- 1 ¾ cups (210g) all-purpose flour (or use 1 cup all-purpose and ¾ cup whole wheat for a nuttier flavor)
- ¼ cup (25g) unsweetened cocoa powder (good quality makes a difference!)
- 1 teaspoon baking soda
- ½ teaspoon baking powder
- ½ teaspoon salt
- ½ teaspoon ground cinnamon
- ¼ teaspoon ground nutmeg (optional, but lovely)
- Wet Ingredients:
- 3-4 very ripe medium bananas (about 1 ½ cups mashed) – the riper, the sweeter!
- ½ cup (100g) granulated sugar (or use brown sugar for extra moisture)
- ¼ cup (60ml) unsweetened plant-based milk (almond, soy, or oat work well)
- ⅓ cup (80ml) neutral-flavored vegetable oil (like canola, sunflower, or melted coconut oil)
- 1 teaspoon vanilla extract
- Add-ins:
- ¾ cup (130g) vegan semi-sweet chocolate chips or chunks (plus extra for sprinkling on top)
- ½ cup (60g) chopped walnuts or pecans (plus extra for sprinkling on top)
Step-by-Step Instructions to Baking Perfection
Follow these instructions carefully, and you’ll be rewarded with a loaf of vegan chocolate banana nut bread that’s sure to impress. Remember, baking is a science, but it’s also an art – enjoy the process!
- Preheat and Prepare: Preheat your oven to 350°F (175°C). Grease and flour a standard 9×5 inch loaf pan, or line it with parchment paper, leaving an overhang on two sides for easy removal. This step is crucial to prevent sticking and ensure your beautiful loaf comes out cleanly.
- Make the Flax Egg: In a small bowl, whisk together the ground flaxseed and warm water. Set aside for at least 5-10 minutes to thicken. This mixture will act as a binder, similar to a traditional egg. You’ll notice it develop a gel-like consistency.
- Combine Dry Ingredients: In a large mixing bowl, whisk together the all-purpose flour, cocoa powder, baking soda, baking powder, salt, cinnamon, and nutmeg (if using). Whisking helps to aerate the flour and distribute the leavening agents evenly, which contributes to a lighter, fluffier bread.
- Mash Bananas and Combine Wet Ingredients: In a separate medium bowl, mash the ripe bananas thoroughly with a fork until mostly smooth, but a few small lumps are okay – they add character! Add the granulated sugar, plant-based milk, vegetable oil, vanilla extract, and the prepared flax egg to the mashed bananas. Whisk everything together until well combined. The mixture should be fragrant and relatively smooth.
- Combine Wet and Dry: Pour the wet banana mixture into the bowl with the dry ingredients. Using a spatula, gently fold the ingredients together until just combined. Be careful not to overmix! A few streaks of flour are perfectly fine at this stage. Overmixing develops the gluten in the flour too much, which can result in a tough or dense bread. We’re aiming for tender and moist.
- Fold in Add-ins: Gently fold in the vegan chocolate chips and chopped nuts, reserving a small amount of each for sprinkling on top if desired. Distribute them evenly throughout the batter.
- Transfer to Pan and Bake: Pour the batter into the prepared loaf pan and spread it evenly with the spatula. If you reserved some chocolate chips and nuts, sprinkle them over the top. This not only looks appealing but adds an extra textural element to the crust.
- Bake: Place the loaf pan in the preheated oven on the center rack. Bake for 55-65 minutes, or until a wooden skewer or toothpick inserted into the center of the loaf comes out clean or with a few moist crumbs attached (but no wet batter). If you notice the top browning too quickly, you can loosely tent it with aluminum foil for the last 15-20 minutes of baking.
- Cool Completely: Once baked, remove the loaf from the oven and let it cool in the pan on a wire rack for at least 15-20 minutes. Then, carefully use the parchment paper overhangs (if used) or invert the pan to remove the loaf and let it cool completely on the wire rack before slicing. This is a very important step! Slicing warm banana bread can cause it to be gummy and fall apart. Patience here will be rewarded with perfectly structured slices.
Nutrition Facts (Estimated)
Understanding the nutritional content can be helpful, especially if you’re tracking your intake. Please note these are estimates and can vary based on specific ingredients and brands used.
- Servings: 1 loaf (approximately 10-12 slices)
- Calories per serving (assuming 12 slices): Approximately 280-320 calories
This bread is a delightful treat, rich in flavor and satisfyingly indulgent. While it contains beneficial ingredients like bananas and nuts, it’s best enjoyed as part of a balanced diet. The bananas provide potassium and fiber, while nuts offer healthy fats and protein. The vegan nature means it’s cholesterol-free.
Preparation and Baking Time Breakdown
Knowing how long each step takes can help you plan your baking session effectively.
- Active Preparation Time: 20 minutes
- Gathering ingredients: 5 minutes
- Making flax egg: 1 minute (plus 5-10 minutes resting)
- Mixing dry ingredients: 2 minutes
- Mashing bananas and mixing wet ingredients: 5 minutes
- Combining wet and dry, folding in add-ins: 3 minutes
- Preparing pan and transferring batter: 4 minutes
- Baking Time: 55-65 minutes
- Cooling Time: At least 1-2 hours (crucial for slicing)
- Total Time (from start to sliceable): Approximately 2 hours 15 minutes to 3 hours 25 minutes
While the total time might seem long, most of it is hands-off baking and cooling time. The actual effort involved is minimal, making this a great recipe for a lazy weekend morning or an afternoon baking project.
How to Serve Your Delicious Vegan Chocolate Banana Nut Bread
This bread is wonderfully versatile. Here are some delightful ways to enjoy your freshly baked loaf:
- Simply Sliced: Enjoy a thick slice as is, at room temperature. The flavors are perfectly balanced on their own.
- Warmed Up: Gently warm a slice in the microwave for 10-15 seconds or in a toaster oven. This makes the chocolate chips extra gooey and enhances the aroma.
- With a Spread:
- A pat of vegan butter melting into a warm slice is classic comfort.
- A smear of peanut butter or almond butter adds extra protein and nutty flavor.
- For a truly decadent treat, try a dollop of vegan chocolate hazelnut spread.
- Alongside a Hot Beverage:
- Perfect with your morning coffee or afternoon tea.
- A glass of chilled plant-based milk is also a great companion.
- As a Dessert:
- Serve a slice with a scoop of vegan vanilla ice cream.
- Drizzle with a little vegan caramel or chocolate sauce.
- For Breakfast or Brunch: It’s substantial enough to be a satisfying breakfast item, especially when paired with some fresh fruit.
- Toasted: Slices can be toasted for a crispier exterior, which is especially nice if the bread is a day or two old.
Additional Tips for the Best Banana Bread Experience
Unlock the full potential of your vegan chocolate banana nut bread with these five expert tips:
- The Riper, The Better (Bananas): This cannot be stressed enough. Use bananas that are heavily speckled with brown or even mostly black. Overripe bananas are much sweeter (reducing the need for extra sugar) and provide superior moisture and banana flavor. If your bananas aren’t ripe enough, you can speed up the process by placing them in a paper bag for a day or two, or even bake them in their skins at a low temperature (around 300°F/150°C) for 15-20 minutes until softened and blackened.
- Don’t Overmix the Batter: When combining wet and dry ingredients, mix only until they are just incorporated. A few small lumps or streaks of flour are okay. Overmixing develops the gluten in the flour, leading to a tough, dense, and sometimes rubbery loaf instead of the tender, moist crumb we’re aiming for. Use a spatula and gentle folding motions.
- Measure Flour Correctly: The most common baking mistake is adding too much flour. Instead of scooping flour directly from the bag with your measuring cup (which compacts it), use the “spoon and level” method. Lightly spoon the flour into your measuring cup until it’s overflowing, then use the back of a knife to level it off. Alternatively, for utmost accuracy, use a kitchen scale to weigh your flour (210g for this recipe).
- Customize Your Add-Ins: Feel free to get creative!
- Nuts: While walnuts and pecans are classic, try hazelnuts or even omit nuts for a nut-free version (ensure your chocolate chips are also nut-free if catering to an allergy).
- Chocolate: Experiment with different types of vegan chocolate – dark chocolate chunks for intense flavor, or even vegan white chocolate chips for a different twist.
- Spices: Amp up the cinnamon, add a pinch of cardamom or allspice, or include a little orange zest for a bright note.
- Dried Fruit: A handful of dried cranberries or chopped dates could add another layer of sweetness and texture.
- Proper Storage for Lasting Freshness: Once completely cooled, store your vegan chocolate banana nut bread in an airtight container at room temperature for up to 3-4 days. For longer storage, you can refrigerate it for up to a week (though it might dry out slightly; warming slices helps). It also freezes beautifully! Wrap the whole loaf or individual slices tightly in plastic wrap, then in aluminum foil or a freezer-safe bag, and freeze for up to 3 months. Thaw at room temperature or gently reheat.
Frequently Asked Questions (FAQ)
Here are answers to some common questions you might have about this vegan chocolate banana nut bread recipe:
- Q: Can I make this recipe gluten-free?
- A: Yes, you likely can! For best results, use a good quality gluten-free all-purpose flour blend that contains xanthan gum. If your blend doesn’t include xanthan gum, you may need to add about ½ to 1 teaspoon. Gluten-free baked goods can sometimes be a bit drier, so ensure your bananas are very ripe and moist. The texture might be slightly different from the original, but it should still be delicious.
- Q: Can I substitute the oil with something else, like applesauce or more banana?
- A: You can experiment with replacing some of the oil with unsweetened applesauce or more mashed banana for a lower-fat version. However, oil contributes significantly to the moistness and tender crumb of the bread. Replacing all of it might result in a denser, gummier texture. If you try, perhaps start by replacing half the oil and see how you like the results.
- Q: My bananas aren’t very ripe. Can I still use them?
- A: Very ripe bananas are crucial for sweetness and moisture. If your bananas are still yellow or only lightly speckled, your bread might be less sweet and a bit drier. You can try to quick-ripen them by baking them in their skins at 300°F (150°C) for 15-20 minutes until they soften and the skins turn black. Let them cool before mashing. Alternatively, you might need to add an extra tablespoon or two of sugar to the recipe.
- Q: How do I know when the banana bread is perfectly baked?
- A: The most reliable way is the toothpick test. Insert a wooden skewer or toothpick into the center of the loaf. If it comes out clean (no wet batter) or with just a few moist crumbs clinging to it, the bread is done. If there’s wet batter, it needs more time. Also, the top should be golden brown and feel slightly springy to the touch. The edges will start to pull away from the sides of the pan.
- Q: Why did my banana bread turn out dense or gummy?
- A: There are a few common culprits for dense or gummy banana bread:
- Overmixing: As mentioned in the tips, overmixing the batter develops too much gluten, leading to a tough texture.
- Too much liquid/banana or not enough flour: Ensure accurate measurements. If bananas are exceptionally large or watery, it can affect the ratio.
- Underbaking: If the bread isn’t baked through, the center can be gummy.
- Slicing while too warm: This is a big one! The bread continues to set as it cools. Slicing it prematurely can make the texture seem dense and gummy.
- Oven temperature issues: An oven that’s not hot enough can lead to improper rising and a dense texture. Consider using an oven thermometer to check accuracy.
- A: There are a few common culprits for dense or gummy banana bread:
This Vegan Chocolate Banana Nut Bread is more than just a recipe; it’s an invitation to create something truly special in your own kitchen. It’s proof that plant-based baking can be every bit as satisfying, rich, and delicious as traditional versions. Happy baking!
Print
Vegan Chocolate Banana Nut Bread Recipe
Ingredients
- For the “Flax Egg”:
- 1 tablespoon ground flaxseed
- 3 tablespoons warm water
- Dry Ingredients:
- 1 ¾ cups (210g) all-purpose flour (or use 1 cup all-purpose and ¾ cup whole wheat for a nuttier flavor)
- ¼ cup (25g) unsweetened cocoa powder (good quality makes a difference!)
- 1 teaspoon baking soda
- ½ teaspoon baking powder
- ½ teaspoon salt
- ½ teaspoon ground cinnamon
- ¼ teaspoon ground nutmeg (optional, but lovely)
- Wet Ingredients:
- 3–4 very ripe medium bananas (about 1 ½ cups mashed) – the riper, the sweeter!
- ½ cup (100g) granulated sugar (or use brown sugar for extra moisture)
- ¼ cup (60ml) unsweetened plant-based milk (almond, soy, or oat work well)
- ⅓ cup (80ml) neutral-flavored vegetable oil (like canola, sunflower, or melted coconut oil)
- 1 teaspoon vanilla extract
- Add-ins:
- ¾ cup (130g) vegan semi-sweet chocolate chips or chunks (plus extra for sprinkling on top)
- ½ cup (60g) chopped walnuts or pecans (plus extra for sprinkling on top)
Instructions
- Preheat and Prepare: Preheat your oven to 350°F (175°C). Grease and flour a standard 9×5 inch loaf pan, or line it with parchment paper, leaving an overhang on two sides for easy removal. This step is crucial to prevent sticking and ensure your beautiful loaf comes out cleanly.
- Make the Flax Egg: In a small bowl, whisk together the ground flaxseed and warm water. Set aside for at least 5-10 minutes to thicken. This mixture will act as a binder, similar to a traditional egg. You’ll notice it develop a gel-like consistency.
- Combine Dry Ingredients: In a large mixing bowl, whisk together the all-purpose flour, cocoa powder, baking soda, baking powder, salt, cinnamon, and nutmeg (if using). Whisking helps to aerate the flour and distribute the leavening agents evenly, which contributes to a lighter, fluffier bread.
- Mash Bananas and Combine Wet Ingredients: In a separate medium bowl, mash the ripe bananas thoroughly with a fork until mostly smooth, but a few small lumps are okay – they add character! Add the granulated sugar, plant-based milk, vegetable oil, vanilla extract, and the prepared flax egg to the mashed bananas. Whisk everything together until well combined. The mixture should be fragrant and relatively smooth.
- Combine Wet and Dry: Pour the wet banana mixture into the bowl with the dry ingredients. Using a spatula, gently fold the ingredients together until just combined. Be careful not to overmix! A few streaks of flour are perfectly fine at this stage. Overmixing develops the gluten in the flour too much, which can result in a tough or dense bread. We’re aiming for tender and moist.
- Fold in Add-ins: Gently fold in the vegan chocolate chips and chopped nuts, reserving a small amount of each for sprinkling on top if desired. Distribute them evenly throughout the batter.
- Transfer to Pan and Bake: Pour the batter into the prepared loaf pan and spread it evenly with the spatula. If you reserved some chocolate chips and nuts, sprinkle them over the top. This not only looks appealing but adds an extra textural element to the crust.
- Bake: Place the loaf pan in the preheated oven on the center rack. Bake for 55-65 minutes, or until a wooden skewer or toothpick inserted into the center of the loaf comes out clean or with a few moist crumbs attached (but no wet batter). If you notice the top browning too quickly, you can loosely tent it with aluminum foil for the last 15-20 minutes of baking.
- Cool Completely: Once baked, remove the loaf from the oven and let it cool in the pan on a wire rack for at least 15-20 minutes. Then, carefully use the parchment paper overhangs (if used) or invert the pan to remove the loaf and let it cool completely on the wire rack before slicing. This is a very important step! Slicing warm banana bread can cause it to be gummy and fall apart. Patience here will be rewarded with perfectly structured slices.
Nutrition
- Serving Size: One Normal Portion
- Calories: 280-320