


Ah, venison chili. Just the thought of it conjures up images of frosty evenings, the comforting aroma filling the kitchen, and the satisfying warmth spreading through you with every spoonful. For our family, this isn’t just a recipe; it’s a tradition, especially after a successful hunting season. I remember the first time I perfected this particular blend of spices and ingredients. The kids, usually a bit hesitant about game meat, devoured their bowls and even asked for seconds. My partner, a seasoned chili connoisseur, declared it “the best darn venison chili” he’d ever had. The secret, I believe, lies in balancing the lean, rich flavor of the venison with a robust, smoky, and slightly spicy symphony of seasonings, all simmered to perfection until the meat is incredibly tender and the flavors have melded into something truly magical. It’s hearty enough to be a meal on its own, especially when loaded with favorite toppings, and it only gets better the next day. This recipe has become our go-to for chilly autumn nights, game day gatherings, and casual get-togethers with friends, always eliciting rave reviews and requests for the recipe. So, get ready to create a pot of venison chili that will undoubtedly become a new favorite in your household too!
The Ultimate Hearty Venison Chili Recipe
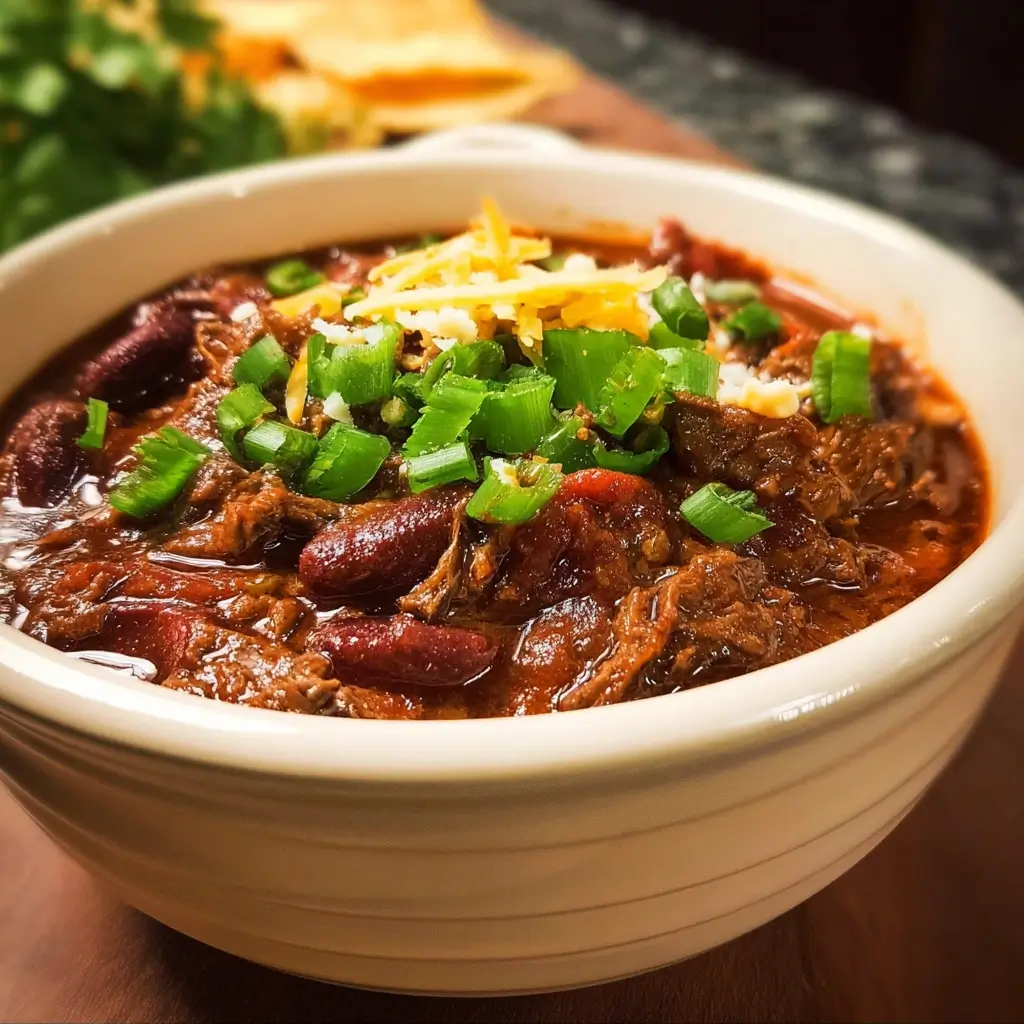
This recipe is designed to deliver a rich, deeply flavored chili that highlights the best qualities of venison. It’s robust, a little smoky, and perfectly spiced.
Yields: 8-10 servings
Prep time: 30 minutes
Cook time: 2 – 3 hours (or longer for even deeper flavor)
Ingredients
This recipe calls for a robust list of ingredients, each playing a crucial role in building layers of flavor. Don’t be intimidated by the length; many are common pantry staples, especially if you’re a chili enthusiast.
- For the Venison and Base:
- 2 tablespoons olive oil or bacon grease (bacon grease adds incredible smoky depth)
- 2 pounds ground venison (if you have venison stew meat, you can dice it small or grind it yourself)
- 1 large yellow onion, chopped (about 1.5 cups)
- 2 bell peppers (any color, I like a mix of red and green), chopped (about 2 cups)
- 4-6 cloves garlic, minced (about 2 tablespoons)
- 1-2 jalapeños, minced (seeds removed for less heat, optional)
- Spices & Seasonings:
- 1/4 cup chili powder (use a good quality one, or a blend of ancho, pasilla, and chipotle powders for complexity)
- 2 tablespoons ground cumin
- 1 tablespoon smoked paprika (this is key for a smoky flavor without liquid smoke)
- 1 tablespoon dried oregano (Mexican oregano if you have it)
- 1 teaspoon cocoa powder (unsweetened, for depth and richness – trust me!)
- 1 teaspoon ground coriander
- 1/2 teaspoon cayenne pepper (or more, to taste, optional for extra heat)
- 2 teaspoons coarse sea salt (or to taste, adjust later)
- 1 teaspoon freshly ground black pepper (or to taste)
- 1-2 dried chipotle peppers, rehydrated and minced, or 1-2 teaspoons chipotle powder (for smoky heat, optional)
- 2 bay leaves
- Liquids & Tomatoes:
- 1 (28-ounce) can crushed tomatoes (fire-roasted if available for extra smokiness)
- 1 (15-ounce) can diced tomatoes, undrained (again, fire-roasted is great)
- 1 (15-ounce) can tomato sauce
- 1 (6-ounce) can tomato paste (this thickens and deepens tomato flavor)
- 2-3 cups beef broth or venison stock (low sodium preferred, start with 2 and add more if needed)
- 1/4 cup apple cider vinegar or red wine vinegar (added at the end to brighten flavors)
- 1 tablespoon Worcestershire sauce
- 1 tablespoon brown sugar or maple syrup (optional, to balance acidity)
- Beans (Optional, but traditional for many):
- 1 (15-ounce) can kidney beans, rinsed and drained
- 1 (15-ounce) can pinto beans, rinsed and drained
- 1 (15-ounce) can black beans, rinsed and drained
(Feel free to use your favorite combination or omit beans for a Texas-style chili)
Instructions
Follow these steps carefully to build layers of flavor that will make your venison chili truly unforgettable. Patience during the simmering process is key.
- Prepare Aromatics and Brown Venison:
- Heat olive oil or bacon grease in a large, heavy-bottomed pot or Dutch oven over medium-high heat.
- Add the chopped onion and bell peppers. Sauté for 5-7 minutes, until softened and lightly caramelized.
- Add the minced garlic and jalapeño (if using) and cook for another 1-2 minutes until fragrant. Be careful not to burn the garlic.
- Push the vegetables to one side of the pot. Add the ground venison to the other side. Break it up with a spoon and cook until browned, about 7-10 minutes. Drain off any excess fat if necessary. Venison is lean, so there might not be much. If your pot isn’t large enough, you might need to brown the venison in batches to ensure it browns properly rather than steams.
- Bloom the Spices:
- Once the venison is browned, stir it together with the vegetables.
- Add all the dry spices: chili powder, cumin, smoked paprika, oregano, cocoa powder, coriander, cayenne pepper (if using), salt, and black pepper. If using dried chipotle peppers (rehydrated and minced) or chipotle powder, add it now.
- Stir well to coat the meat and vegetables. Cook for 2-3 minutes, stirring constantly. This step, known as “blooming” the spices, toasts them slightly and really brings out their flavor, making a huge difference in the final chili.
- Add Tomatoes and Liquids:
- Stir in the tomato paste and cook for 2-3 minutes, allowing it to caramelize slightly. This deepens its flavor.
- Add the crushed tomatoes, diced tomatoes (undrained), and tomato sauce. Stir everything together thoroughly.
- Pour in 2 cups of the beef broth or venison stock and the Worcestershire sauce. Add the bay leaves. If using brown sugar or maple syrup, stir it in now.
- Bring the mixture to a gentle simmer.
- Simmer to Perfection:
- Once simmering, reduce the heat to low, cover the pot, and let the chili cook for at least 1.5 hours, stirring occasionally to prevent sticking. For the best, most developed flavor, simmer for 2.5 to 3 hours, or even longer. The longer it simmers, the more tender the venison will become and the more the flavors will meld.
- If the chili becomes too thick during simmering, add the remaining cup of broth (or more, if needed) to reach your desired consistency.
- Add Beans (if using) and Finish:
- If you’re using beans, stir in the rinsed and drained kidney beans, pinto beans, and black beans during the last 30 minutes of cooking. This allows them to heat through and absorb some of the chili flavor without becoming mushy.
- After the long simmer, remove the bay leaves. Stir in the apple cider vinegar or red wine vinegar. This final touch of acidity brightens up all the rich, deep flavors.
- Taste the chili and adjust seasonings as needed. You might want more salt, pepper, or a pinch more cayenne for heat.
- Rest (Recommended):
- For the absolute best flavor, let the chili rest for at least 30 minutes before serving. Even better, make it a day ahead! The flavors continue to meld and deepen as it sits. Reheat gently on the stovetop.
Nutrition Facts
- Servings: This recipe makes approximately 8-10 hearty servings.
- Calories per serving (approximate): Around 350-450 calories per serving, without toppings. This can vary based on the exact leanness of your venison, whether you use bacon grease, and the specific brands of canned goods. Toppings will add to the calorie count.
This estimate considers a balanced mix of lean venison, beans, and vegetables. It’s packed with protein and fiber, making it a very satisfying meal.
Preparation Time
Understanding the time commitment helps in planning your cooking day.
- Active Preparation Time (Chopping, Browning, etc.): Approximately 30-40 minutes. This includes dicing vegetables, mincing garlic, and browning the venison.
- Simmering Time: 1.5 hours (minimum) to 3 hours (recommended for best flavor). Some chili aficionados swear by even longer, slower simmers.
- Total Time: Approximately 2 hours 10 minutes to 3 hours 40 minutes (excluding optional resting time overnight).
While the simmering time is long, it’s mostly hands-off, requiring only occasional stirring. This is a perfect weekend cooking project.
How to Serve Your Venison Chili
Chili is a wonderfully versatile dish, and the serving options are part of the fun! Here are some classic and creative ways to enjoy your homemade venison chili:
- Classic Bowl with Toppings: This is the most popular way. Set up a “chili bar” so everyone can customize their bowl.
- Dairy: Shredded cheddar cheese (sharp or Monterey Jack works well), sour cream or plain Greek yogurt, crumbled cotija cheese.
- Fresh & Green: Chopped fresh cilantro, sliced green onions or chives, diced white or red onion, fresh or pickled jalapeño slices.
- Crunch: Crushed tortilla chips, Fritos corn chips, oyster crackers.
- Creamy: Diced avocado or a dollop of guacamole.
- Extra Heat: Your favorite hot sauce, a sprinkle of red pepper flakes.
- Paired with Starches:
- Cornbread: A classic pairing. Serve with a warm slice of traditional cornbread, honey cornbread, or even a spicy jalapeño-cheddar cornbread.
- Rice: Serve over a bed of fluffy white or brown rice to soak up the delicious sauce.
- Baked Potatoes: Use the chili as a hearty topping for a baked potato or baked sweet potato. Add cheese and sour cream for a complete meal.
- Crusty Bread: Perfect for dipping and mopping up every last bit of chili from the bowl.
- As a Component in Other Dishes:
- Chili Cheese Fries: Ladle over crispy French fries and top with melted cheese.
- Chili Dogs: A generous spoonful over a grilled hot dog in a bun, topped with cheese and onions.
- Chili Mac: Mix with cooked macaroni pasta for a comforting chili mac and cheese.
- Nachos: Use as the meaty base for an epic platter of nachos, layered with chips, cheese, jalapeños, and all your favorite nacho toppings.
- Frito Pie: A Southern classic – serve directly in a bag of Fritos (or in a bowl over Fritos) topped with cheese and onions.
- Garnish Suggestions for the Pot:
- If serving directly from the pot at a gathering, a sprinkle of fresh cilantro and a swirl of sour cream can make it look even more inviting.
No matter how you choose to serve it, this venison chili is sure to be a crowd-pleaser. The key is to offer variety and let everyone enjoy it their favorite way.
Additional Tips for the Best Venison Chili
Elevate your venison chili from great to absolutely exceptional with these pro tips:
- Grind Your Own Venison (or Choose Wisely):
- If you process your own deer, grinding tougher cuts like shoulder or shank makes for fantastic chili meat. Consider adding about 10-20% beef or pork fat (like pork butt or bacon ends) to the grind if your venison is very lean. This adds moisture and flavor. If buying ground venison, ask your butcher about the cut and fat content. Using a coarser grind can also provide a more pleasant, rustic texture.
- Toast and Bloom Your Spices:
- Don’t skip the step of adding your dry spices to the pot before the liquids. Cooking them in the hot oil with the meat and vegetables for a couple of minutes (blooming) awakens their essential oils and deepens their flavors significantly. For an even more intense flavor, you can gently toast whole cumin seeds and coriander seeds in a dry skillet until fragrant, then grind them yourself before adding.
- The Magic of a Long, Slow Simmer:
- Patience is a virtue with chili. While it’s edible after an hour, a longer simmer (2-3 hours, or even more on very low heat) allows the venison to become incredibly tender and all the diverse flavors to meld together into a harmonious, complex taste. Use a heavy-bottomed pot or Dutch oven to distribute heat evenly and prevent scorching. Stir occasionally, and don’t be afraid to add a bit more broth if it gets too thick.
- Secret Flavor Boosters:
- Small additions can make a big impact. Consider these:
- Unsweetened Cocoa Powder or Dark Chocolate: Just a teaspoon or two adds incredible depth and richness, complementing the chili spices (as included in the recipe).
- Strong Brewed Coffee or Espresso Powder: A tablespoon or two of coffee or a teaspoon of espresso powder can enhance the savory, beefy notes.
- Beer: Substitute a cup of beef broth with a dark beer like a stout or porter for added malty complexity. Add it after browning the meat and let it reduce slightly.
- Smoked Salt or Liquid Smoke (use sparingly): If you don’t have smoked paprika or chipotle, a tiny dash of liquid smoke or using smoked salt can add that coveted smoky element.
- Small additions can make a big impact. Consider these:
- Make it Ahead – It Gets Better!
- Chili is one of those magical dishes that tastes even better the next day, or even two days later. The flavors continue to marry and deepen as it rests in the refrigerator. This makes it a perfect dish to prepare in advance for gatherings or for easy weeknight meals. Reheat gently on the stovetop, adding a splash of broth if needed to loosen it. It also freezes beautifully for up to 3-4 months.
By incorporating these tips, you’ll not only create a delicious venison chili but also understand the nuances that contribute to its exceptional flavor and texture.
FAQ: Your Venison Chili Questions Answered
Here are answers to some frequently asked questions about making venison chili:
Q1: My venison sometimes has a “gamey” taste. How can I minimize this in the chili?
- A: Several techniques can help. First, ensure all silverskin and as much visible fat as possible is trimmed from the venison before grinding or dicing, as these often contribute to gamey flavors. Soaking the venison cuts in buttermilk or a mild saltwater brine for a few hours (or overnight in the fridge) before cooking can also draw out some of the stronger flavors. Rinsing well and patting dry is essential after soaking. Additionally, the robust spices, long simmer time, and acidity (from tomatoes and vinegar) in this chili recipe are specifically designed to complement and mellow the natural flavor of venison. Adding a bit of pork or beef fat to the grind, as mentioned in the tips, can also help balance the flavor profile.
Q2: Can I make this venison chili in a slow cooker?
- A: Absolutely! A slow cooker is excellent for chili. To adapt this recipe:
- Complete steps 1 and 2 (sautéing vegetables, browning venison, blooming spices) on the stovetop in a skillet. This browning step is crucial for flavor development and shouldn’t be skipped.
- Transfer the browned meat/vegetable/spice mixture to your slow cooker.
- Add the tomatoes (crushed, diced, sauce, paste), 1.5-2 cups of broth (you might need less liquid in a slow cooker initially), Worcestershire sauce, bay leaves, and optional sugar.
- Stir well, cover, and cook on LOW for 6-8 hours or on HIGH for 3-4 hours.
- Add the rinsed and drained beans (if using) during the last 30-60 minutes of cooking.
- Stir in the vinegar before serving. Taste and adjust seasonings.
Q3: I don’t have all three types of beans listed. Can I use different beans or omit them?
- A: Yes, definitely! The bean combination is flexible. You can use all of one type (e.g., all kidney beans) or any combination you prefer. Black-eyed peas, cannellini beans, or even chickpeas could work. If you prefer chili without beans (often called “Texas chili” or “chili con carne”), simply omit them. You may want to slightly increase the amount of venison or add some diced vegetables like carrots or celery for bulk if you omit beans.
Q4: How spicy is this chili recipe, and how can I adjust the heat level?
- A: As written, with 1/2 teaspoon of cayenne and optional jalapeño with seeds removed, this chili has a mild to medium background warmth.
- To Make it Milder: Omit the cayenne pepper entirely and ensure all seeds and membranes are removed from the jalapeño (or omit the jalapeño too). You can also use a milder chili powder.
- To Make it Spicier: Increase the amount of cayenne pepper. Keep the seeds in the jalapeño, or add more jalapeños. Include the optional rehydrated chipotle peppers or chipotle powder for smoky heat. You can also add a few dashes of your favorite hot sauce at the end or serve it on the side. For a serious kick, consider adding a pinch of habanero powder or a finely minced serrano pepper along with the jalapeños. Always start with small additions and taste as you go – you can always add more heat, but it’s hard to take it away.
Q5: How long will leftover venison chili last, and what’s the best way to store it?
- A: Leftover venison chili stores very well.
- Refrigerator: Cool the chili completely (you can speed this up by placing the pot in an ice bath or dividing it into shallower containers). Then, transfer it to airtight containers and store it in the refrigerator for 3-4 days.
- Freezer: For longer storage, cool the chili completely and then transfer it to freezer-safe airtight containers or heavy-duty freezer bags. Leave about an inch of headspace for expansion. Properly stored, venison chili will maintain good quality in the freezer for 3-4 months, and can be safe to eat for even longer, though the texture might slightly change over extended periods.
- Reheating: Thaw frozen chili in the refrigerator overnight. Reheat gently on the stovetop over medium-low heat, stirring occasionally, until heated through. You may need to add a splash of broth or water if it has thickened too much. You can also reheat individual portions in the microwave.

Venison Chili Recipe
Ingredients
- For the Venison and Base:
- 2 tablespoons olive oil or bacon grease (bacon grease adds incredible smoky depth)
- 2 pounds ground venison (if you have venison stew meat, you can dice it small or grind it yourself)
- 1 large yellow onion, chopped (about 1.5 cups)
- 2 bell peppers (any color, I like a mix of red and green), chopped (about 2 cups)
- 4–6 cloves garlic, minced (about 2 tablespoons)
- 1–2 jalapeños, minced (seeds removed for less heat, optional)
- Spices & Seasonings:
- 1/4 cup chili powder (use a good quality one, or a blend of ancho, pasilla, and chipotle powders for complexity)
- 2 tablespoons ground cumin
- 1 tablespoon smoked paprika (this is key for a smoky flavor without liquid smoke)
- 1 tablespoon dried oregano (Mexican oregano if you have it)
- 1 teaspoon cocoa powder (unsweetened, for depth and richness – trust me!)
- 1 teaspoon ground coriander
- 1/2 teaspoon cayenne pepper (or more, to taste, optional for extra heat)
- 2 teaspoons coarse sea salt (or to taste, adjust later)
- 1 teaspoon freshly ground black pepper (or to taste)
- 1–2 dried chipotle peppers, rehydrated and minced, or 1-2 teaspoons chipotle powder (for smoky heat, optional)
- 2 bay leaves
- Liquids & Tomatoes:
- 1 (28-ounce) can crushed tomatoes (fire-roasted if available for extra smokiness)
- 1 (15-ounce) can diced tomatoes, undrained (again, fire-roasted is great)
- 1 (15-ounce) can tomato sauce
- 1 (6-ounce) can tomato paste (this thickens and deepens tomato flavor)
- 2–3 cups beef broth or venison stock (low sodium preferred, start with 2 and add more if needed)
- 1/4 cup apple cider vinegar or red wine vinegar (added at the end to brighten flavors)
- 1 tablespoon Worcestershire sauce
- 1 tablespoon brown sugar or maple syrup (optional, to balance acidity)
- Beans (Optional, but traditional for many):
- 1 (15-ounce) can kidney beans, rinsed and drained
- 1 (15-ounce) can pinto beans, rinsed and drained
- 1 (15-ounce) can black beans, rinsed and drained
(Feel free to use your favorite combination or omit beans for a Texas-style chili)
Instructions
- Prepare Aromatics and Brown Venison:
- Heat olive oil or bacon grease in a large, heavy-bottomed pot or Dutch oven over medium-high heat.
- Add the chopped onion and bell peppers. Sauté for 5-7 minutes, until softened and lightly caramelized.
- Add the minced garlic and jalapeño (if using) and cook for another 1-2 minutes until fragrant. Be careful not to burn the garlic.
- Push the vegetables to one side of the pot. Add the ground venison to the other side. Break it up with a spoon and cook until browned, about 7-10 minutes. Drain off any excess fat if necessary. Venison is lean, so there might not be much. If your pot isn’t large enough, you might need to brown the venison in batches to ensure it browns properly rather than steams.
- Bloom the Spices:
- Once the venison is browned, stir it together with the vegetables.
- Add all the dry spices: chili powder, cumin, smoked paprika, oregano, cocoa powder, coriander, cayenne pepper (if using), salt, and black pepper. If using dried chipotle peppers (rehydrated and minced) or chipotle powder, add it now.
- Stir well to coat the meat and vegetables. Cook for 2-3 minutes, stirring constantly. This step, known as “blooming” the spices, toasts them slightly and really brings out their flavor, making a huge difference in the final chili.
- Add Tomatoes and Liquids:
- Stir in the tomato paste and cook for 2-3 minutes, allowing it to caramelize slightly. This deepens its flavor.
- Add the crushed tomatoes, diced tomatoes (undrained), and tomato sauce. Stir everything together thoroughly.
- Pour in 2 cups of the beef broth or venison stock and the Worcestershire sauce. Add the bay leaves. If using brown sugar or maple syrup, stir it in now.
- Bring the mixture to a gentle simmer.
- Simmer to Perfection:
- Once simmering, reduce the heat to low, cover the pot, and let the chili cook for at least 1.5 hours, stirring occasionally to prevent sticking. For the best, most developed flavor, simmer for 2.5 to 3 hours, or even longer. The longer it simmers, the more tender the venison will become and the more the flavors will meld.
- If the chili becomes too thick during simmering, add the remaining cup of broth (or more, if needed) to reach your desired consistency.
- Add Beans (if using) and Finish:
- If you’re using beans, stir in the rinsed and drained kidney beans, pinto beans, and black beans during the last 30 minutes of cooking. This allows them to heat through and absorb some of the chili flavor without becoming mushy.
- After the long simmer, remove the bay leaves. Stir in the apple cider vinegar or red wine vinegar. This final touch of acidity brightens up all the rich, deep flavors.
- Taste the chili and adjust seasonings as needed. You might want more salt, pepper, or a pinch more cayenne for heat.
- Rest (Recommended):
- For the absolute best flavor, let the chili rest for at least 30 minutes before serving. Even better, make it a day ahead! The flavors continue to meld and deepen as it sits. Reheat gently on the stovetop.
Nutrition
- Serving Size: One Normal Portion
- Calories: 350-450


