

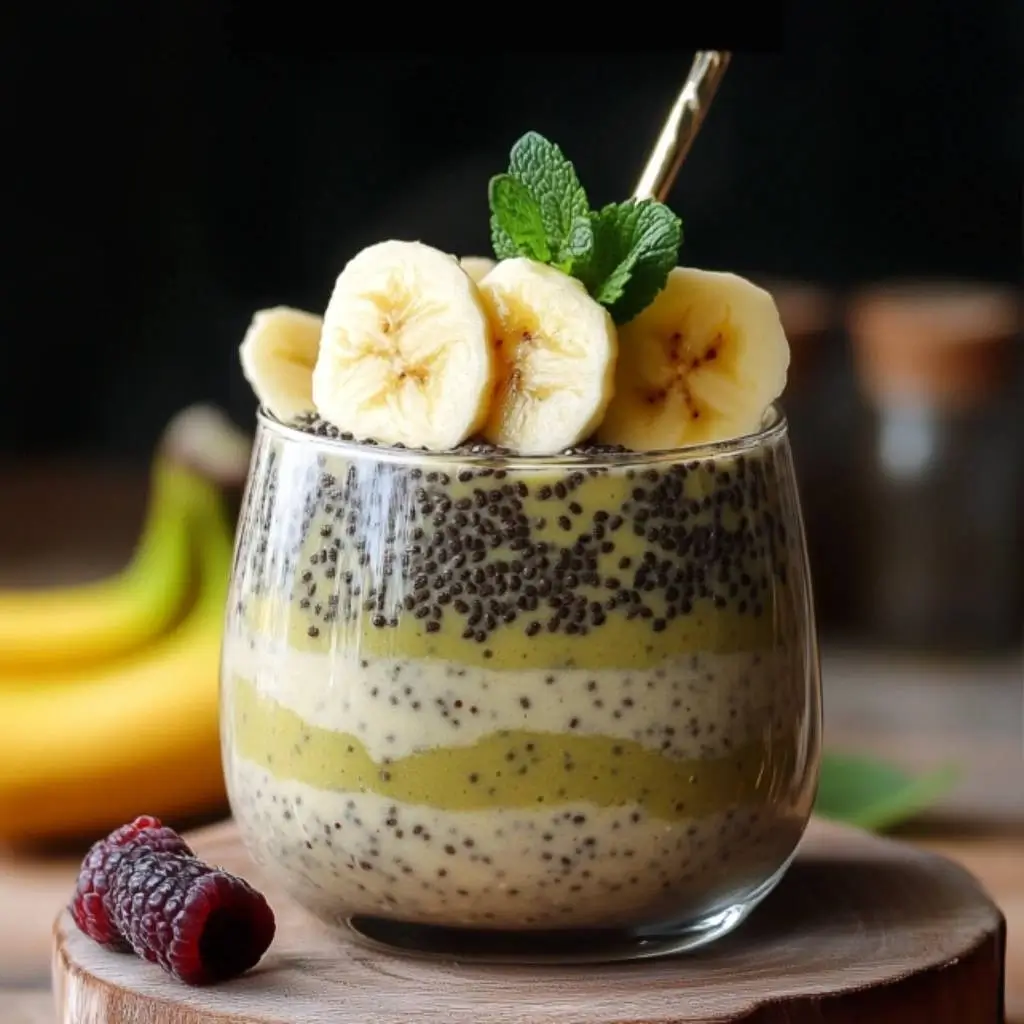

It’s become a morning ritual in our house – the gentle hum of the blender replaced by the quiet mash of a fork against ripe bananas. Honestly, I used to be skeptical about chia pudding. “Seeds in pudding?” I thought. But one busy weekday morning, desperate for a quick and healthy breakfast, I stumbled upon this banana chia pudding recipe. The simplicity was immediately appealing, and the ingredient list was short and wholesome. The first spoonful was a revelation – creamy, subtly sweet, and with a delightful texture that was nothing like I imagined. Now, even my kids, who are usually picky eaters, happily devour bowls of this pudding, especially when topped with fresh berries and a sprinkle of nuts. It’s become our go-to breakfast, snack, and even a light dessert. This banana chia pudding isn’t just easy to make; it’s genuinely delicious and incredibly versatile. If you’re looking for a healthy, fuss-free recipe that’s both satisfying and nutritious, look no further. This banana chia pudding is a game-changer.
Ingredients
This simple yet satisfying banana chia pudding relies on just a handful of wholesome ingredients, each playing a crucial role in creating the perfect texture and flavor. Let’s delve deeper into each component and understand why they are essential and if there are any potential substitutions you could consider.
- 2 Ripe Bananas: The star of the show, ripe bananas are not just about sweetness. They provide the natural base for this pudding, lending a creamy texture and that unmistakable banana flavor we all love. The ripeness is key here; the riper the banana, the sweeter and easier it will be to mash, resulting in a smoother pudding. Those brown spots you often see on banana peels are actually indicators of peak ripeness and sweetness! Beyond flavor and texture, bananas are packed with potassium, an essential electrolyte, and fiber, contributing to the pudding’s overall health benefits.
- Choosing the Right Bananas: Look for bananas that are mostly yellow with brown speckles. Avoid bananas that are still green, as they will be harder to mash and less sweet. Overripe bananas, with mostly brown peels, can also be used but might make the pudding a bit too sweet and intensely banana-flavored for some palates.
- Potential Substitutions: While bananas are central to this recipe, if you’re adventurous or have dietary restrictions, you could experiment with other fruits for a different flavor profile. Consider using:
- Avocado: For an ultra-creamy and less sweet pudding. You might need to add a bit more sweetener if you choose avocado.
- Mango: For a tropical twist. Ripe mangoes will provide sweetness and a smooth texture similar to bananas.
- Pumpkin Puree: Especially during fall, pumpkin puree can create a delicious and spiced chia pudding. You’ll definitely want to add spices like cinnamon and nutmeg if using pumpkin.
- Sweet Potato Puree: Similar to pumpkin, sweet potato puree adds a creamy texture and subtle sweetness. It also pairs well with warm spices.
- Applesauce: Unsweetened applesauce can be used, but it will be less creamy and more liquidy. You might need to adjust the amount of milk accordingly and potentially increase the chia seeds for a thicker consistency.
- 1/4 Cup Chia Seeds: These tiny black seeds are nutritional powerhouses and the magic ingredient that transforms liquid into pudding. Chia seeds are hydrophilic, meaning they absorb many times their weight in liquid. When soaked in almond milk (or any liquid), they swell and create a gel-like consistency, giving chia pudding its signature texture. Beyond their gelling abilities, chia seeds are packed with omega-3 fatty acids, fiber, protein, and antioxidants. They contribute significantly to the pudding’s health benefits, promoting satiety and digestive health.
- Types of Chia Seeds: You’ll typically find black or white chia seeds. Nutritionally, they are very similar. Black chia seeds are more common and what you’ll likely find in most stores. White chia seeds have a slightly milder flavor and can be visually less noticeable in lighter-colored puddings. Either type will work perfectly in this recipe.
- Potential Substitutions: While there isn’t a direct substitute for chia seeds in terms of creating the same pudding-like texture through gelling, you could consider:
- Flaxseeds (Ground): Ground flaxseeds also have gelling properties, although not as pronounced as chia seeds. If substituting, use ground flaxseeds and be aware that the texture might be slightly different and potentially less firm. Use roughly the same amount as chia seeds and adjust liquid as needed. Flaxseeds also have a nuttier flavor.
- Oat Flour: While not a direct gelling agent, oat flour can thicken liquids. You would need to cook oat flour slightly to activate its thickening properties, which deviates from the no-cook nature of chia pudding. This would significantly alter the recipe and is not a recommended direct substitution for texture.
- Agar Agar Powder: Agar agar is a vegan gelling agent derived from seaweed. It requires heating to activate and sets into a firmer jelly-like consistency than chia seeds. Using agar agar would create a different type of pudding, more akin to a jelly or panna cotta, and is not a direct substitute for the texture chia seeds provide.
- 2 Cups Almond Milk (or any plant-based milk): Almond milk provides the liquid base for the chia seeds to absorb and create the pudding. Its mild, slightly nutty flavor complements the banana without overpowering it. However, the beauty of this recipe lies in its versatility – you can easily use any plant-based milk you prefer or have on hand.
- Plant-Based Milk Options:
- Soy Milk: Offers a creamy texture and a good source of protein, similar to dairy milk in consistency.
- Oat Milk: Known for its creamy and slightly sweet flavor, oat milk is a popular choice for its texture and neutral taste. It will result in a richer and creamier pudding.
- Coconut Milk (Canned, Light or Full-Fat): Adds a distinct coconut flavor. Full-fat coconut milk will create a very rich and creamy pudding. Light coconut milk will be lighter in calories and less intensely coconut-flavored.
- Cashew Milk: Naturally creamy and slightly sweet, cashew milk is a good option for a smoother pudding.
- Rice Milk: Thinner in consistency and slightly sweeter than other plant-based milks. It might result in a less creamy pudding and potentially require a bit more chia seeds for thickening.
- Hemp Milk: Has a slightly nutty and earthy flavor. It is also a good source of omega-3 and omega-6 fatty acids.
- Dairy Milk: While the recipe is designed to be plant-based, you can absolutely use dairy milk (cow’s milk) if you prefer or don’t have plant-based milk available. The consistency and texture of the pudding will be similar.
- Plant-Based Milk Options:
- 1 tsp Vanilla Extract: Vanilla extract enhances the overall flavor profile, adding warmth and depth. It complements both the banana and the milk, creating a more rounded and delicious pudding. Pure vanilla extract is preferred for the best flavor, but vanilla essence can also be used as a more budget-friendly alternative.
- Vanilla Bean Paste: For an even more intense vanilla flavor and those beautiful flecks of vanilla bean, consider using vanilla bean paste. Use about 1 teaspoon of paste as a substitute for vanilla extract.
- Vanilla Powder: Vanilla powder is made from dried vanilla beans and offers a concentrated vanilla flavor. Use about 1/2 teaspoon of vanilla powder as a substitute for 1 teaspoon of extract.
- Substitutions (Non-Vanilla): If you don’t have vanilla or want to experiment with different flavors, consider:
- Almond Extract: Adds a nutty and slightly sweet flavor. Use sparingly, as almond extract is stronger than vanilla extract. Start with 1/2 teaspoon.
- Maple Extract: Complements the maple syrup and adds a richer, caramel-like note.
- Cinnamon: Adds warmth and spice, especially delicious if using pumpkin or sweet potato puree as a banana substitute.
- Nutmeg: Another warm spice that pairs well with banana and adds a touch of complexity.
- Lemon or Orange Zest: For a brighter, citrusy flavor.
- 1 tbsp Maple Syrup (optional): Maple syrup adds a touch of sweetness to the pudding. The ripeness of the bananas will contribute natural sweetness, so the maple syrup is optional, especially if you prefer a less sweet pudding or are watching your sugar intake. Maple syrup also adds a subtle caramel-like flavor that enhances the overall taste.
- Sweetener Alternatives: If you prefer not to use maple syrup, or want to explore other sweeteners, consider:
- Agave Nectar: A vegan sweetener with a neutral flavor and slightly thinner consistency than maple syrup.
- Honey: Not vegan, but a natural sweetener with a distinct floral flavor. Use sparingly as honey is sweeter than maple syrup.
- Dates (Medjool Dates, Pitted): For a natural and fiber-rich sweetener. You can blend 1-2 Medjool dates with the banana and milk mixture for sweetness and added caramel notes.
- Stevia or Monk Fruit Sweetener: For sugar-free options. Use according to package instructions as these sweeteners are very potent.
- Coconut Sugar: A less refined sugar with a caramel-like flavor. Use the same amount as maple syrup.
- Brown Sugar: Adds a molasses-like flavor. Use the same amount as maple syrup.
- Sweetener Alternatives: If you prefer not to use maple syrup, or want to explore other sweeteners, consider:
- A Pinch of Salt: A seemingly small addition, but salt plays a crucial role in enhancing the flavors of all the other ingredients. It balances the sweetness and brings out the nuances of the banana, vanilla, and maple syrup (if used). Just a pinch is enough to make a noticeable difference.
- Types of Salt: Regular table salt, sea salt, or kosher salt can be used. If using flaky sea salt, you might want to use a slightly larger pinch.
Instructions
Making banana chia pudding is incredibly straightforward, requiring just a few simple steps. Here’s a detailed breakdown of each step to ensure your pudding turns out perfectly every time:
- In a bowl, mash the bananas until smooth.
- Why Mash Smoothly? Mashing the bananas smoothly is key to achieving a creamy and lump-free pudding. Larger chunks of banana might not fully incorporate into the pudding and can result in an uneven texture.
- Best Tools for Mashing:
- Fork: A simple fork works perfectly well for mashing ripe bananas.
- Potato Masher: If you have one, a potato masher can make the job even quicker and easier, especially if you’re making a larger batch.
- Whisk (Firm Wire Whisk): A firm wire whisk can also be used to mash bananas, especially if they are very ripe.
- Tips for Easier Mashing:
- Ensure your bananas are truly ripe. They should be soft to the touch and easily mashed with a fork.
- If you’re using slightly less ripe bananas, you can microwave them for 15-30 seconds (with the peel on, but pricked with a fork) to soften them slightly before mashing.
- Smoothness Level: Aim for a relatively smooth mash. A few very small lumps are okay, but try to eliminate any large chunks for the best texture.
- Add almond milk, vanilla, maple syrup (if using), and salt to the mashed bananas. Mix well.
- Layering Ingredients: Adding the wet ingredients (milk, vanilla, maple syrup) to the mashed bananas helps to further break down any remaining lumps and create a smoother base for the chia seeds.
- Mixing Thoroughly: Ensure you mix these ingredients well with the mashed bananas. You want a homogenous mixture before adding the chia seeds so that the flavor is evenly distributed throughout the pudding.
- Taste Test (Optional): At this stage, you can taste the mixture and adjust the sweetness. If you prefer a sweeter pudding, add a bit more maple syrup or your chosen sweetener. Remember that the flavor will mellow slightly after chilling and the chia seeds will absorb some of the sweetness.
- Stir in chia seeds until evenly distributed.
- Even Distribution is Crucial: The key to preventing clumping and ensuring all chia seeds hydrate properly is to distribute them evenly throughout the banana-milk mixture.
- Stirring Technique: Use a whisk or a fork to vigorously stir the chia seeds into the mixture. Make sure to reach the bottom and sides of the bowl to incorporate all the seeds.
- Visual Check: Look closely to ensure there are no clumps of chia seeds sitting at the bottom of the bowl. The seeds should be dispersed throughout the liquid.
- Let the mixture sit for 5 minutes, then stir again to prevent clumping.
- The Initial Gelling Process: Chia seeds start to absorb liquid very quickly. Letting the mixture sit for 5 minutes allows the initial gelling process to begin.
- Why Re-stir? Even with thorough initial stirring, chia seeds can sometimes settle at the bottom and clump together as they start to hydrate. Re-stirring after 5 minutes helps to break up any clumps and redistribute the seeds, ensuring a smoother and more consistent pudding texture.
- Importance of this Step: Don’t skip this re-stirring step! It’s vital for preventing clumping and achieving the desired smooth texture of your chia pudding.
- Cover and refrigerate for at least 2 hours or overnight.
- Refrigeration Time: The minimum refrigeration time is 2 hours, but ideally, refrigerating overnight (or for at least 4-6 hours) is recommended for the best texture. This allows the chia seeds ample time to fully hydrate and create a thick and pudding-like consistency.
- Covering is Essential: Covering the bowl prevents the pudding from absorbing odors from the refrigerator and also prevents a skin from forming on the surface. Use an airtight container or plastic wrap to cover the bowl tightly.
- Overnight Advantage: Refrigerating overnight is incredibly convenient as it allows you to prepare the pudding ahead of time, making it perfect for a quick breakfast or snack the next day. The texture also tends to improve with longer chilling time, becoming even thicker and more pudding-like.
- Serve chilled, topped with fresh fruit or nuts if desired.
- Serving Temperature: Chia pudding is best served chilled. The cold temperature enhances the refreshing quality and texture of the pudding.
- Topping Ideas (Detailed in “How to Serve” section): The beauty of chia pudding is its versatility as a blank canvas for toppings. Get creative with fresh fruits, nuts, seeds, granola, nut butter, spices, and more! Toppings add flavor, texture, and visual appeal to your banana chia pudding.
Nutrition Facts (per serving)
This banana chia pudding is not only delicious but also packed with nutrients. Here’s a breakdown of the approximate nutritional information per serving, based on the recipe making approximately 2 servings. Keep in mind that these are estimates and can vary slightly depending on the specific brands and ripeness of the ingredients used.
- Servings: Approximately 2 servings per recipe (this can vary based on serving size).
- Calories: 150
- Calorie Breakdown: The calories primarily come from the bananas, almond milk, chia seeds, and maple syrup (if used). This makes it a relatively low-calorie yet satisfying snack or breakfast option.
- Compared to other breakfasts/snacks: Compared to many processed breakfast cereals, pastries, or sugary snacks, banana chia pudding is significantly lower in calories and higher in nutrients.
- Protein: 4g
- Protein Source: The protein mainly comes from the chia seeds and almond milk. While 4g might seem modest, it’s a decent amount for a snack or light breakfast, especially when combined with other protein sources throughout the day.
- Benefits of Protein: Protein is essential for satiety, muscle building and repair, and overall body function. Including protein in your breakfast or snack helps keep you feeling fuller for longer and can aid in stabilizing blood sugar levels.
- Carbs: 27g
- Carb Source: The carbohydrates primarily come from the bananas and maple syrup (if used). These are mainly natural sugars and fiber from the banana.
- Types of Carbs: The carbs in banana chia pudding are a mix of simple sugars (fructose from bananas) and complex carbohydrates (fiber from chia seeds and bananas). The fiber content helps to slow down the absorption of sugars, preventing rapid blood sugar spikes.
- Fat: 7g
- Fat Source: The fat primarily comes from the chia seeds and almond milk. These are primarily healthy fats, especially omega-3 fatty acids from chia seeds and monounsaturated fats from almond milk.
- Types of Fat: The majority of the fat is healthy unsaturated fat, beneficial for heart health and brain function. Omega-3 fatty acids are particularly important for reducing inflammation and supporting overall well-being.
- Fiber: 6g
- Fiber Source: The impressive fiber content comes primarily from the chia seeds and bananas.
- Benefits of Fiber: Fiber is crucial for digestive health, promoting regularity and feeding beneficial gut bacteria. It also contributes to satiety, helps regulate blood sugar levels, and can lower cholesterol. 6g of fiber per serving is a significant amount, contributing substantially to your daily fiber needs.
Important Note on Serving Size: These nutrition facts are estimates per serving, assuming the recipe yields approximately 2 servings. Serving sizes can vary based on individual appetite and preferences. If you consume a larger or smaller portion, the nutritional values will adjust accordingly. You can easily adjust the recipe to make more or fewer servings as needed.
Overall Nutritional Value: Banana chia pudding is a nutritionally dense food. It’s a good source of:
- Fiber: Promotes digestive health and satiety.
- Omega-3 Fatty Acids: Beneficial for heart and brain health.
- Potassium: From bananas, important for electrolyte balance and blood pressure regulation.
- Antioxidants: From bananas and chia seeds, protect against cell damage.
- Vitamins and Minerals: Bananas and almond milk contribute vitamins and minerals like vitamin B6, vitamin E, and calcium (depending on the almond milk).
Dietary Considerations:
- Vegan: This recipe is naturally vegan.
- Gluten-Free: Chia seeds and almond milk are naturally gluten-free.
- Dairy-Free: Using plant-based milk makes it dairy-free and lactose-free.
- Nut-Free (Potentially): If using oat milk, soy milk, rice milk, hemp milk, or coconut milk instead of almond milk, and ensuring toppings are nut-free, this recipe can be made nut-free. Always check labels to confirm ingredients are processed in nut-free facilities if severe allergies are a concern.
- Sugar-Conscious: The recipe is naturally low in added sugar, especially if you omit the maple syrup or use a sugar-free sweetener. The sweetness primarily comes from the natural sugars in bananas.
Preparation Time
One of the greatest advantages of banana chia pudding is its minimal preparation time. It’s a perfect recipe for busy individuals or anyone looking for a quick and healthy meal or snack option.
- Prep time: 10 minutes
- Active Time: The active time, meaning the time you actually spend actively working on the recipe, is approximately 10 minutes. This involves:
- Mashing the bananas (2-3 minutes)
- Adding and mixing the milk, vanilla, maple syrup (if using), and salt (2-3 minutes)
- Stirring in the chia seeds (3-4 minutes, including the initial stir and the re-stir after 5 minutes).
- Speed and Efficiency: The recipe is designed to be quick and efficient. There’s no cooking involved, and the steps are straightforward. Even beginners in the kitchen can easily prepare this pudding in under 10 minutes.
- Make-Ahead Convenience: The short prep time, combined with the overnight chilling, makes it an ideal make-ahead recipe. You can prepare a batch in the evening and have a ready-to-go breakfast or snack for the next day(s).
- Active Time: The active time, meaning the time you actually spend actively working on the recipe, is approximately 10 minutes. This involves:
- Chill time: 2 hours (or overnight)
- Passive Time: The chill time is passive time – you don’t need to actively do anything during this period. The refrigerator does all the work!
- Minimum Chill Time: The minimum recommended chill time is 2 hours. This is the shortest duration for the chia seeds to absorb enough liquid and create a pudding-like consistency. However, the texture will continue to improve with longer chilling.
- Optimal Chill Time (Overnight): For the best texture and convenience, chilling overnight is highly recommended. Overnight chilling allows the chia seeds to fully hydrate and create a thicker, creamier, and more pudding-like consistency. It also deepens the flavors as they meld together in the refrigerator.
- Flexibility: If you’re in a rush, 2 hours of chilling will suffice. But if you have the time, overnight chilling will result in a superior texture. You can even chill it for up to 2-3 days in the refrigerator (in an airtight container) and it will still be delicious.
Time-Saving Tips:
- Prep in Batches: To save even more time during the week, prepare a larger batch of chia pudding on the weekend. It stores well in the refrigerator for several days, providing you with quick and healthy breakfasts or snacks throughout the week.
- Assemble Ingredients in Advance: If you’re very pressed for time in the mornings, you can pre-mash the bananas and measure out the chia seeds, vanilla, maple syrup, and salt the night before. In the morning, simply combine everything with the almond milk and stir.
- Use a Larger Bowl: Using a slightly larger bowl gives you more room to mash and mix, making the process faster and less messy.
Overall Time Commitment: In total, you’re looking at just 10 minutes of active preparation time and then passive chilling time. This makes banana chia pudding an incredibly time-efficient recipe, perfect for incorporating into a busy lifestyle while still prioritizing healthy eating.
How to Serve
Banana chia pudding is delicious on its own, but its mild flavor and creamy texture make it a fantastic base for a wide variety of toppings and additions. Get creative and personalize your pudding to suit your taste and mood! Here are some serving suggestions to elevate your banana chia pudding experience:
- Fresh Fruit:
- Berries: Strawberries, blueberries, raspberries, blackberries – berries add sweetness, tartness, and vibrant color. They are also packed with antioxidants.
- Sliced Bananas: For an extra banana boost and a creamy texture contrast.
- Mango Chunks: For a tropical twist, mango adds sweetness and a juicy texture.
- Peaches or Nectarines: Sliced peaches or nectarines in season bring a summery sweetness and soft texture.
- Kiwi Slices: Kiwi adds a tangy and slightly acidic flavor, along with vibrant green color.
- Citrus Segments (Oranges, Grapefruit): For a refreshing and zesty topping, especially in warmer months.
- Apple or Pear Slices (Thinly Sliced): For a crisp and slightly sweet topping, especially good with a sprinkle of cinnamon.
- Nuts and Seeds:
- Sliced Almonds: Add crunch and a nutty flavor. Toasted almonds enhance the flavor even more.
- Chopped Walnuts or Pecans: Provide a richer, buttery flavor and satisfying crunch.
- Pumpkin Seeds (Pepitas): Offer a slightly nutty and earthy flavor, and a good source of zinc and magnesium.
- Sunflower Seeds: A milder nutty flavor and a good source of vitamin E.
- Hemp Seeds: Add a subtle nutty flavor and a boost of protein and omega-3 fatty acids.
- Chia Seeds (Sprinkle on Top): For extra texture and a visual appeal, sprinkle a few extra chia seeds on top.
- Granola and Cereals:
- Homemade Granola: For added crunch, sweetness, and complex flavors. Choose your favorite granola flavor – nutty, fruity, spiced.
- Store-Bought Granola: For convenience and variety. Look for granola with whole grains and lower sugar content.
- Oats (Rolled or Toasted): Toasted oats add a pleasant crunch and nutty flavor.
- Puffed Rice or Quinoa: Light and airy, puffed rice or quinoa provide a delicate crunch.
- Nut Butters and Seed Butters:
- Peanut Butter: Classic pairing with banana, adds creaminess and protein.
- Almond Butter: Creamy and slightly sweeter than peanut butter.
- Cashew Butter: Very smooth and mild, allows the banana flavor to shine.
- Sunflower Seed Butter (SunButter): Nut-free alternative, creamy and slightly tangy.
- Tahini (Sesame Seed Paste): Adds a unique savory and slightly bitter note, interesting flavor combination with banana.
- Spices and Flavor Enhancements:
- Cinnamon: Classic spice that complements banana beautifully, adds warmth and sweetness.
- Nutmeg: Adds a warm and slightly nutty flavor, especially good in fall or winter.
- Cocoa Powder (Unsweetened): For a chocolate banana chia pudding, sprinkle with cocoa powder for a richer flavor.
- Ginger (Ground or Freshly Grated): Adds a spicy and warming kick, pairs well with banana and tropical fruits.
- Cardamom: Adds a fragrant and slightly citrusy note, for a more exotic flavor profile.
- Vanilla Bean Paste (Swirl on Top): For extra vanilla flavor and visual appeal.
- Sweet Drizzles (Use Sparingly):
- Maple Syrup (Extra Drizzle): If you prefer a sweeter pudding, drizzle a little extra maple syrup on top.
- Honey (Non-Vegan): For a floral sweetness, drizzle a bit of honey.
- Agave Nectar: Vegan alternative to honey with a neutral sweetness.
- Date Syrup: Adds a rich, caramel-like sweetness.
- Chocolate Syrup (Vegan or Regular): For a decadent treat, drizzle with chocolate syrup.
- Other Creative Toppings:
- Coconut Flakes (Toasted or Unsweetened): Adds texture and tropical flavor, especially good with coconut milk-based pudding.
- Dried Fruit (Chopped): Raisins, cranberries, chopped dates, or apricots add chewiness and concentrated sweetness.
- Chocolate Chips (Dark, Milk, or White): For a touch of indulgence, sprinkle with chocolate chips.
- Whipped Coconut Cream (Vegan): For extra creaminess and a decadent touch.
- Yogurt (Dairy or Plant-Based): Layer chia pudding with yogurt for a parfait-style breakfast or snack.
Presentation Tips:
- Layering: Create beautiful layers in a glass or jar by alternating chia pudding with toppings like granola, fruit, and yogurt.
- Garnishes: A simple garnish like a sprig of mint, a few fresh berries, or a sprinkle of nuts can elevate the presentation.
- Swirls: Swirl nut butter, yogurt, or fruit puree on top of the pudding for a visually appealing effect.
- Individual Jars or Glasses: Serving chia pudding in individual jars or glasses makes it perfect for meal prep and grab-and-go breakfasts or snacks.
Additional Tips
To ensure your banana chia pudding is consistently delicious and perfectly textured, here are five additional tips to keep in mind:
- Adjust Liquid for Desired Consistency: Chia seeds can vary slightly in their absorbency depending on the brand and freshness. If you prefer a thicker pudding, use slightly less almond milk (start with 1 ¾ cups instead of 2 cups). If you prefer a thinner pudding, add a bit more almond milk (up to 2 ¼ cups). Experiment to find your perfect consistency. You can always add a tablespoon or two of milk to thin it out even after it’s chilled if it’s too thick for your liking.
- Blend for Ultra-Smooth Pudding (Optional): While mashing the bananas usually creates a sufficiently smooth base, if you desire an exceptionally smooth and completely lump-free pudding, you can blend the banana and milk mixture before adding the chia seeds. Use an immersion blender or a regular blender to blend the mashed bananas, almond milk, vanilla, maple syrup, and salt until perfectly smooth. Then, proceed with stirring in the chia seeds and chilling as directed. Blending is especially helpful if you are using slightly less ripe bananas that are harder to mash completely smooth.
- Flavor Variations Beyond Banana: While this recipe focuses on banana, chia pudding is incredibly versatile. Don’t hesitate to experiment with other flavor combinations!
- Chocolate Banana: Add 1-2 tablespoons of unsweetened cocoa powder to the banana-milk mixture before adding chia seeds.
- Peanut Butter Banana: Add 1-2 tablespoons of peanut butter (or almond butter) to the mixture.
- Berry Swirl: Blend a handful of berries (strawberries, raspberries, blueberries) with a portion of the almond milk and swirl it into the chia pudding after it has chilled.
- Coconut Mango: Use coconut milk instead of almond milk and add a bit of mango puree or diced mango to the mixture.
- Spiced Apple Cinnamon: Substitute some of the banana with applesauce, add cinnamon and nutmeg, and use oat milk for a cozy fall flavor.
- Pumpkin Spice: Use pumpkin puree instead of banana, add pumpkin pie spice, and maple syrup for a seasonal treat.
- Sweetness Control is Key: Ripe bananas provide natural sweetness, and the maple syrup is optional. Taste the mixture before adding the chia seeds and adjust the sweetener to your preference. Remember that the pudding will taste slightly less sweet after chilling, so it’s better to err on the side of slightly sweeter than not sweet enough at this stage. If you are using very ripe bananas, you might even find that you don’t need any added sweetener at all. For those watching their sugar intake, sugar-free sweeteners like stevia or monk fruit can be used in place of maple syrup.
- Storage and Make-Ahead Tips: Chia pudding is an excellent make-ahead breakfast or snack. It can be stored in an airtight container in the refrigerator for up to 3-4 days. The texture might thicken slightly over time, but you can easily stir in a tablespoon or two of almond milk to restore it to your desired consistency. Prepare a larger batch on the weekend for easy grab-and-go meals throughout the week. For optimal freshness, store toppings separately and add them just before serving.
FAQ Section (Ingredients)
Q1: Can I use frozen bananas for this recipe?
A: Yes, you can use frozen bananas! However, you’ll need to thaw them slightly before mashing. Microwaving frozen bananas for a short period (30-60 seconds) or letting them sit at room temperature for a bit will soften them enough to mash. Keep in mind that thawed bananas might release more liquid, so your pudding might be slightly thinner. You can compensate for this by using slightly less almond milk or adding a touch more chia seeds. Frozen bananas can be a convenient way to use up ripe bananas before they go bad, and they will still provide the same flavor and nutritional benefits.
Q2: I don’t have almond milk. What other liquids can I use?
A: You have plenty of options! As mentioned in the ingredients section, this recipe is very flexible when it comes to the liquid base. Excellent alternatives to almond milk include:
- Oat Milk: For a creamier and slightly sweeter pudding.
- Soy Milk: Offers a good source of protein and a similar consistency to dairy milk.
- Coconut Milk (Canned): Adds a distinct coconut flavor and richness. Use light coconut milk for fewer calories or full-fat for extra creaminess.
- Cashew Milk: Naturally creamy and slightly sweet.
- Dairy Milk (Cow’s Milk): If you’re not vegan or dairy-free, regular cow’s milk works perfectly well.
- Water (in a pinch): While not as flavorful or creamy as milk, water can be used if you’re out of milk. The pudding will be less rich, and you might want to add extra vanilla extract or sweetener to compensate for the lack of flavor from the milk.
Q3: Can I make this recipe without maple syrup? Is it sweet enough without it?
A: Absolutely! Maple syrup is optional in this recipe. Ripe bananas provide a significant amount of natural sweetness. If your bananas are very ripe, you might find the pudding perfectly sweet enough without any added sweetener. It really depends on your personal preference for sweetness. Start by making the recipe without maple syrup, taste it after chilling, and then add a drizzle of maple syrup or another sweetener to taste if needed. This allows you to control the sweetness level and keep the recipe lower in added sugar.
Q4: Can I use white chia seeds instead of black chia seeds? Is there a difference?
A: Yes, you can definitely use white chia seeds interchangeably with black chia seeds in this recipe. Nutritionally, there is very little difference between black and white chia seeds. The main difference is their color. White chia seeds might be slightly less visually noticeable in lighter-colored puddings, but in terms of flavor and gelling properties, they are essentially the same. Choose whichever type you prefer or have readily available.
Q5: I’m allergic to bananas. What fruit can I substitute?
A: While bananas are central to this recipe, you can successfully substitute them with other creamy fruits or purees. Some good banana alternatives include:
- Avocado: For an ultra-creamy and less sweet pudding. You’ll likely need to add more sweetener and perhaps a different flavoring, like cocoa powder or vanilla, to mask the avocado flavor if you don’t want it to be prominent.
- Pumpkin Puree: Creates a delicious and spiced pudding, especially if you add cinnamon, nutmeg, and ginger.
- Sweet Potato Puree: Similar to pumpkin, offers a creamy texture and subtle sweetness.
- Mango Puree: For a tropical flavor. Ripe mango puree will provide sweetness and a smooth texture.
- Applesauce (Unsweetened): Can be used, but the pudding will be less creamy and more liquidy. You might need to adjust the amount of milk or chia seeds to achieve the desired consistency.
Banana Chia Pudding Recipe
Ingredients
- 2 Ripe Bananas: The star of the show, ripe bananas are not just about sweetness. They provide the natural base for this pudding, lending a creamy texture and that unmistakable banana flavor we all love. The ripeness is key here; the riper the banana, the sweeter and easier it will be to mash, resulting in a smoother pudding. Those brown spots you often see on banana peels are actually indicators of peak ripeness and sweetness! Beyond flavor and texture, bananas are packed with potassium, an essential electrolyte, and fiber, contributing to the pudding’s overall health benefits.
- Choosing the Right Bananas: Look for bananas that are mostly yellow with brown speckles. Avoid bananas that are still green, as they will be harder to mash and less sweet. Overripe bananas, with mostly brown peels, can also be used but might make the pudding a bit too sweet and intensely banana-flavored for some palates.
- Potential Substitutions: While bananas are central to this recipe, if you’re adventurous or have dietary restrictions, you could experiment with other fruits for a different flavor profile. Consider using:
- Avocado: For an ultra-creamy and less sweet pudding. You might need to add a bit more sweetener if you choose avocado.
- Mango: For a tropical twist. Ripe mangoes will provide sweetness and a smooth texture similar to bananas.
- Pumpkin Puree: Especially during fall, pumpkin puree can create a delicious and spiced chia pudding. You’ll definitely want to add spices like cinnamon and nutmeg if using pumpkin.
- Sweet Potato Puree: Similar to pumpkin, sweet potato puree adds a creamy texture and subtle sweetness. It also pairs well with warm spices.
- Applesauce: Unsweetened applesauce can be used, but it will be less creamy and more liquidy. You might need to adjust the amount of milk accordingly and potentially increase the chia seeds for a thicker consistency.
- 1/4 Cup Chia Seeds: These tiny black seeds are nutritional powerhouses and the magic ingredient that transforms liquid into pudding. Chia seeds are hydrophilic, meaning they absorb many times their weight in liquid. When soaked in almond milk (or any liquid), they swell and create a gel-like consistency, giving chia pudding its signature texture. Beyond their gelling abilities, chia seeds are packed with omega-3 fatty acids, fiber, protein, and antioxidants. They contribute significantly to the pudding’s health benefits, promoting satiety and digestive health.
- Types of Chia Seeds: You’ll typically find black or white chia seeds. Nutritionally, they are very similar. Black chia seeds are more common and what you’ll likely find in most stores. White chia seeds have a slightly milder flavor and can be visually less noticeable in lighter-colored puddings. Either type will work perfectly in this recipe.
- Potential Substitutions: While there isn’t a direct substitute for chia seeds in terms of creating the same pudding-like texture through gelling, you could consider:
- Flaxseeds (Ground): Ground flaxseeds also have gelling properties, although not as pronounced as chia seeds. If substituting, use ground flaxseeds and be aware that the texture might be slightly different and potentially less firm. Use roughly the same amount as chia seeds and adjust liquid as needed. Flaxseeds also have a nuttier flavor.
- Oat Flour: While not a direct gelling agent, oat flour can thicken liquids. You would need to cook oat flour slightly to activate its thickening properties, which deviates from the no-cook nature of chia pudding. This would significantly alter the recipe and is not a recommended direct substitution for texture.
- Agar Agar Powder: Agar agar is a vegan gelling agent derived from seaweed. It requires heating to activate and sets into a firmer jelly-like consistency than chia seeds. Using agar agar would create a different type of pudding, more akin to a jelly or panna cotta, and is not a direct substitute for the texture chia seeds provide.
- 2 Cups Almond Milk (or any plant-based milk): Almond milk provides the liquid base for the chia seeds to absorb and create the pudding. Its mild, slightly nutty flavor complements the banana without overpowering it. However, the beauty of this recipe lies in its versatility – you can easily use any plant-based milk you prefer or have on hand.
- Plant-Based Milk Options:
- Soy Milk: Offers a creamy texture and a good source of protein, similar to dairy milk in consistency.
- Oat Milk: Known for its creamy and slightly sweet flavor, oat milk is a popular choice for its texture and neutral taste. It will result in a richer and creamier pudding.
- Coconut Milk (Canned, Light or Full-Fat): Adds a distinct coconut flavor. Full-fat coconut milk will create a very rich and creamy pudding. Light coconut milk will be lighter in calories and less intensely coconut-flavored.
- Cashew Milk: Naturally creamy and slightly sweet, cashew milk is a good option for a smoother pudding.
- Rice Milk: Thinner in consistency and slightly sweeter than other plant-based milks. It might result in a less creamy pudding and potentially require a bit more chia seeds for thickening.
- Hemp Milk: Has a slightly nutty and earthy flavor. It is also a good source of omega-3 and omega-6 fatty acids.
- Dairy Milk: While the recipe is designed to be plant-based, you can absolutely use dairy milk (cow’s milk) if you prefer or don’t have plant-based milk available. The consistency and texture of the pudding will be similar.
- Plant-Based Milk Options:
- 1 tsp Vanilla Extract: Vanilla extract enhances the overall flavor profile, adding warmth and depth. It complements both the banana and the milk, creating a more rounded and delicious pudding. Pure vanilla extract is preferred for the best flavor, but vanilla essence can also be used as a more budget-friendly alternative.
- Vanilla Bean Paste: For an even more intense vanilla flavor and those beautiful flecks of vanilla bean, consider using vanilla bean paste. Use about 1 teaspoon of paste as a substitute for vanilla extract.
- Vanilla Powder: Vanilla powder is made from dried vanilla beans and offers a concentrated vanilla flavor. Use about 1/2 teaspoon of vanilla powder as a substitute for 1 teaspoon of extract.
- Substitutions (Non-Vanilla): If you don’t have vanilla or want to experiment with different flavors, consider:
- Almond Extract: Adds a nutty and slightly sweet flavor. Use sparingly, as almond extract is stronger than vanilla extract. Start with 1/2 teaspoon.
- Maple Extract: Complements the maple syrup and adds a richer, caramel-like note.
- Cinnamon: Adds warmth and spice, especially delicious if using pumpkin or sweet potato puree as a banana substitute.
- Nutmeg: Another warm spice that pairs well with banana and adds a touch of complexity.
- Lemon or Orange Zest: For a brighter, citrusy flavor.
- 1 tbsp Maple Syrup (optional): Maple syrup adds a touch of sweetness to the pudding. The ripeness of the bananas will contribute natural sweetness, so the maple syrup is optional, especially if you prefer a less sweet pudding or are watching your sugar intake. Maple syrup also adds a subtle caramel-like flavor that enhances the overall taste.
- Sweetener Alternatives: If you prefer not to use maple syrup, or want to explore other sweeteners, consider:
- Agave Nectar: A vegan sweetener with a neutral flavor and slightly thinner consistency than maple syrup.
- Honey: Not vegan, but a natural sweetener with a distinct floral flavor. Use sparingly as honey is sweeter than maple syrup.
- Dates (Medjool Dates, Pitted): For a natural and fiber-rich sweetener. You can blend 1-2 Medjool dates with the banana and milk mixture for sweetness and added caramel notes.
- Stevia or Monk Fruit Sweetener: For sugar-free options. Use according to package instructions as these sweeteners are very potent.
- Coconut Sugar: A less refined sugar with a caramel-like flavor. Use the same amount as maple syrup.
- Brown Sugar: Adds a molasses-like flavor. Use the same amount as maple syrup.
- Sweetener Alternatives: If you prefer not to use maple syrup, or want to explore other sweeteners, consider:
- A Pinch of Salt: A seemingly small addition, but salt plays a crucial role in enhancing the flavors of all the other ingredients. It balances the sweetness and brings out the nuances of the banana, vanilla, and maple syrup (if used). Just a pinch is enough to make a noticeable difference.
- Types of Salt: Regular table salt, sea salt, or kosher salt can be used. If using flaky sea salt, you might want to use a slightly larger pinch.
Instructions
- In a bowl, mash the bananas until smooth.
- Why Mash Smoothly? Mashing the bananas smoothly is key to achieving a creamy and lump-free pudding. Larger chunks of banana might not fully incorporate into the pudding and can result in an uneven texture.
- Best Tools for Mashing:
- Fork: A simple fork works perfectly well for mashing ripe bananas.
- Potato Masher: If you have one, a potato masher can make the job even quicker and easier, especially if you’re making a larger batch.
- Whisk (Firm Wire Whisk): A firm wire whisk can also be used to mash bananas, especially if they are very ripe.
- Tips for Easier Mashing:
- Ensure your bananas are truly ripe. They should be soft to the touch and easily mashed with a fork.
- If you’re using slightly less ripe bananas, you can microwave them for 15-30 seconds (with the peel on, but pricked with a fork) to soften them slightly before mashing.
- Smoothness Level: Aim for a relatively smooth mash. A few very small lumps are okay, but try to eliminate any large chunks for the best texture.
- Add almond milk, vanilla, maple syrup (if using), and salt to the mashed bananas. Mix well.
- Layering Ingredients: Adding the wet ingredients (milk, vanilla, maple syrup) to the mashed bananas helps to further break down any remaining lumps and create a smoother base for the chia seeds.
- Mixing Thoroughly: Ensure you mix these ingredients well with the mashed bananas. You want a homogenous mixture before adding the chia seeds so that the flavor is evenly distributed throughout the pudding.
- Taste Test (Optional): At this stage, you can taste the mixture and adjust the sweetness. If you prefer a sweeter pudding, add a bit more maple syrup or your chosen sweetener. Remember that the flavor will mellow slightly after chilling and the chia seeds will absorb some of the sweetness.
- Stir in chia seeds until evenly distributed.
- Even Distribution is Crucial: The key to preventing clumping and ensuring all chia seeds hydrate properly is to distribute them evenly throughout the banana-milk mixture.
- Stirring Technique: Use a whisk or a fork to vigorously stir the chia seeds into the mixture. Make sure to reach the bottom and sides of the bowl to incorporate all the seeds.
- Visual Check: Look closely to ensure there are no clumps of chia seeds sitting at the bottom of the bowl. The seeds should be dispersed throughout the liquid.
- Let the mixture sit for 5 minutes, then stir again to prevent clumping.
- The Initial Gelling Process: Chia seeds start to absorb liquid very quickly. Letting the mixture sit for 5 minutes allows the initial gelling process to begin.
- Why Re-stir? Even with thorough initial stirring, chia seeds can sometimes settle at the bottom and clump together as they start to hydrate. Re-stirring after 5 minutes helps to break up any clumps and redistribute the seeds, ensuring a smoother and more consistent pudding texture.
- Importance of this Step: Don’t skip this re-stirring step! It’s vital for preventing clumping and achieving the desired smooth texture of your chia pudding.
- Cover and refrigerate for at least 2 hours or overnight.
- Refrigeration Time: The minimum refrigeration time is 2 hours, but ideally, refrigerating overnight (or for at least 4-6 hours) is recommended for the best texture. This allows the chia seeds ample time to fully hydrate and create a thick and pudding-like consistency.
- Covering is Essential: Covering the bowl prevents the pudding from absorbing odors from the refrigerator and also prevents a skin from forming on the surface. Use an airtight container or plastic wrap to cover the bowl tightly.
- Overnight Advantage: Refrigerating overnight is incredibly convenient as it allows you to prepare the pudding ahead of time, making it perfect for a quick breakfast or snack the next day. The texture also tends to improve with longer chilling time, becoming even thicker and more pudding-like.
- Serve chilled, topped with fresh fruit or nuts if desired.
- Serving Temperature: Chia pudding is best served chilled. The cold temperature enhances the refreshing quality and texture of the pudding.
- Topping Ideas (Detailed in “How to Serve” section): The beauty of chia pudding is its versatility as a blank canvas for toppings. Get creative with fresh fruits, nuts, seeds, granola, nut butter, spices, and more! Toppings add flavor, texture, and visual appeal to your banana chia pudding.
Nutrition
- Serving Size: One Normal Portion
- Calories: 150
- Fat: 7g
- Carbohydrates: 27g
- Fiber: 6g
- Protein: 4g


