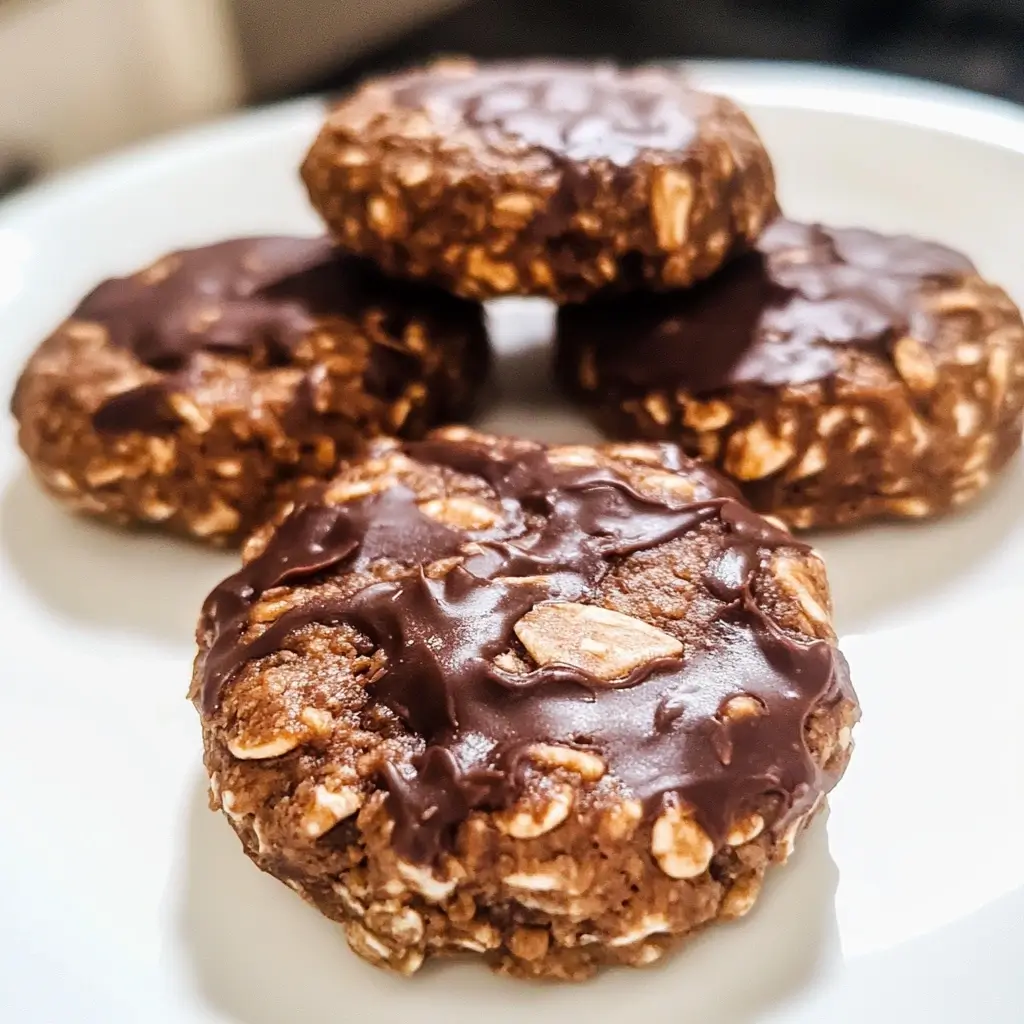
It’s funny how some of the simplest recipes become absolute staples in a busy household. For the longest time, breakfast felt like a battleground in our home. Between the rush to get everyone out the door and the varying preferences (one kid wants cereal, the other toast, and my partner usually skips it altogether), I was desperate for a universally loved, quick, and genuinely healthy option. Then, these Homemade Healthy No-Bake Breakfast Cookies came into my life, almost by accident while experimenting with leftover oats and peanut butter. The first batch disappeared within a day! My kids, who are notoriously picky about anything “healthy,” devoured them, thinking they were a treat. My partner started grabbing a couple on his way to work, and even I found myself reaching for them as a mid-morning pick-me-up. They are incredibly easy to whip up on a Sunday evening, setting us up for a week of stress-free mornings. The chewy texture, the satisfying blend of oats and nut butter, and the little bursts of sweetness from dried fruit or a few chocolate chips make them irresistible. Plus, knowing they’re packed with wholesome ingredients gives me that mom-win feeling. They’ve truly been a game-changer, transforming our morning chaos into a moment of shared, healthy enjoyment.
Ingredients: Crafting Your Perfect No-Bake Breakfast Cookie
The beauty of these no-bake breakfast cookies lies in their simplicity and adaptability. The core components provide structure, flavor, and nutrition, while the optional add-ins allow for endless customization. Here’s a breakdown of what you’ll need and why each ingredient plays a crucial role:
Core Wet Ingredients (The Binders & Sweeteners):
- Natural Creamy Peanut Butter: 1 cup (250g)
- Role: This is a primary binder, holding the cookies together. It also provides a rich, nutty flavor, healthy fats, and a good dose of protein.
- Why Natural? Natural peanut butter typically contains just peanuts and maybe a touch of salt, avoiding added sugars, hydrogenated oils, and emulsifiers found in conventional brands. This keeps the cookies healthier.
- Substitutions: Almond butter, cashew butter, sunflower seed butter (for nut-free), or tahini can be used. Note that different nut/seed butters have varying consistencies and flavors, which will slightly alter the final cookie. Sunflower seed butter, for instance, can sometimes react with baking soda (if you were to add it, though not in this recipe) and turn green, which is harmless but visually surprising!
- Pure Maple Syrup: 1/2 cup (120ml)
- Role: Provides sweetness and contributes to the binding of the cookies.
- Why Pure? Pure maple syrup is an unrefined sweetener containing antioxidants and minerals like zinc and manganese. Avoid “pancake syrup,” which is mostly high-fructose corn syrup and artificial flavors.
- Substitutions: Honey (will make it non-vegan), agave nectar, or date syrup can be used in a 1:1 ratio. Each will impart a slightly different flavor profile. For a lower sugar option, you could try a sugar-free liquid sweetener, but the binding properties might be slightly affected.
- Unsweetened Applesauce: 1/4 cup (60g)
- Role: Adds moisture, a touch of natural sweetness, and helps bind the ingredients without adding excessive fat or refined sugar. It contributes to a softer, chewier texture.
- Substitutions: Mashed ripe banana (about 1 small banana) can be a great alternative, adding its own distinct flavor and nutritional benefits. You could also use pumpkin puree for a fall-inspired twist.
- Vanilla Extract: 1 teaspoon
- Role: Enhances all the other flavors in the cookies, adding warmth and depth.
- Why Pure? Pure vanilla extract provides a much richer and more complex flavor than imitation vanilla.
Core Dry Ingredients (The Body & Texture):
- Rolled Oats (Old-Fashioned Oats): 2 ½ cups (225g)
- Role: This is the star of the show, providing the main structure, chewy texture, and a wealth of nutritional benefits, including soluble fiber (beta-glucan), which is great for heart health and sustained energy release.
- Why Rolled Oats? They offer the best texture for no-bake cookies – chewy yet soft. Instant oats can become mushy, and steel-cut oats will be too hard as they won’t soften sufficiently without cooking.
- Gluten-Free Option: If you need these cookies to be gluten-free, ensure you use certified gluten-free rolled oats to avoid cross-contamination.
- Unsweetened Shredded Coconut: 1/2 cup (40g)
- Role: Adds a delightful chewiness, a subtle tropical flavor, and healthy fats.
- Substitutions: If you’re not a coconut fan, you can replace this with an equal amount of additional rolled oats or finely chopped nuts/seeds for a different texture.
- Chia Seeds: 2 tablespoons
- Role: These tiny powerhouses absorb liquid and help bind the cookies further, creating a slightly gel-like consistency that aids cohesion. They are also packed with omega-3 fatty acids, fiber, and protein.
- Substitutions: Ground flaxseed (flax meal) is an excellent substitute and offers similar binding properties and nutritional benefits. Use the same amount.
- Ground Cinnamon: 1 teaspoon
- Role: Adds warmth and a classic cookie spice. Cinnamon is also known for its potential blood sugar-regulating properties.
- Substitutions: You can adjust the amount to your preference or experiment with other spices like nutmeg, cardamom, or a pumpkin pie spice blend.
Optional Add-Ins (For Flavor, Texture & Nutrient Boosts – Choose 1/2 to 1 cup total):
- Mini Chocolate Chips (Dark or Semi-Sweet): 1/4 to 1/2 cup
- Role: Adds pockets of melty, chocolatey goodness. Dark chocolate (70% cacao or higher) offers antioxidants. Mini chips distribute more evenly.
- Vegan Option: Ensure you use dairy-free chocolate chips.
- Dried Fruit (e.g., raisins, cranberries, chopped apricots, dates): 1/4 to 1/2 cup
- Role: Provides natural sweetness, chewiness, and added fiber and vitamins. Chopping larger dried fruits ensures better distribution.
- Chopped Nuts (e.g., walnuts, pecans, almonds): 1/4 to 1/2 cup
- Role: Adds a satisfying crunch, healthy fats, protein, and distinct flavors. Toasting them lightly beforehand can enhance their flavor.
- Protein Powder (Vanilla or Unflavored): 1-2 scoops (approx. 1/4 to 1/2 cup)
- Role: Boosts the protein content significantly, making these cookies even more satiating and great for a post-workout snack. It may slightly alter the texture, potentially requiring a touch more liquid (like a tablespoon of milk or water) if the dough becomes too dry.
- Hemp Seeds: 2-3 tablespoons
- Role: Adds a nutty flavor, complete protein, and healthy fats. They blend in nicely without significantly changing the texture.
Instructions: Your Step-by-Step Guide to No-Bake Perfection
Making these breakfast cookies is incredibly straightforward. There’s no baking involved, just mixing, shaping, and chilling. Follow these simple steps for cookie success:
- Prepare Your Baking Sheet: Line a large baking sheet or tray with parchment paper or a silicone baking mat. This prevents the cookies from sticking and makes cleanup a breeze. Set aside.
- Combine Wet Ingredients: In a large mixing bowl, add the natural creamy peanut butter, pure maple syrup, unsweetened applesauce, and vanilla extract. Stir these ingredients together thoroughly with a spatula or wooden spoon until the mixture is smooth, well-combined, and creamy. Ensure there are no large clumps of peanut butter remaining.
- Tip: If your peanut butter is very stiff (especially if it’s been refrigerated), you can gently warm it for 15-20 seconds in the microwave to make it easier to stir. Similarly, warming the maple syrup slightly can help it combine more easily.
- Add Dry Ingredients (Except Optional Add-ins): To the bowl with the wet ingredients, add the rolled oats, unsweetened shredded coconut, chia seeds, and ground cinnamon.
- Consideration: If you’re using ground flaxseed instead of chia seeds, add it at this stage.
- Mix Thoroughly: Using your spatula or spoon (or even your clean hands for a more thorough mix), combine the wet and dry ingredients until everything is evenly moistened and a sticky dough forms. Make sure all the oats and coconut are coated with the wet mixture. The dough should be thick and hold together when pressed.
- Troubleshooting:
- If the mixture seems too dry and crumbly, add a tablespoon of extra applesauce, maple syrup, or a plant-based milk (like almond or oat milk) at a time until it comes together.
- If the mixture seems too wet or sticky, add a tablespoon or two of additional rolled oats or a bit more chia/flax meal and mix again.
- Troubleshooting:
- Incorporate Optional Add-Ins (If Using): Gently fold in your chosen optional add-ins, such as mini chocolate chips, dried fruit, chopped nuts, or protein powder. Distribute them evenly throughout the cookie dough.
- Note on Protein Powder: If adding protein powder, the mixture might become drier. Be prepared to add a little extra liquid (as mentioned in step 4) if needed to achieve the right consistency.
- Shape the Cookies: Using a medium cookie scoop (about 1.5 to 2 tablespoons) or simply two spoons, scoop portions of the dough and drop them onto the prepared baking sheet. You can leave them as rustic drop cookies or gently flatten them with the back of a spoon or your palm to about 1/2-inch thickness. They won’t spread during chilling, so you can place them fairly close together.
- Alternative Shaping: For a more uniform look or for bars, you can press the entire mixture evenly into an 8×8 inch pan lined with parchment paper (with overhangs for easy removal). After chilling, you can then cut them into squares or bars.
- Chill to Set: Place the baking sheet with the cookies into the refrigerator for at least 30 minutes to an hour. This chilling time is crucial as it allows the cookies to firm up and the flavors to meld. The chia seeds will also absorb more liquid during this time, helping the cookies set properly. For a firmer cookie, you can chill them for longer.
- Serve or Store: Once chilled and firm, the cookies are ready to eat! Enjoy them immediately or transfer them to an airtight container.
Nutrition Facts
- Servings: This recipe makes approximately 16-20 cookies, depending on the size you make them.
- Calories per serving (approximate): Around 150-180 calories per cookie (based on making 18 cookies and using mini chocolate chips as an add-in).
Disclaimer: The nutritional information is an estimate and can vary significantly based on the specific brands of ingredients used, the precise amounts, the types and quantities of optional add-ins, and the final cookie size. For precise nutritional data, it’s recommended to use an online recipe calculator with your exact ingredients.
These cookies are generally a good source of:
- Fiber: Thanks to the oats, chia seeds, and any added fruits or nuts.
- Healthy Fats: From nut butter, chia seeds, coconut, and nuts.
- Protein: Primarily from nut butter, oats, chia seeds, and significantly more if protein powder is added.
- Complex Carbohydrates: For sustained energy, mainly from the oats.
Preparation Time
One of the best things about these cookies is how quick they are to prepare!
- Active Preparation Time: 15-20 minutes (This includes gathering ingredients, mixing, and shaping the cookies).
- Chilling Time: Minimum 30 minutes (though 1 hour is better for optimal firmness).
- Total Time: Approximately 45 minutes to 1 hour 20 minutes (mostly hands-off chilling time).
This makes them an ideal recipe for quick meal prepping on a Sunday evening or even a weeknight if you’re looking for a healthy snack option for the next few days.
How to Serve Your Healthy No-Bake Breakfast Cookies
These versatile cookies can be enjoyed in numerous ways, making them a fantastic addition to your breakfast or snack routine. Here are some serving ideas:
- On-the-Go Breakfast:
- Grab one or two cookies as you head out the door for a super quick and satisfying breakfast.
- Pair with a piece of fruit like a banana or apple for a more complete meal.
- With Your Morning Coffee or Tea:
- Enjoy a cookie alongside your favorite hot beverage for a delightful morning treat.
- As Part of a Balanced Breakfast Bowl:
- Crumble a cookie over a bowl of Greek yogurt or plant-based yogurt.
- Add fresh berries, sliced banana, or other fruits for extra nutrients and flavor.
- Sprinkle with extra nuts or seeds for added crunch.
- Pre-Workout or Post-Workout Snack:
- Their blend of carbohydrates and protein makes them an excellent choice for fueling up before exercise or replenishing energy afterward. Especially effective if you’ve added protein powder.
- Healthy Dessert Alternative:
- Satisfy your sweet cravings with a cookie instead of a less healthy dessert option.
- They are particularly good slightly chilled.
- Lunchbox Treat:
- Pack a cookie in your child’s (or your own) lunchbox for a healthy and appealing snack.
- With a Glass of Milk:
- Enjoy them classic cookie-style with a cold glass of dairy milk or your favorite plant-based milk (almond, soy, oat, or coconut milk).
- After-School Snack:
- A perfect, energizing, and kid-approved snack to tide them over until dinner.
- Crumble Topping:
- Crumble a cookie over smoothie bowls or even a bowl of warm oatmeal for added texture and flavor.
Additional Tips for No-Bake Breakfast Cookie Success
To ensure your breakfast cookies turn out perfectly every time and to experiment with variations, consider these helpful tips:
- Adjust Sweetness and Flavor:
- Sweetness: Taste the dough before chilling (since there are no raw eggs, it’s safe!). If it’s not sweet enough for your liking, you can add a little more maple syrup or a few drops of liquid stevia. Conversely, if you prefer less sweetness, slightly reduce the maple syrup.
- Flavor Boosters: Don’t be afraid to experiment with extracts. A 1/4 teaspoon of almond extract can add a lovely marzipan note, or a touch of orange zest can brighten the flavor, especially if you’re using cranberries.
- Achieving the Right Consistency is Key:
- The “stickiness” of your dough is crucial. If it’s too dry, the cookies will be crumbly. If it’s too wet, they might not firm up properly. Natural nut butters vary in consistency (some are runnier, some are thicker). Be prepared to adjust by adding a tablespoon more oats if too wet, or a tablespoon more applesauce/maple syrup/milk if too dry. The dough should be sticky enough to hold its shape when pressed but not so sticky that it’s unmanageable.
- Storage for Freshness:
- Refrigerator: Store the cookies in an airtight container in the refrigerator. They will stay fresh and maintain their texture for up to one week. The coolness also helps them stay firm.
- Freezer: For longer storage, these cookies freeze beautifully. Place them in a single layer on a baking sheet to flash freeze for about an hour, then transfer them to a freezer-safe bag or container. They can be frozen for up to 2-3 months. Thaw them in the refrigerator or at room temperature for a few minutes before enjoying. They are also quite tasty eaten directly from the freezer for a firmer, chewier treat.
- Make Them Allergen-Friendly:
- Nut-Free: Use sunflower seed butter or tahini instead of peanut butter. Ensure any chocolate chips or other add-ins are also nut-free.
- Gluten-Free: As mentioned, use certified gluten-free rolled oats. Most other core ingredients are naturally gluten-free, but always double-check labels, especially for add-ins.
- Vegan: This recipe is easily made vegan by using maple syrup (instead of honey if you were considering it as a sub) and ensuring your chocolate chips are dairy-free.
- Get Creative with Shapes and Sizes:
- Cookie Scoop: Using a cookie scoop ensures uniformly sized cookies, which is great for portion control and even chilling.
- Bars: As mentioned in the instructions, pressing the mixture into a lined pan and cutting it into bars is a great alternative, especially if you’re short on time or prefer a different format.
- Energy Balls: Roll the mixture into small, bite-sized balls instead of cookies. These are perfect for a quick energy boost. You might need to chill the dough for 15-20 minutes before rolling if it’s too sticky.
FAQ Section: Your No-Bake Breakfast Cookie Questions Answered
Here are some common questions you might have about making and enjoying these healthy no-bake breakfast cookies:
Q1: Can I use quick oats or instant oats instead of rolled oats?
A1: While you can use quick oats in a pinch, it’s not ideal. Quick oats are more processed and thinner than rolled oats, which means they will absorb liquid differently and can result in a mushier, less chewy texture. Rolled oats (old-fashioned oats) provide the best texture for these no-bake cookies. Avoid steel-cut oats altogether, as they will remain hard and unpalatable in a no-bake recipe.
Q2: My cookie mixture is too sticky to handle. What should I do?
A2: If your mixture is overly sticky, it likely needs a bit more dry ingredient to absorb some of the excess moisture. Try adding more rolled oats, one tablespoon at a time, mixing well after each addition until the dough is manageable. A tablespoon of chia seeds or ground flax meal can also help, as they are excellent at absorbing liquid. Chilling the dough for 15-20 minutes before shaping can also make it less sticky and easier to work with.
Q3: How can I make these cookies lower in sugar?
A3: You can reduce the amount of maple syrup slightly, perhaps down to 1/3 cup, but be aware this might affect the binding and overall sweetness. Using unsweetened applesauce is already a step in this direction. Ensure your nut butter is unsweetened, and opt for no-sugar-added dried fruits if using them. You could also experiment with a portion of a natural, liquid, sugar-free sweetener like monk fruit or stevia drops to replace some of the maple syrup, but this may change the texture as maple syrup also acts as a binder. Avoid sugar-free chocolate chips that use sugar alcohols if you are sensitive to them.
Q4: Are these breakfast cookies suitable for toddlers and young children?
A4: Yes, generally they are! They are soft, chewy, and made with wholesome ingredients. However, consider a few things:
* Allergens: Be mindful of any allergies (especially nuts – use seed butter if needed).
* Choking Hazards: For very young children, ensure any nuts or large dried fruits are finely chopped or omitted. You might also want to make the cookies smaller.
* Sweetness: While naturally sweetened, they do contain sugars. Offer them in moderation as part of a balanced diet.
* Honey: If you were to substitute honey for maple syrup, remember that honey is not recommended for children under one year of age.
Q5: Can I add protein powder to this recipe? If so, how much?
A5: Absolutely! Adding protein powder is a great way to boost the protein content, making these cookies even more filling and perfect for a post-workout snack. You can typically add 1-2 scoops (which is roughly 1/4 to 1/2 cup, depending on the brand) of your favorite vanilla, chocolate, or unflavored protein powder. When you add protein powder, the mixture may become drier. If this happens, simply add a tablespoon or two of extra liquid (like unsweetened applesauce, plant-based milk, or a little more maple syrup) until you reach the desired consistency. Mix it in with the other dry ingredients.
Homemade Healthy No-Bake Breakfast Cookies Recipe
Ingredients
- Natural Creamy Peanut Butter: 1 cup (250g)
- Role: This is a primary binder, holding the cookies together. It also provides a rich, nutty flavor, healthy fats, and a good dose of protein.
- Why Natural? Natural peanut butter typically contains just peanuts and maybe a touch of salt, avoiding added sugars, hydrogenated oils, and emulsifiers found in conventional brands. This keeps the cookies healthier.
- Substitutions: Almond butter, cashew butter, sunflower seed butter (for nut-free), or tahini can be used. Note that different nut/seed butters have varying consistencies and flavors, which will slightly alter the final cookie. Sunflower seed butter, for instance, can sometimes react with baking soda (if you were to add it, though not in this recipe) and turn green, which is harmless but visually surprising!
- Pure Maple Syrup: 1/2 cup (120ml)
- Role: Provides sweetness and contributes to the binding of the cookies.
- Why Pure? Pure maple syrup is an unrefined sweetener containing antioxidants and minerals like zinc and manganese. Avoid “pancake syrup,” which is mostly high-fructose corn syrup and artificial flavors.
- Substitutions: Honey (will make it non-vegan), agave nectar, or date syrup can be used in a 1:1 ratio. Each will impart a slightly different flavor profile. For a lower sugar option, you could try a sugar-free liquid sweetener, but the binding properties might be slightly affected.
- Unsweetened Applesauce: 1/4 cup (60g)
- Role: Adds moisture, a touch of natural sweetness, and helps bind the ingredients without adding excessive fat or refined sugar. It contributes to a softer, chewier texture.
- Substitutions: Mashed ripe banana (about 1 small banana) can be a great alternative, adding its own distinct flavor and nutritional benefits. You could also use pumpkin puree for a fall-inspired twist.
- Vanilla Extract: 1 teaspoon
- Role: Enhances all the other flavors in the cookies, adding warmth and depth.
- Why Pure? Pure vanilla extract provides a much richer and more complex flavor than imitation vanilla.
Core Dry Ingredients (The Body & Texture):
- Rolled Oats (Old-Fashioned Oats): 2 ½ cups (225g)
- Role: This is the star of the show, providing the main structure, chewy texture, and a wealth of nutritional benefits, including soluble fiber (beta-glucan), which is great for heart health and sustained energy release.
- Why Rolled Oats? They offer the best texture for no-bake cookies – chewy yet soft. Instant oats can become mushy, and steel-cut oats will be too hard as they won’t soften sufficiently without cooking.
- Gluten-Free Option: If you need these cookies to be gluten-free, ensure you use certified gluten-free rolled oats to avoid cross-contamination.
- Unsweetened Shredded Coconut: 1/2 cup (40g)
- Role: Adds a delightful chewiness, a subtle tropical flavor, and healthy fats.
- Substitutions: If you’re not a coconut fan, you can replace this with an equal amount of additional rolled oats or finely chopped nuts/seeds for a different texture.
- Chia Seeds: 2 tablespoons
- Role: These tiny powerhouses absorb liquid and help bind the cookies further, creating a slightly gel-like consistency that aids cohesion. They are also packed with omega-3 fatty acids, fiber, and protein.
- Substitutions: Ground flaxseed (flax meal) is an excellent substitute and offers similar binding properties and nutritional benefits. Use the same amount.
- Ground Cinnamon: 1 teaspoon
- Role: Adds warmth and a classic cookie spice. Cinnamon is also known for its potential blood sugar-regulating properties.
- Substitutions: You can adjust the amount to your preference or experiment with other spices like nutmeg, cardamom, or a pumpkin pie spice blend.
Optional Add-Ins (For Flavor, Texture & Nutrient Boosts – Choose 1/2 to 1 cup total):
- Mini Chocolate Chips (Dark or Semi-Sweet): 1/4 to 1/2 cup
- Role: Adds pockets of melty, chocolatey goodness. Dark chocolate (70% cacao or higher) offers antioxidants. Mini chips distribute more evenly.
- Vegan Option: Ensure you use dairy-free chocolate chips.
- Dried Fruit (e.g., raisins, cranberries, chopped apricots, dates): 1/4 to 1/2 cup
- Role: Provides natural sweetness, chewiness, and added fiber and vitamins. Chopping larger dried fruits ensures better distribution.
- Chopped Nuts (e.g., walnuts, pecans, almonds): 1/4 to 1/2 cup
- Role: Adds a satisfying crunch, healthy fats, protein, and distinct flavors. Toasting them lightly beforehand can enhance their flavor.
- Protein Powder (Vanilla or Unflavored): 1-2 scoops (approx. 1/4 to 1/2 cup)
- Role: Boosts the protein content significantly, making these cookies even more satiating and great for a post-workout snack. It may slightly alter the texture, potentially requiring a touch more liquid (like a tablespoon of milk or water) if the dough becomes too dry.
- Hemp Seeds: 2-3 tablespoons
- Role: Adds a nutty flavor, complete protein, and healthy fats. They blend in nicely without significantly changing the texture.
Instructions
- Prepare Your Baking Sheet: Line a large baking sheet or tray with parchment paper or a silicone baking mat. This prevents the cookies from sticking and makes cleanup a breeze. Set aside.
- Combine Wet Ingredients: In a large mixing bowl, add the natural creamy peanut butter, pure maple syrup, unsweetened applesauce, and vanilla extract. Stir these ingredients together thoroughly with a spatula or wooden spoon until the mixture is smooth, well-combined, and creamy. Ensure there are no large clumps of peanut butter remaining.
- Tip: If your peanut butter is very stiff (especially if it’s been refrigerated), you can gently warm it for 15-20 seconds in the microwave to make it easier to stir. Similarly, warming the maple syrup slightly can help it combine more easily.
- Add Dry Ingredients (Except Optional Add-ins): To the bowl with the wet ingredients, add the rolled oats, unsweetened shredded coconut, chia seeds, and ground cinnamon.
- Consideration: If you’re using ground flaxseed instead of chia seeds, add it at this stage.
- Mix Thoroughly: Using your spatula or spoon (or even your clean hands for a more thorough mix), combine the wet and dry ingredients until everything is evenly moistened and a sticky dough forms. Make sure all the oats and coconut are coated with the wet mixture. The dough should be thick and hold together when pressed.
- Troubleshooting:
- If the mixture seems too dry and crumbly, add a tablespoon of extra applesauce, maple syrup, or a plant-based milk (like almond or oat milk) at a time until it comes together.
- If the mixture seems too wet or sticky, add a tablespoon or two of additional rolled oats or a bit more chia/flax meal and mix again.
- Troubleshooting:
- Incorporate Optional Add-Ins (If Using): Gently fold in your chosen optional add-ins, such as mini chocolate chips, dried fruit, chopped nuts, or protein powder. Distribute them evenly throughout the cookie dough.
- Note on Protein Powder: If adding protein powder, the mixture might become drier. Be prepared to add a little extra liquid (as mentioned in step 4) if needed to achieve the right consistency.
- Shape the Cookies: Using a medium cookie scoop (about 1.5 to 2 tablespoons) or simply two spoons, scoop portions of the dough and drop them onto the prepared baking sheet. You can leave them as rustic drop cookies or gently flatten them with the back of a spoon or your palm to about 1/2-inch thickness. They won’t spread during chilling, so you can place them fairly close together.
- Alternative Shaping: For a more uniform look or for bars, you can press the entire mixture evenly into an 8×8 inch pan lined with parchment paper (with overhangs for easy removal). After chilling, you can then cut them into squares or bars.
- Chill to Set: Place the baking sheet with the cookies into the refrigerator for at least 30 minutes to an hour. This chilling time is crucial as it allows the cookies to firm up and the flavors to meld. The chia seeds will also absorb more liquid during this time, helping the cookies set properly. For a firmer cookie, you can chill them for longer.
- Serve or Store: Once chilled and firm, the cookies are ready to eat! Enjoy them immediately or transfer them to an airtight container.
Nutrition
- Serving Size: One Normal Portion
- Calories: 150-180