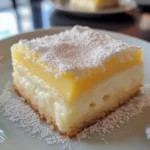
The first time I encountered the authentic Portuguese Orange Roll Cake, or Torta de Laranja, wasn’t in a sun-drenched Algarve café, but rather on a drizzly afternoon in my own kitchen, guided by a cherished, slightly faded recipe card from a dear Portuguese friend’s grandmother. I was initially skeptical – the ingredient list seemed almost too simple, relying heavily on eggs, sugar, and the vibrant essence of oranges, with minimal flour. How could something so seemingly basic transform into the elegant, moist, intensely flavourful roll I’d heard so much about? Yet, as the scent of caramelizing sugar and bright citrus filled the air during its brief baking time, anticipation grew. The true magic, however, happened during the roll. That moment of inverting the warm, fragile cake onto a sugar-dusted towel, peeling back the parchment, and gently coaxing it into a spiral felt like handling edible sunshine. When I finally presented it to my family later that day, sliced into delicate pinwheels revealing the moist, almost custardy interior, the reaction was unanimous: pure delight. It wasn’t just a cake; it was an experience – the intense, unadulterated taste of orange, a texture unlike any other roll cake (more akin to a dense, baked custard than a sponge), and a beautiful simplicity that spoke volumes. It has since become a staple for special occasions and quiet afternoons alike, a reminder that sometimes the most profound flavours come from the most unassuming combinations. This recipe isn’t just about baking; it’s about capturing a piece of Portuguese culinary sunshine.
A Taste of Sunshine: Ingredients for Portuguese Orange Roll Cake
This recipe celebrates the essence of orange, using both the zest and juice for maximum flavour impact. The minimal flour results in its characteristic dense, moist, and slightly sticky texture, which is distinct from fluffier sponge roll cakes. Gathering high-quality ingredients is key to achieving the authentic Torta de Laranja experience. Ensure your eggs are at room temperature for optimal volume when whisked, and use fresh, fragrant oranges – the stars of the show.
Here’s what you’ll need:
- Large Eggs: 8 (at room temperature) – The backbone of the cake, providing structure, richness, and moisture. Using room temperature eggs helps them incorporate more air when beaten, leading to a slightly lighter (though still dense) texture.
- Granulated Sugar: 300g (approximately 1 ½ cups) – Provides sweetness and contributes significantly to the moist, slightly syrupy texture. Some recipes use slightly more or less, but this amount provides a good balance.
- Large, Fragrant Oranges: 2 – You will use both the finely grated zest of both oranges and the freshly squeezed juice of approximately 1.5 to 2 oranges to get the required juice quantity. Choose unwaxed oranges if possible, or scrub waxed oranges thoroughly. The zest carries intense aromatic oils crucial for the flavour profile.
- Freshly Squeezed Orange Juice: 150ml (approximately ⅔ cup) – Adds moisture and reinforces the bright citrus flavour. Freshly squeezed is non-negotiable here for authentic taste; bottled juice often lacks the same vibrancy and can contain preservatives that affect flavour.
- All-Purpose Flour: 1 tablespoon (optional, but recommended for stability) – Traditional recipes sometimes omit flour entirely, relying solely on the eggs for structure. However, a small amount like this helps bind the cake just enough to make rolling slightly easier without compromising the signature moist texture significantly. You can substitute with cornstarch for a gluten-free version or omit it if you are comfortable with a very delicate cake.
- Salt: A small pinch – Enhances all the other flavours, especially the sweetness and the citrus notes.
- Unsalted Butter: For greasing the pan – Ensures the parchment paper stays put and helps prevent any batter seepage from sticking directly to the pan edges.
- Powdered Sugar (Icing Sugar): Approximately 100g (1 cup), plus more for dusting – Crucial for preparing the tea towel for rolling the cake. The generous layer prevents the warm, slightly sticky cake from adhering to the fabric. It also adds a final touch of sweetness and visual appeal when dusted over the finished roll.
Ingredient Notes & Considerations:
- Egg Size: This recipe assumes large eggs (approx. 60g each in shell). If using medium or extra-large eggs, the results might vary slightly in texture and baking time.
- Orange Variety: While any sweet orange like Navel or Valencia works well, using varieties known for their aromatic zest, such as Bergamot oranges (if available and in season), can add another layer of complexity, though this deviates slightly from the most traditional flavour profile.
- Flour Debate: The inclusion of flour is a point of variation in Torta de Laranja recipes. Hardcore traditionalists often bake it flourless. The result is incredibly moist, almost like a set custard sheet. Adding a tablespoon of flour provides a tiny bit more structure, making it less prone to tearing during the rolling process, especially for beginners. If aiming for gluten-free, either omit the flour or use 1 tablespoon of cornstarch or a reliable gluten-free all-purpose blend.
Crafting the Perfect Roll: Step-by-Step Instructions
Making a Portuguese Orange Roll Cake is less about complex techniques and more about careful execution, particularly during the baking and rolling stages. Follow these steps closely for a beautiful and delicious result. Patience during the cooling phase is also essential.
- Preparation is Key: Preheat your oven to 180°C (350°F). Select a rectangular baking tray, approximately 38×25 cm (15×10 inches). Generously grease the bottom and sides of the baking tray with unsalted butter. Line the tray meticulously with parchment paper, ensuring it covers the bottom and goes up the sides. Press the parchment paper down firmly so it adheres to the buttered surfaces – this prevents the batter from seeping underneath. Grease the surface of the parchment paper as well. This double greasing might seem excessive, but it’s vital insurance against sticking. Set aside.
- Prepare the Rolling Surface: Lay a clean, lint-free tea towel (larger than your baking tray) flat on your work surface. Dust it very generously and evenly with powdered sugar. Aim for a thick, uniform layer – don’t be shy! This sugary bed is what will prevent your warm cake from sticking to the towel when you invert it. Have this ready before the cake comes out of the oven.
- Zest and Juice the Oranges: Thoroughly wash and dry the oranges. Finely grate the zest of both oranges directly into a large mixing bowl, avoiding the white pith which can be bitter. Cut the oranges in half and squeeze them to get 150ml of fresh juice. Strain the juice to remove any pulp or seeds, unless you prefer some pulp in your cake. Add the strained juice to the bowl with the zest.
- Create the Batter Base: Add the granulated sugar and the pinch of salt to the bowl containing the orange zest and juice. Whisk these together briefly just to combine.
- Incorporate the Eggs: Crack the 8 room-temperature eggs into the bowl with the sugar-orange mixture. Now, using an electric mixer (handheld or stand mixer with whisk attachment), beat the mixture on medium-high speed. This is a crucial step. Continue beating for a good 5-8 minutes. The mixture should become pale, significantly increase in volume, and develop a thick, ribbony consistency. When you lift the beaters, the batter falling back should leave a temporary trail on the surface before sinking back in. This aeration contributes to the cake’s structure.
- Fold in Flour (if using): If you’re using the tablespoon of all-purpose flour, sift it directly over the egg mixture. Using a large spatula, gently fold the flour into the batter. Use slow, deliberate movements, scraping down the sides and folding from the bottom up, just until no dry streaks remain. Be careful not to overmix or deflate the airy batter you worked hard to create. If omitting flour, skip this step.
- Pour and Spread: Carefully pour the prepared batter onto the centre of the lined baking tray. Gently tilt the tray or use an offset spatula to spread the batter evenly across the entire surface, ensuring it reaches all corners. The layer will be quite thin – this is normal and necessary for it to bake quickly and be flexible enough to roll.
- Bake Until Just Set: Place the baking tray in the preheated oven on the middle rack. Bake for approximately 12-15 minutes. Keep a close eye on it, as ovens vary. The cake is ready when the surface is lightly golden, feels set to a gentle touch (it should spring back slightly), and the edges might just begin to pull away from the sides of the parchment. Do not overbake. An overbaked cake will become dry and brittle, making it impossible to roll without cracking. It should still feel very moist and pliable.
- The Crucial Inversion and Roll: As soon as the cake comes out of the oven, timing is critical. Carefully but confidently, lift the hot baking tray and quickly invert it onto the prepared powdered sugar-dusted tea towel. The cake should now be lying face down on the sugary towel.
- Peel the Parchment: While the cake is still hot, carefully peel off the parchment paper starting from one corner. Go slowly and gently to avoid tearing the delicate cake. If it sticks in places, gently coax it away.
- Trim (Optional but Recommended): For neater edges on your final roll, quickly trim off the slightly crispier edges (about 1cm or ½ inch) from all four sides using a sharp knife or pizza cutter. This step isn’t strictly necessary but improves the final appearance.
- Roll it Up (While Hot!): Now, working quickly while the cake is still very warm and pliable, start rolling. Beginning from one of the shorter edges, use the tea towel to help you lift and guide the cake, rolling it up tightly along with the towel into a cylinder. The towel will be rolled inside the cake.
- Cool Completely: Place the rolled cake (still wrapped snugly in the tea towel) seam-side down on a wire rack. Let it cool completely in this rolled position. This will take at least 1-2 hours, possibly longer depending on ambient temperature. Do not rush this step! Cooling it while rolled helps the cake set its shape and prevents it from cracking when unrolled later.
- Unroll and Re-roll: Once completely cool to the touch, gently and carefully unroll the cake, removing the tea towel. The inside will be coated with some of the powdered sugar from the towel. Now, carefully re-roll the cake without the towel. It should hold its shape much better now.
- Final Dusting and Serving: Place the finished orange roll cake seam-side down on a serving platter or board. Generously dust the top with more powdered sugar just before serving for a beautiful finish. Slice into rounds (about 1.5-2cm or ¾ inch thick) using a sharp, serrated knife, wiping the blade clean between cuts if necessary for neat slices.
Nutritional Snapshot: Understanding Your Indulgence
It’s important to remember that Torta de Laranja is a dessert meant for enjoyment and indulgence. Its characteristic moistness and rich flavour come from a generous amount of sugar and eggs. While nutritional values can vary slightly based on exact ingredient sizes and brands, here’s an approximate estimate:
- Servings: This recipe typically yields 10-12 slices, depending on how thickly you cut them.
- Calories Per Serving (approximate): Around 280-350 kcal per slice (based on 10 servings).
Key Nutritional Contributions:
- Carbohydrates: Primarily from the granulated and powdered sugar, providing quick energy. The orange juice also contributes natural sugars.
- Protein: Significantly contributed by the large number of eggs used in the recipe.
- Fat: Mostly from the egg yolks and the small amount of butter used for greasing.
- Vitamin C: From the fresh orange juice and zest, although some degradation occurs during baking.
Disclaimer: These values are estimates calculated using standard nutritional databases. Actual figures may vary. This information is provided for general awareness and should not be considered a substitute for professional nutritional advice, especially for those with specific dietary requirements or health conditions. Enjoy this delicious treat as part of a balanced diet.
Time Commitment: Planning Your Baking Adventure
While the active baking process for Torta de Laranja is relatively quick, planning for the essential cooling time is crucial. Here’s a breakdown:
- Preparation Time: Approximately 20-25 minutes. This includes gathering ingredients, greasing and lining the pan, preparing the tea towel, zesting and juicing oranges, mixing the batter.
- Baking Time: Approximately 12-15 minutes. Keep a close eye during this short period.
- Rolling Time (Immediate Post-Bake): Approximately 5 minutes. This involves inverting, peeling parchment, trimming (optional), and rolling the cake while hot.
- Cooling Time (Essential): 1.5 – 2 hours (minimum). The cake needs to cool completely while rolled in the tea towel to set its shape. Do not skip or shorten this time significantly.
- Final Unrolling and Finishing: Approximately 5 minutes. Gently unrolling, removing the towel, re-rolling, and dusting with powdered sugar.
Total Time: Approximately 2 hours 15 minutes to 3 hours.
Active Time: Approximately 40-45 minutes.
Passive Time (Cooling): Approximately 1.5 – 2 hours.
Plan accordingly, ensuring you have a sufficient window for the cake to cool undisturbed before you intend to serve it.
Serving Suggestions: Elevating Your Torta de Laranja
The beauty of Portuguese Orange Roll Cake lies in its intense, pure orange flavour and unique texture, which shines beautifully on its own. However, a few simple accompaniments can complement or contrast its profile wonderfully. Here are some ideas:
- Simply Classic:
- Serve slices as they are, perhaps with an extra dusting of powdered sugar. This is the most traditional way, allowing the cake’s flavour and texture to be the star.
- Pair with a small cup of strong Portuguese coffee (bica) or a quality espresso. The bitterness of the coffee cuts through the sweetness beautifully.
- A cup of black tea or Earl Grey tea also makes a delightful partner.
- With Cream or Dairy:
- Dollop of Whipped Cream: A lightly sweetened or unsweetened dollop of freshly whipped heavy cream adds a light, airy contrast to the dense cake.
- Crème Fraîche: The slight tanginess of crème fraîche provides a sophisticated counterpoint to the cake’s sweetness.
- Greek Yogurt: A spoonful of plain Greek yogurt offers a tangy and protein-rich contrast, making it feel slightly less indulgent.
- Vanilla Bean Ice Cream: A small scoop of high-quality vanilla bean ice cream served alongside a slice creates a lovely temperature and texture contrast, especially nice on a warmer day.
- Fruit & Garnish:
- Fresh Berries: A small scattering of fresh raspberries, blueberries, or sliced strawberries adds a pop of colour and a different type of fruity acidity.
- Candied Orange Peel: Garnish with thin slivers of homemade or store-bought candied orange peel to echo the primary flavour and add a chewy texture.
- Mint Sprig: A simple sprig of fresh mint adds visual appeal and a hint of freshness.
- Subtle Spice & Flavour Enhancements:
- Cinnamon Dusting: A very light dusting of cinnamon over the powdered sugar can add warmth, but use sparingly so as not to overpower the orange.
- Orange Liqueur: For an adult twist, very lightly brush the cake with a touch of Grand Marnier or Cointreau after unrolling and before re-rolling, or serve a tiny glass alongside.
Presentation Tips:
- Always use a sharp, clean knife (serrated works well) for slicing to get neat pinwheels.
- Arrange slices attractively on a platter, either slightly overlapping or fanned out.
- Serve at room temperature for the best flavour and texture. Refrigeration can make it slightly firmer, so allow it to sit out for 20-30 minutes before serving if stored cold.
Pro Tips for a Flawless Orange Roll
Achieving the perfect Torta de Laranja involves attention to detail. Here are five key tips to help you succeed:
- Embrace Room Temperature Eggs: Don’t underestimate the power of using eggs that are not cold straight from the fridge. Room temperature eggs whip up significantly better, incorporating more air. This aeration is crucial for providing structure in a cake with little to no flour, contributing to a texture that’s light yet satisfyingly dense, rather than overly heavy. Let them sit out for at least 30-60 minutes before you start.
- Master the Bake – Avoid Overbaking: This is perhaps the most critical factor for rollability. The cake needs to be baked just until set. Overbaking, even by a minute or two, will dry out the edges and surface, causing the cake to crack dramatically when you attempt to roll it. Watch for the visual cues: a light golden surface, slight spring-back when touched gently, and edges just beginning to recede from the parchment. Err slightly on the side of underbaking rather than overbaking if unsure.
- Roll While Hot – No Hesitation! The window for rolling is immediately after it comes out of the oven. The heat keeps the cake structure pliable and flexible. As it cools, the sugars and proteins begin to set, making it increasingly brittle. Have your sugar-dusted towel ready before the timer goes off. Work quickly and confidently to invert, peel the parchment, and roll it up with the towel. This immediate hot roll is non-negotiable for preventing cracks.
- Be Generous with Powdered Sugar: The layer of powdered sugar on your tea towel acts as a crucial barrier between the warm, slightly sticky cake and the fabric. Skimping on the sugar will almost guarantee the cake sticks, potentially tearing it when you unroll it later. Ensure an even, thick coating covers the entire area where the cake will land. This sugar also gets absorbed slightly, adding to the characteristic sweetness.
- Cool Completely, Unroll Gently: Patience during the cooling phase (while rolled in the towel) is essential. This allows the cake to fully set in its spiral shape. When it’s completely cool (give it at least 1.5-2 hours), unroll it slowly and gently. The cake will still be delicate. Re-roll it carefully without the towel, guiding it rather than forcing it. This final roll should be much easier as the cake has ‘memorized’ its shape.
Frequently Asked Questions (FAQ) about Torta de Laranja
Here are answers to some common questions about making this delightful Portuguese Orange Roll Cake:
- Q: My Torta de Laranja cracked when I tried to roll it. What went wrong?
- A: Cracking is the most common issue and usually stems from one of two things:
- Overbaking: Even slightly overbaking makes the cake too dry and brittle to roll. Ensure you pull it from the oven the moment it’s just set and still pliable (around 12-15 minutes usually).
- Rolling Too Late: You must roll the cake immediately while it’s piping hot. If you let it cool even for a few minutes on the baking sheet before inverting and rolling, it will lose its flexibility and crack. Have your sugared towel ready and work quickly!
- Uneven Batter: Ensure the batter is spread very evenly in the pan. Thicker spots might not bake through at the same rate as thinner spots, leading to textural differences that can cause cracking.
- A: Cracking is the most common issue and usually stems from one of two things:
- Q: Can I make this recipe gluten-free?
- A: Absolutely! Torta de Laranja is naturally very low in gluten or easily adaptable. Many traditional versions contain no flour at all. You can simply omit the 1 tablespoon of all-purpose flour called for in this version. The result will be slightly more delicate and custardy, so handle it with extra care during rolling. Alternatively, you can substitute the all-purpose flour with 1 tablespoon of cornstarch or a trusted gluten-free flour blend for a little extra stability.
- Q: It seems like a lot of sugar. Can I reduce the amount?
- A: While you can slightly reduce the sugar (perhaps by 25-50g), be aware that sugar does more than just sweeten in this recipe. It contributes significantly to the characteristic moist, almost syrupy texture and helps keep the cake pliable for rolling. Reducing it too much will alter the texture, potentially making it drier and more prone to cracking. This dessert is inherently sweet; it’s part of its charm. If reducing, do so modestly and expect textural changes.
- Q: How should I store leftover Torta de Laranja, and how long will it last?
- A: Store leftover cake tightly wrapped in plastic wrap or in an airtight container. It can be kept at room temperature for up to 2 days or refrigerated for up to 3-4 days. Note that refrigeration will make it firmer; allow slices to come to room temperature for about 20-30 minutes before serving for the best texture and flavour. Due to its high moisture content, it’s best enjoyed within the first couple of days. Freezing is generally not recommended as the texture can become watery upon thawing.
- Q: Can I add a filling like cream or jam?
- A: Traditionally, Torta de Laranja is served plain, without a filling, allowing the intense orange flavour and unique moist texture to shine. Its structure is quite delicate and moist, unlike sturdy sponge rolls. However, if you wish to experiment, you could add a very thin layer of filling after unrolling the cooled cake and before re-rolling it. Options could include:
- A thin spread of orange marmalade or curd (might make it very sweet).
- A light layer of stabilized whipped cream (consume quickly if using cream).
- A thin layer of mascarpone cheese mixed with a little powdered sugar and orange zest.
Keep the filling layer extremely thin to avoid overwhelming the delicate cake or causing it to unroll messily. But for the authentic experience, try it plain first!
- A: Traditionally, Torta de Laranja is served plain, without a filling, allowing the intense orange flavour and unique moist texture to shine. Its structure is quite delicate and moist, unlike sturdy sponge rolls. However, if you wish to experiment, you could add a very thin layer of filling after unrolling the cooled cake and before re-rolling it. Options could include:

Portuguese Orange Roll Cake Recipe
Ingredients
- Large Eggs: 8 (at room temperature) – The backbone of the cake, providing structure, richness, and moisture. Using room temperature eggs helps them incorporate more air when beaten, leading to a slightly lighter (though still dense) texture.
- Granulated Sugar: 300g (approximately 1 ½ cups) – Provides sweetness and contributes significantly to the moist, slightly syrupy texture. Some recipes use slightly more or less, but this amount provides a good balance.
- Large, Fragrant Oranges: 2 – You will use both the finely grated zest of both oranges and the freshly squeezed juice of approximately 1.5 to 2 oranges to get the required juice quantity. Choose unwaxed oranges if possible, or scrub waxed oranges thoroughly. The zest carries intense aromatic oils crucial for the flavour profile.
- Freshly Squeezed Orange Juice: 150ml (approximately ⅔ cup) – Adds moisture and reinforces the bright citrus flavour. Freshly squeezed is non-negotiable here for authentic taste; bottled juice often lacks the same vibrancy and can contain preservatives that affect flavour.
- All-Purpose Flour: 1 tablespoon (optional, but recommended for stability) – Traditional recipes sometimes omit flour entirely, relying solely on the eggs for structure. However, a small amount like this helps bind the cake just enough to make rolling slightly easier without compromising the signature moist texture significantly. You can substitute with cornstarch for a gluten-free version or omit it if you are comfortable with a very delicate cake.
- Salt: A small pinch – Enhances all the other flavours, especially the sweetness and the citrus notes.
- Unsalted Butter: For greasing the pan – Ensures the parchment paper stays put and helps prevent any batter seepage from sticking directly to the pan edges.
- Powdered Sugar (Icing Sugar): Approximately 100g (1 cup), plus more for dusting – Crucial for preparing the tea towel for rolling the cake. The generous layer prevents the warm, slightly sticky cake from adhering to the fabric. It also adds a final touch of sweetness and visual appeal when dusted over the finished roll.
Instructions
- Preparation is Key: Preheat your oven to 180°C (350°F). Select a rectangular baking tray, approximately 38×25 cm (15×10 inches). Generously grease the bottom and sides of the baking tray with unsalted butter. Line the tray meticulously with parchment paper, ensuring it covers the bottom and goes up the sides. Press the parchment paper down firmly so it adheres to the buttered surfaces – this prevents the batter from seeping underneath. Grease the surface of the parchment paper as well. This double greasing might seem excessive, but it’s vital insurance against sticking. Set aside.
- Prepare the Rolling Surface: Lay a clean, lint-free tea towel (larger than your baking tray) flat on your work surface. Dust it very generously and evenly with powdered sugar. Aim for a thick, uniform layer – don’t be shy! This sugary bed is what will prevent your warm cake from sticking to the towel when you invert it. Have this ready before the cake comes out of the oven.
- Zest and Juice the Oranges: Thoroughly wash and dry the oranges. Finely grate the zest of both oranges directly into a large mixing bowl, avoiding the white pith which can be bitter. Cut the oranges in half and squeeze them to get 150ml of fresh juice. Strain the juice to remove any pulp or seeds, unless you prefer some pulp in your cake. Add the strained juice to the bowl with the zest.
- Create the Batter Base: Add the granulated sugar and the pinch of salt to the bowl containing the orange zest and juice. Whisk these together briefly just to combine.
- Incorporate the Eggs: Crack the 8 room-temperature eggs into the bowl with the sugar-orange mixture. Now, using an electric mixer (handheld or stand mixer with whisk attachment), beat the mixture on medium-high speed. This is a crucial step. Continue beating for a good 5-8 minutes. The mixture should become pale, significantly increase in volume, and develop a thick, ribbony consistency. When you lift the beaters, the batter falling back should leave a temporary trail on the surface before sinking back in. This aeration contributes to the cake’s structure.
- Fold in Flour (if using): If you’re using the tablespoon of all-purpose flour, sift it directly over the egg mixture. Using a large spatula, gently fold the flour into the batter. Use slow, deliberate movements, scraping down the sides and folding from the bottom up, just until no dry streaks remain. Be careful not to overmix or deflate the airy batter you worked hard to create. If omitting flour, skip this step.
- Pour and Spread: Carefully pour the prepared batter onto the centre of the lined baking tray. Gently tilt the tray or use an offset spatula to spread the batter evenly across the entire surface, ensuring it reaches all corners. The layer will be quite thin – this is normal and necessary for it to bake quickly and be flexible enough to roll.
- Bake Until Just Set: Place the baking tray in the preheated oven on the middle rack. Bake for approximately 12-15 minutes. Keep a close eye on it, as ovens vary. The cake is ready when the surface is lightly golden, feels set to a gentle touch (it should spring back slightly), and the edges might just begin to pull away from the sides of the parchment. Do not overbake. An overbaked cake will become dry and brittle, making it impossible to roll without cracking. It should still feel very moist and pliable.
- The Crucial Inversion and Roll: As soon as the cake comes out of the oven, timing is critical. Carefully but confidently, lift the hot baking tray and quickly invert it onto the prepared powdered sugar-dusted tea towel. The cake should now be lying face down on the sugary towel.
- Peel the Parchment: While the cake is still hot, carefully peel off the parchment paper starting from one corner. Go slowly and gently to avoid tearing the delicate cake. If it sticks in places, gently coax it away.
- Trim (Optional but Recommended): For neater edges on your final roll, quickly trim off the slightly crispier edges (about 1cm or ½ inch) from all four sides using a sharp knife or pizza cutter. This step isn’t strictly necessary but improves the final appearance.
- Roll it Up (While Hot!): Now, working quickly while the cake is still very warm and pliable, start rolling. Beginning from one of the shorter edges, use the tea towel to help you lift and guide the cake, rolling it up tightly along with the towel into a cylinder. The towel will be rolled inside the cake.
- Cool Completely: Place the rolled cake (still wrapped snugly in the tea towel) seam-side down on a wire rack. Let it cool completely in this rolled position. This will take at least 1-2 hours, possibly longer depending on ambient temperature. Do not rush this step! Cooling it while rolled helps the cake set its shape and prevents it from cracking when unrolled later.
- Unroll and Re-roll: Once completely cool to the touch, gently and carefully unroll the cake, removing the tea towel. The inside will be coated with some of the powdered sugar from the towel. Now, carefully re-roll the cake without the towel. It should hold its shape much better now.
- Final Dusting and Serving: Place the finished orange roll cake seam-side down on a serving platter or board. Generously dust the top with more powdered sugar just before serving for a beautiful finish. Slice into rounds (about 1.5-2cm or ¾ inch thick) using a sharp, serrated knife, wiping the blade clean between cuts if necessary for neat slices.
Nutrition
- Serving Size: One Normal Portion
- Calories: 280-350